
Panther Productions 1/32 Sea Vixen FAW 2
By Frank Mitchell
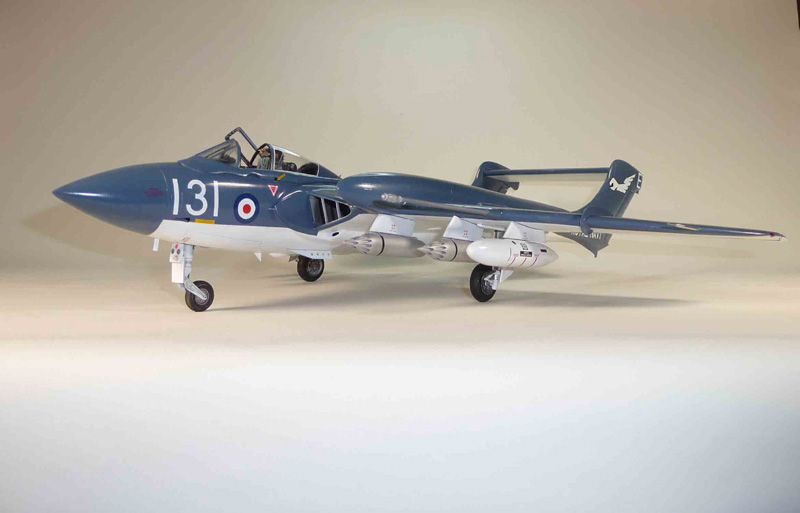
The Sea Vixen has always been one of my favorite aircraft; it just has "the look" of a potent flying machine much like the Phantom, another favorite. Although I built the Dynavector 48th kit many years ago, I was one of the first in line to order the 2008 limited production 1/32 scale vac-form kit by Panther Productions.
If you like modeling challenges, you will love this kit. As with most large, low-volume vac-formed kits, the Sea Vixen is very basic and not an easy build. This one was in and out of the box a number of times. The shear size of the aircraft is also a problem at times, and, therefore, getting everything aligned takes some head scratching. Some sort of jig is essential. The good news is that there are some excellent resources available, both in and in print and on the Internet. Of particular help were the on-line walkarounds and several publications including books by Roy Sutherland (BarracudaGraphs) and the Sea Vixen by Richard Franks. Also useful were a Database reference in Aeroplane along with a number of websites, and miscellaneous articles from various magazines.
Note for General Interest: During this build, I was reminded of constantly was that one should never take the word of drawings; any drawings. I blew up three sets of drawings for the Sea Vixen, all from reputable (and British) sources and all contained errors, some rather significant. Always try to find photographic verification for bloody near everything. The time will not be wasted.
Construction
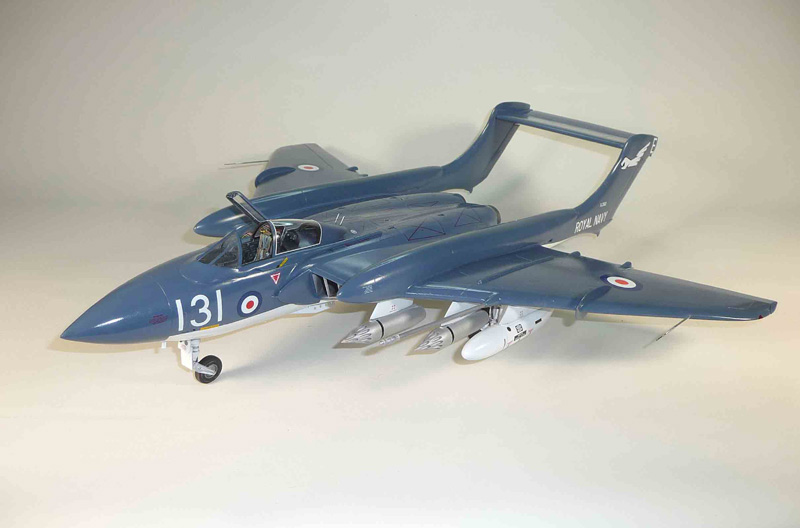
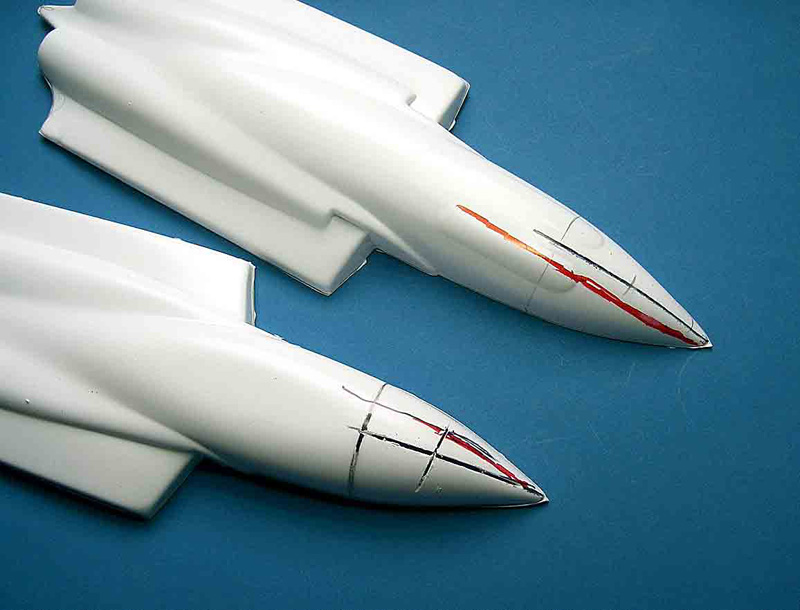
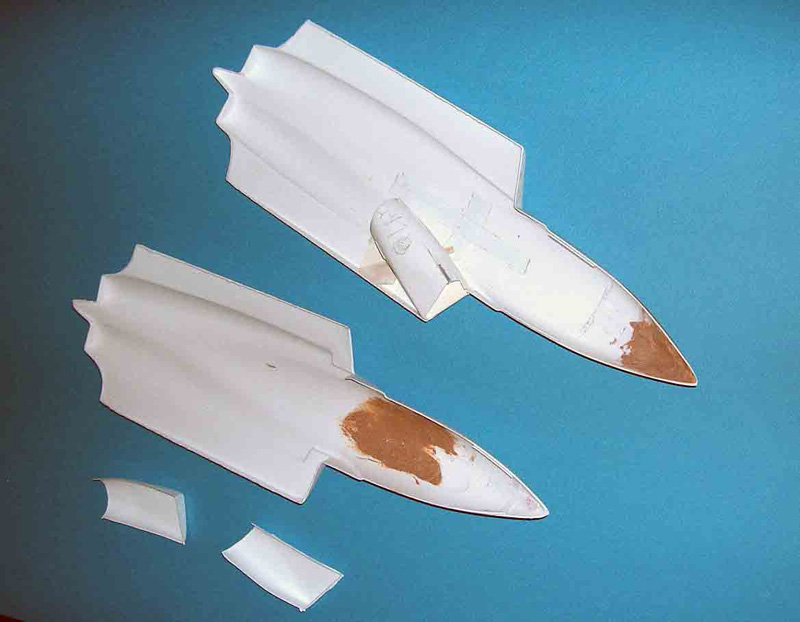
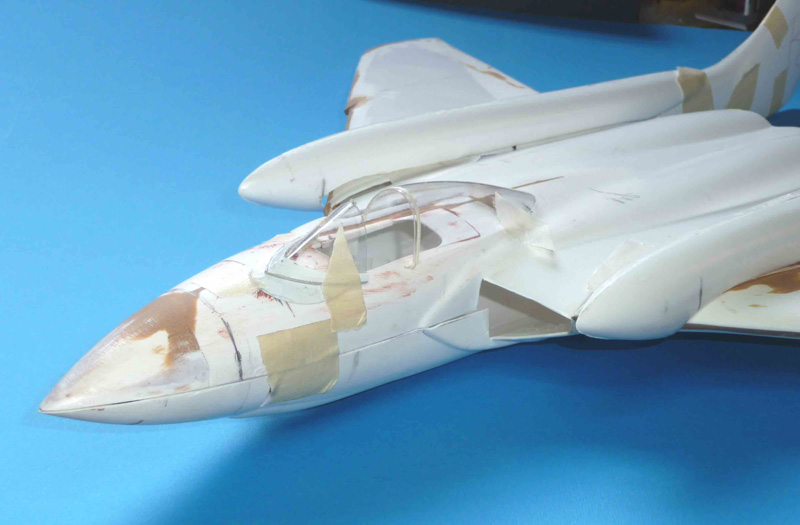
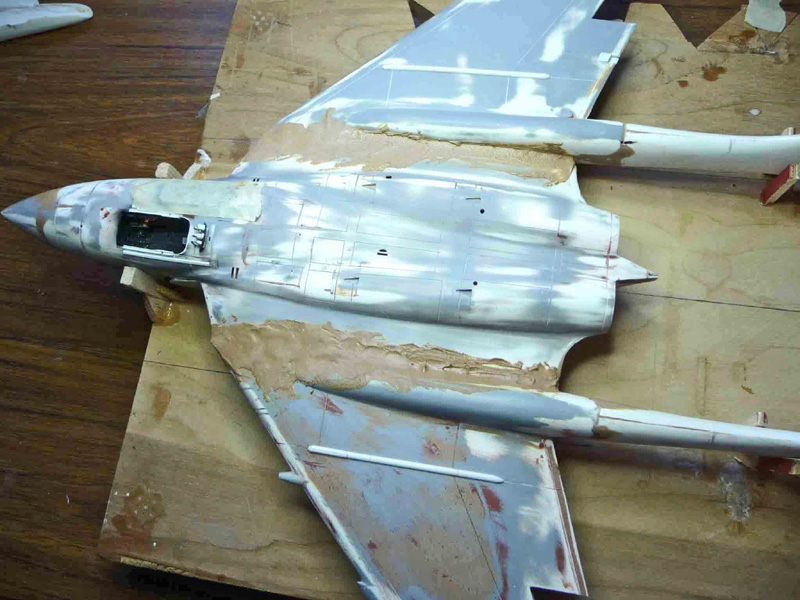
On first appraisal, it appeared to me that the fuselage had some shapes that needed some rather significant refining. The main ones were bulges in the top of the nose section and in the center line behind the cockpit area. In each case, cuts (slices, really) were made and the edges were brought together and re-joined with super glue and epoxy putty. I also significantly reduced the vertical height of the fuselage, particularly from mid-cockpit forward. The problem of shapes came up a number of time throughout the build, but that is not uncommon in this type of kit, and most were not all that hard to fix. One saving grace was that the job of correction (and scribing) was made easier because of the thick plastic used in the kit.
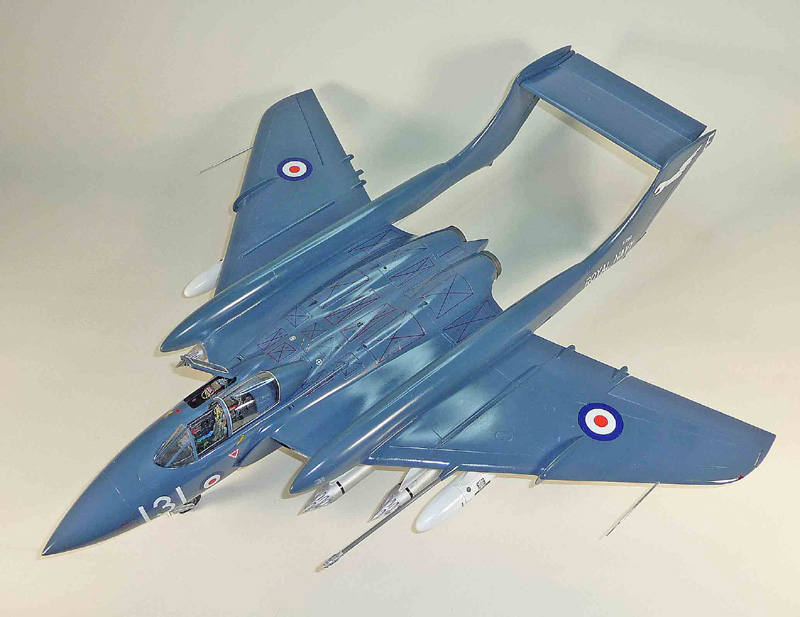
Another, more immediate, problem was that there were two right wings in my kit, but that was easy to solve by cutting out the forward sections of the boom in one wing and flipping them from top to bottom. No big deal until I began to prepare for attaching the wings and realized that, of course, the airfoil was the wrong way ´round. That required some fixing.
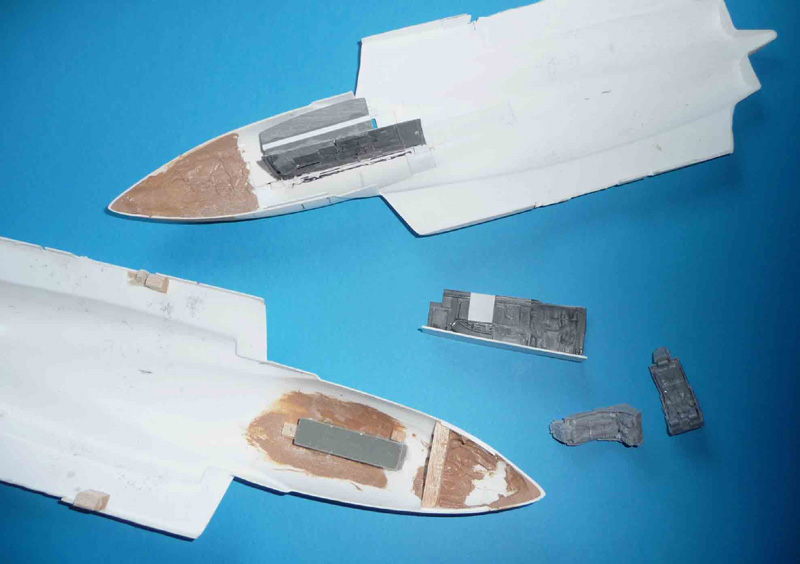
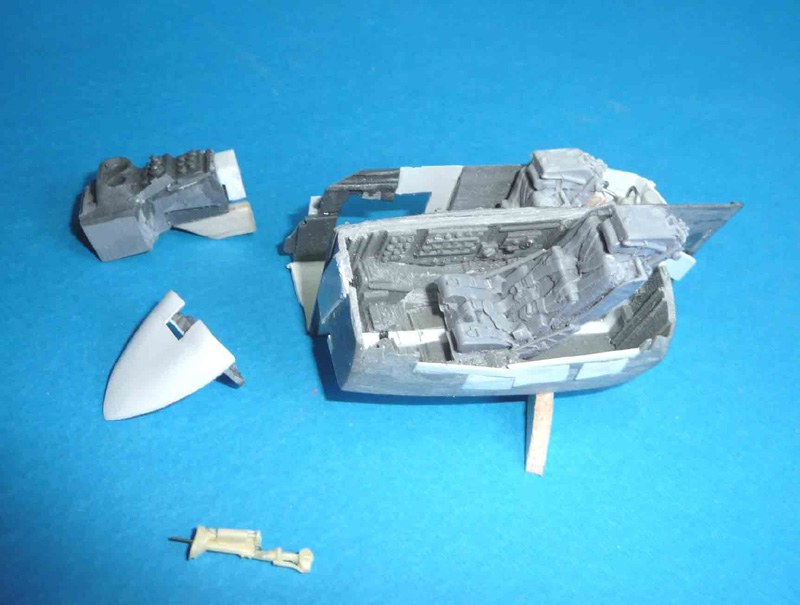
The interior was time-consuming because the resin castings were rough, but more importantly, the relationship of many of the parts simply wasn´t very good. Therefore, a fair bit of scratch-building was needed to make everything fit, while also allowing for the observer´s window, etc. I did use some aftermarket seats, which made life a bit easier.
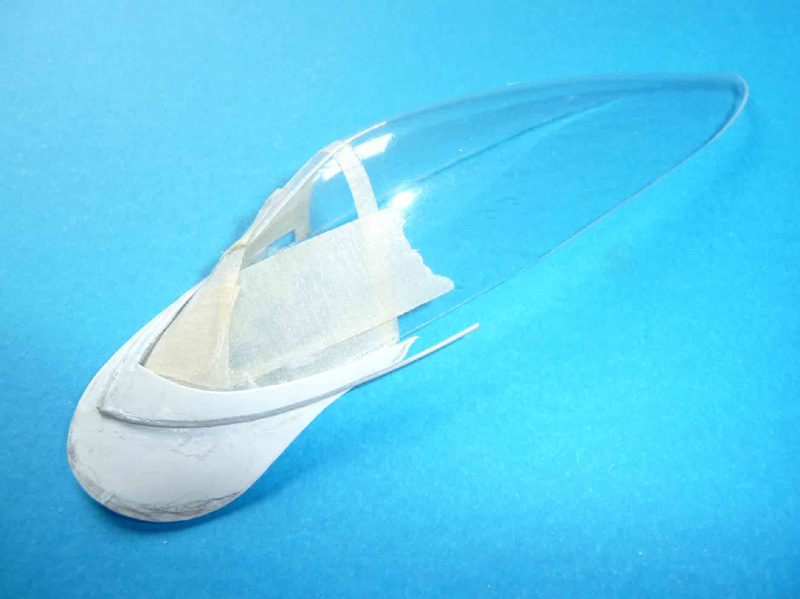
I made a new set of canopies, which I pretty much always do, if for no other reason than to enable me to modify and change things without worrying about ruining the one-and-only. After checking many sources, I also significantly reduced the height of the pilot´s canopy and windscreen, and made a new observer´s hatch.
The rather complex rain suppression system around the base of the pilot´s cockpit is not easy, even with the kit-supplied duct extending back from the base of the windscreen. I think there may be as much time in the windscreen as in some entire models.
Some of the other areas that kept my head and aged fingers busy were:
- The intakes/splitter plates, and intake vanes chewed up a good deal of time. I did use some engine faces from the scrap box and yes, I know they aren´t completely correct. The kit exhausts were used with some modifications.
- The Sea Vixen´s many (and very visible) engine hatches, inlets, various "lumps and bumps", antenna, etc., will also while away some time.
- The smaller details, such as the refueling probe, the underwing loads, etc. also needed some patience, although I did use a set of Revell Hunter drop tanks that were donated by a friend (thanks, Rob).
- The scribing needed was rather extensive, but, as noted above, the thick plastic made this job much easier than in many other vac-forms I have built (including some of my own).
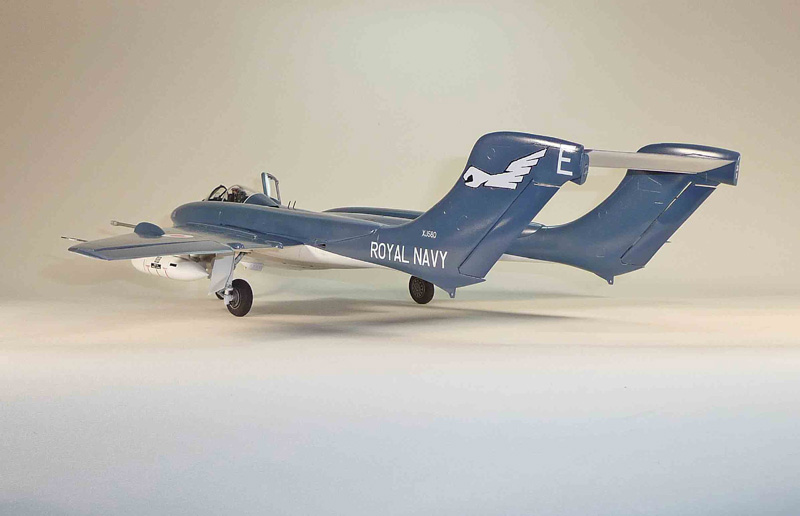
The kit wheel wells were used, but the nose gear was scratchbuilt because the kit wheel was about 50% too small. The kit main gear were used, but were shortened.
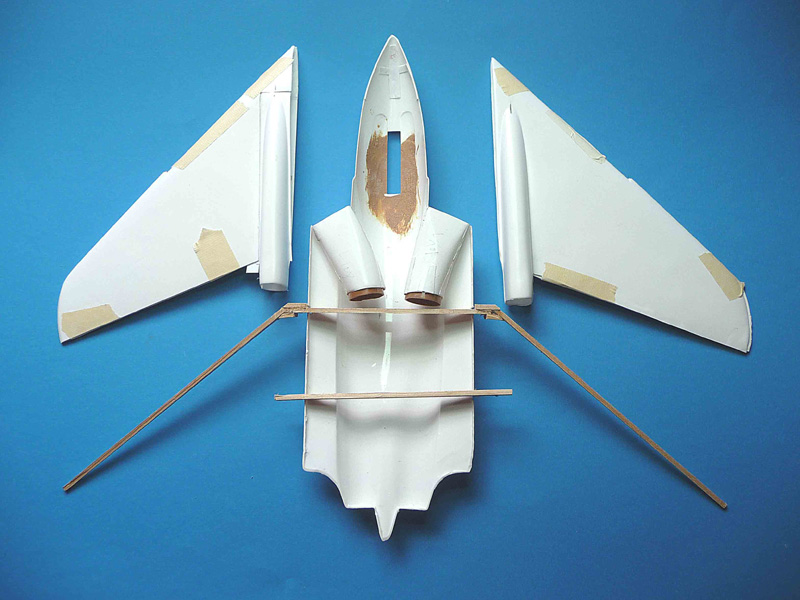
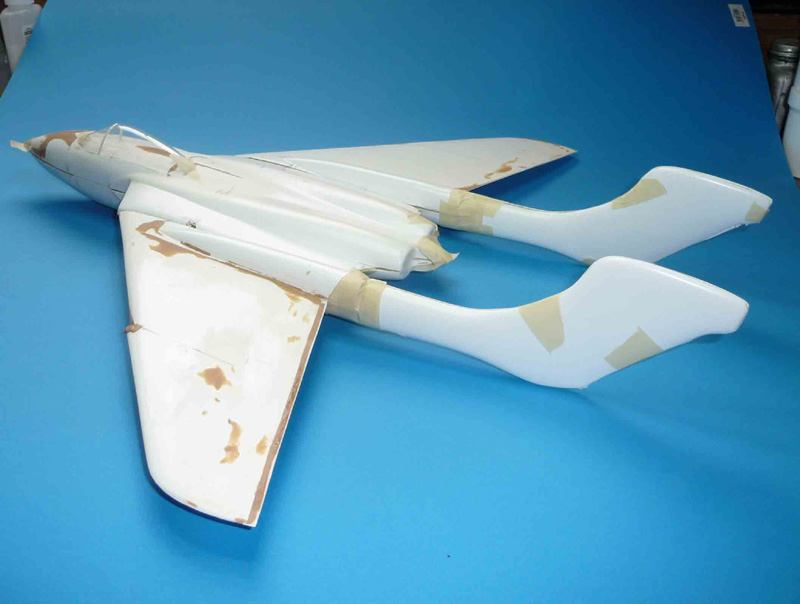
Because of the model´s size and layout, main and rear wing spars were made from 1/8" basswood which added strength as well as helping to keep things in line, which, along with making up my usual building board/jig, were very useful. The outer portions of the spar were later cut off just to make handling easier, but the pieces were drilled and wire inserted so that they could be re-attached when the wings were ready to be assembled. As mentioned above, the use of a building board/jig was invaluable to get the right relationships between the booms, and their several degree up-sweep (added to keep the booms off the deck during landings), the wings and fuselage, etc.
The rear of the booms and vertical tail(s) were too thick in plan view, and some careful sanding was also needed to make both side identical.
No simple path around all this, just suck it up and build. The photos will give some idea of how I approached the various problems.
I used Gunze for the blue, Tamiya spray-can white for everything else, and Mr. Color spray-can gloss Clear for the final finish (that stuff is great). Decals were a combination of the kit, some computer work, and 40 years or so of accumulated left-over and specialty decals.
In summary, it wasn´t easy or quick to build, but I am reasonably happy with the final appearance. There are some errors (which I will not point out), but on the whole.


© Frank Mitchell 2008
This article was published on Friday, September 27 2013; Last modified on Saturday, May 14 2016