
Hasegawa 1/32 Brazilian F-5E Tiger II
By Marcelo Ribeiro
Converting the Hasegawa F-5E Tiger II to the Brazilian Air Force Model
In the past years I have done only military models in 1/35 scale and military aircraft in 1/48. When I found the Hasegawa's 1/32 scale F-5E Tiger II kit, in a model store in my city, I imagined it in the Brazilian Air Force (BAF) F-5E colors. The camouflaged F-5s used in Brazil are based in Rio de Janeiro's Santa Cruz Air Force Base (SCAFB).
The F-5s based in SCAFB are a bit different in some aspects with the others F-5s that serve in Brazil. The SCAFB fighters, besides having a camouflage pattern used by the USAF in the Vietnam conflict, they have some structural differences that must be done on the Hasegawa kit.
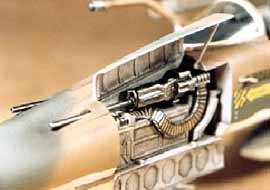
The SCAFB F-5Es have a little vertical fin in the lower side of the fin of the plane, and there is a little antenna just behind the canopy. Both of this modifications can easily be done by using styrene card and some putty. There is another important difference in this Brazilian fighters: an air refueling probe, at the right side of the plane. This construction can be done using some stretched sprue.
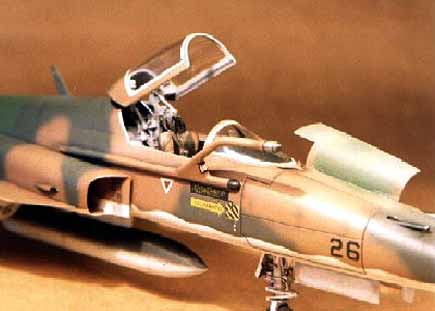
The BAF F-5E ejection seat is diferent of that one found in the USAF's F-5Es. The Brazilian one is the Martin-Baker BRQ-7A so one must convert the seat to the proper variant. The Hasegawa's kit version is the same used by the Aggressors F-5s, done by Northrop.
The kit's seat must have the head back cut and molded with epoxy putty, just like the seat back, that must be filled with putty. The Brazilians F-5E ejections seat don't have detonation cable on the top of the pilots head. It is between the pilots knees. There is two canopy breakers on the seat's top. After that, you can add the seat belts.
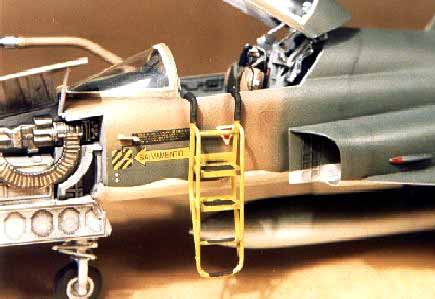
The interior of the cockpit is the first step for the model construction. The instrument panel is injected and have the instruments engraved, with good details.The interior side of the cockpit must be filed with putty and sanded.
The next step is the painting and the weathering of the model. The camo pattern of the Brazilian F-5Es is the same used by USAF in the Vietnam war.
Before I painted the model, I filled the seams with Tamiya putty and sanded it smooth. After that, I primed the entire plane with camouflage grey. This is the definite lower color of the plane besides this coat reveals some forgotten unfilled seam.
Now this is time for the camouflage. I used two ways of airbrush painting: one masked and one free. In the bottom line, that divides the lower grey of the other camo colors, I used a masking tape. I drawn a undulated line with a pencil and cut the upper side with a hobby knife. Remember to cover all lower side of the plane with masking tape!
The upper camo colors must follow a pattern. I made this scheme with no mask. To weather my model, I used pastel chalks in the panel lines. Make some oil seams.
I applied Tamiya X-22 gloss varnish to apply the decals over it. Cover the decal with a matt varnish. This is done. A good kit with a good result!
© Marcelo Ribeiro
This article was published on Friday, September 27 2013; Last modified on Thursday, June 14 2018