
Zoukei-Mura 1/32 J7W1 Shin Den
By Brian Casteel
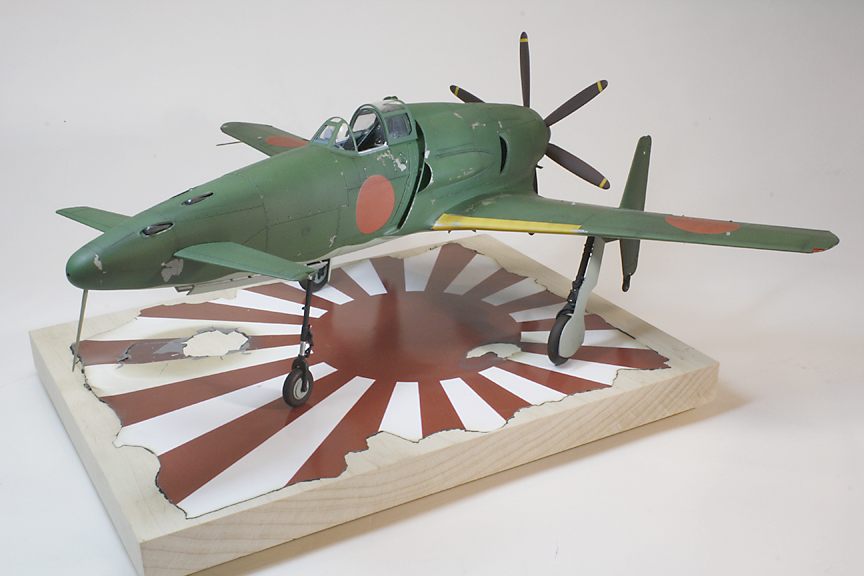
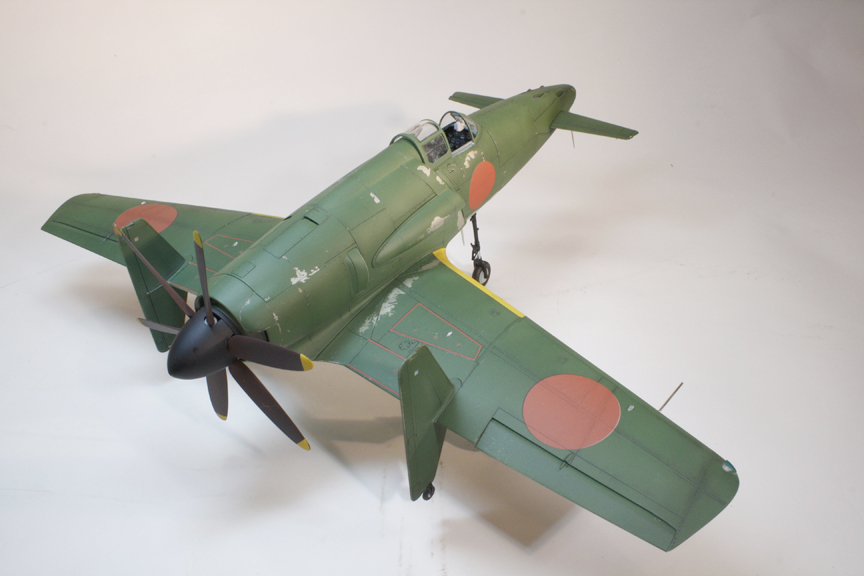
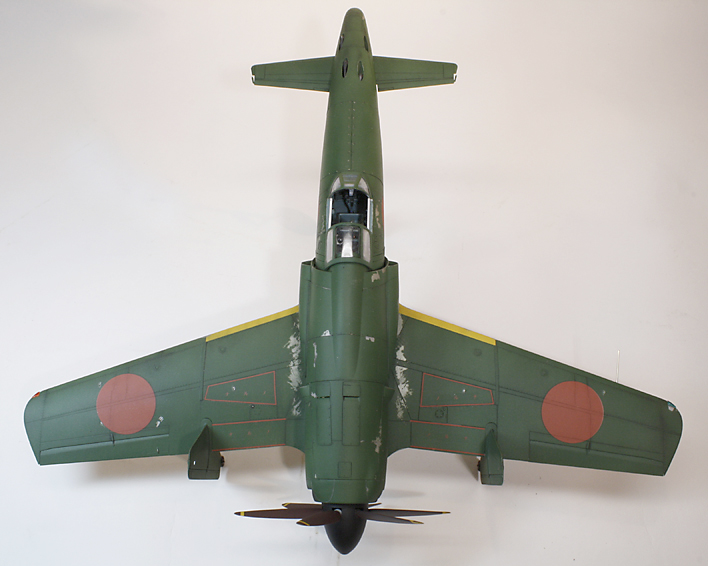
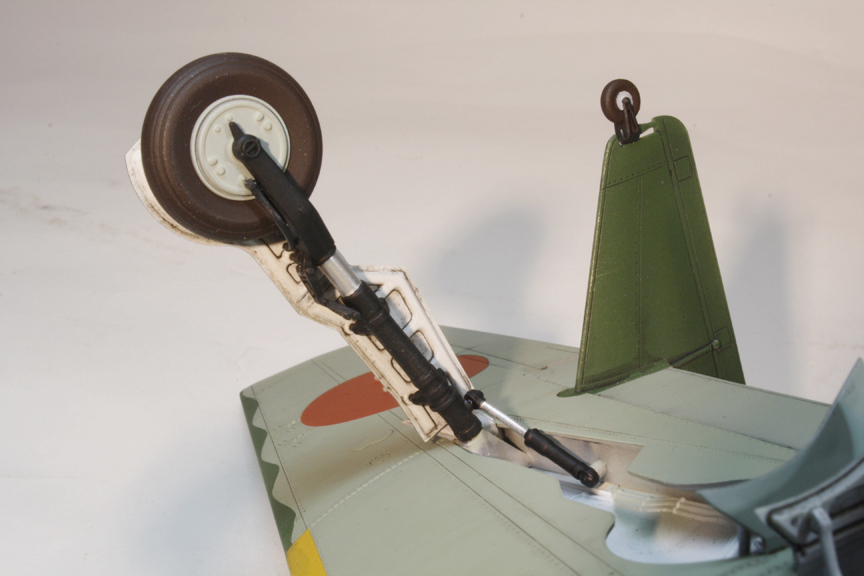
The Kyushu J7W1 Shin Den (magnificent lightning) was a rather unique and daring aircraft. The aircraft featured a canard and rear propeller design. I´ve had a hard time finding much information on it through the Internet. I do know there were only 2 ever built. Its first test flight attempt was sometime in June of 1945 ending unsuccessfully when the prop struck the ground while attempting takeoff. The fix for this was to add wheels to the bottom of the vertical tails thus preventing the aircraft from tipping too far backwards upon take-off. The first successful flight was made on August 3, 1945, just mere days before the end of WWII. The only surviving Shin Den is supposedly in storage at the National Air and Space Museum in Washington D.C.
ZOUKEI-MURA Inc. from Japan has engineered a 1/32 Shin Den as an injection molded kit. Who is ZOUKEI-MURA Inc. you ask? Good question. There are two web sites that I could find about them, the more extensive one is all in Japanese so I have no idea what it says. The second is in English but offers little company history or information. However, from what information I can gather they are an older toy and model company that has entered into the realm of WWII scale plastic models with the J7W1 Shin Den is the first release and is labeled No.1 in the Super Wing Series.
I myself, along with a good friend and fellow modeler that shares my enthusiasm for 1/32 scale aircraft, had been waiting for the Shin Den´s release for a while. When it finally was released, my friend bought two of them. Shortly there after, I worked a trade to get one from him. I traded away a 1/32 Trumpeter A-10 I had in my stash, since I´ve already built one it was a good trade.
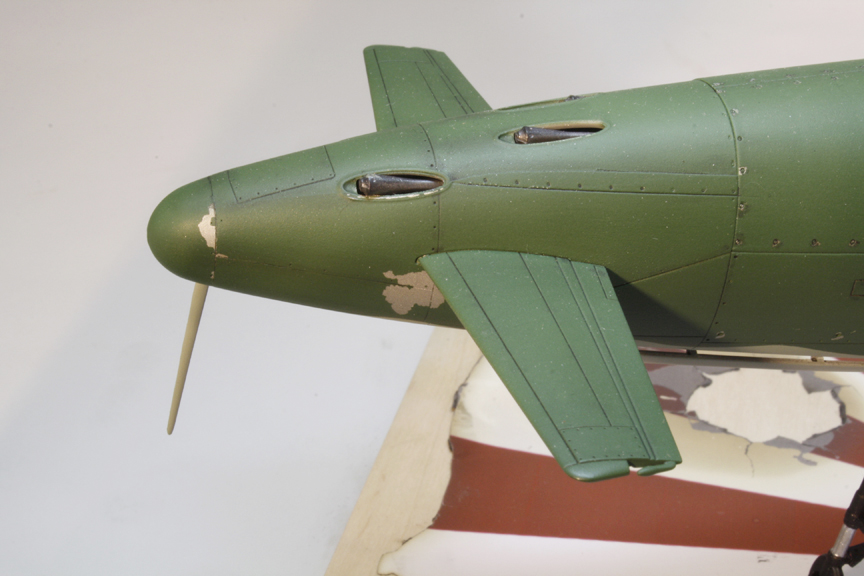
The kit is packaged painstakingly careful with the sprues individually bagged then wrapped and taped in bubble wrap, then tightly placed into the box. There were no broken or loose pieces when I opened the box. In the box you will find 9 Sprues molded in four colors; black, silver, gray and clear. There is a very well illustrated instruction book, decal sheet, vinyl canopy masks and a small brass rod. The kit that is presented is the armed variant, meaning that it has the four 30mm cannons in the nose. It´s my understanding that the two prototypes produced never had the guns installed. So that would make this a hypothetical model.
After I built my model I found out that ZOUKEI-MURA Inc. offers some added detail parts such as metal landing gear, metal gun magazine ballast (for nose weight, which you really don´t need), a jet engine conversion, the prototype nose cowling (the no gun version) and resin-cast weighted tires.
The parts are pretty well molded with mostly sharp details. There are a couple of spots that just aren´t as crisp as they should be in this scale. There is a teensy bit of flash on a couple of pieces but nothing major and all the mold lines are pretty miniscule. The ejector pin marks are placed mostly in places that you do not have to deal with them, that is if you close up all the panels. Some of the parts seem a bit thick, especially in the cockpit area.
The instruction book is well designed and comprised of 39 pages with color photographs of a model as it is being built sporadically placed through out the book. The instructions are laid out in roughly 92 fairly easy to follow steps but they are mostly in Japanese with some English here and there. The color callouts are for Vallejo Colors and they take some deciphering. (This took me several nights to do as I wanted to convert them to Tamiya colors).
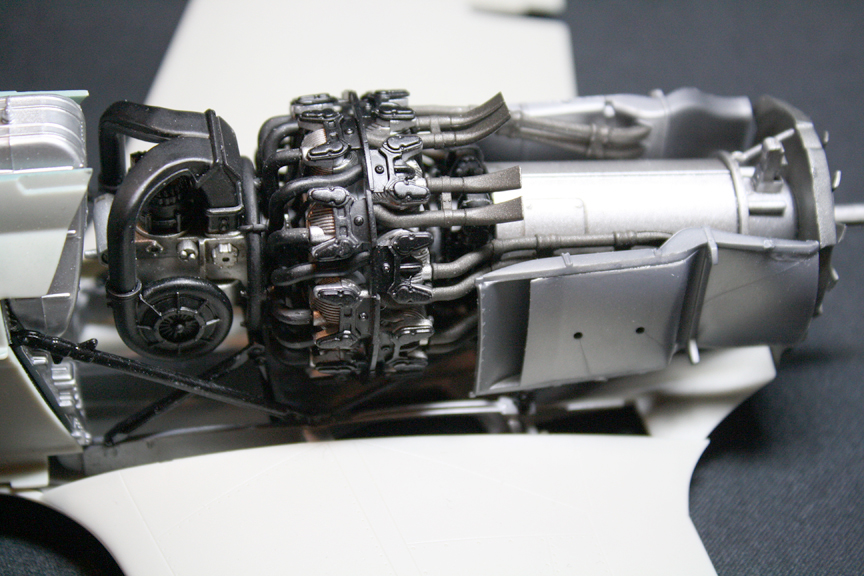
Once I figured out the colors I was going to use I began building. The instructions have you start with the engine. This is beautifully designed for the most part with only a couple of issues. There is excellent detail here even if I have nothing to compare it too. Now, the instructions may warn you about some things that you need to look out for when building the engine. But there are only a couple of warnings actually printed in English. Here is one of the issues you need to watch for, since this is a duel-radial type engine. You build the two radial assemblies separately and then put those two assemblies together. When you do this, there is a series of vertical fins or plates on the valve covers that intersect one another when the two radials are combined. These fins form a ring between the two radials. I suggest attaching the radials together and then installing the valve covers so that you have better control over the alignment of these fins. Once together you should have a nice even circle that goes right between the two radials. Now that I have said that, the valve covers are the second issue in the engine. They really are tricky to get attached correctly. They seem like they should just snap into place but they don´t, and forcing them will only result in breakage or shooting parts across the room. Those are the only problems I had with the engine assembly, the rest is a breeze to put together.
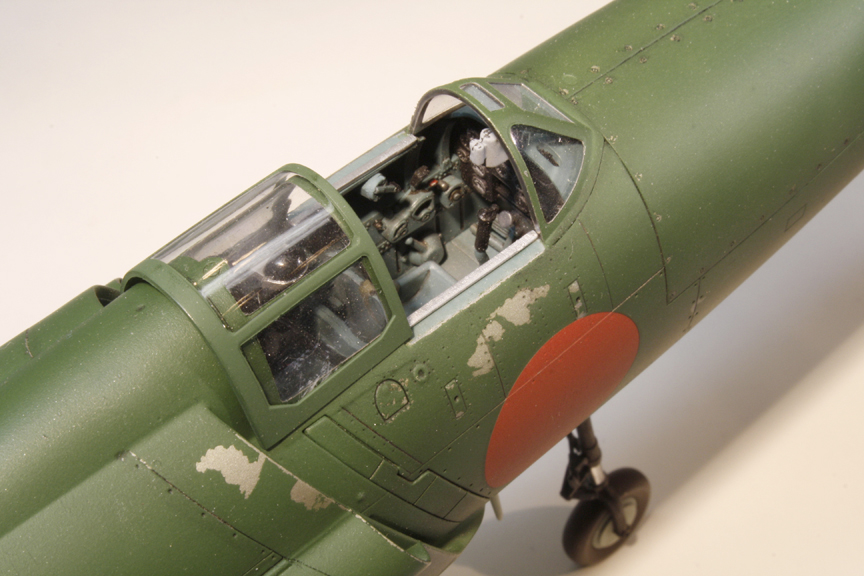
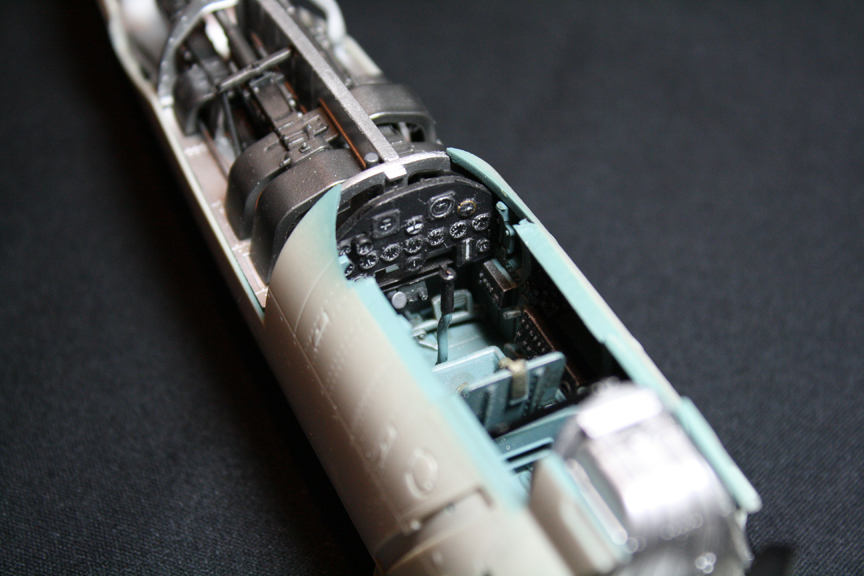
The Cockpit is really a simple assembly and you don´t really need any help from me here. However if not using the Vallejo paints, getting the right color may be a bit tough. But then again without color reference who´s going to argue that you do or don´t have the correct color. The kit supplies you with two seats one with molded-in seatbelts and one without, nice touch. There is a decal for the instrument panel for added detail. Some of the parts in the cockpit seem a bit thick but they still have good detail. The final cockpit assembly looks very nice when you get it all together.
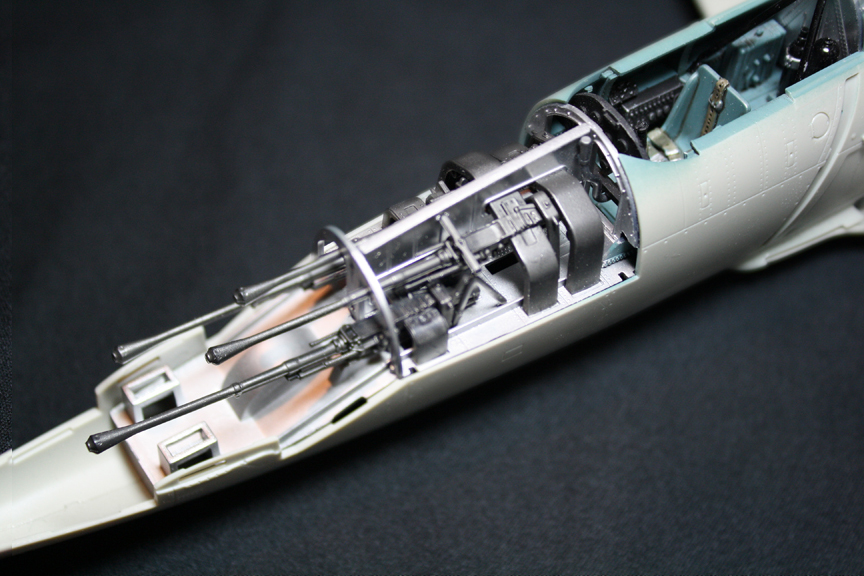
The main airframe is exactly that, a large internal frame, triangular in shape. All of the rest of the assembly will take place to and around this structure. The cockpit, front landing gear bay and gun bay are attached then the guns are assembled and placed in. Once those components are added you will begin to "skin" the aircraft. The front panels are added as well as the wings. After that, the engine is dropped in. Now you have to make up your mind here. Do you want to show your beautifully detailed engine and gun bay or seal them all up for all eternity? Well, I picked the latter since I had no idea how the panels should be posed on the aircraft. Were they hinged or removed?
Getting all the panels on is one of the trickier parts of this model. Some fit really well while others fit poorly from being too small. The covers for the gun bay definitely don´t fit right. They were a bit too short on the sides and needed special attention. I had a feeling I was in trouble when I actually spotted this problem in the photographs of the finished model within the instruction book (you can really see the problem in pictures on ZOUKEI-MURA´s web site). I fixed this by adding a small strip of styrene to one of the panels to eliminate the gap. The nose in general needed a bit of help so be aware of that. Some of the panels I just filled in the seam lines and re-scribed them later. After I got everything fixed I added the front canards. At this point I have the majority of the aircraft together with the exception of the rear vertical stabilizers.
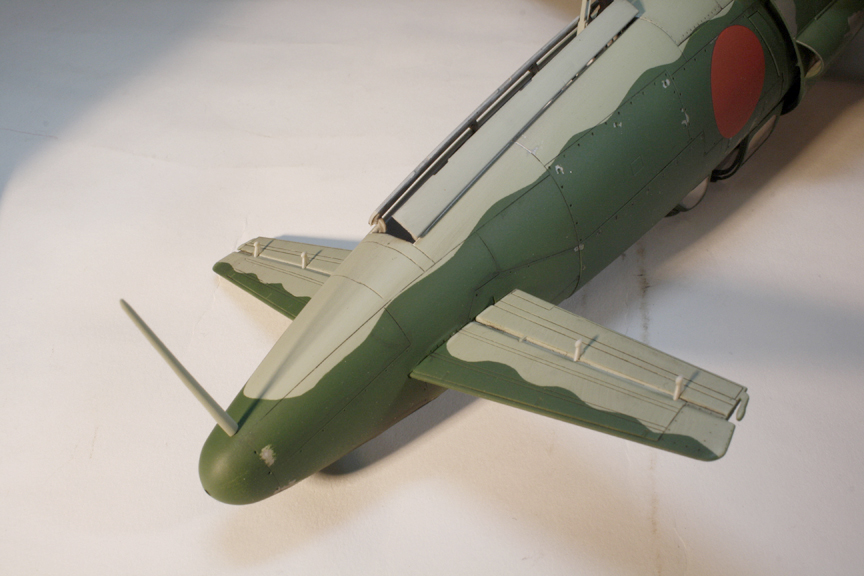
The rear vertical stabilizer fins are painted all green so I left those off and added them towards the end. Initially I was supposed to install the lights to the tops of these fins by placing them in between the two halves. Well, I forgot to do this. However, this turned out to be a happy mistake as I just trimmed down the clear lights to a square shape and popped them into their respective holes after the painting was done... no masking that way!
Speaking of masking; As mentioned before, this kit comes with vinyl masks for the canopy and windscreen and they are easy to apply. A couple of spots came up short but I was able to stretch the masks enough to make them fit.
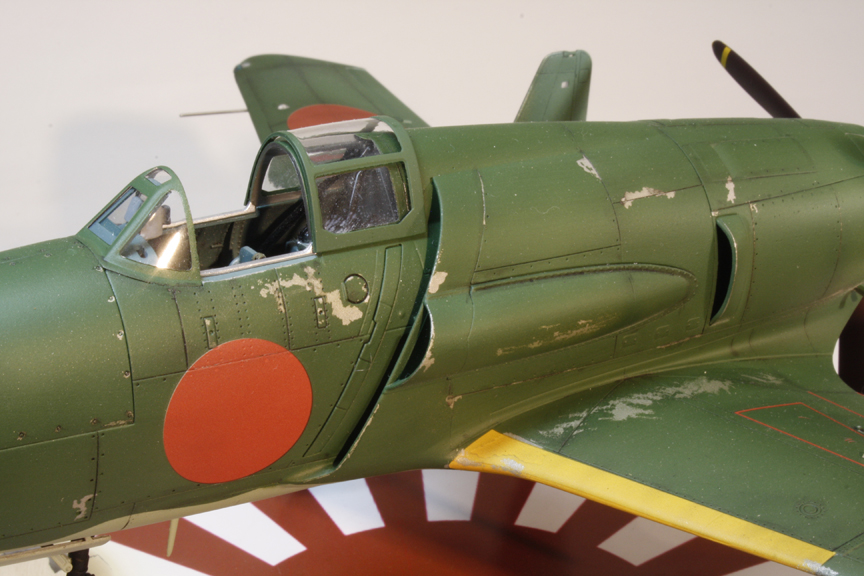
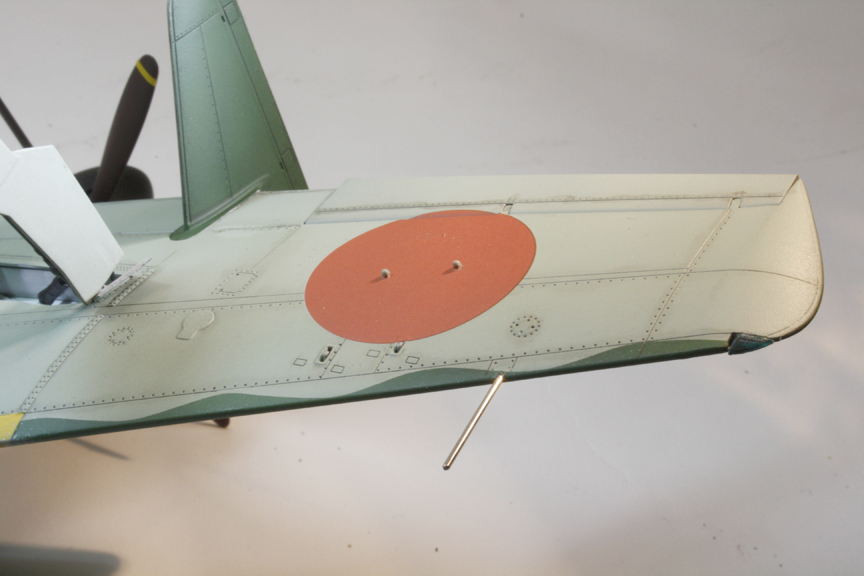
After you get your aircraft assembled it is time to paint. I opted to go with a more tried and tested look so I decided I would make this plane a bit worn out. I started with an overall coat of Model Master Steel followed by a coat of clear gloss. Since this is a hypothetical model I figured I didn´t have to go with a fresh-from-the-factory green paint job. In keeping with the worn out look I opted for a sun faded paint job. First I used Tamiya XF-26 Dark Green to pre shade the panel lines. For the underneath side of the plane I used XF-12 JN Light Gray. I masked off the bottom of the plane with Tamiya tape giving it the wavy demarcation lines. I then faded some of the XF-26 by adding a bit of the XF-12 to it. Probably a 4:1 green to gray ratio. I sprayed this over my steel and pre shaded panel lines and achieved the faded, sun-bleached look I was after.
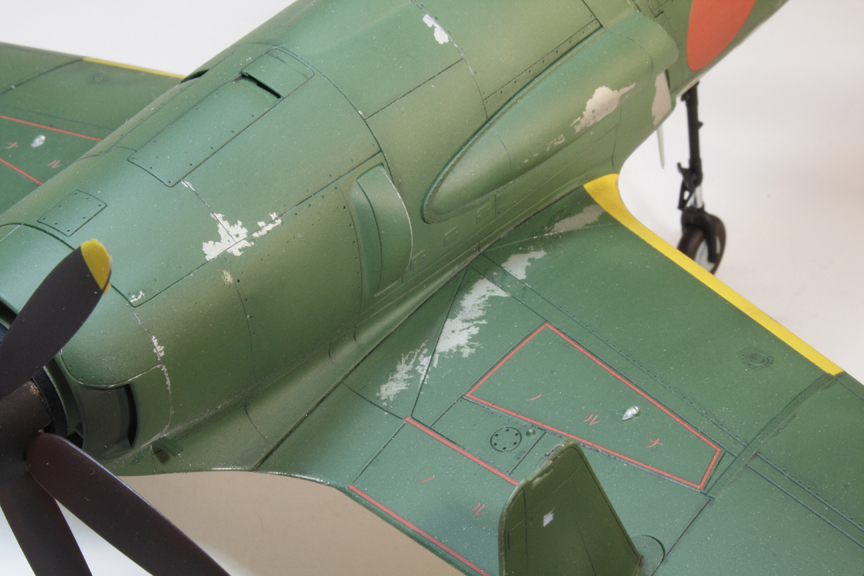
After I let that dry for a day or so. I decided to chip and peel the paint job. I used blue painters tape for the peeled away look. This is why I added the clear coat over the steel paint. It will not allow the flat coat that goes on over it to adhere too much, so when you press the masking tape over the flat green and lift it up, you get that peeled away effect with bare metal showing underneath. For the chipping I used a carefully applied X-ACTO Blade.
I removed all the masking from the bottom of the plane and I now have a fictitious plane that has seen a lot of action. I shot it with clear and added the decals. They went on without incident and snuggled down with a bit of Mr. Mark Soft, they are slightly thick but still easy to work with.
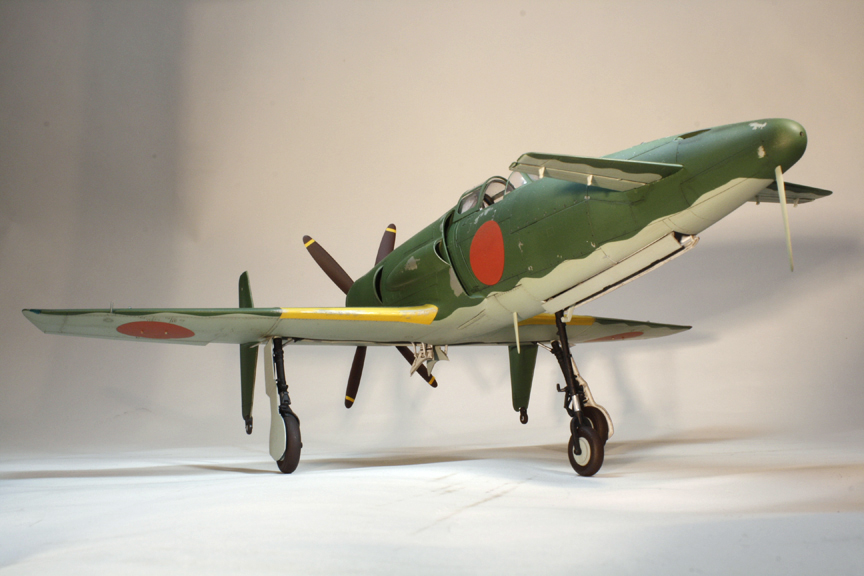
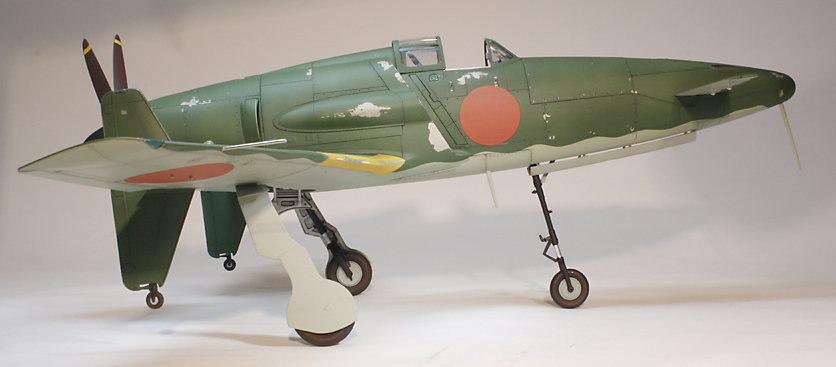
After I shot the entire model with Testors Dull Coat I moved on to the landing gear. From the profile shot I have provided you can see that the landing gear has a strange shape to it. It looks like the entire plane is about to sit up and beg or the landing gear is about to fold underneath the plane. This being said, the rear landing gear is a bit flimsy. If you have the means I would suggest ordering the metal landing gear I spoke of earlier. For the front and very tall landing gear you assemble the two half´s with the brass rod in between, this does help here. I turned the plane over and set it on its feet. Man, this thing is tall!
Finishing up is a breeze I added the propeller and antennas along with the front gear bay doors. I unmasked the cockpit and added the canopy rails (another nice touch) and the sliding canopy in the open position.
Overall this is a pretty nice kit, despite its shortcomings. I would guess that I have between 60-70 hours put into it. If I were to compare this kit with another manufacturer I would say they are on par with Trumpeter. I don´t believe anyone in the United States is carrying this model so you will have to order it direct from the manufacturer. You can find them at: www.zoukeimura.co.jp.
© Brian Casteel
This article was published on Friday, September 27 2013; Last modified on Saturday, May 14 2016