
A Pair of Hasegawa 1/32 Sabres - Canadair Mk 6 and F-86 F40
By JD King
Of Thoughts of Long Ago – Hasegawa’s Large Scale Sabre Revisited
Like most of us who purport to be practicing members of this hobby my start came in the heady days of youth. In fact I can attest that I was still well within single figures when a 1/72 Airfix F-104 in West German markings attained the mantel of first completed kit. What would follow was an eclectic collection of kits bought from the local newsagent, and later the fledgling hobby store, in small town rural Australia. There were littlies like 1/144 P-38s and biggies such as Hasegawa's 1/72 P-3 Orion and 1/32 P-51; all were admired when suspended on fishing line from the ceiling, but are now all long since demised. Adolescence and the discovery of things like beer, women and big boy’s toys (not necessarily in that order) would put the hobby into remission in a familiar story to most of us. Many years later, in wet season Darwin a long leave period that was out of synch with my wife’s time off, would see a monster rekindled. That monster has continued to grow and I am sure that my wife now rues that unsynchronised Christmas break. My display shelves are now filled with up to date 48 and 32 scale kits whose detail and engineering was only dreamed of when I was young. But of late I have come to ponder those early days and in particular kits previously built that left a lasting impression. I have rebuilt in recent years Monogram's old 1/48 Harvard, have a re-issue of Hasegawa's 1/72 Neptune in the ready to build pile and would pay handsomely if an old Matchbox 1/72 Supermarine Stranraer could be found. But the subject of this article holds a special place.
In the early 1980s Moree the local Aero Club held an Airshow of significance, well it was to me. Coming from an Aero Club family I had plenty of access to the hardware and crews. Col Pays Mustang, Army Aviations Kiowas Porters and Nomads and the RAAF Museums Sabre. Now the Sabre was just about the coolest thing I had ever had the chance to get up close to. My father recognised this and the following Christmas I entered the exciting world of 1/32 Scale modelling with Hasegawa's F-86F40 becoming the “best Christmas present ever”. To my young and impressionable mind the detail and size were fabulous. Detailed Gun bays, separate control surfaces and an engine that was more complex alone than the previous kit I had built. It would leave a lasting impression and would be repainted many times in various guises from American aircraft to a pseudo Avon variant before its demise. It has always stuck in my mind as a great kit and I reckon it was about time I had a crack at it with the skills that age and unhealthy obsession had developed.
The Canadaire Mk 6
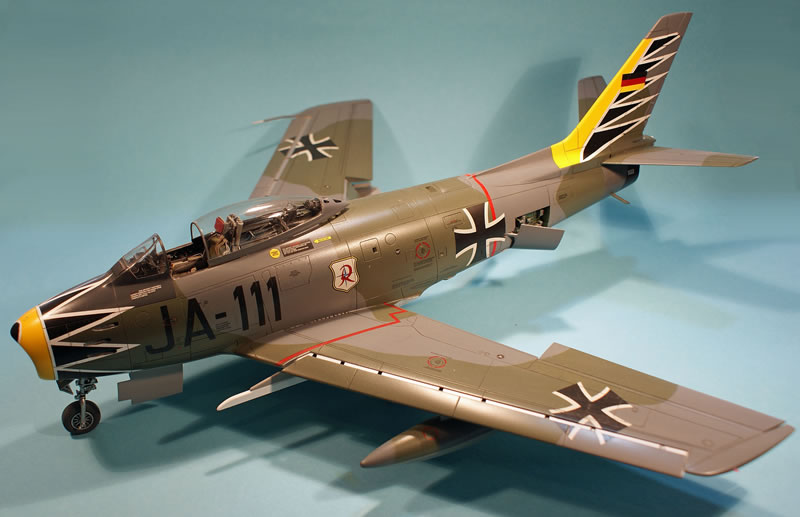
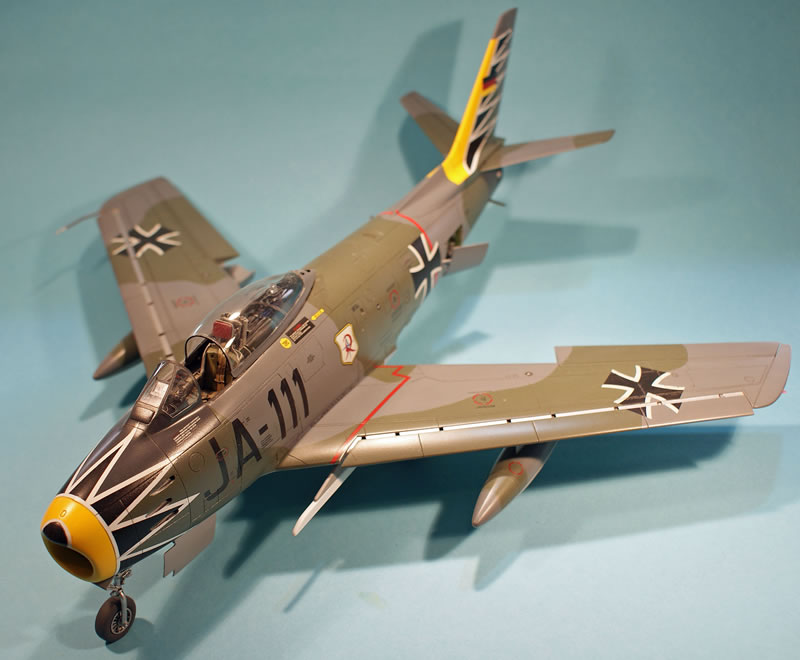
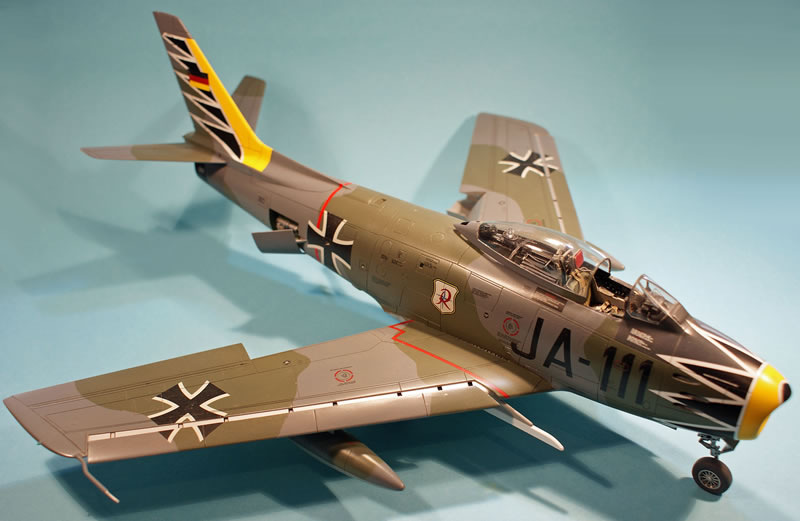
My first attempt came in late 2007 with a re-issue of the kit in the guise of a Canadaire Mk 6 in attractive Hartman Black Tulip Luftwaffe markings. In this issue the plastic is unchanged from the original with the simple addition of two new wingtips in a tan resin and a revised decal sheet. To this I added the Avionix resin cockpit and Scale Aircraft Conversions white metal undercarriage and set to work.
Those of you who have built this kit would understand that though the height of model technology in the late 70’s early 80’s it is a bit dated today. Raised panel lines are the order of the day and some of the fabulous detail back then looks a little simplistic or clunky today. It is however very accurate in shape and its engineering provides a good basis for an AMS project. The kit provides a late model “slatted wing” and has the wingtip extensions peculiar to Japanese F-86 F40s. My aim was to update the surface features by rescribing, add a little to the cockpit detail through the use of resin and use the kits decals.
Construction began unconventionally with the wings. This involved the removal of the wingtip extensions to level with the end of the ailerons and the fitment of the resin wingtips to Canadaire Mk6 standard before rescribing was completed. I would also modify the kits slats so they could be fitted after the wing halves were joined and to enable a more natural sit. Attention was then turned to the very prominent intake trunking. To solve a problem I remembered from my youth of a poor join of the nose to the trunking if fitted after the fuselage was joined, I reversed the process. I joined the upper and lower halves and the fitted the nose to the resulting tube. This enables the hours of sanding to achieve a seamless intake without risk to the rest of the model. The subassembly suitably smooth, it was finished by painting the inside of the intake and fitting the face of the compressor. As I did not intent to fit the whole engine a similar process was used for the jet pipe before turning to the fuselage.
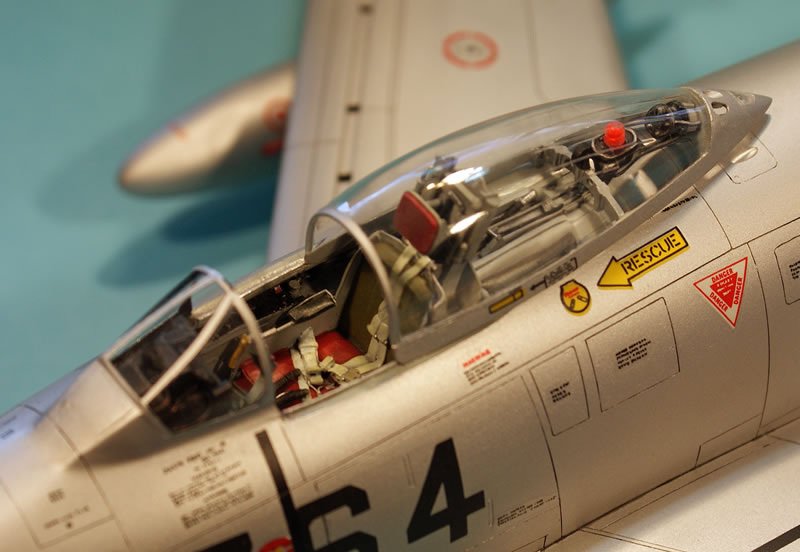
Fuselage construction began by sanding off all raised detail and rescribing before moving on to the cockpit. Rescribing was achieved in my usual manner of combining good reference drawings with lots of DYMO tape and shape needle in a pinvice. This enables a straight edge that is thick enough to guide the needle yet flexible enough to conform to the kits curves. In the cockpit the Avionix set greatly enhances the kit and though requiring a bit of cutting and thinning it is principally a simple replacement of the kit parts. Once the cockpit was properly prepared the nose and intake were glued to the left side of the fuselage enabling the cockpit tub to be inserted along with plenty of nose weight. The right fuselage was then joined and a little filler and sanding finished the nose joint. My time again and as will be seen subsequently I would join the front and rear fuselage parts before joining left to right. This results in a far stronger joint and most importantly only a small gap in the left /right join rather than a significant step in the front/rear join. The step required about four hours of remediation with sanding stick and filler, the gap about 10 minutes with strip styrene and sanding stick.
After fixing the front rear join, the wings were mated to the fuselage and the final surface preparation was completed by fixing gun bay panels, tidying up panel lines and adding key fasteners. Elevators were then added, the jet pipe cleaned up and the rudder glued in place. Test fitting of ancillaries like air breaks, undercarriage and canopy completed primary construction and it was time for paint.
The kit markings are for a natural metal bird with red nose and fin, which is nice but for me the classic NATO camouflage with yellow nose and fin that the squadron also used looks better. Rather than use the tulip decals I decided to paint them. This was achieved by first laying down the yellow and masking, the white and masking and then the black. This was all done prior to camouflage application to ensure an even colour whilst being as thin as possible. The black areas were then masked and the camouflage sprayed. Decaling was achieved with the kit decals including all stencil data which settled down very well with a little Micro Sol.
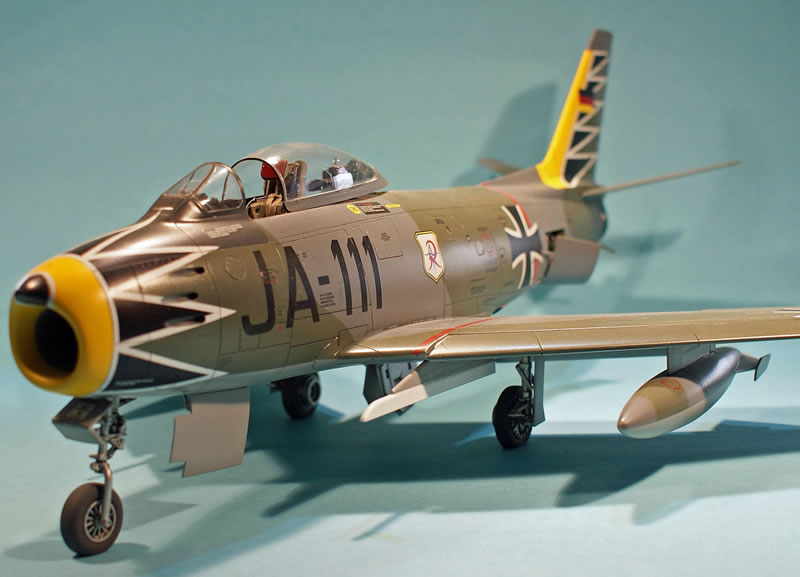
Wing tanks, missile pylons and the very sturdy undercarriage later I was pretty happy with the result. Some of you may have seen the finished kit displayed at Scale ACT 2008. It would be at this event that the opportunity to truly revisit the kit I had built so many years before. At the swap and sell I found an original issue version of the kit. It was exactly the same as I had built almost 30 years before. The same box, an original instruction sheet without its incorrect part numbering being revised as in later reissues, and the same JASDF decal sheet. Well it had to be done again, and this time just as it was the first time.
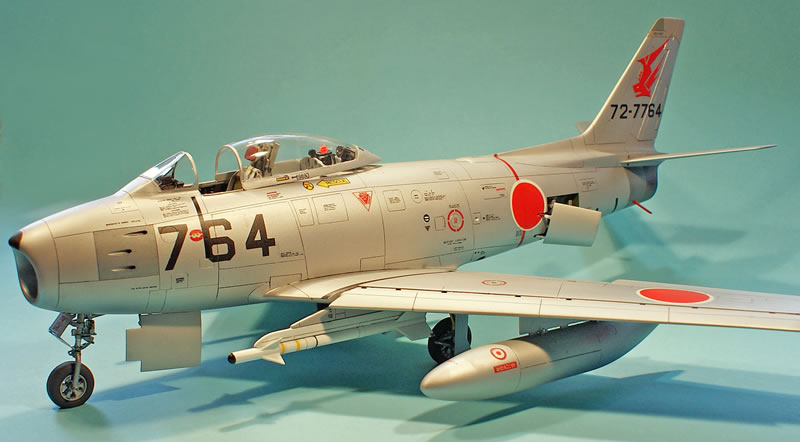
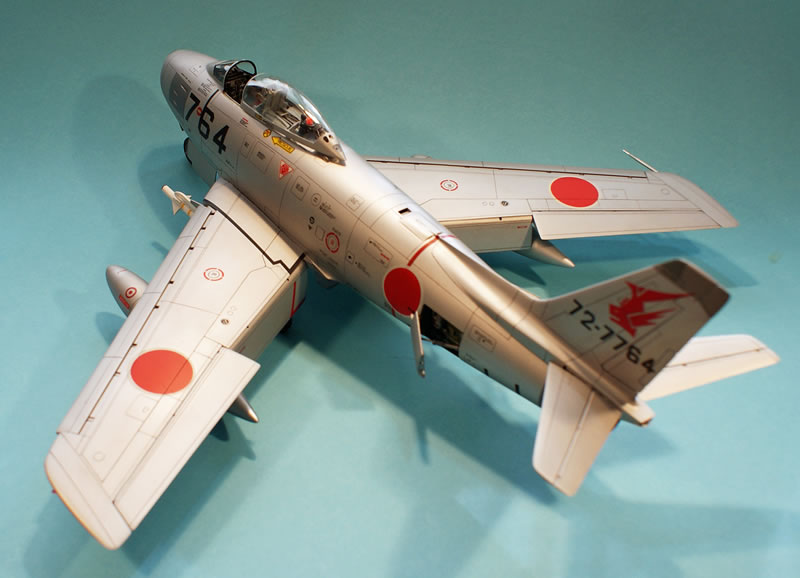
The F-86 F40
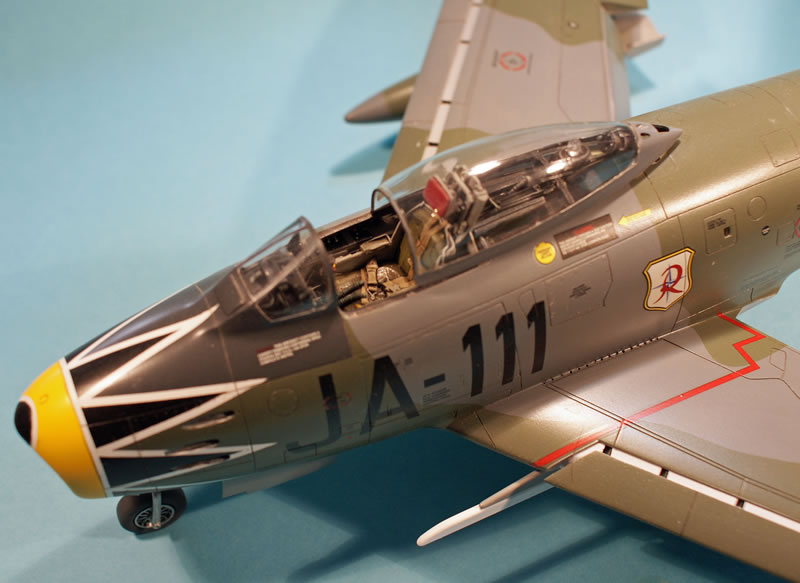
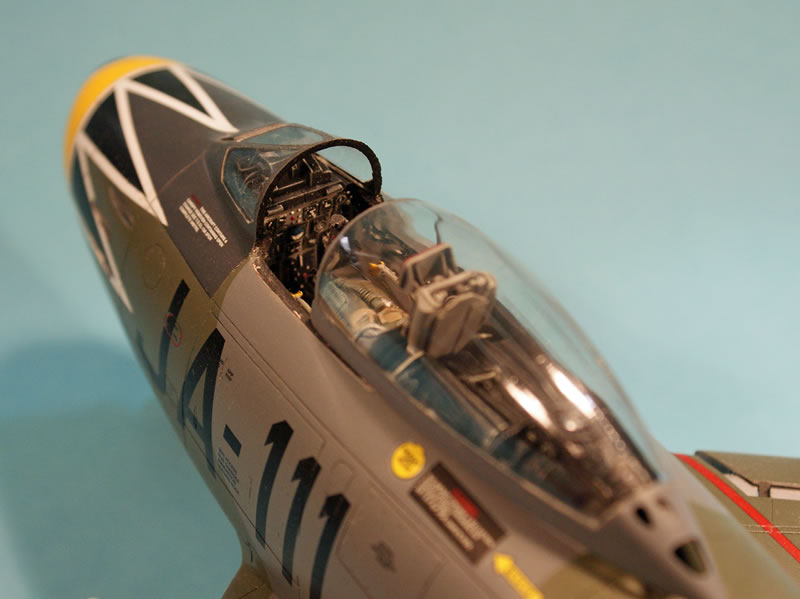
With the lessons of 2008 in mind construction of the second kit began in late 2009. I would again use the Avionix cockpit set and Scale Aircraft Conversions undercarriage but I would also add the Eduard PE set to the mix. This set provides many cockpit items to spruce up the kit parts, wheelwells, airbrakes and many surface features such and landing light rings and a number of access panels.
Construction began this time with the fuselage, joining front to rear and closing the gun bays first before sanding and rescribing. This helped enormously in surface preparation and rescribing; particularly around the gun panels which are designed to be left open and do not fit particularly well. It also greatly helped in achieving a clean representation of the fuselage break line. I would also drill out all gun blast tubes and circular vents and replace them with tube styrene for a deeper more accurate depiction. The cockpit inserted the fuselage halves were joined and wings added as per the first kit. Intake trunking and jet pipe were completes as per the Mk6.
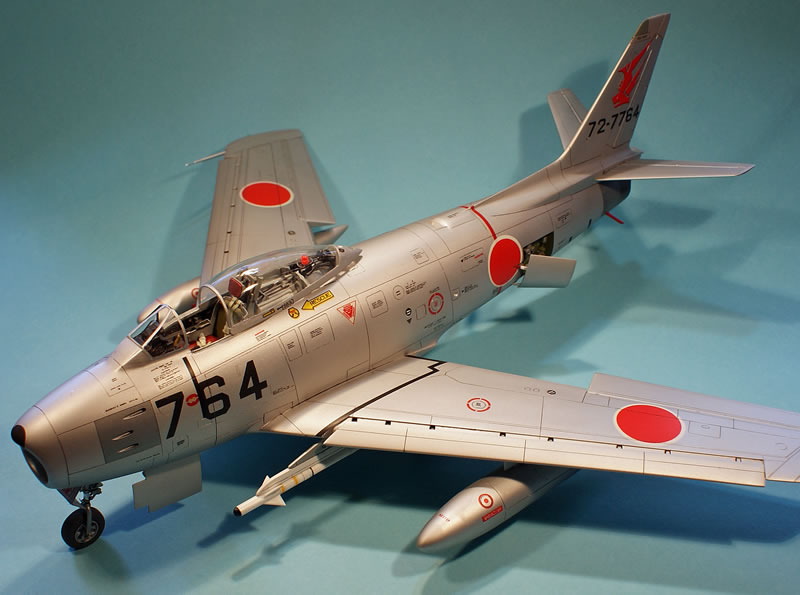
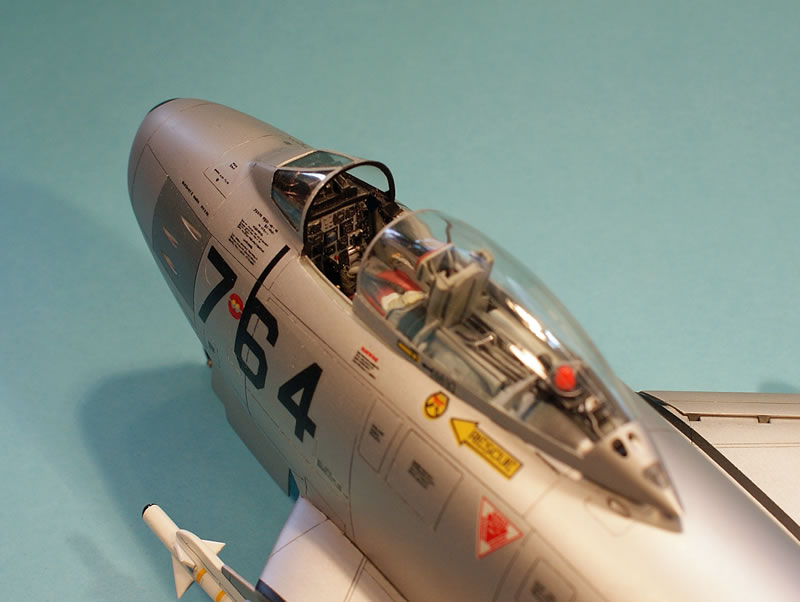
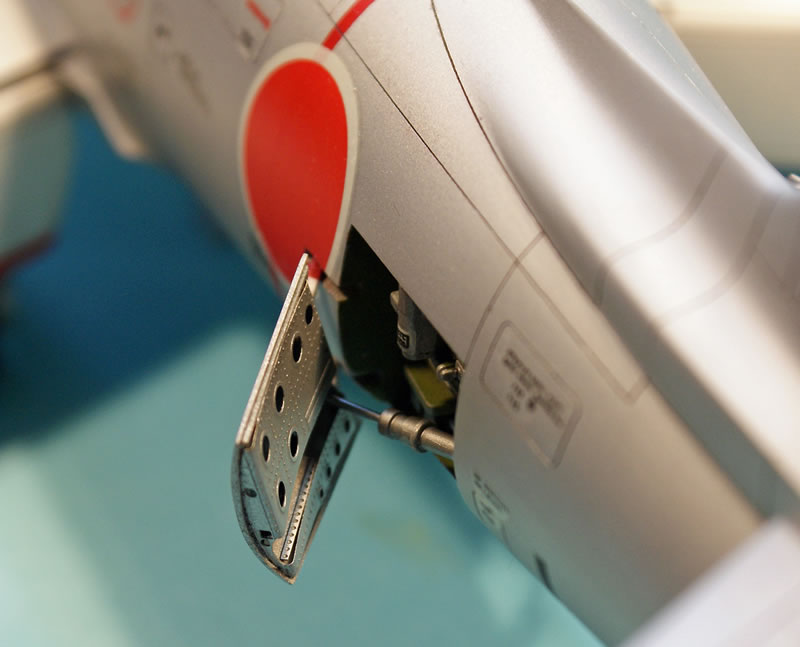
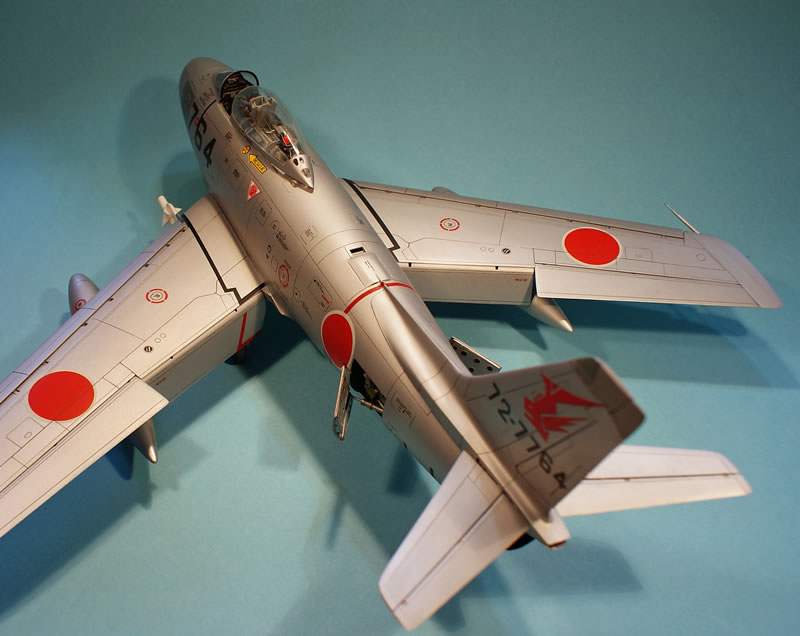
In this instance the kit would be finished in aluminium, a finish that does not take too kindly to the sticky of being masked or the handling whilst applying it. So this time all the painting of things like the airbrake bays, undercarriage bays, walkway lines and turbine warning bands were panted first and then masked out. This achieved aluminium was applied and sealed before decaling began. Again all decals used were those in the kit, and to my surprise at 30 years old, they worked just fine. They do show their age however with many stencils being unreadable where a modern 48 scale decal set would be very clear and concise whilst being smaller in size. Two of the Honiara’s were also a little out of register but were still used in keeping with the theme of the kit.
Of note this time the Eduard wheel bays and airbrakes really address some of the kits most prominent shortfalls and in combination with the very good resin cockpit this old kit comes up a treat. Resplendent in its Honiara’s and very Japanese tail markings the finished model is every bit what I was looking to produce and captures all of my childhood recollections.
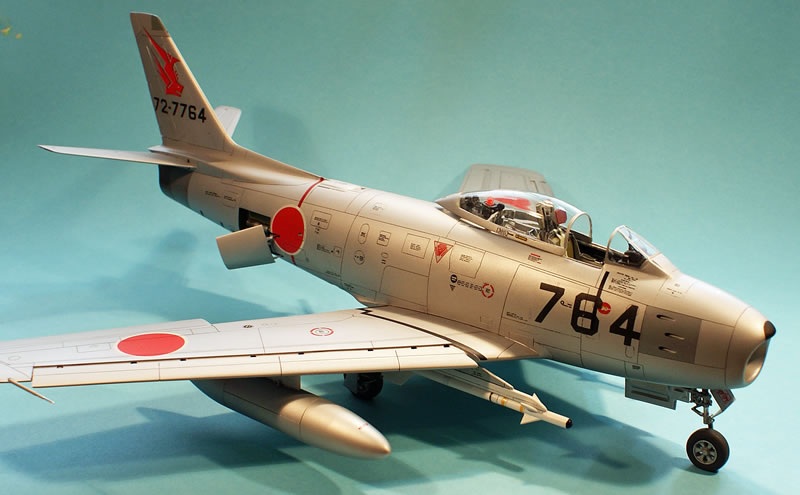

For me this is by far the best of the two 1/32 Sabres on the market. Though the Kinetic kit has recessed panel lines, its shape especially in the nose, is not as accurate and to be frank its surface detail is more time consuming to correct. The Hasegawa offering is also far superior in its intake trunking and jet pipe, which in the kinetic offering requires significant effort to clean up if you wish to display without FOD covers. For me I would rather convert the Hasegawa wing to an un-slatted version. To be fair, I will finished the started Kinetic kit that is sitting on my shelf of doom as a 112 Sqn RAF bird, but my 1/32 Avon Sabre currently in the planning phase will be based upon a conversion of the Hasegawa kit.
Bill Bryson once noted that revisiting a childhood memory seldom results in an experience that matches the memory, and more often than not results in disappointment. Well Bill, whilst in many instances I have readily agreed, this time it was not the case.
© JD King 2013
This article was published on Thursday, December 05 2013; Last modified on Monday, April 25 2016