
Revell 1/32 Tornado ECR - Tiger Meet 2011 - Last of the Line
By Alexander Breunig
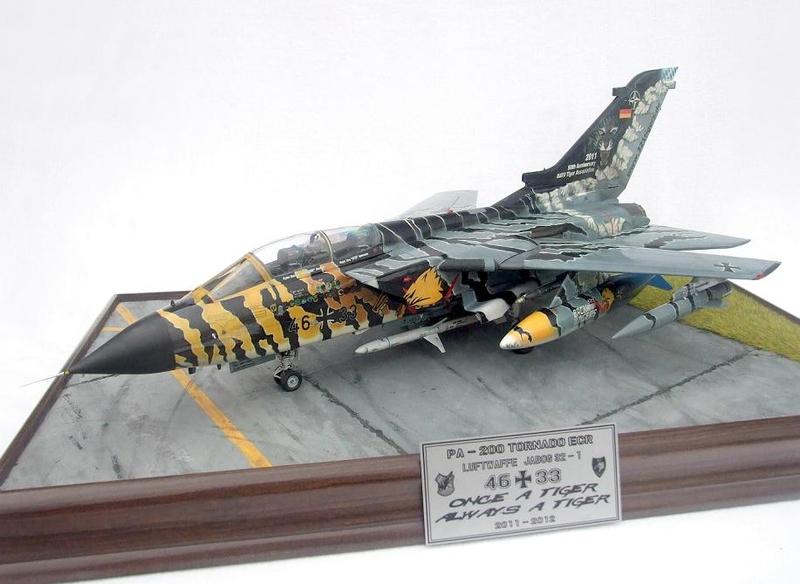
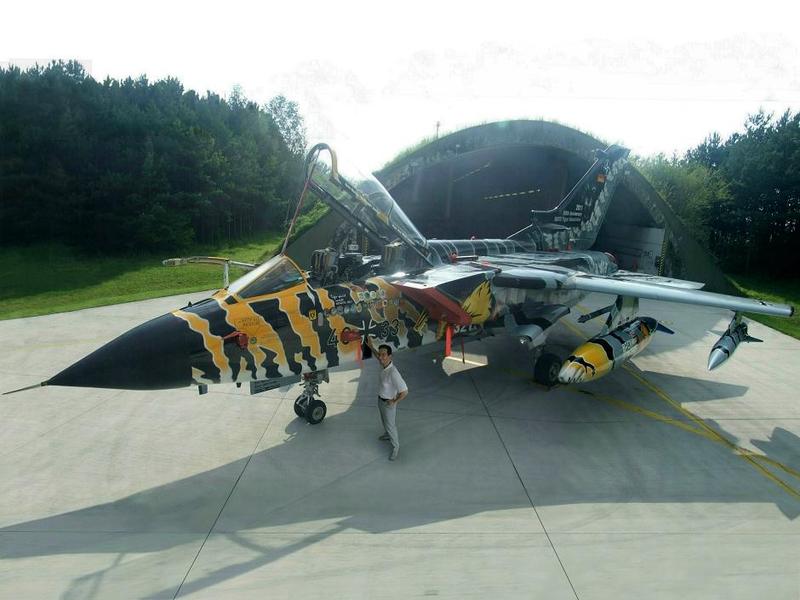
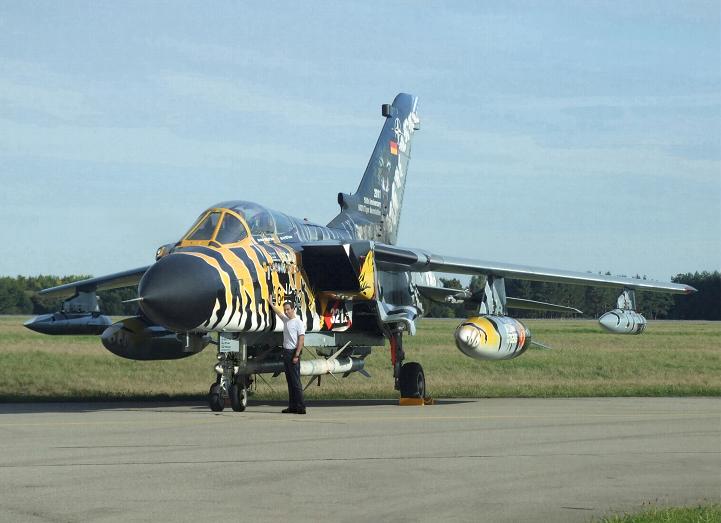
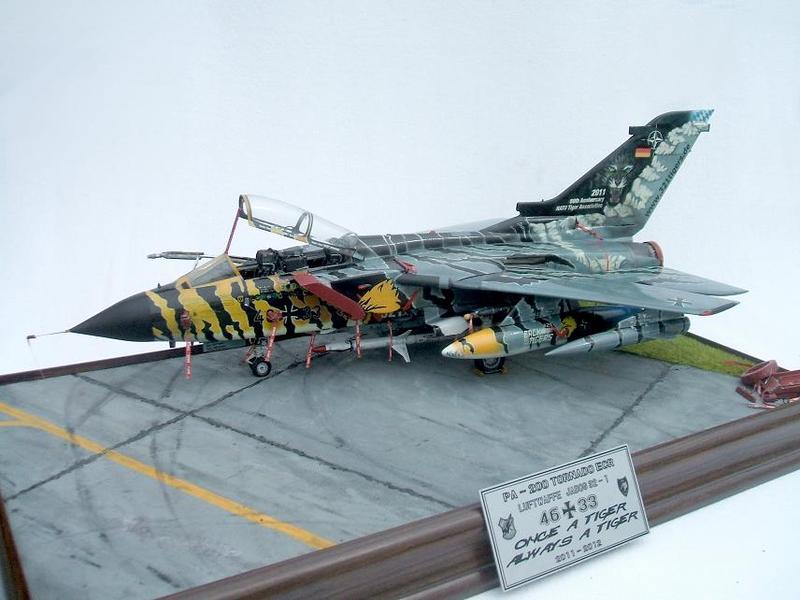
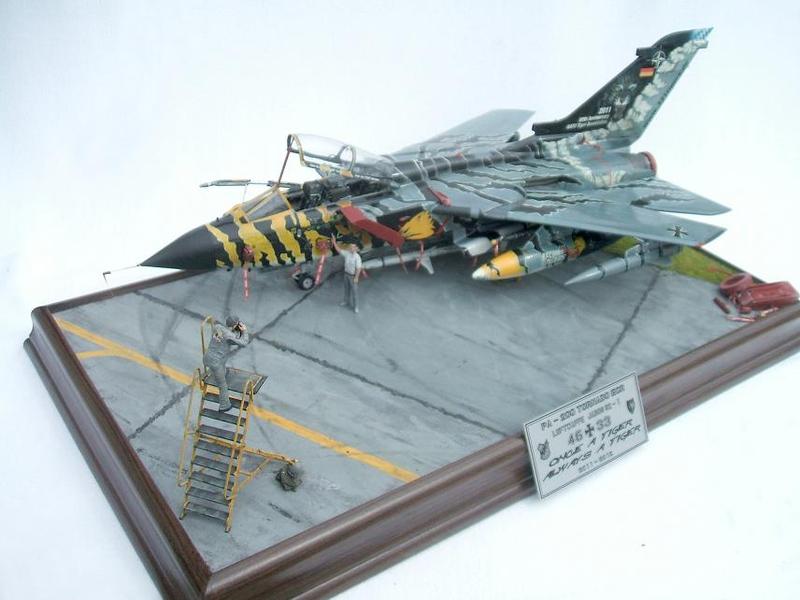
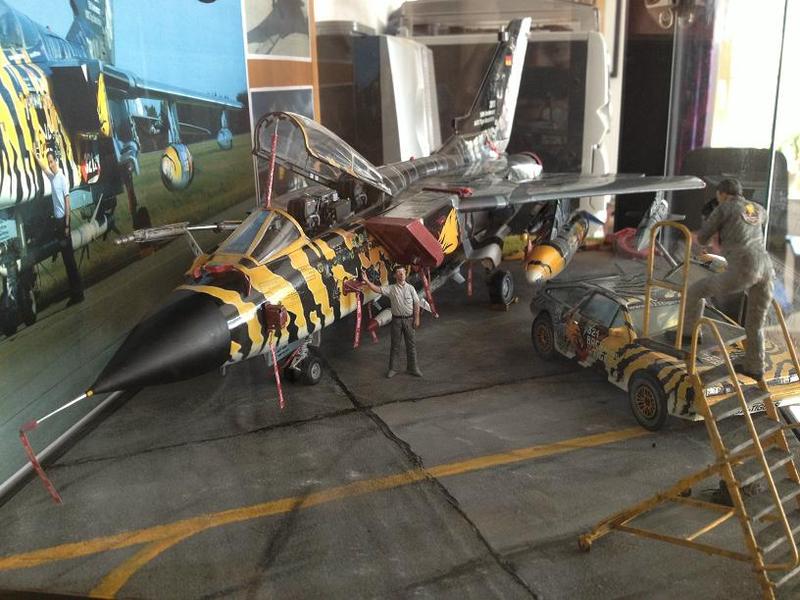
Before I start maybe just a little digression but which should hopefully make sense in the end: I was one of three finalists of Fighter Bomber Wing-32's design competition which led to the design for this - as it should prove only a short time later - sadly final Bavarian Tiger Tonka due to the wing's disbandment only a few months later. In 2011 and 2012 I had several opportunities to have some pics taken of me together with the lady as many of us like to do given the occasion. For me this Tigerlady is something very special and it is just a shame that she got shredded in early 2013. If the original can't be saved I want at least a nice keepsake as big as possible, hence in 1/32 and it needs to be something special.
Some time ago another German modeller had the idea to portrait himself in front of a model, i.e. something like a 3D photo. I just found this idea so grand and original, I just had to copycat that for me. On one occasion the Tiger was covered with FODs, canopy and refuel probe open / extended but without any load and another time the Tiger was packed, with closed canopy and refuel probe and without any covers. Hmm hard choice...hence before I force myself to decide I'll construct everything as flexible as possible so I can change to whatever mood I am in and in the end it turned out as a changing amalgam of these two shots:
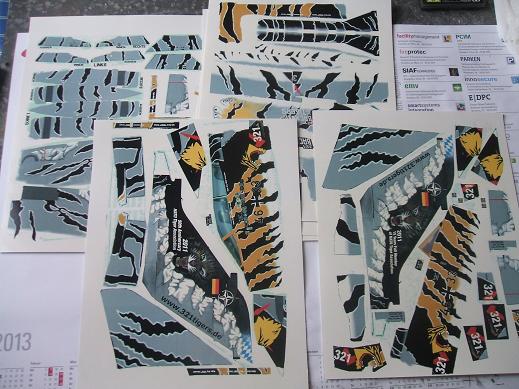
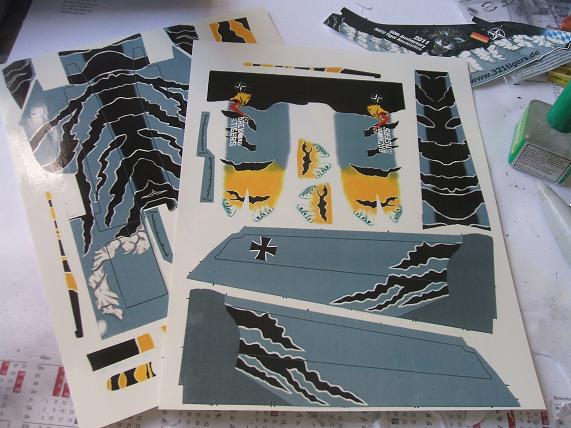
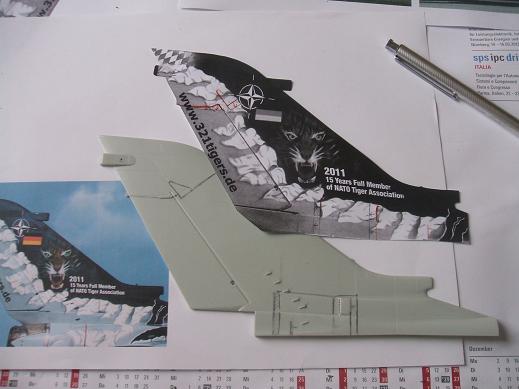
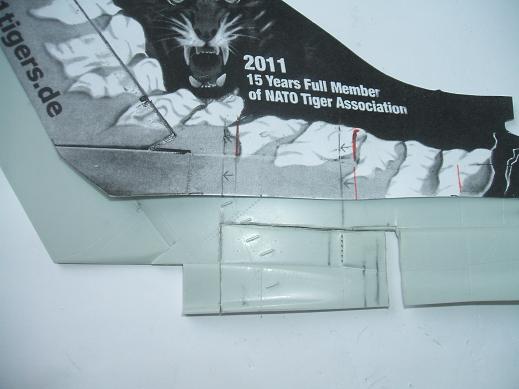
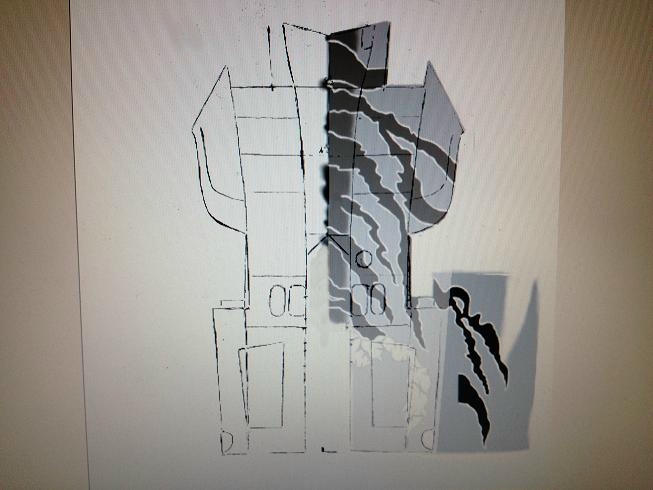
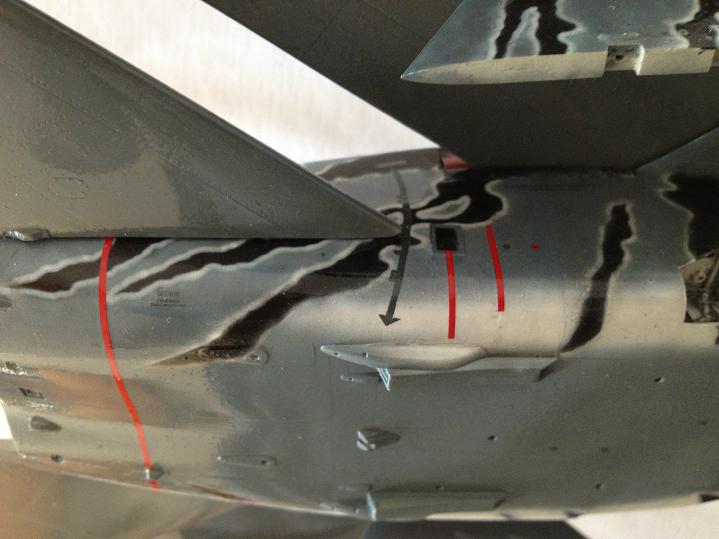
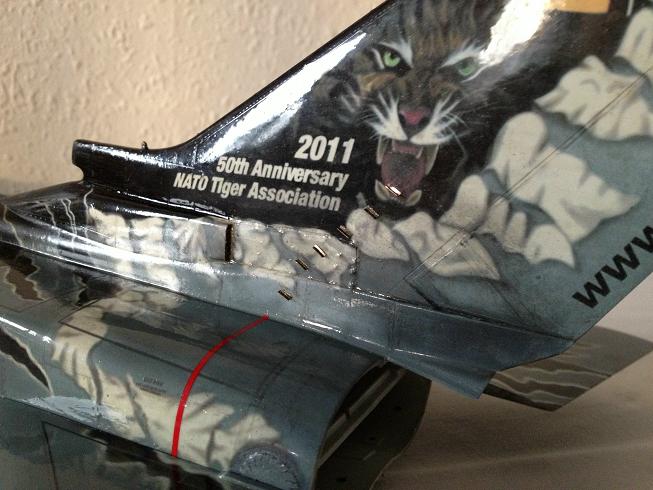
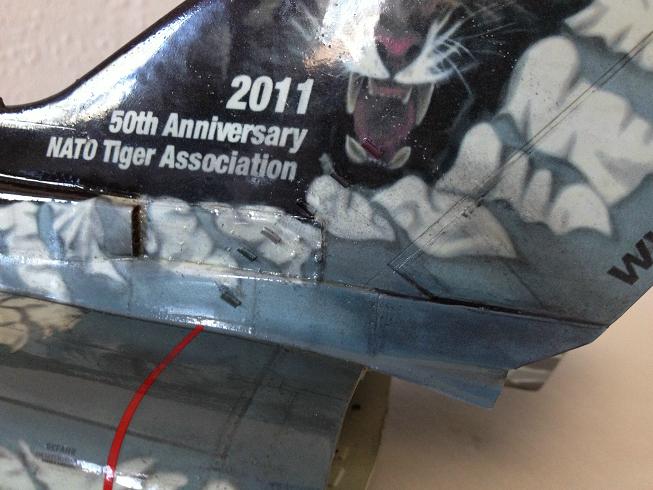
OK before the roll out here is at least a "short" rundown of all the changes to the kit. Base is the well known Revell kit. Decals are made by myself and laid out as some sort of full body suit. Since the base for the decals had been direct shots of the original I found that some of the dimensions of the tail fin are slightly off to the original. As a discrepancy is on the rear as well as on the front side of the tail fin I can exclude a perspective effect as a cause. The big advantage of using photographs as basis is that you take all the nice little details on the original along with you on the decal and eventually the model. Big disadvantage is that you can't simply adjust the decals to the kit but rather have to adjust the kit to the decals. Well....here we go:
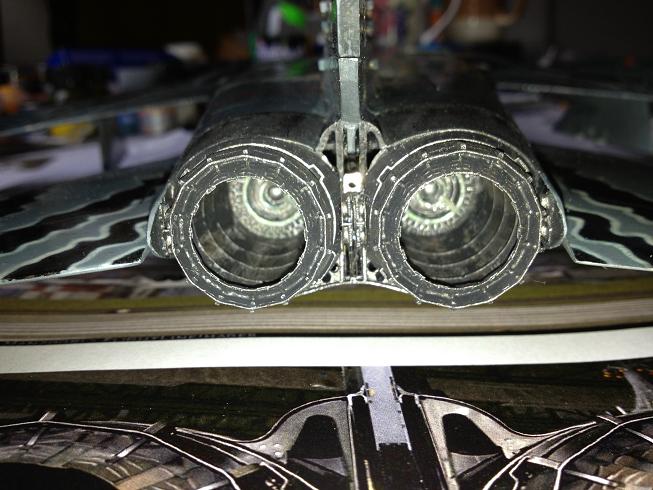
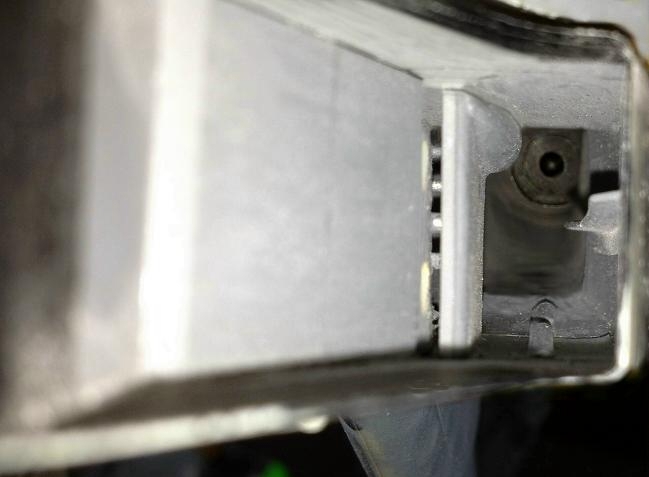
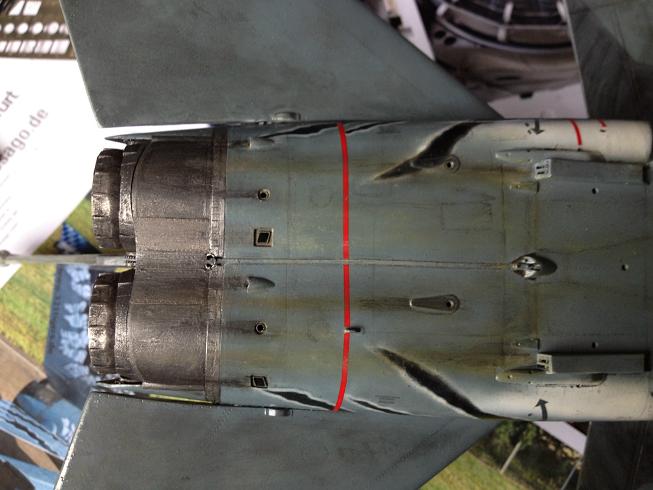
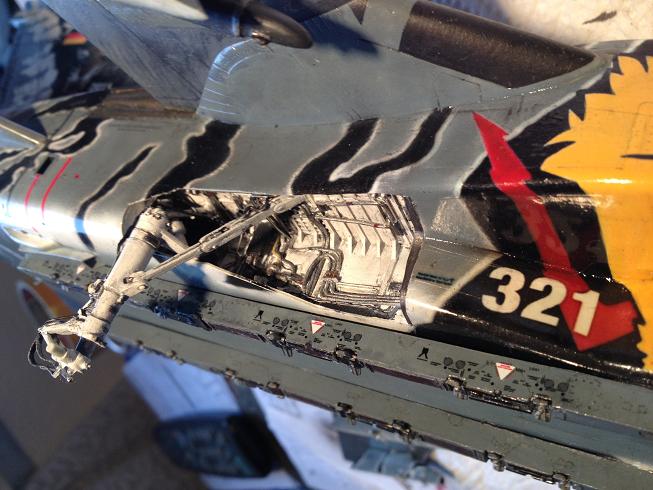
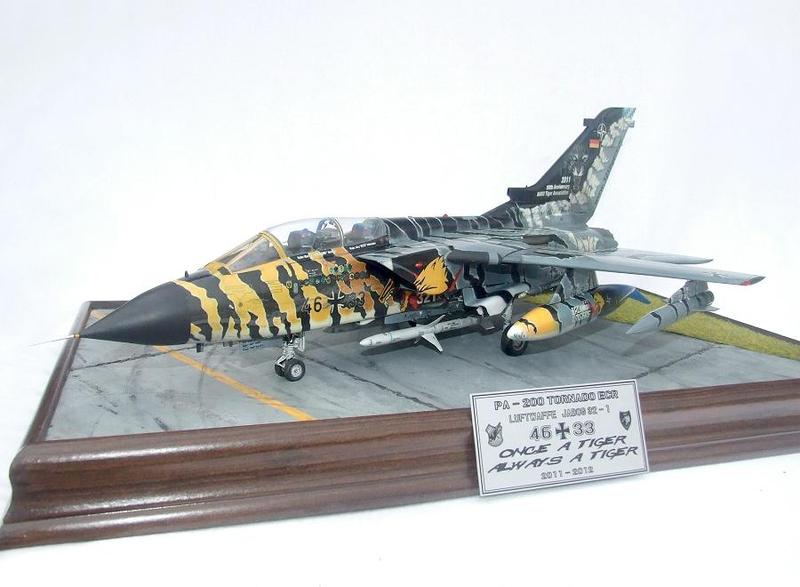
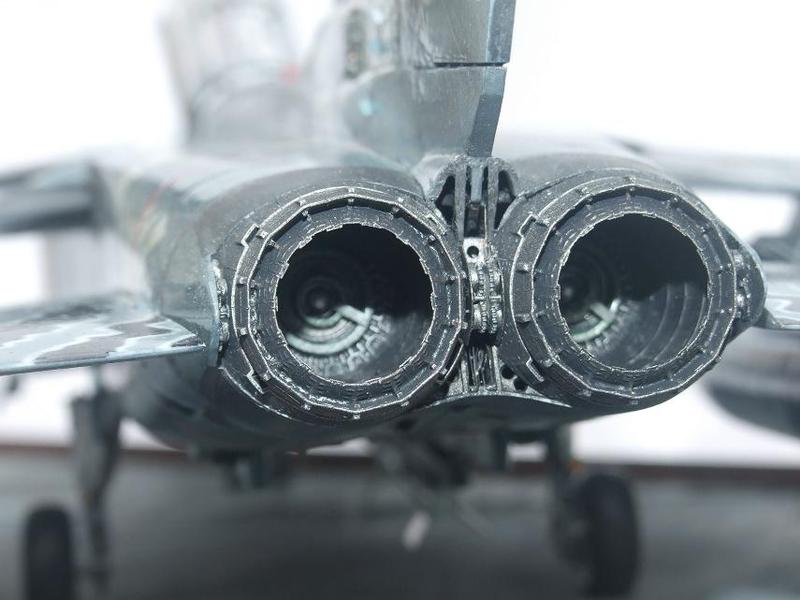
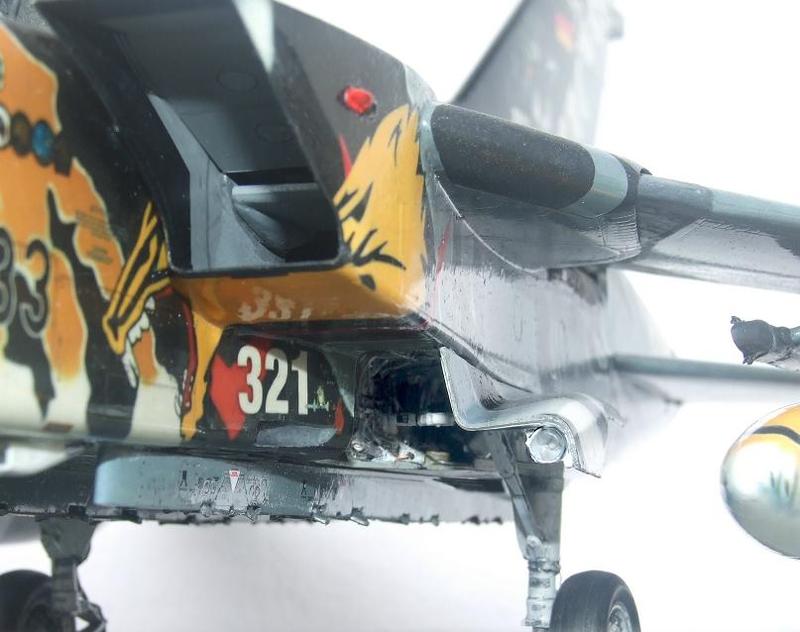
The engines are not the resin pieces. I rather stuck with the kit parts. These received further detailing with scratchparts, particularly around the turbine and the reverse thrust mechanism below the tail root.
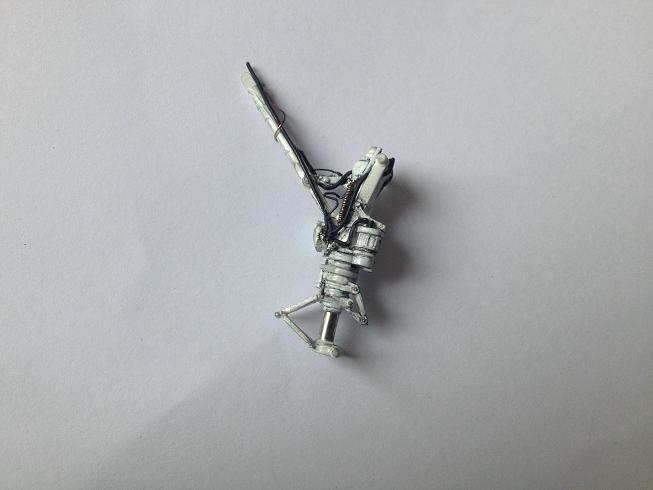
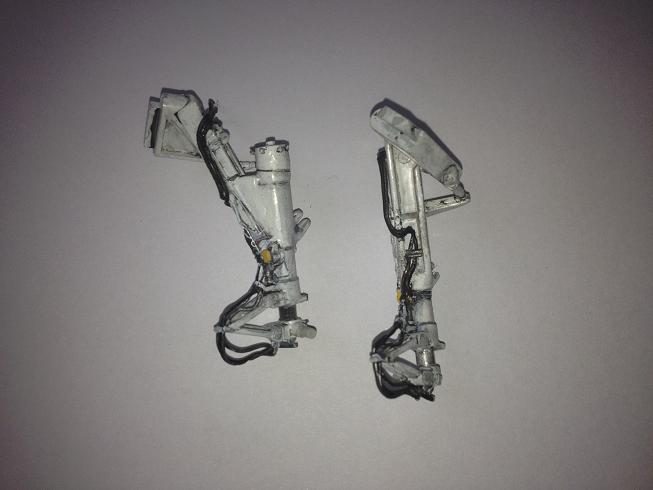
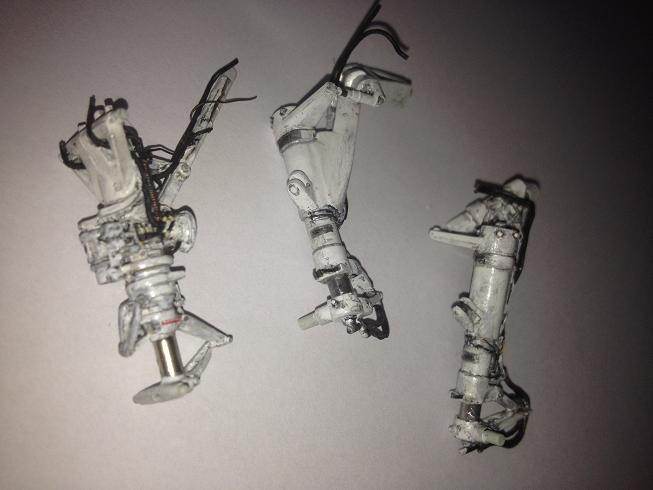
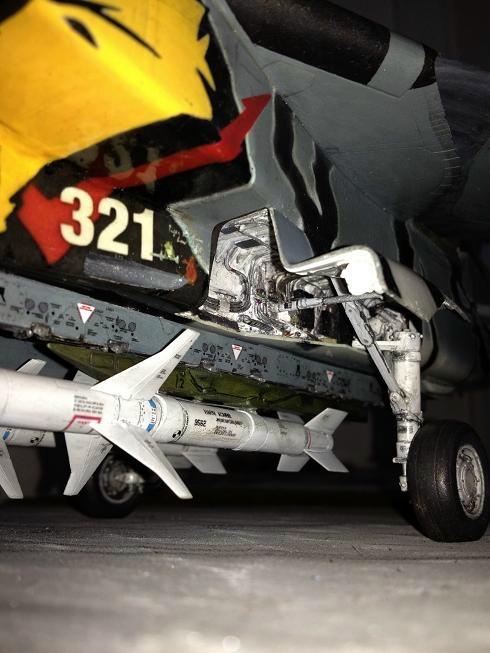
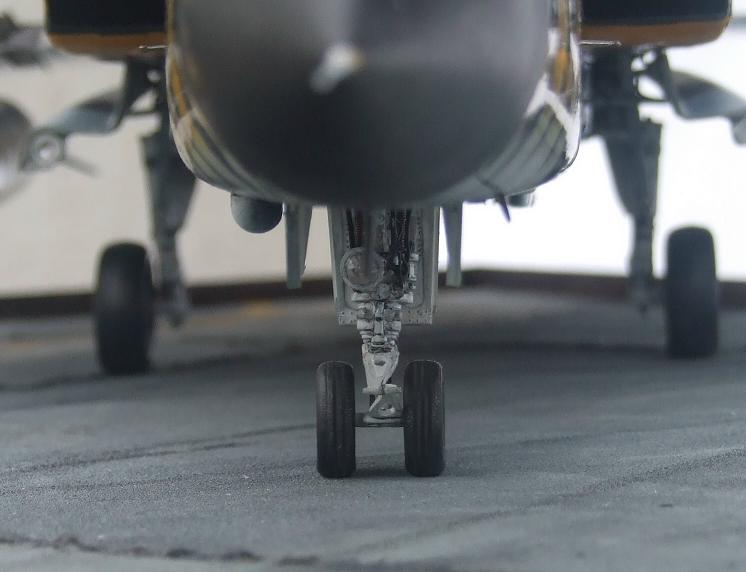
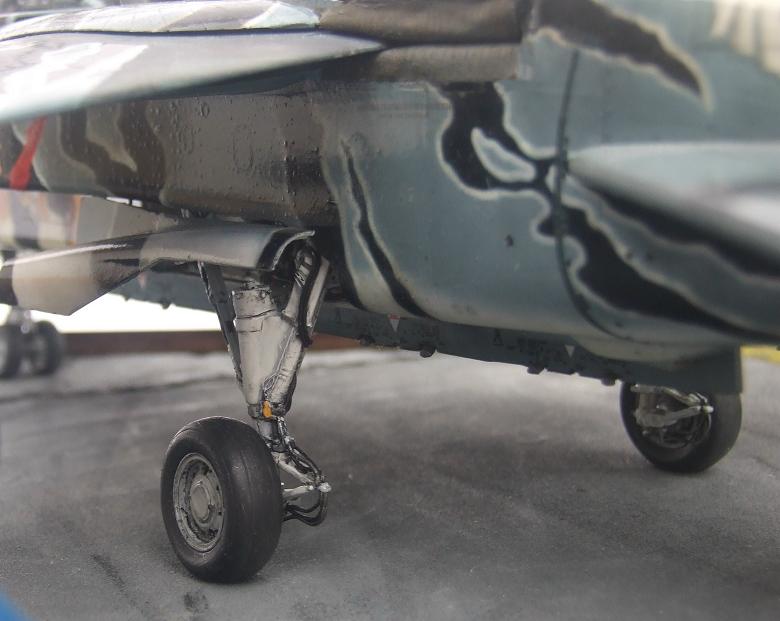
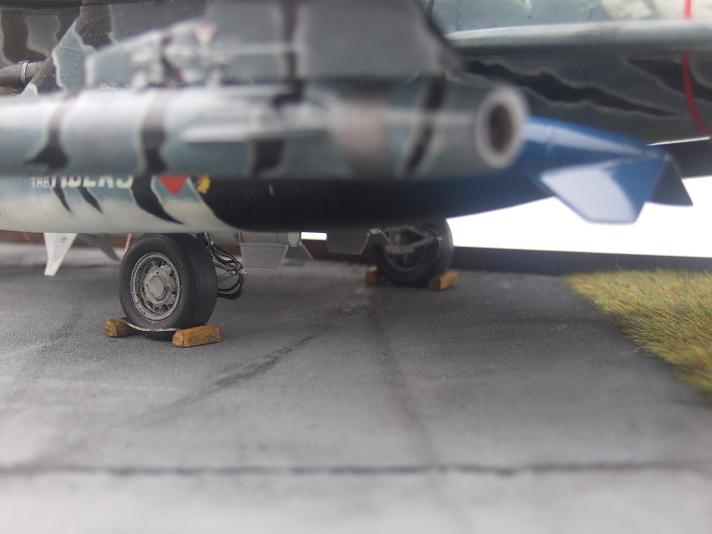
The gear was completely disassembled, shortened and rebuilt with metal struts and extra wire along some plastic scratch parts:

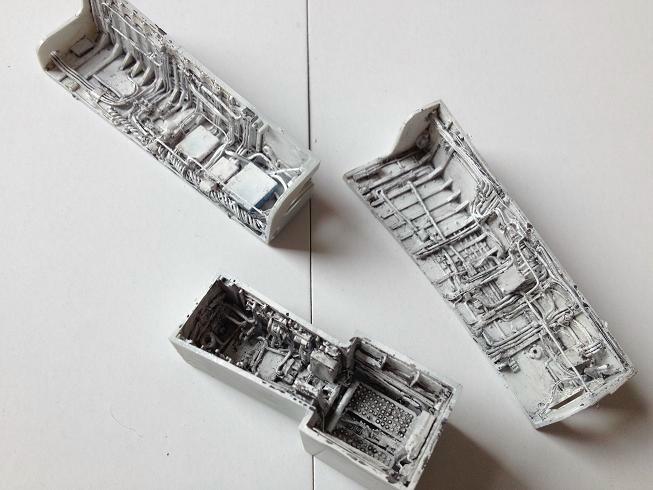
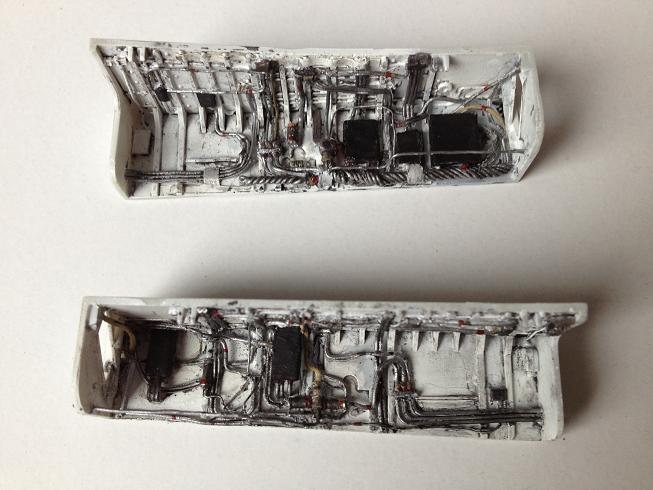
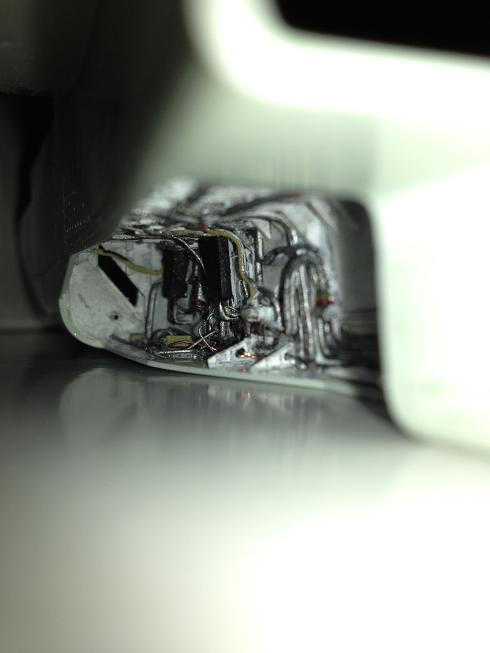
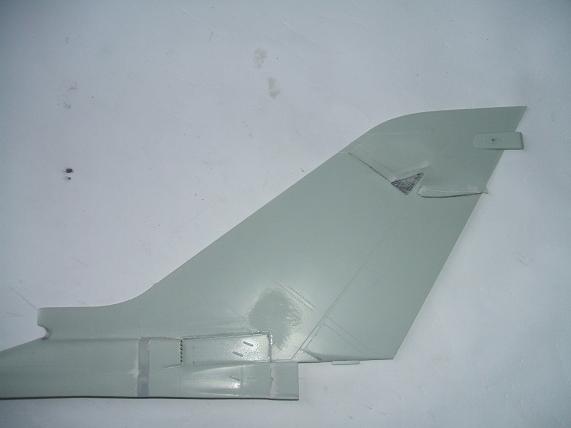
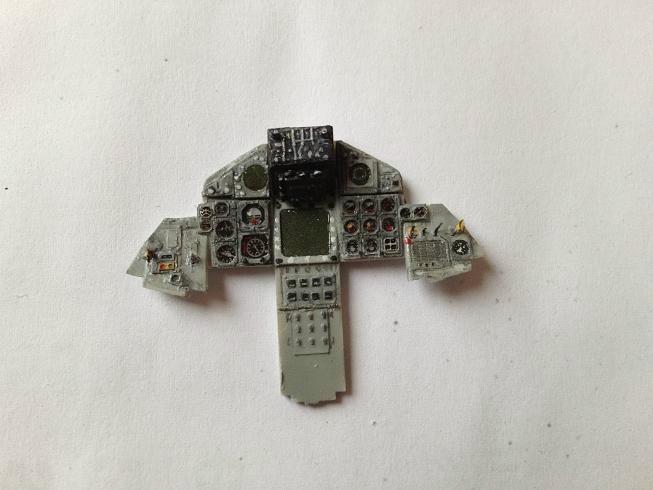
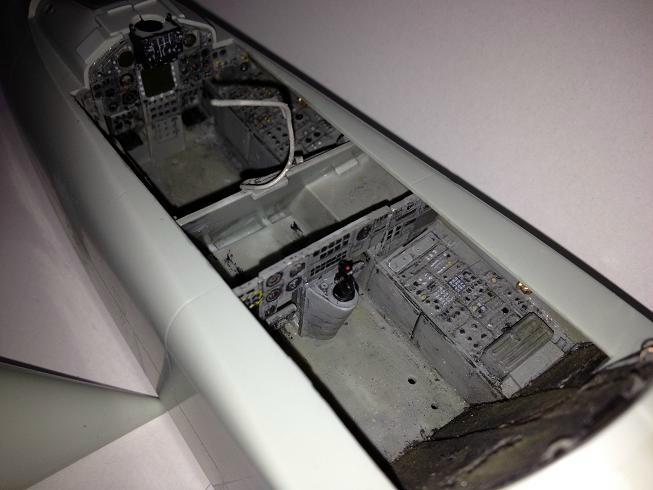
As nice as the Revell kit may be, Revell forgot to further detail the lower half of the kit so that had to be done as well:
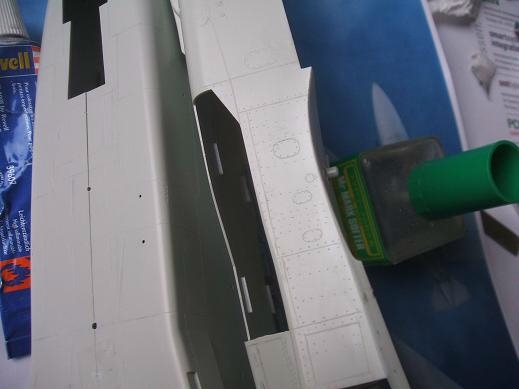
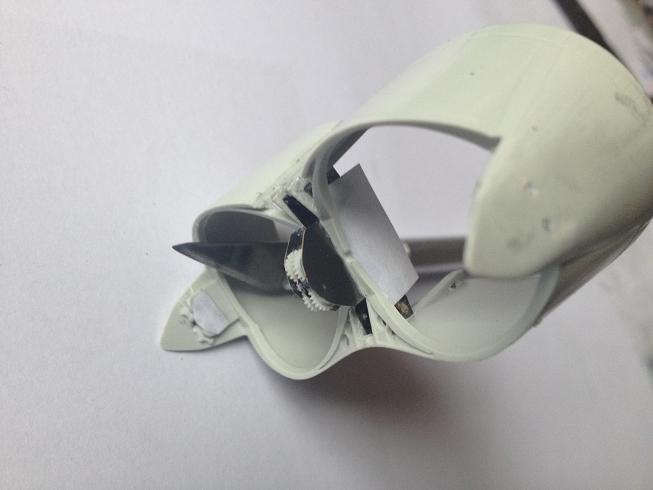
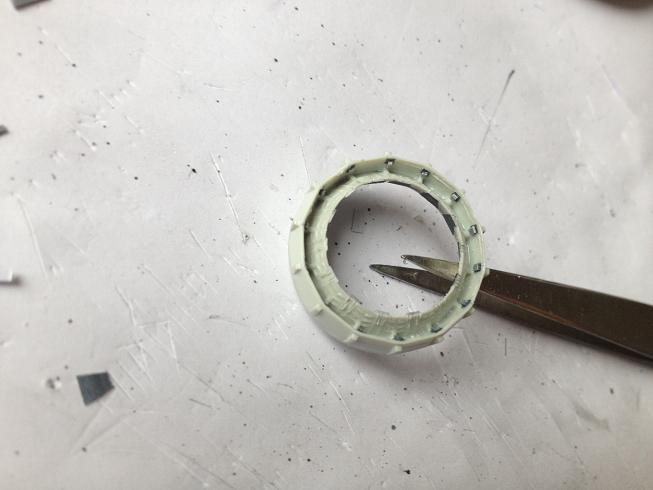
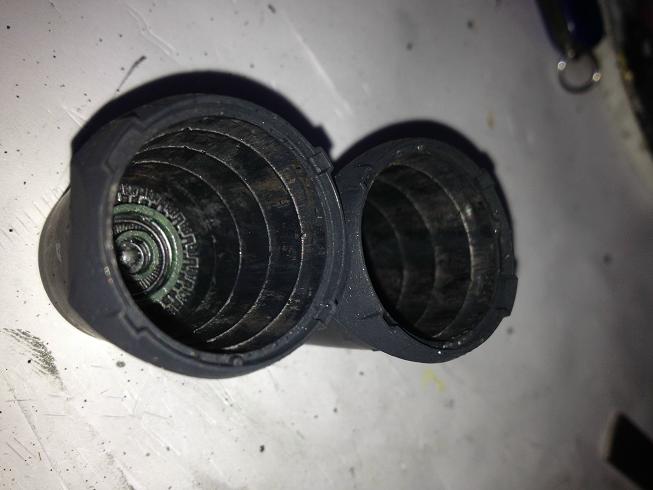
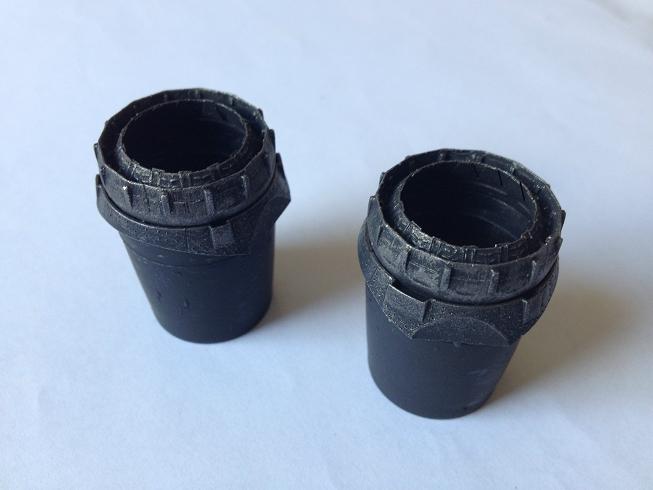
The intakes received scratch channels down to the fan blades and I scratchbuild some proper intake ramps which hopefully resemble the original a little more:
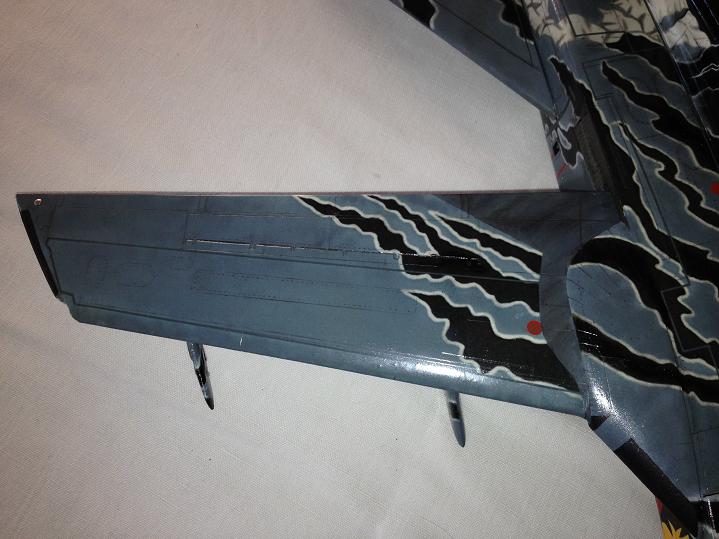
As I wanted to keep the wings movable but still wanted to avoid those ugly holes in the wing seal bags I rebuilt the seal bags with styrofoam and old rubber from a bicycle hose similarly to the 1/48 approaches:
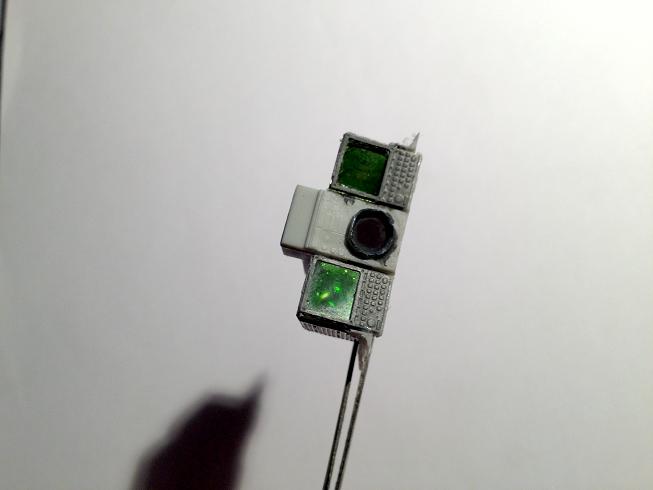
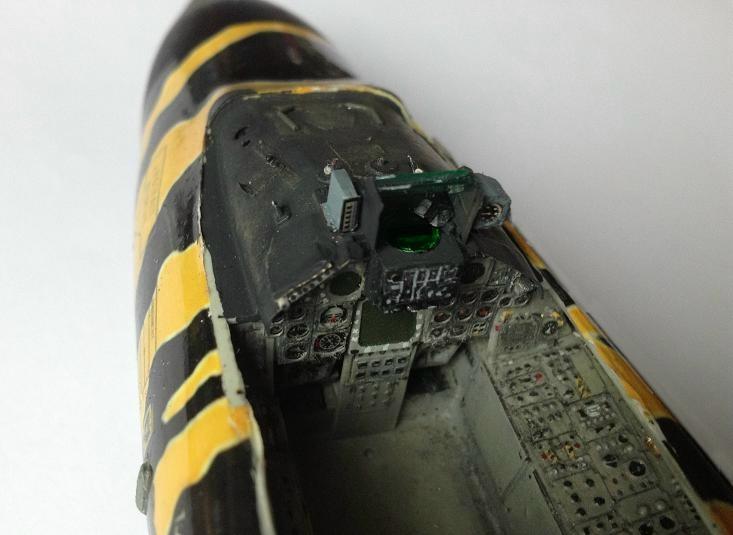
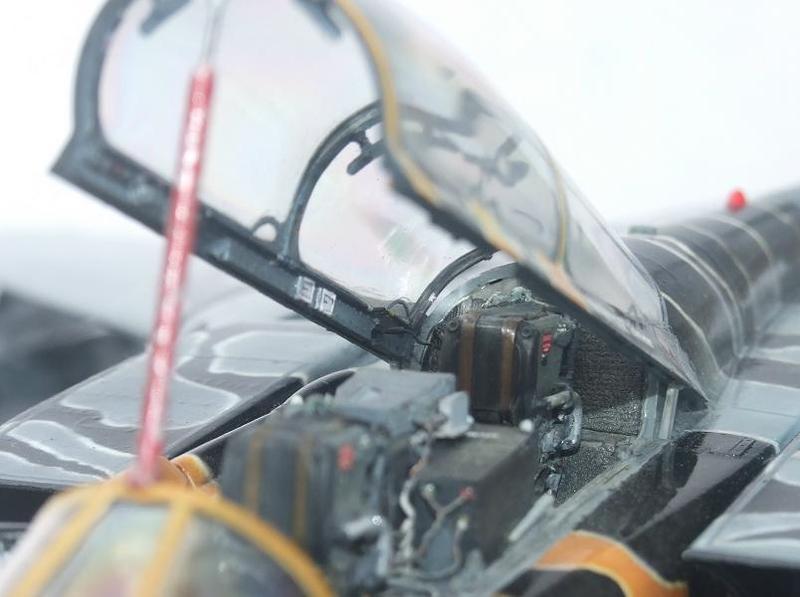
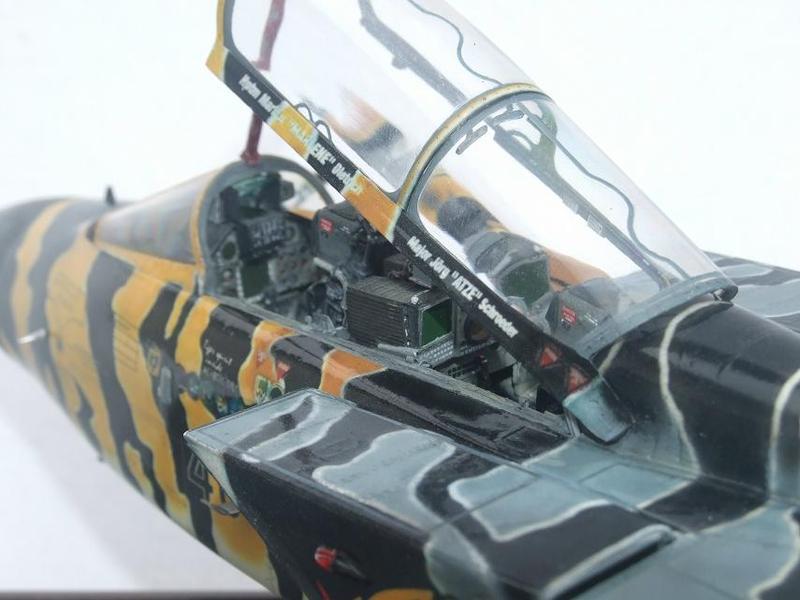
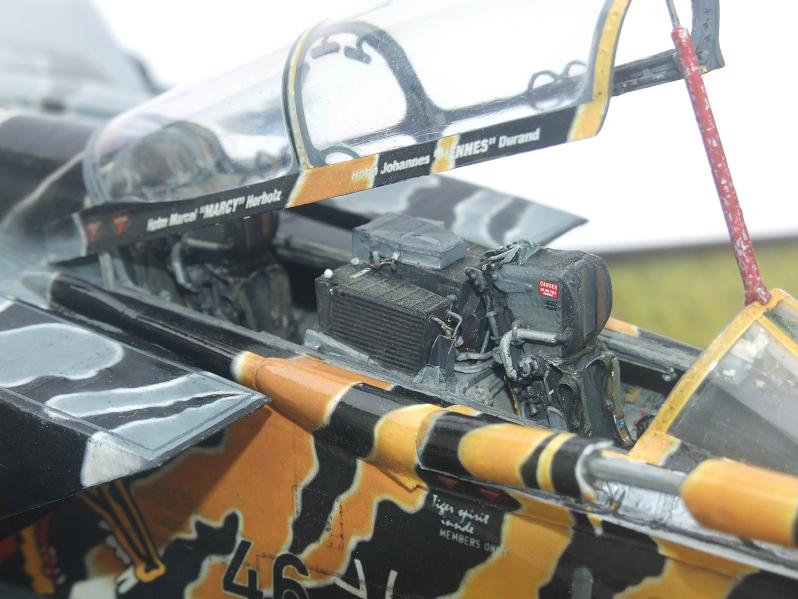
The instruments and cockpit tube was enhanced with some PE parts. The WSO's displays had been reworked with a Dremel in a way that some sort of three-dimensional effect similar to the original is created, i.e. one can see either the black monitors or the greenish tint of the glass depending of the angle of the light.
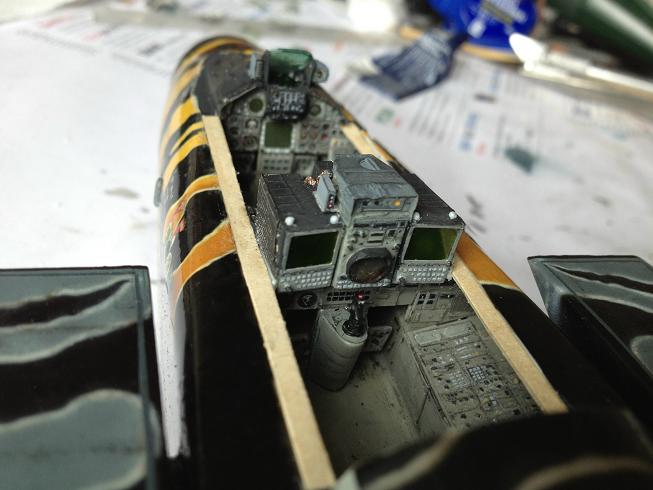
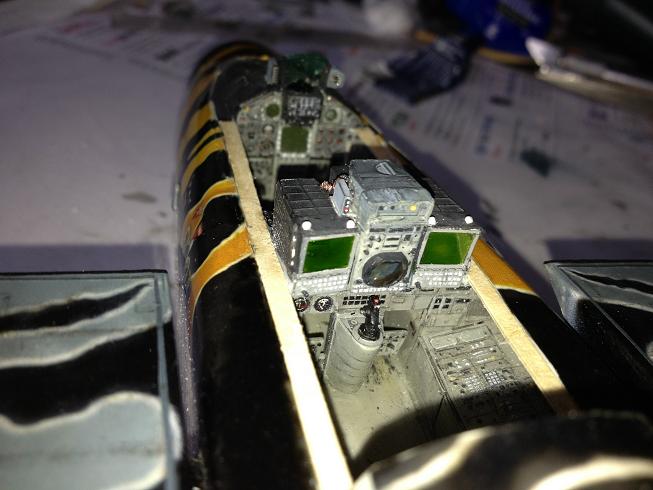
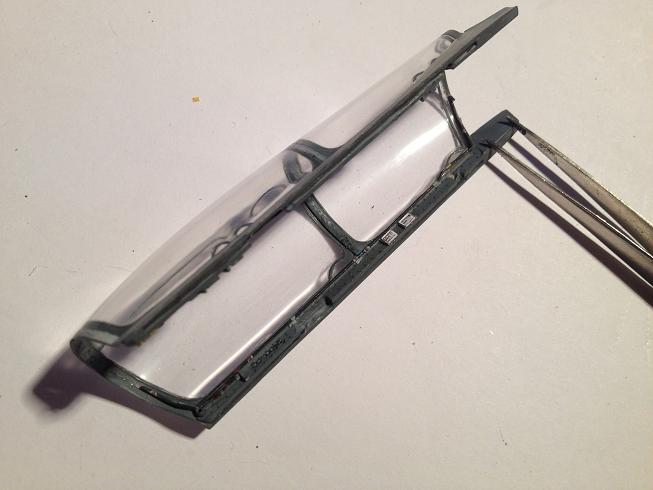
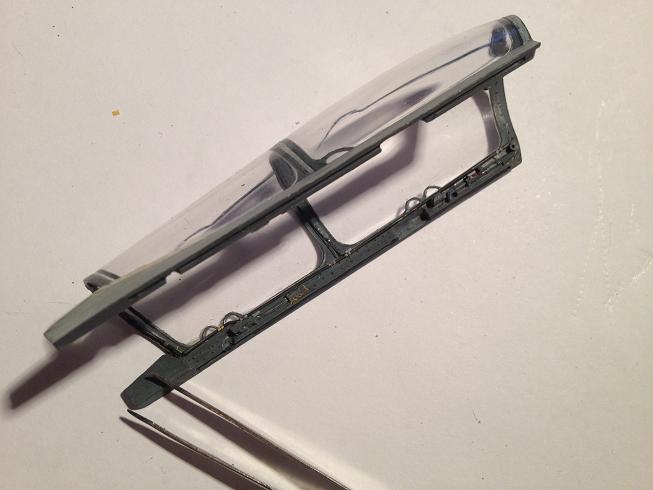
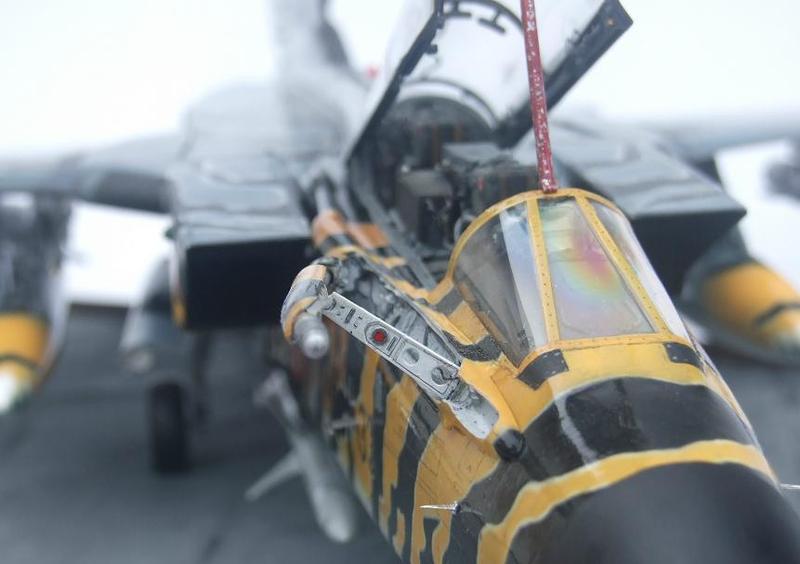
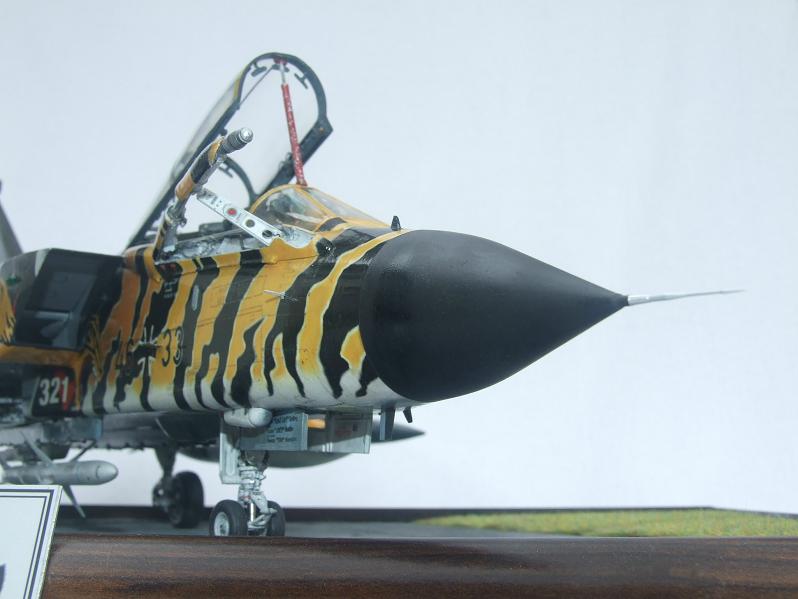
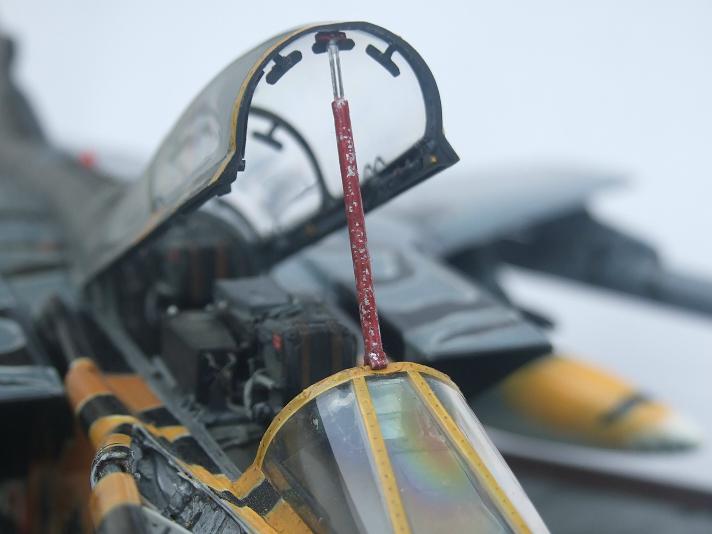
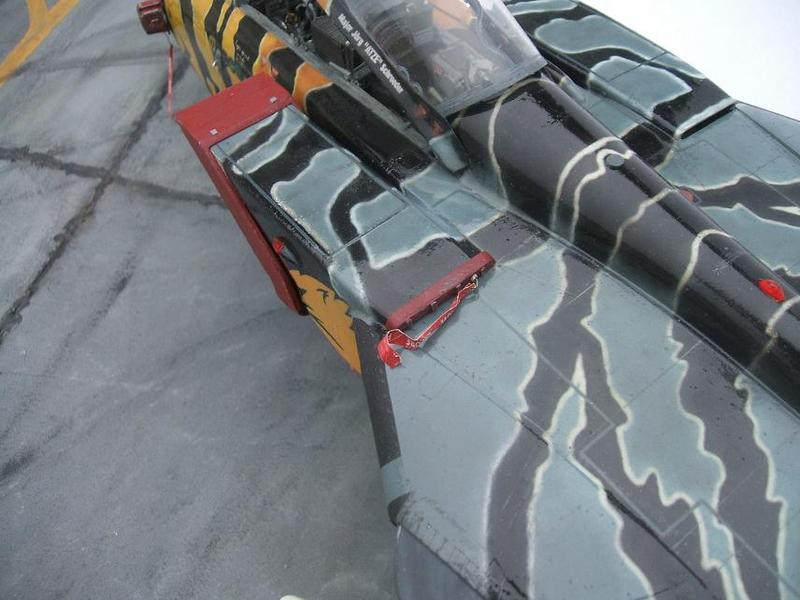
The canopy definitely needed some rework around the frame and the rail received some further scratch detailing.
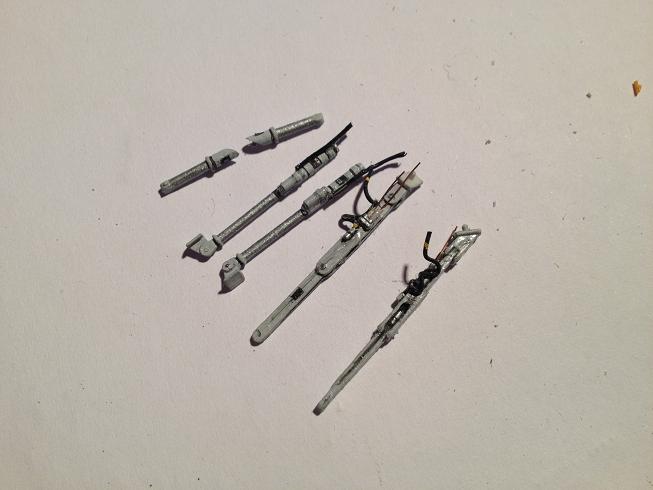
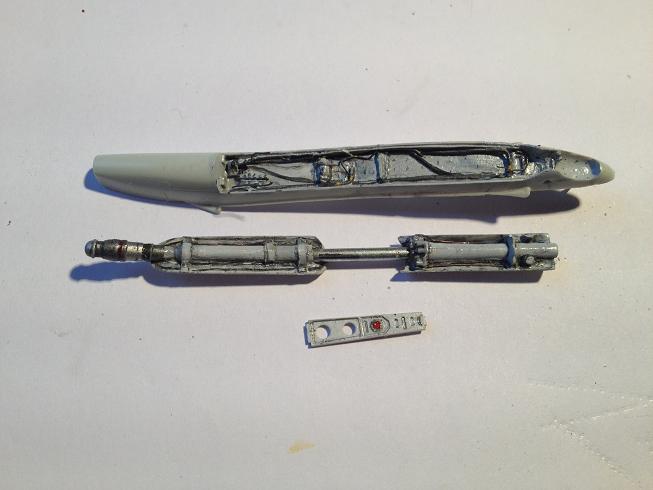
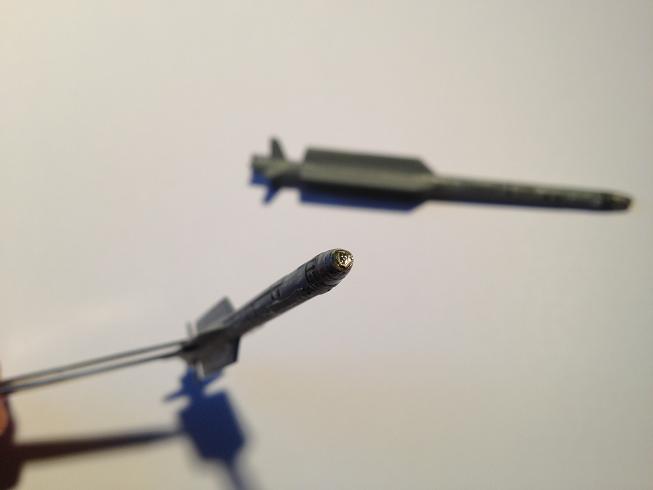
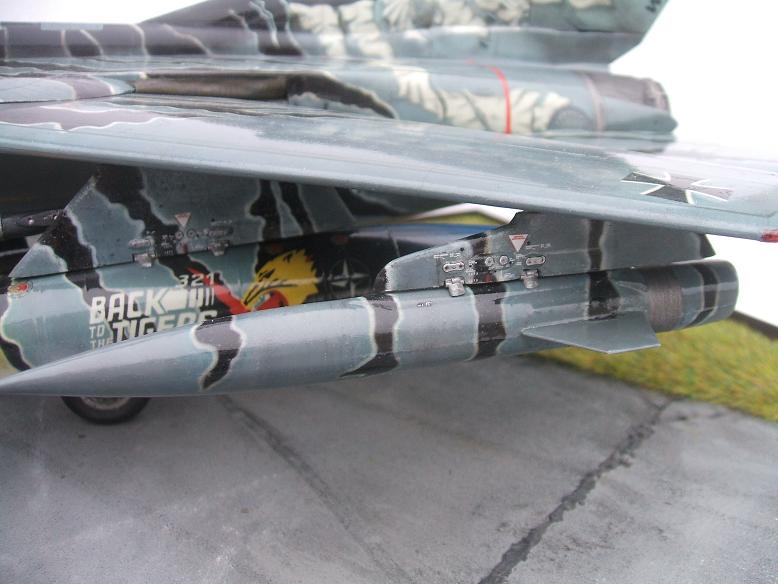
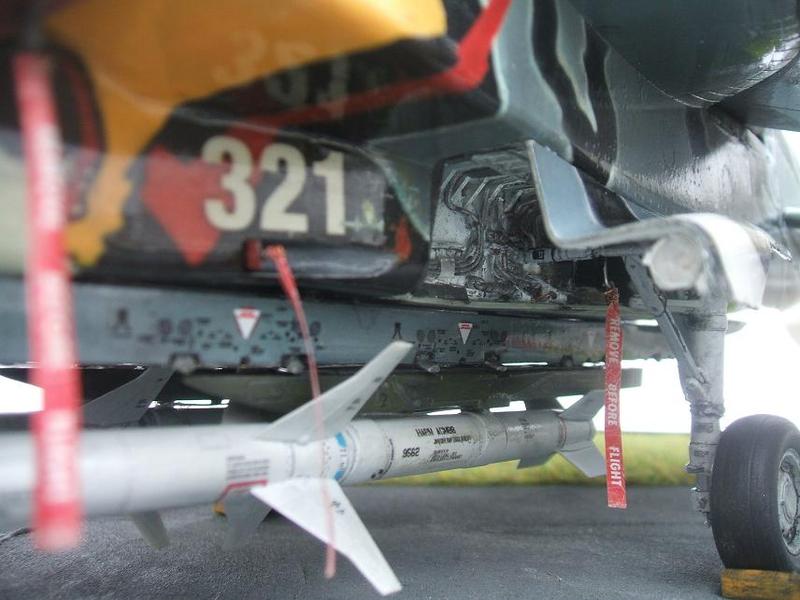
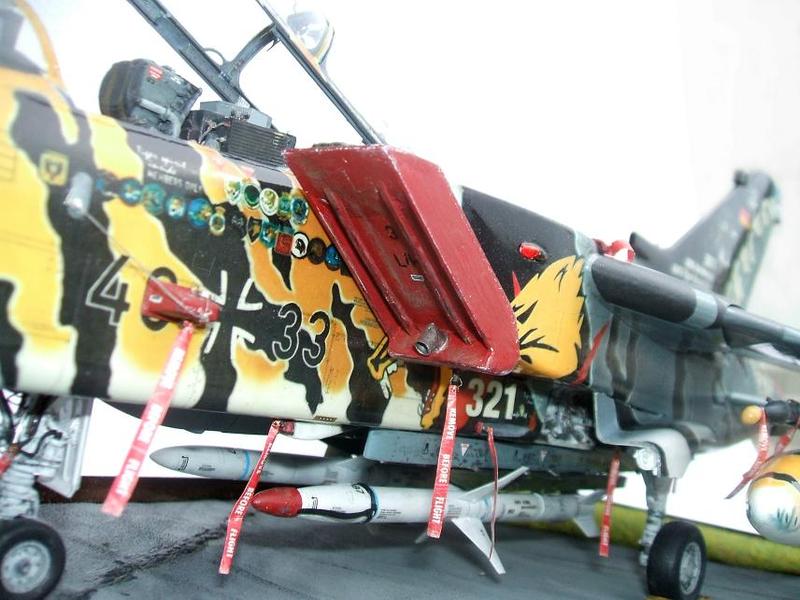
The in-flight refueling probe received a metal rod and also the weapons pylons and LAUs were enhanced with some metal scratch rails:
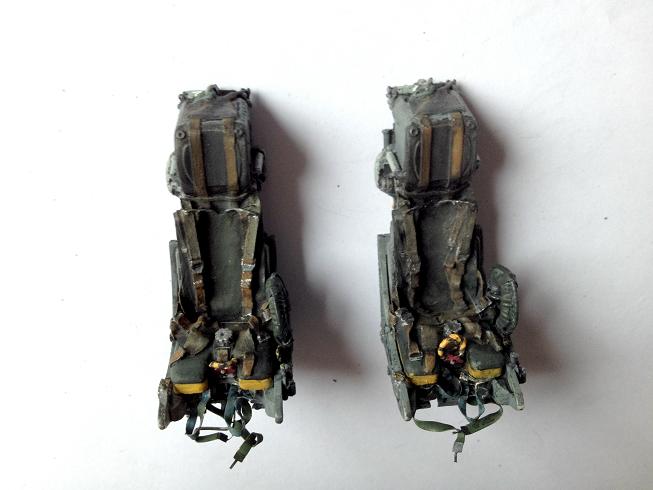
The seats albeit, are resin pieces though. But even these received some additional parts like belts and some tubes.

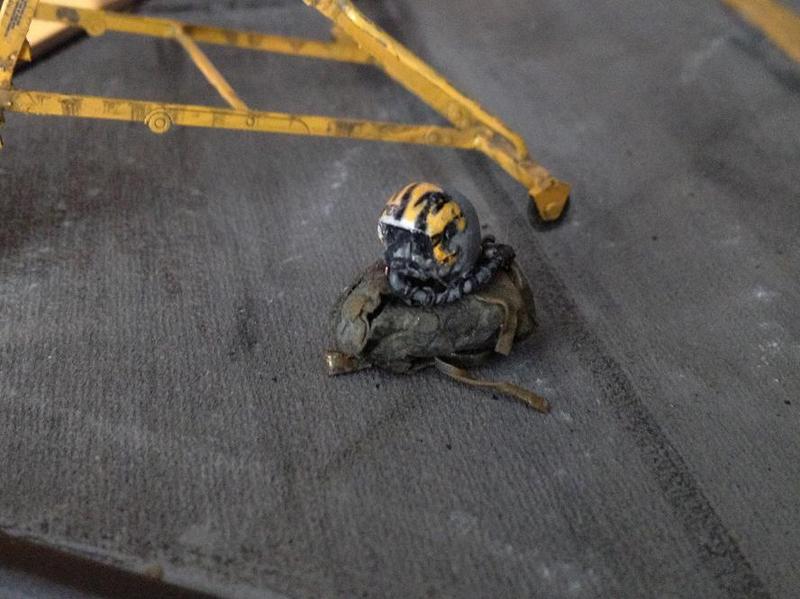
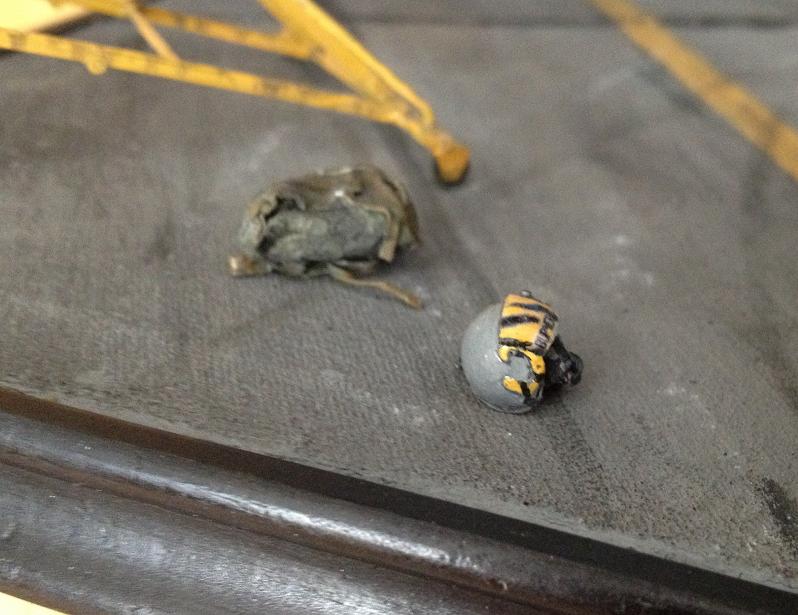
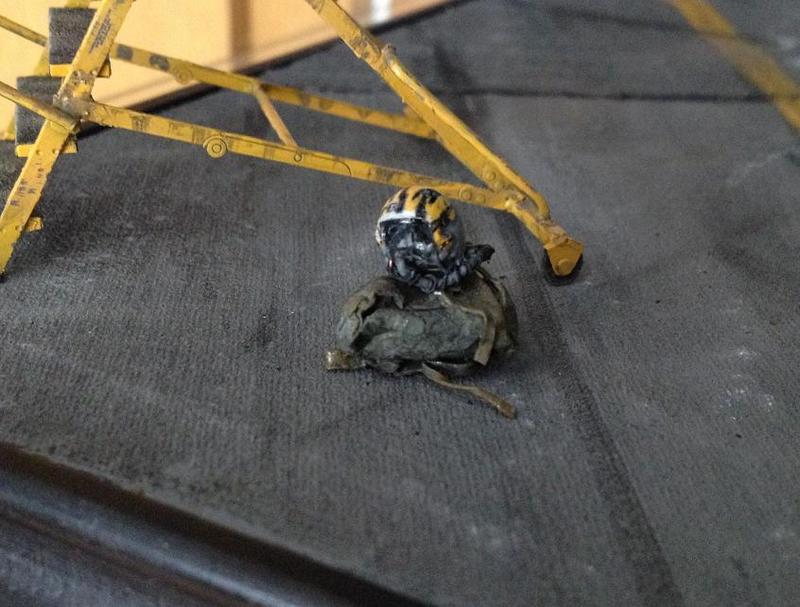
The typical Luftwaffe HGU-55G "Gustav" helmet was formed out of a drilled up helmet shell of a British Tornado pilot.
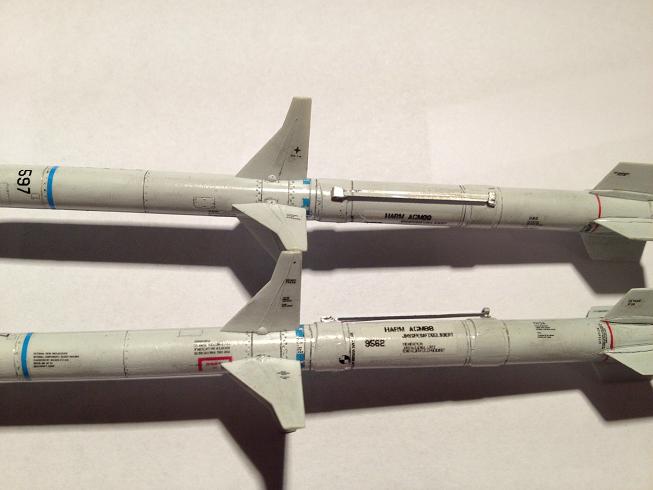
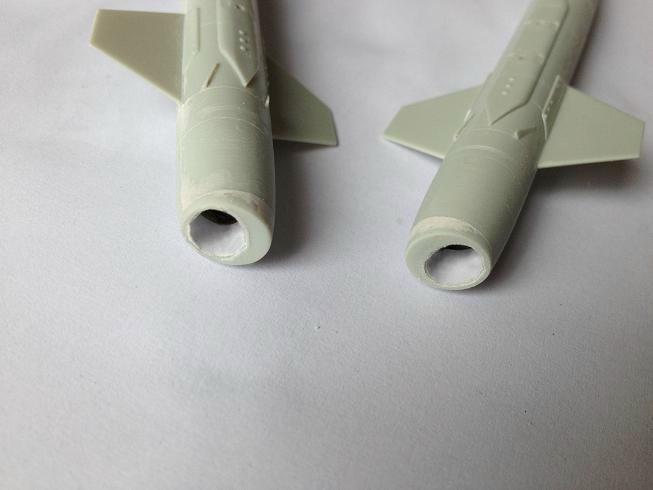
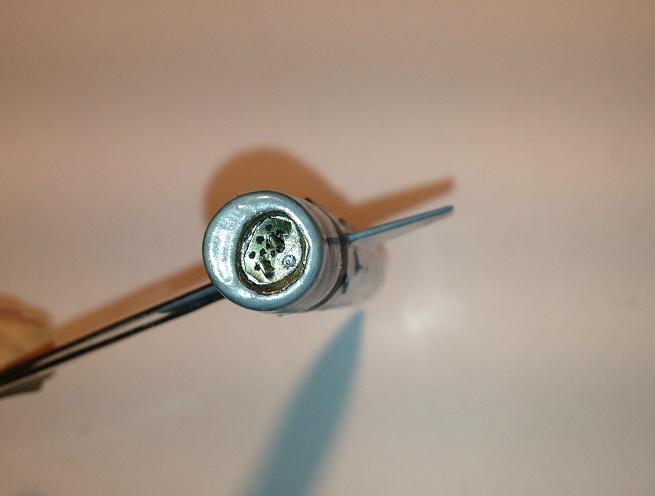
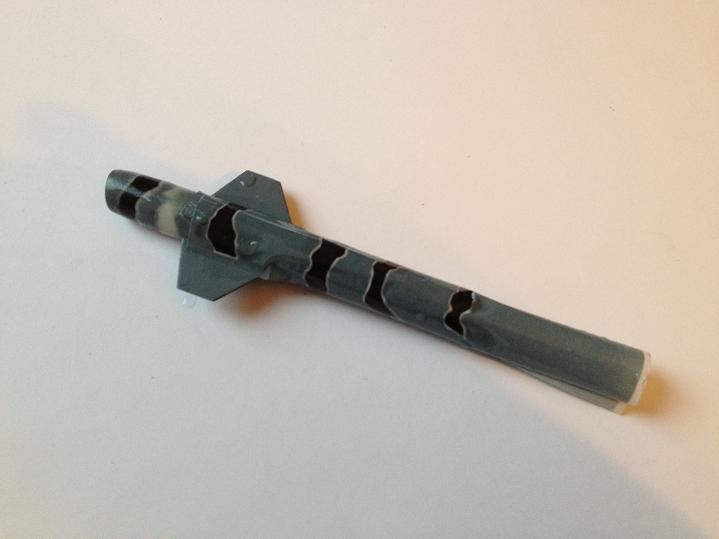
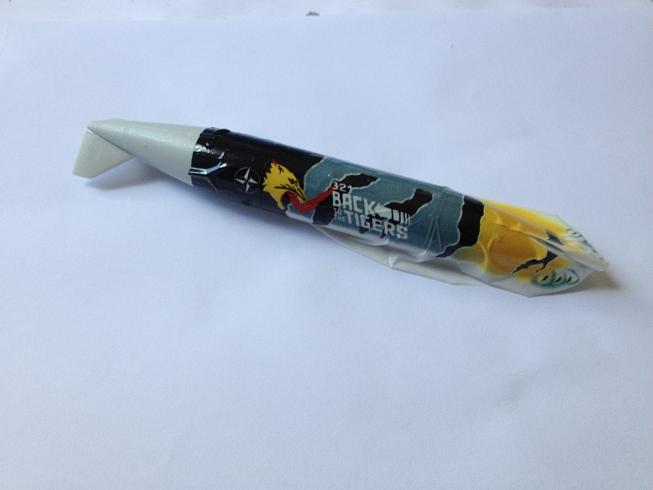
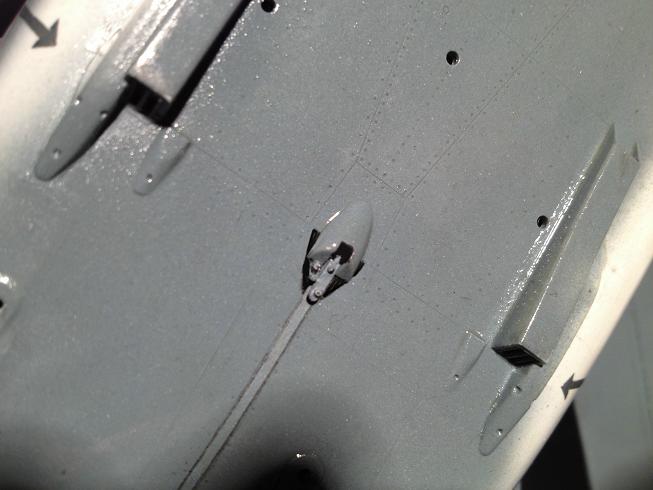
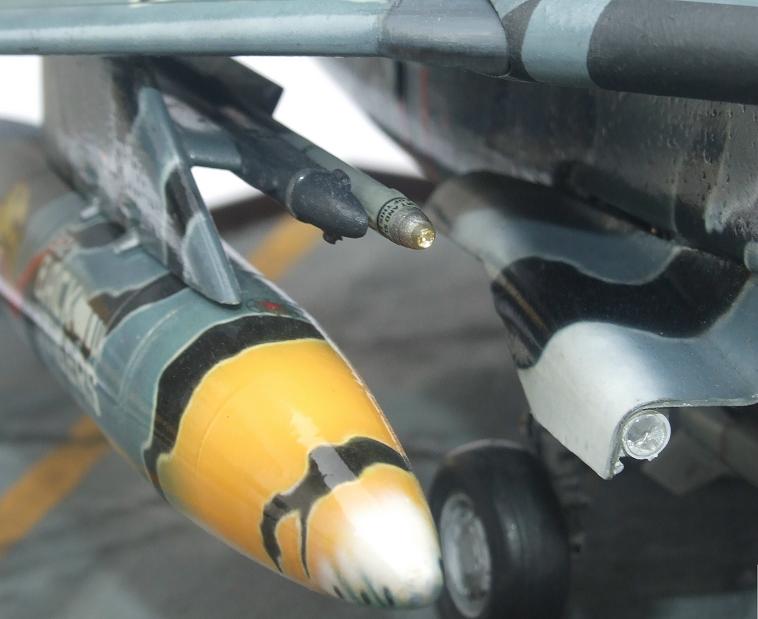
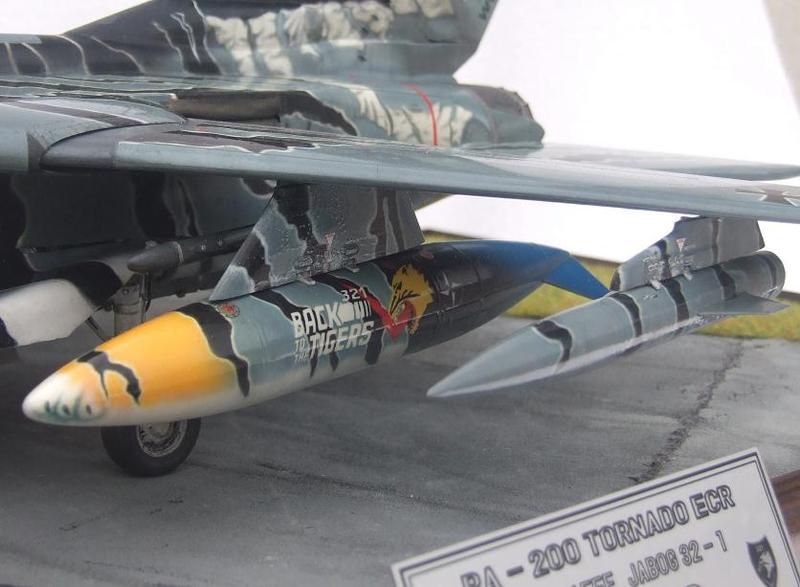
The IRIS-T missiles received an optical sensor made of silver paper and clear varnish and the HARMS received some self medae decals and metal rails.
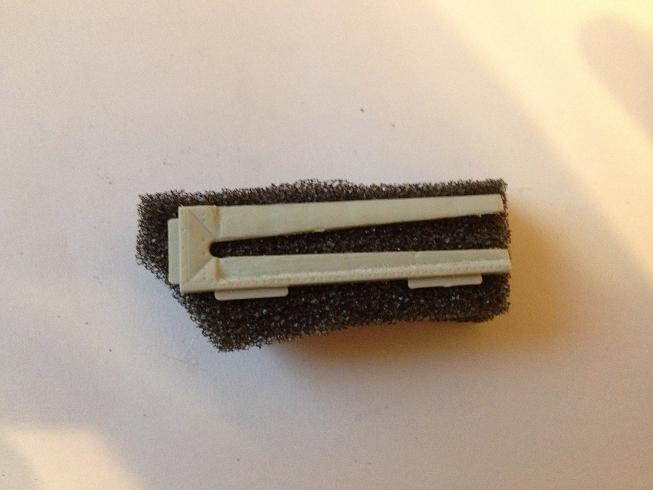
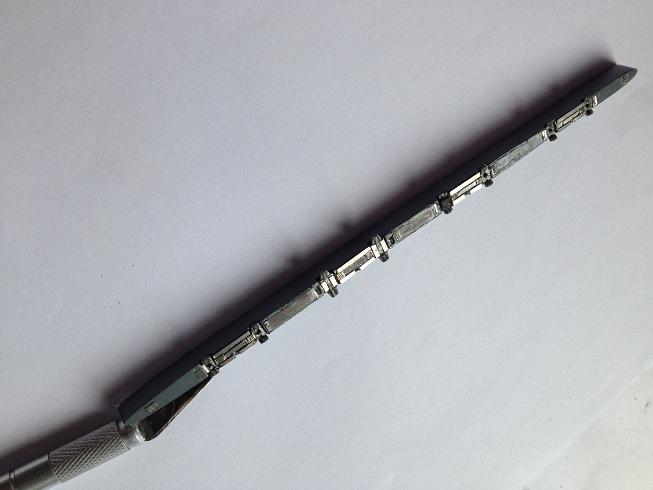
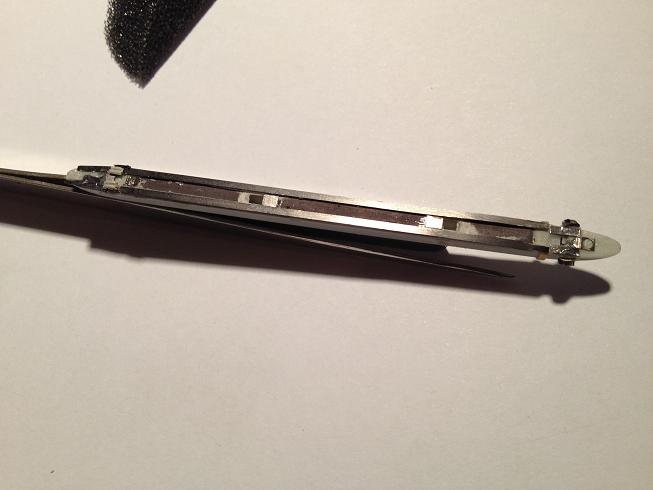
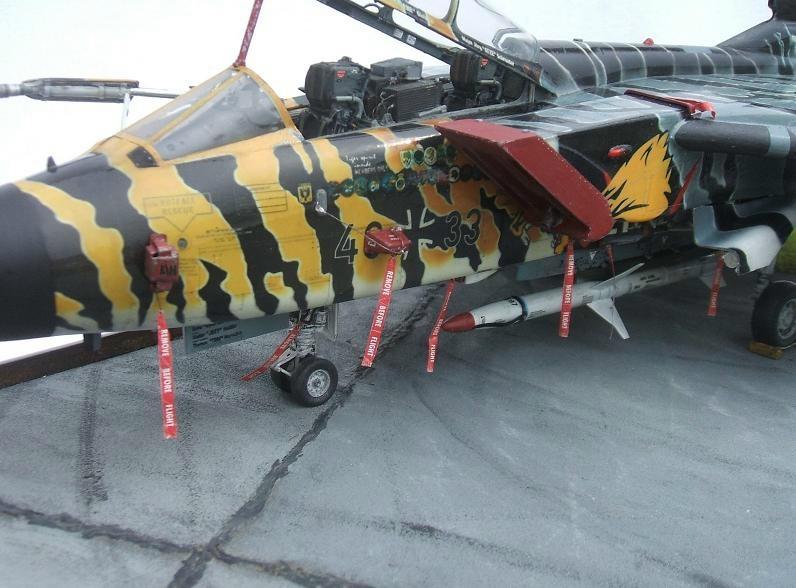
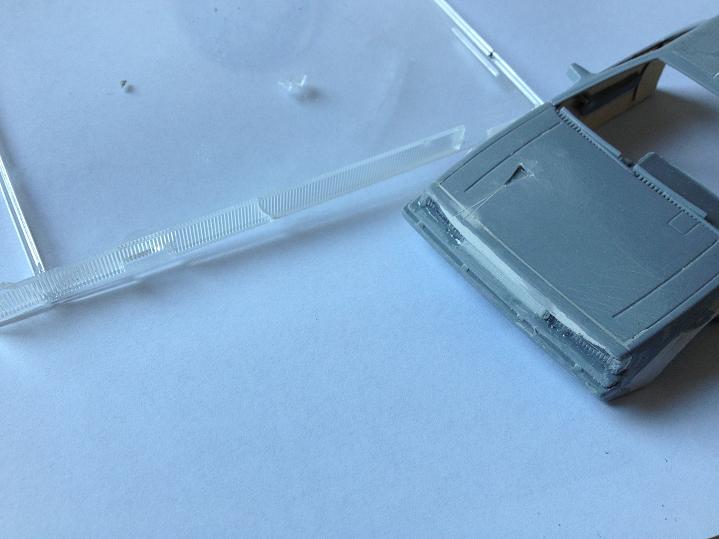
The BOZ of the kit are very nice, albeit the ejector end is some kind of strange mix of loaded and unloaded which doesn't make that much sense. Thus that had to be redone too:
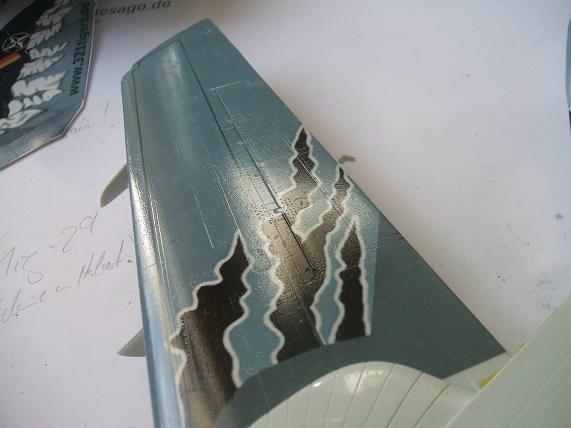
After all the rework on the kit itself I eventually went ahead and started the decalling orgy starting withe BOZ. After some fitting problems were solved I was actually quite happy with the first result. Even the less obvious panels and lines are exactly where they were on the original.


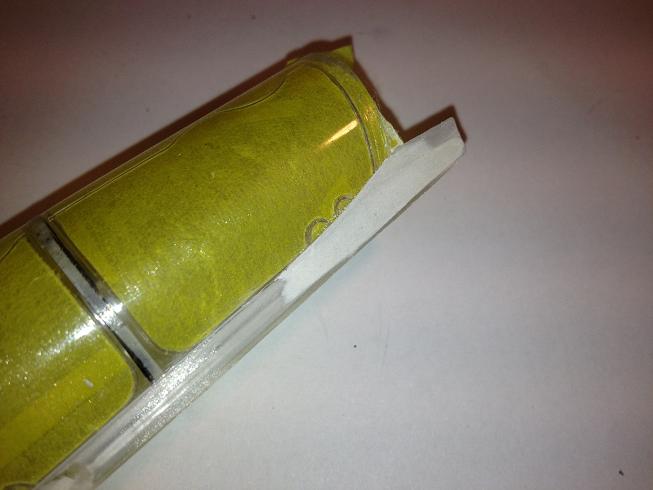
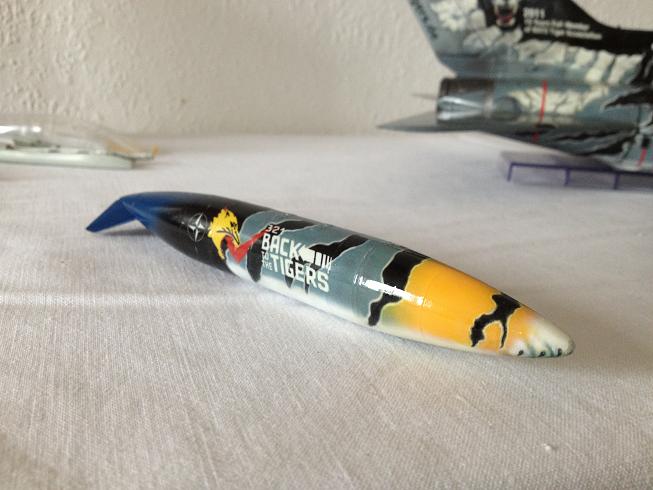
Same applies to the drop tanks:
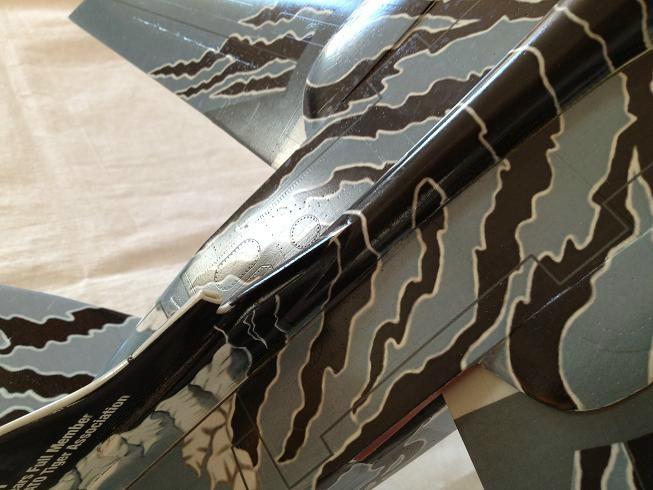
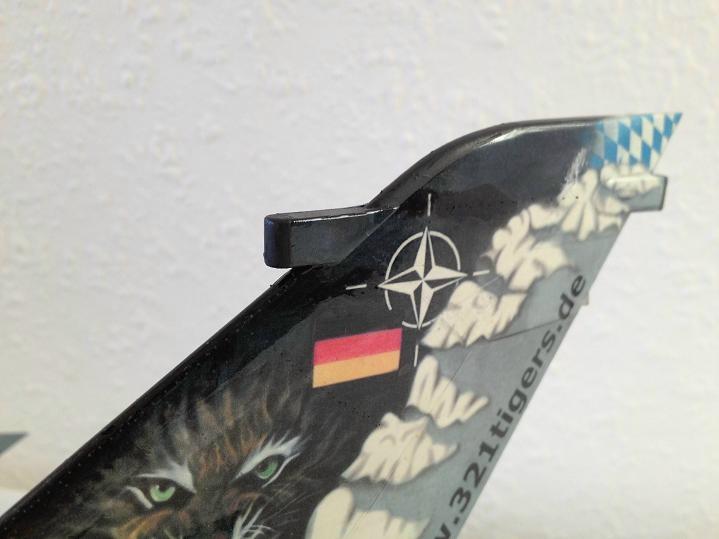
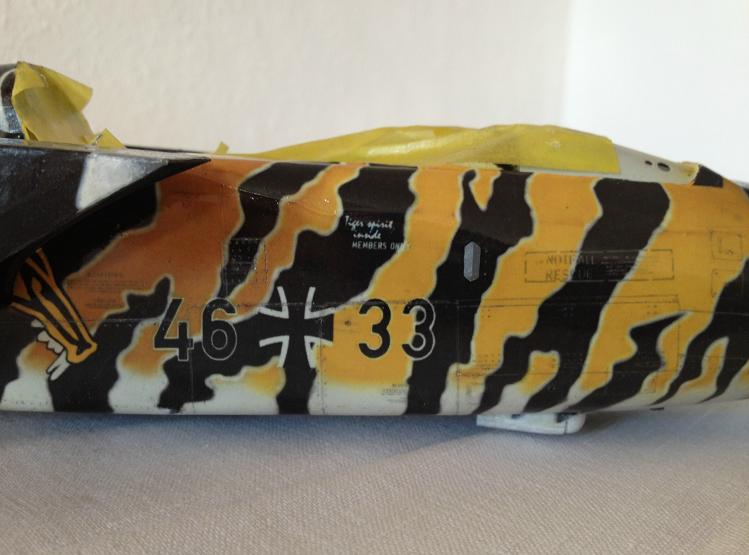
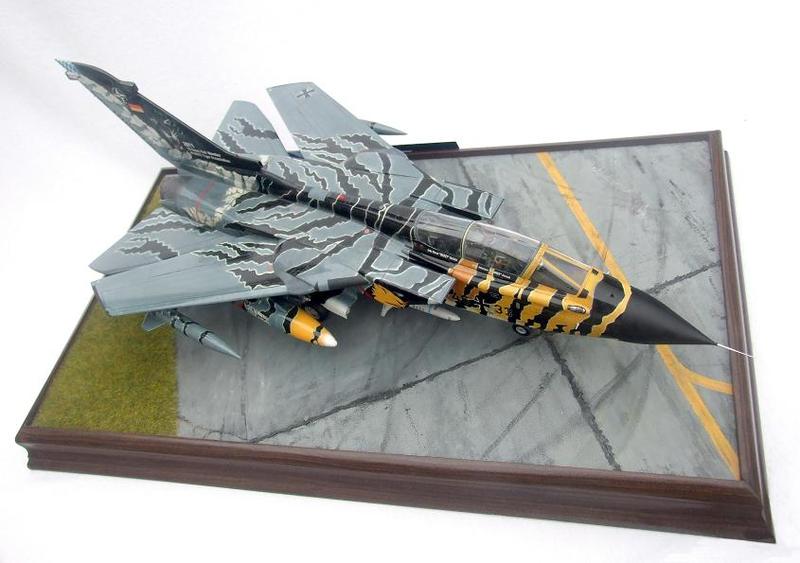
I adjusted some of the markings for the fuselage but in the end I am quite happy how that went too. About everything seems to be exactly where it was on the original.
After that several layers of clear coat and future were applied and I additionally polished the whole thing several times. the original was shining like a fatty bacon rind and I really wanted to have that effect on the model as well.
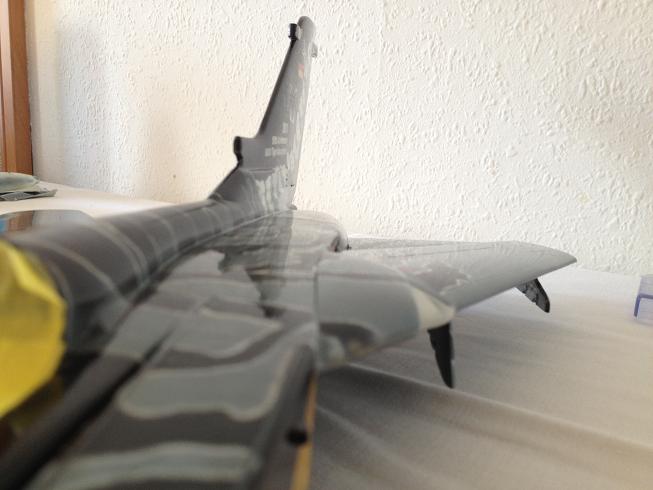
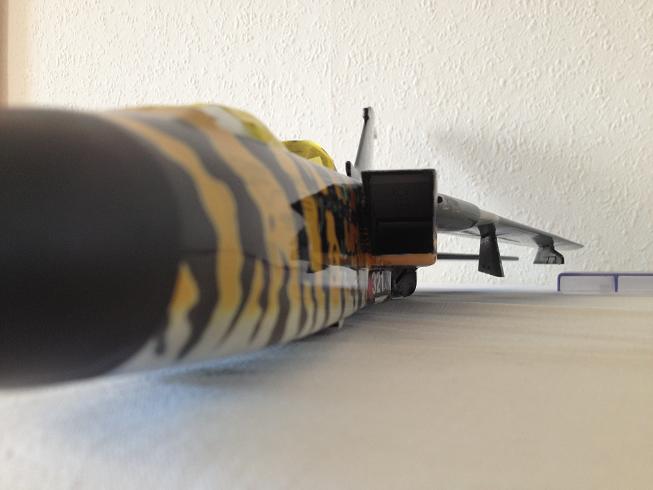
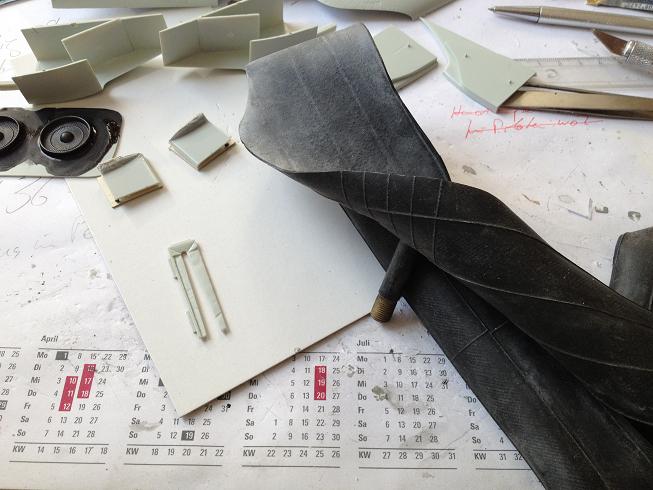
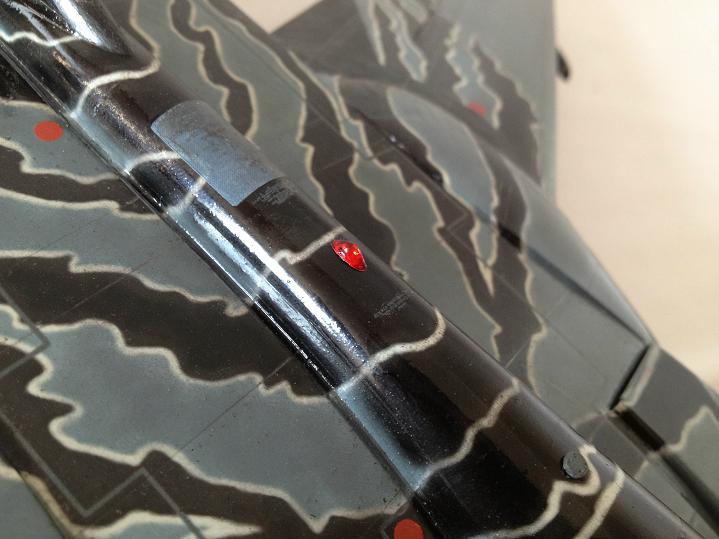
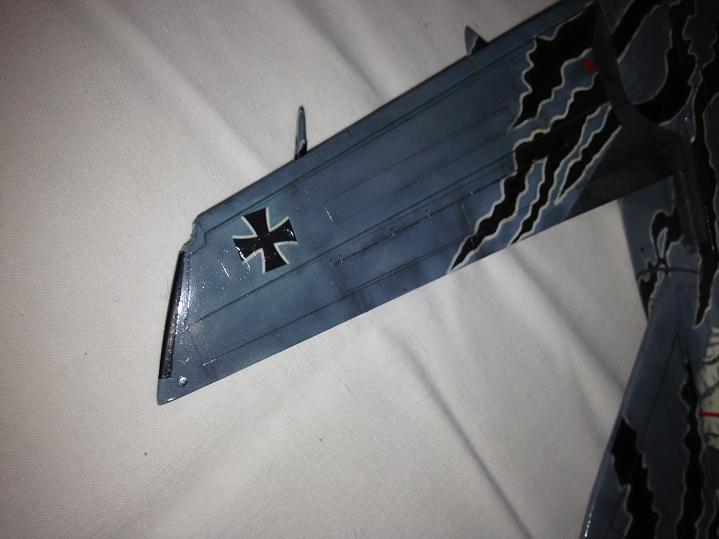
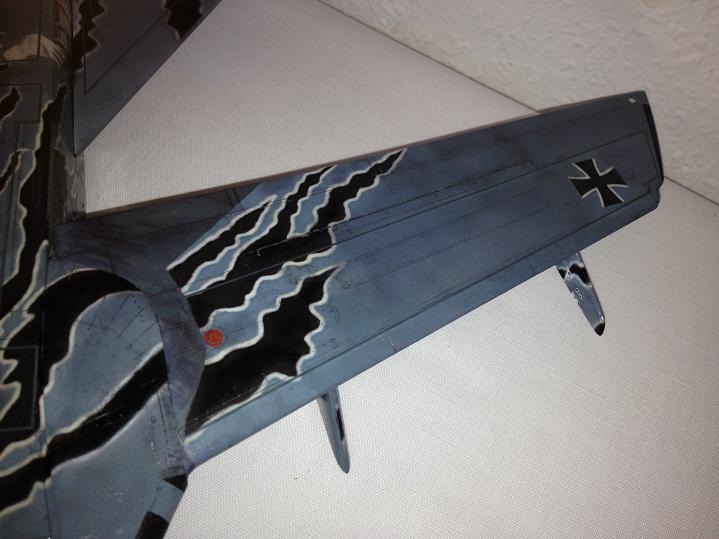
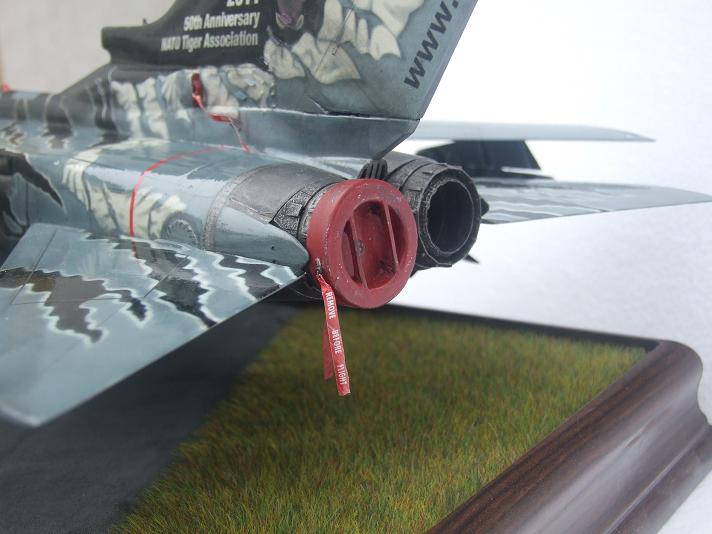
After the polishing several details were added to the fuselage. Antennae had been placed and painted, panel lines and screws highlighted, position lights received some life with silver paper, the APU opening was drilled up, the wing sweep zone was repainted and withered, the air stream diverters around the vortex were added with this metal parts and eventually painted according to the Tiger markings and the tail hook and its root for the field arrested landing was scratchbuilt and further detailed:

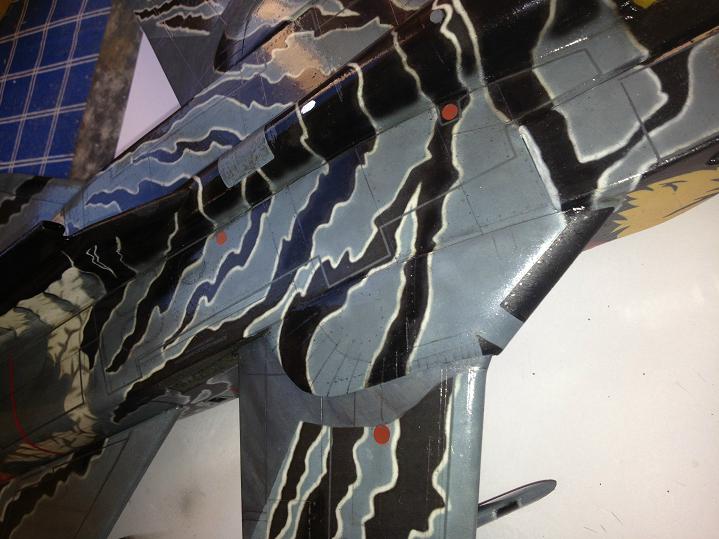
Regarding the aging and weathering such high gloss high viz special markings always represent a challenge for me. The original flew only a short time in that Tiger suit and was hence only little weathered. On the other hand unweathered models in high viz colors quickly look like large toys. Thus it is at least for me always quite a challenge to find that golden middle between a weathering that is on the one hand enough to make it look real enough to not look like a toy and on the other hand is not too extreme in comparison to the original. I really hope I achieved that here by using rather dry particles instead of a washing.

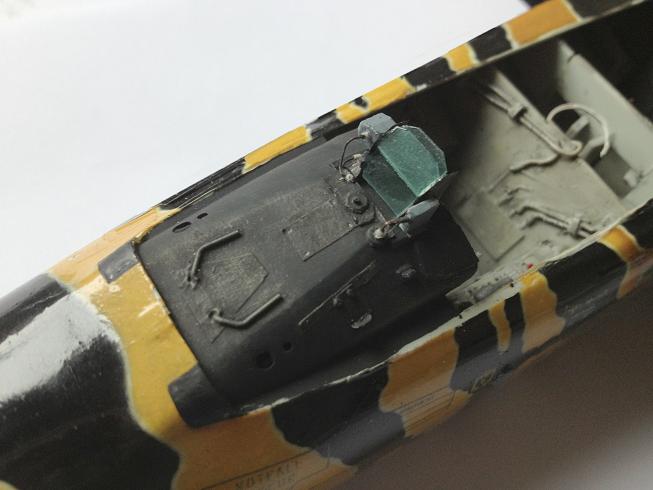
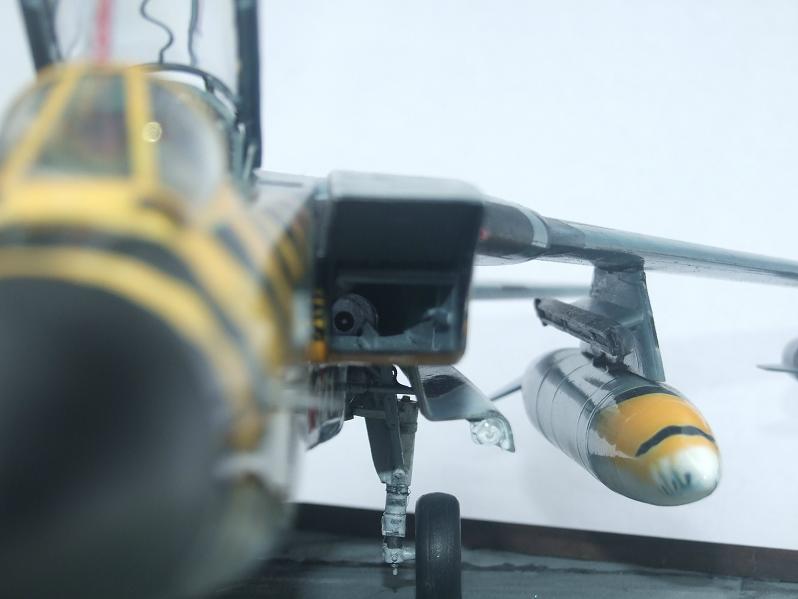
The CPU cover of the pilot was further detailed with scratch parts and also received a new HUF along with the board camera:
Eventually all the parts of the puzzles were done and it was time for the final assembly:
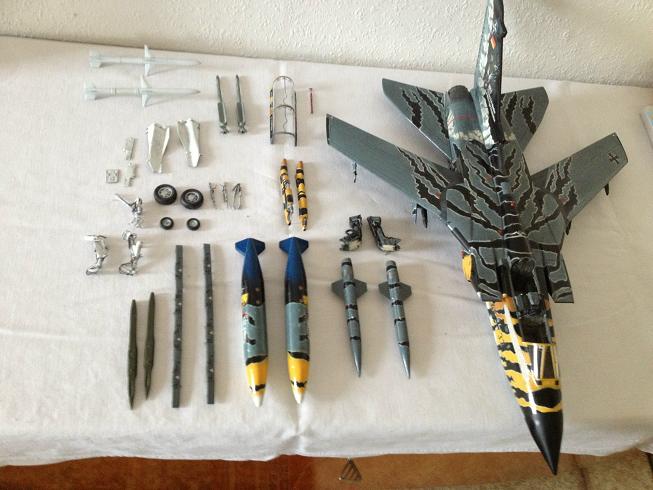
Well with all that being done the Tiger was almost ready for the roll out.
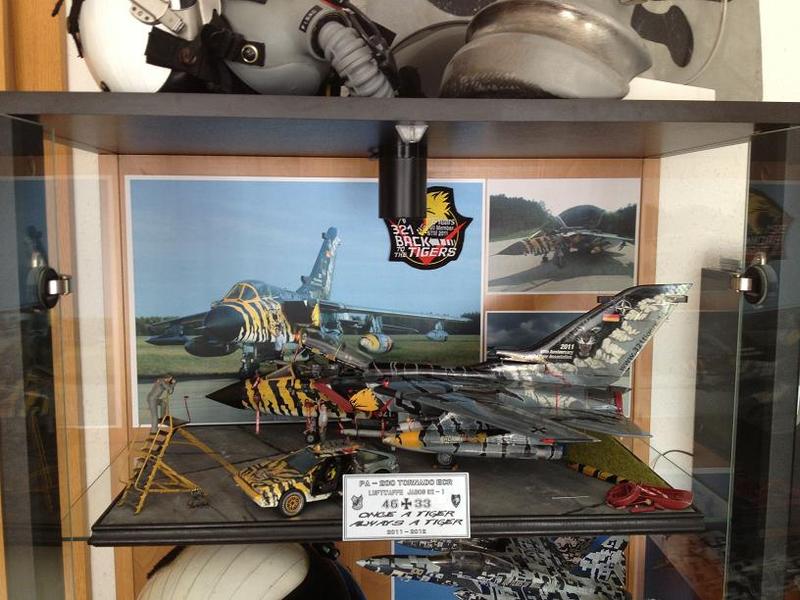
Finished Photo Gallery
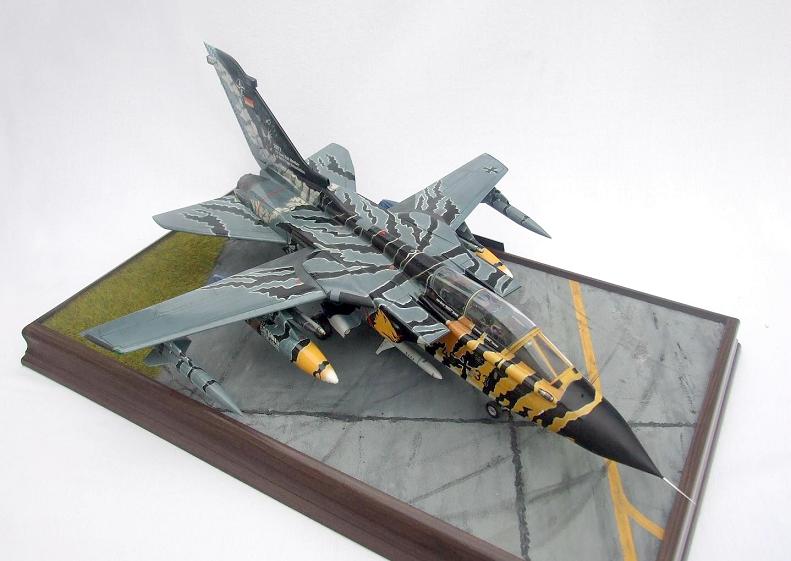
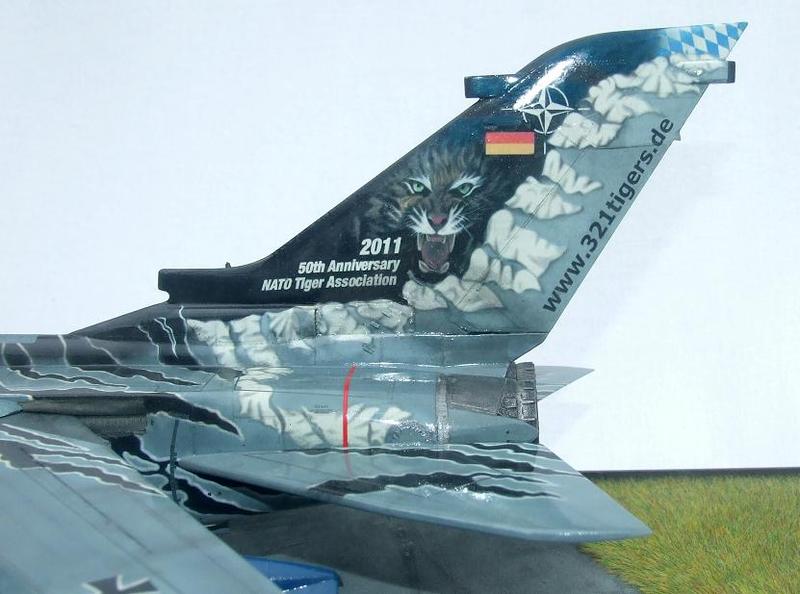
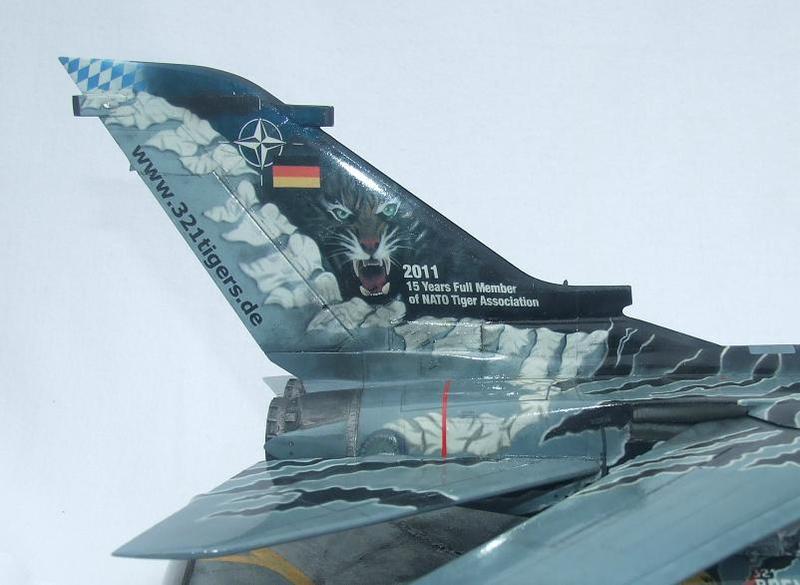
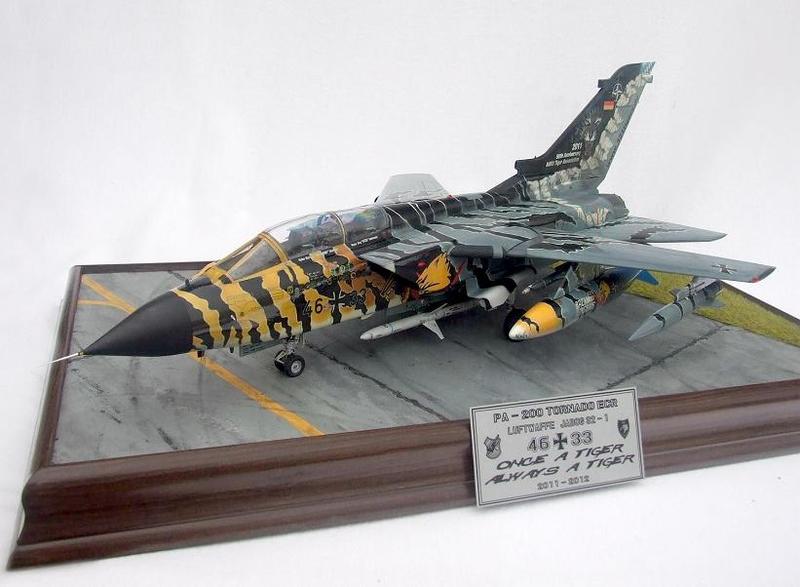
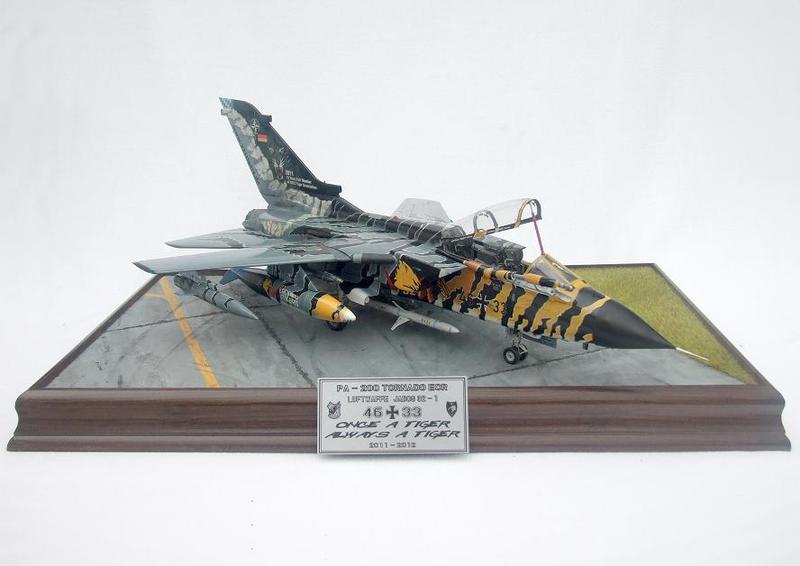
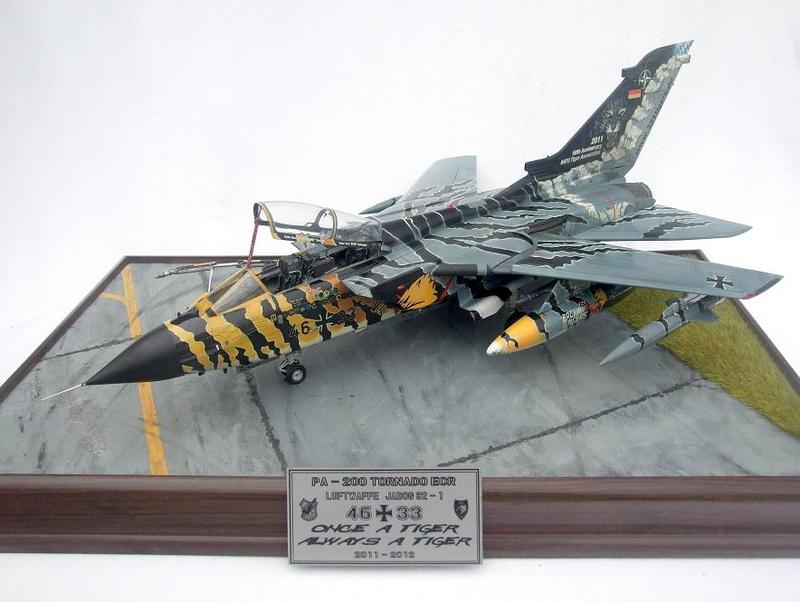
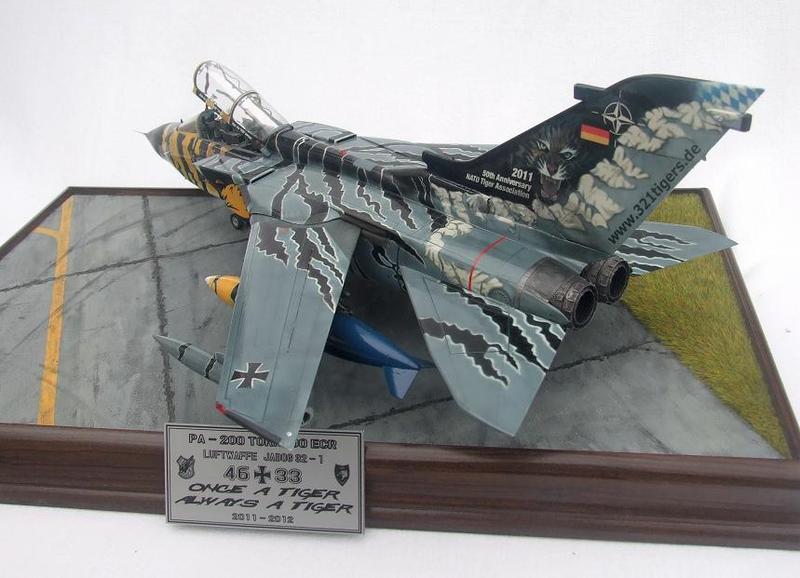
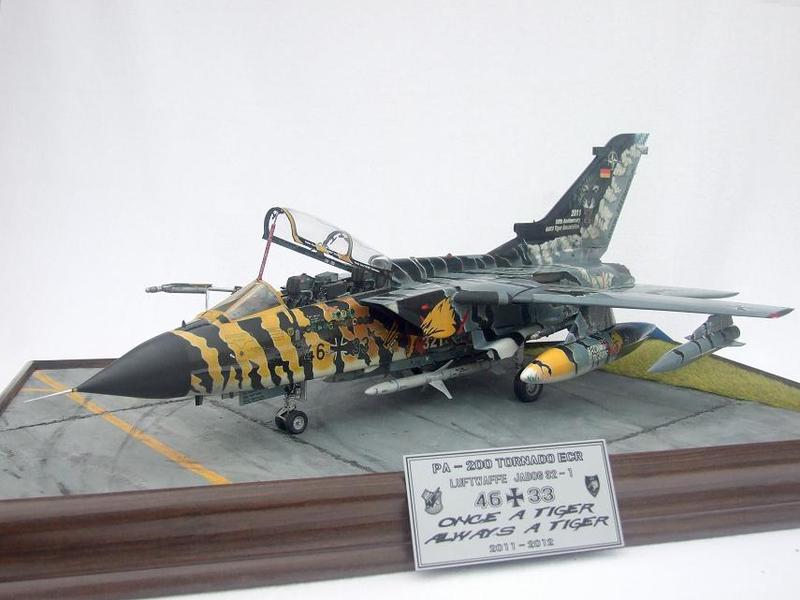
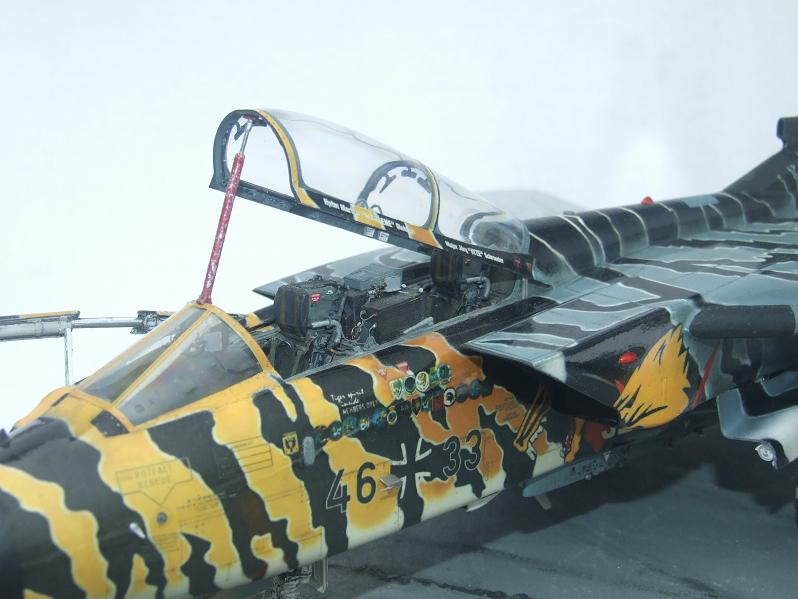


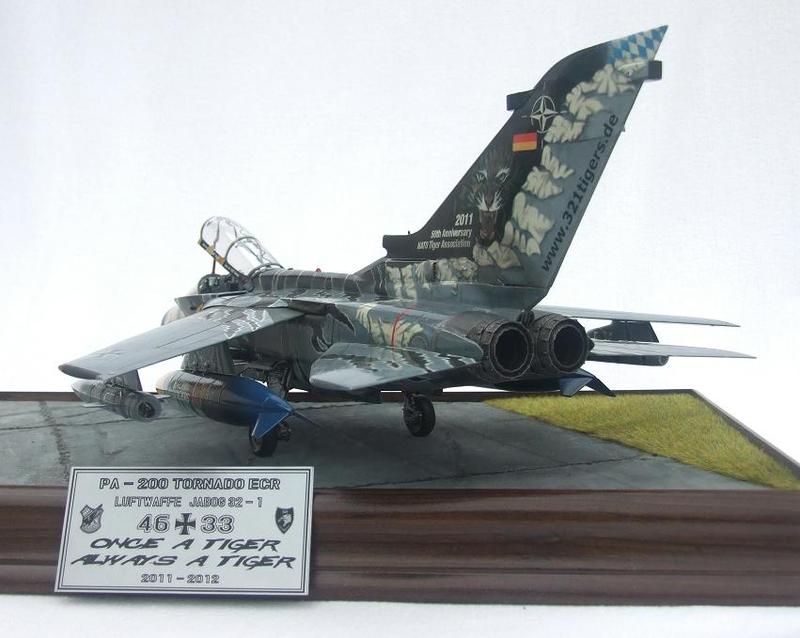
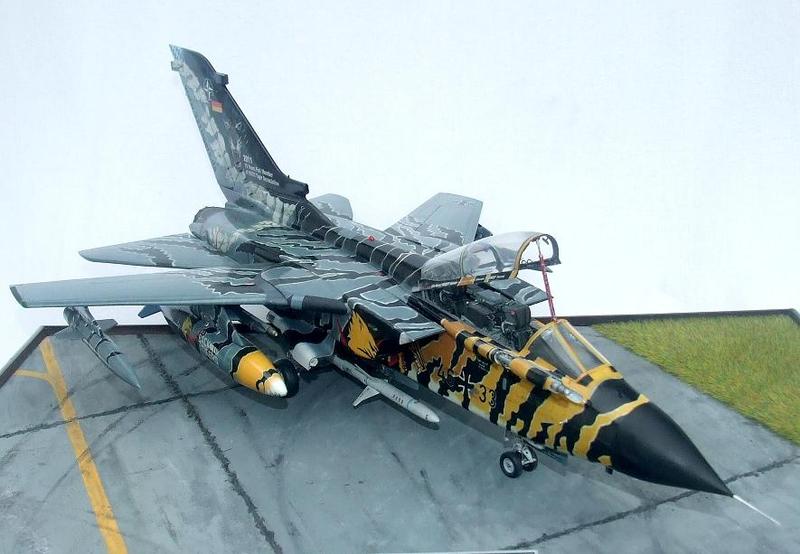

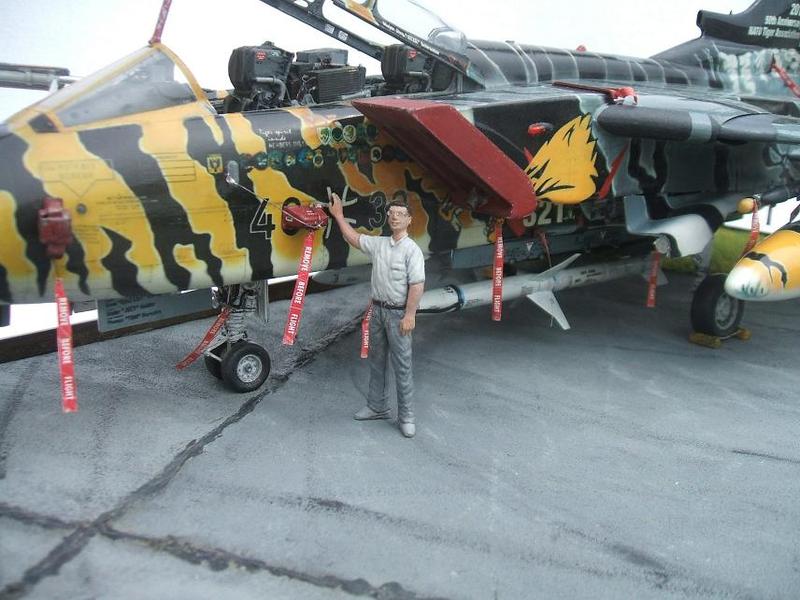
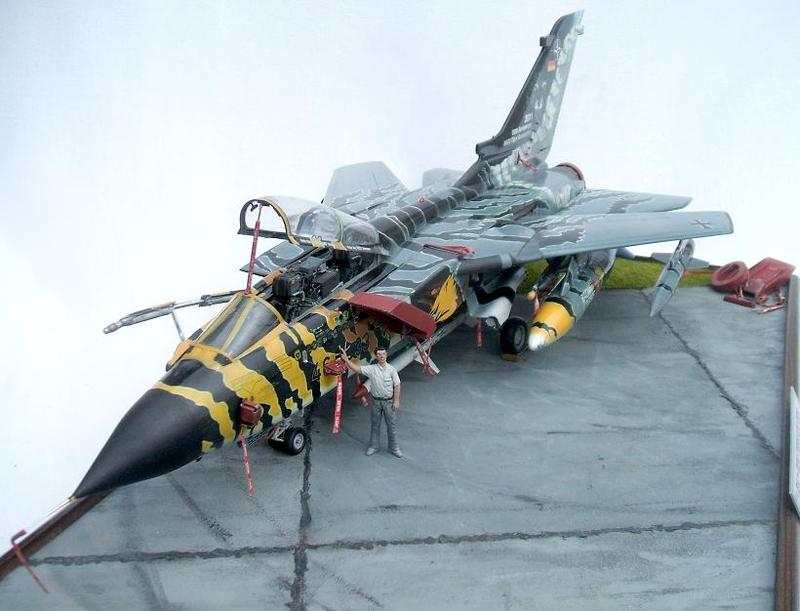
You might be able to make out another advantage of the full body decalling - next to no visible decal borders that screw up the overal impression. I inserted the stencils directly into the design of the Tiger stripes rather than adding these afterwards. You really have to wathc out to place them exactly where they were on the original and that also in regards to the slight discrepancies of the kit regarding panel lines and the like but once that is about done the final result really seems wortrhwhile the extra effort.
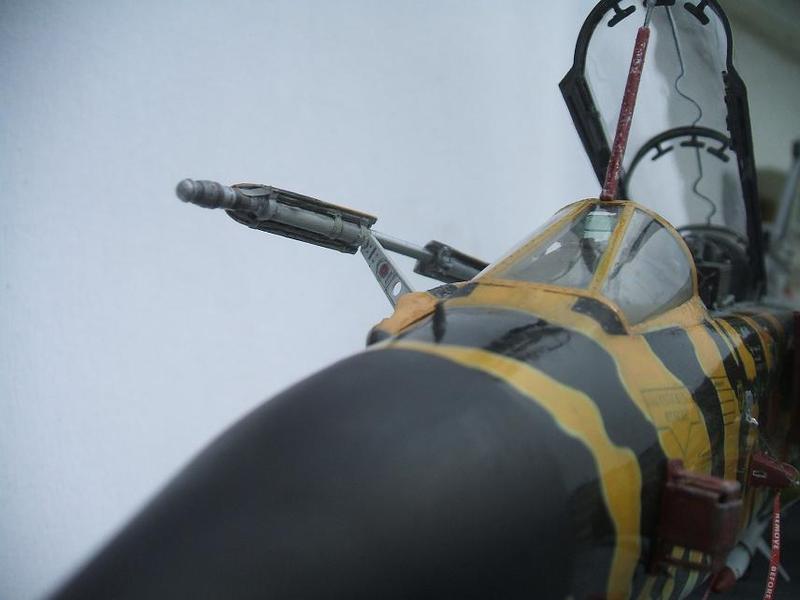
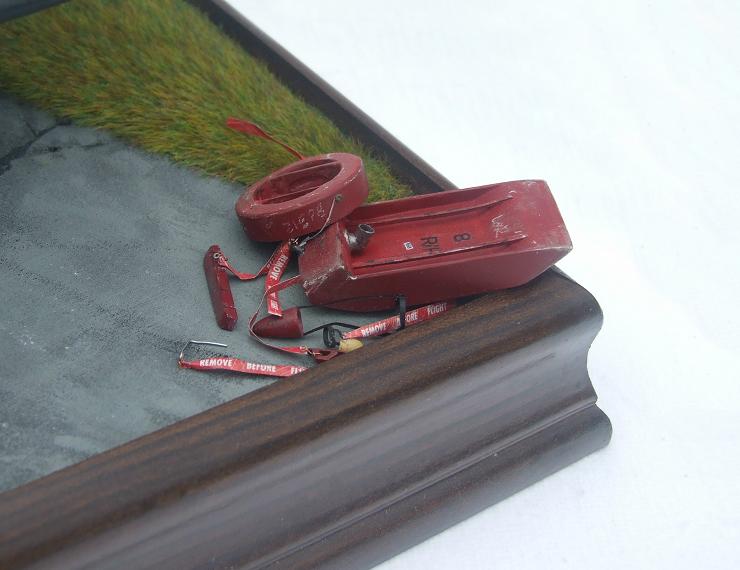
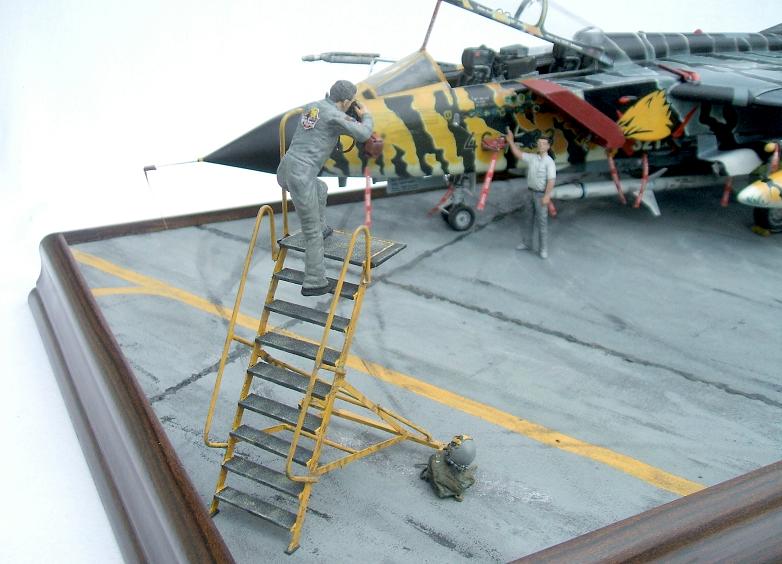
Keeping the model flexible also means to keep the canopy movable as well as the refueling probe. Also the missiles can be displayed either attached or off the jet.
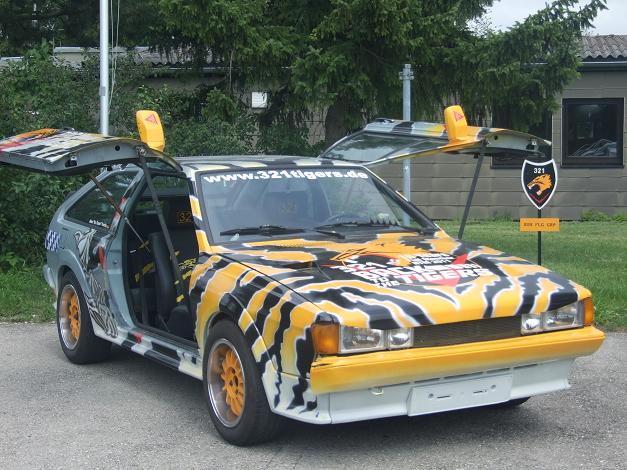
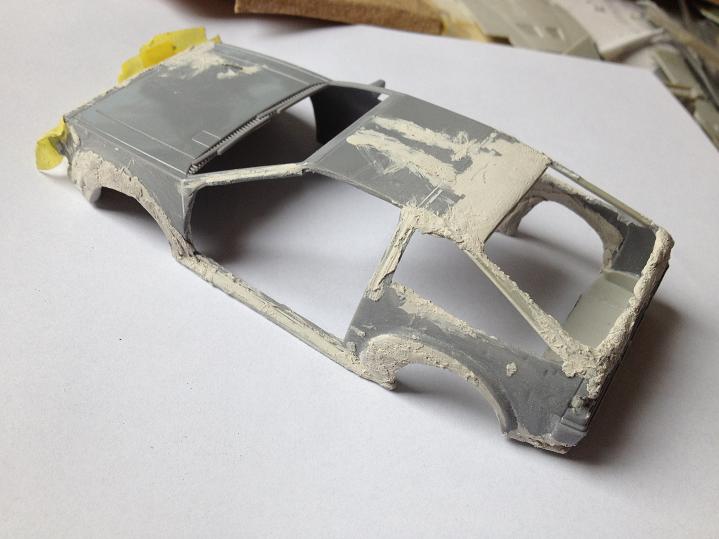
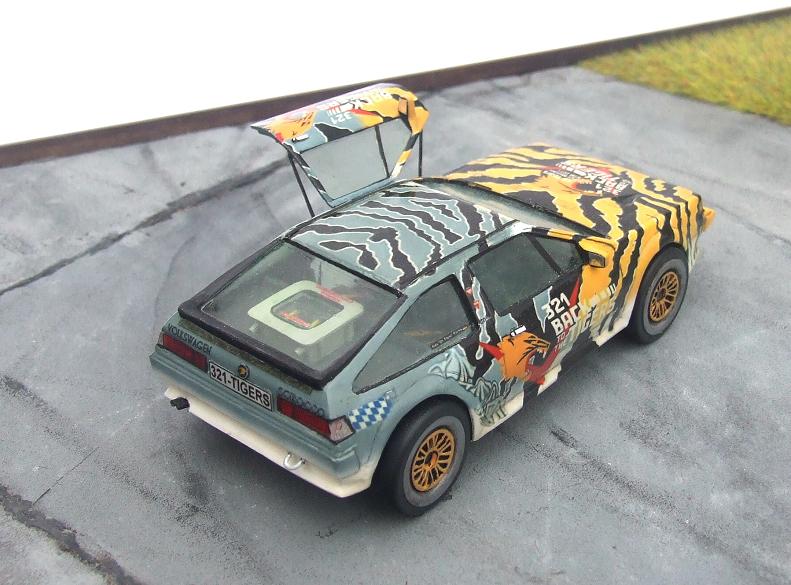
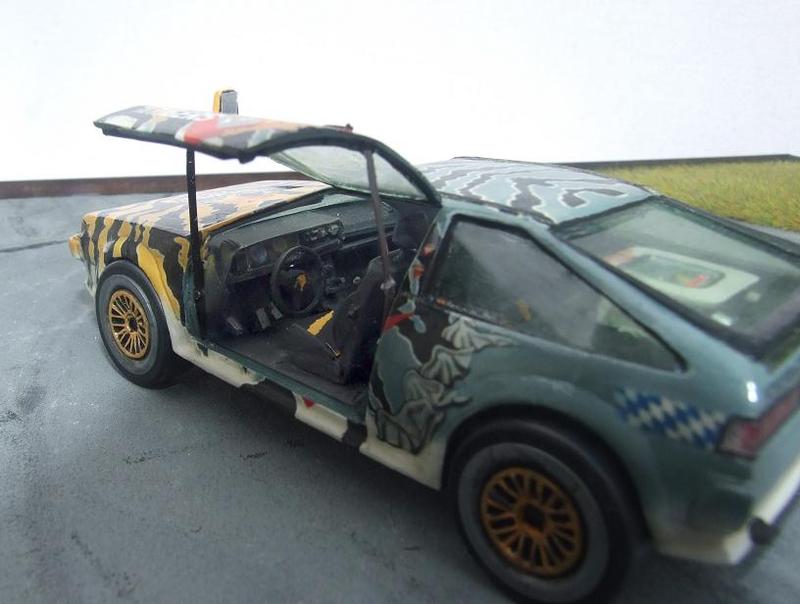
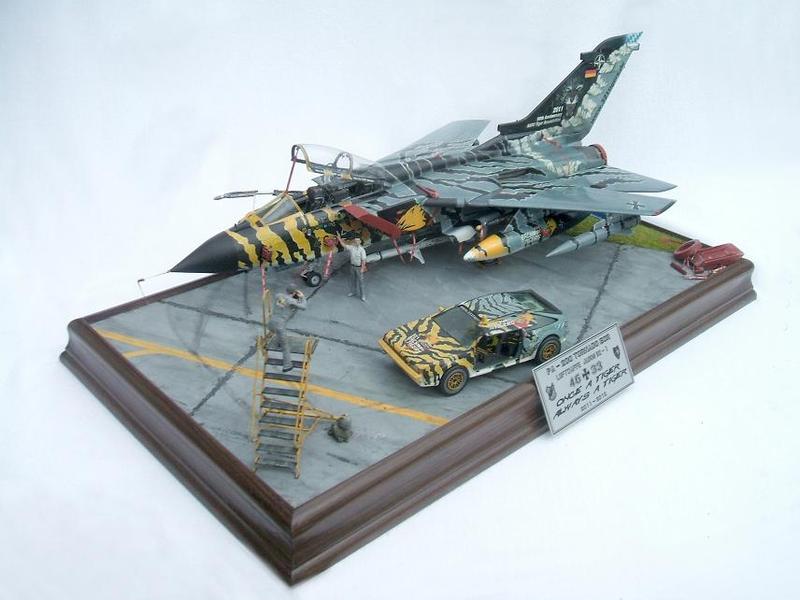
Volkswagen Scirocco
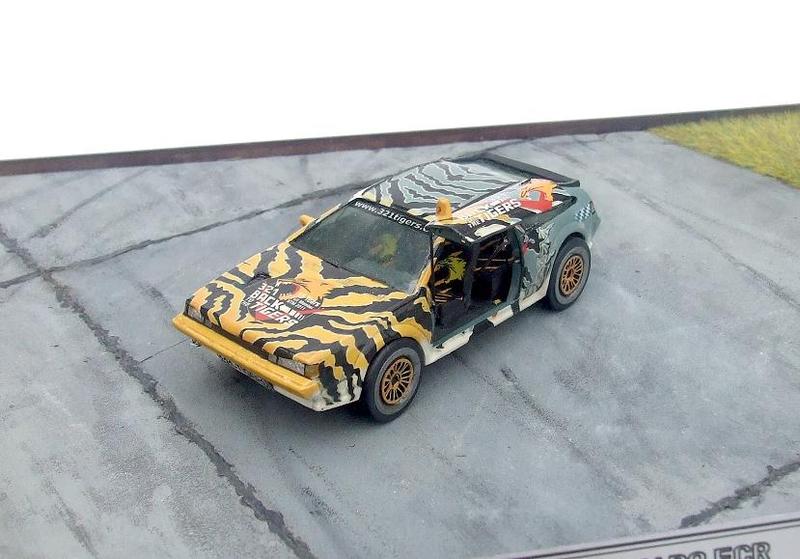
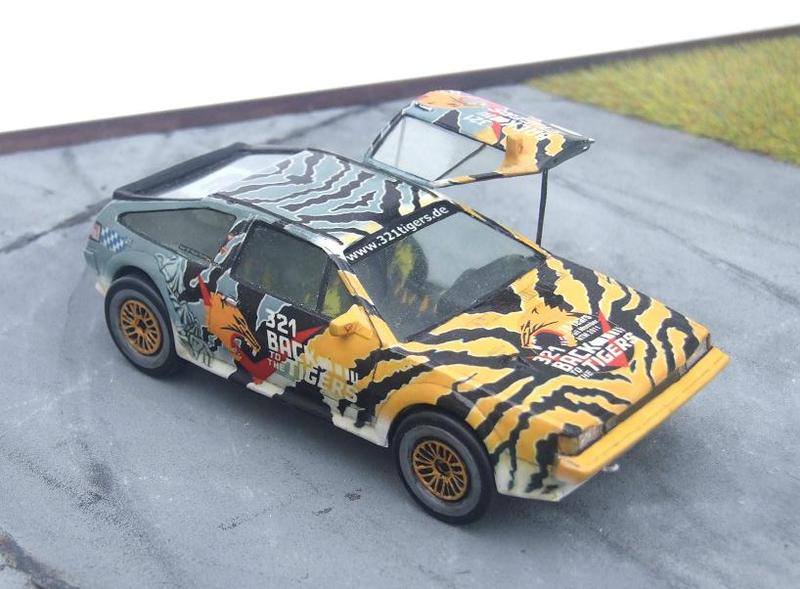
For the show of the original the Lechfeld Tigers converted an old Volkswagen Scirocco into some sort of Back-to-the-Future-style Wanna-Be-Delorean.
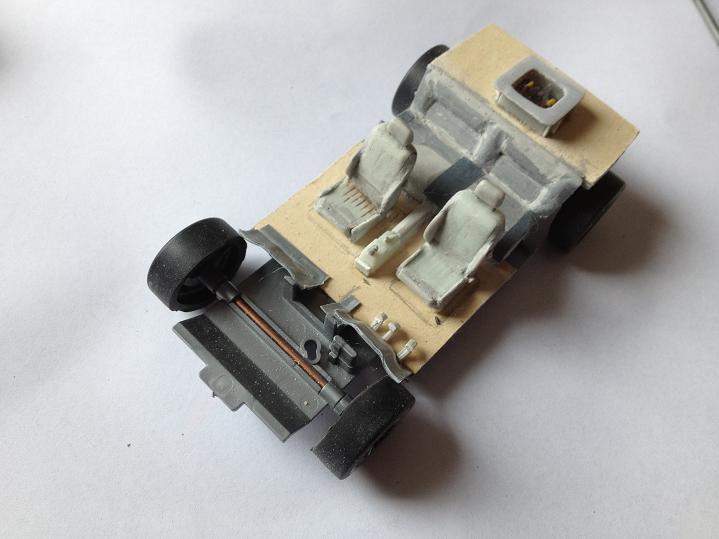
A great idea as I think and something I definitely had to try and add to the dio. It's kind of ironic that the only base for that undertaking I found was a 1/32 DMC Delorean toy car from Japan. The original was a Scirocco trying to be a Delorean and I was faced with the task of downgrading a Delorean into a Scirocco. Well...about 50 percent of the result is putty I must admit and there are some deiscrepancies to the original - it is somewhat...uuuhhmmm...sporty in comparison to the original but in the end it is better than nothing at all. As said the base was a toy car with rubber motor inside and black windows. hence all the interior and the windows are scratch work as well. The seats for instance are old GRU-7As from a 1/32 Revell Tomcat.
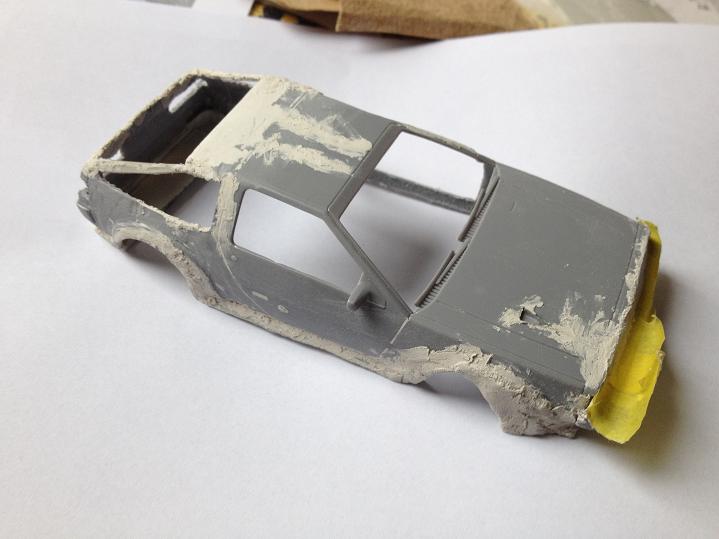
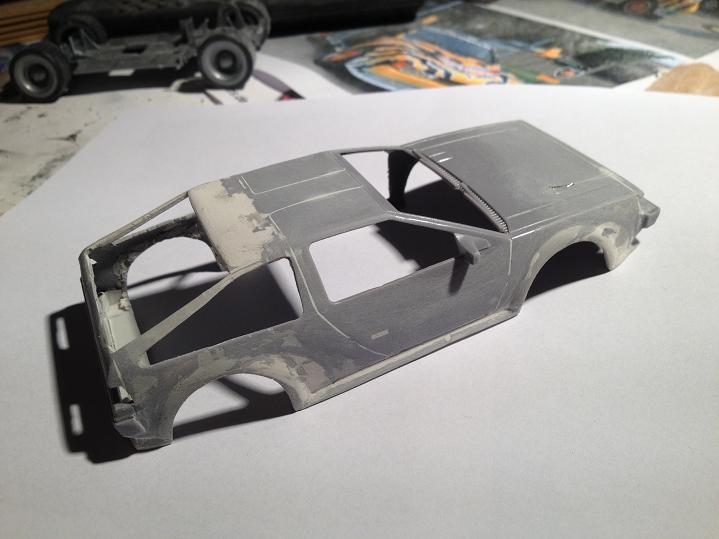
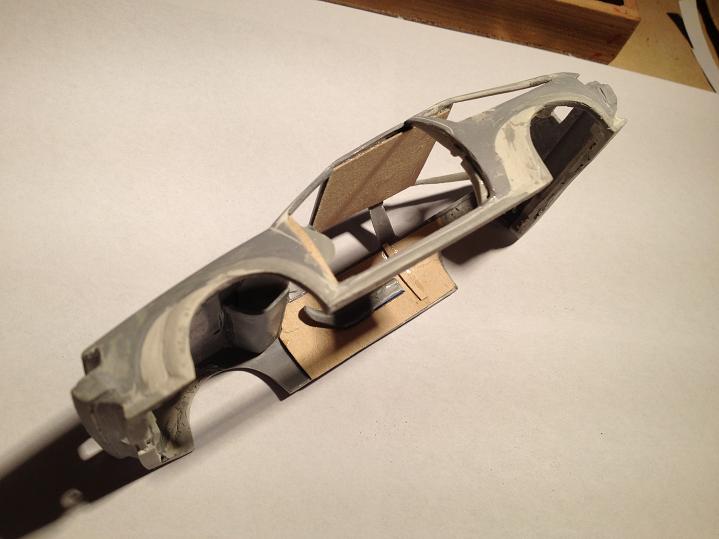
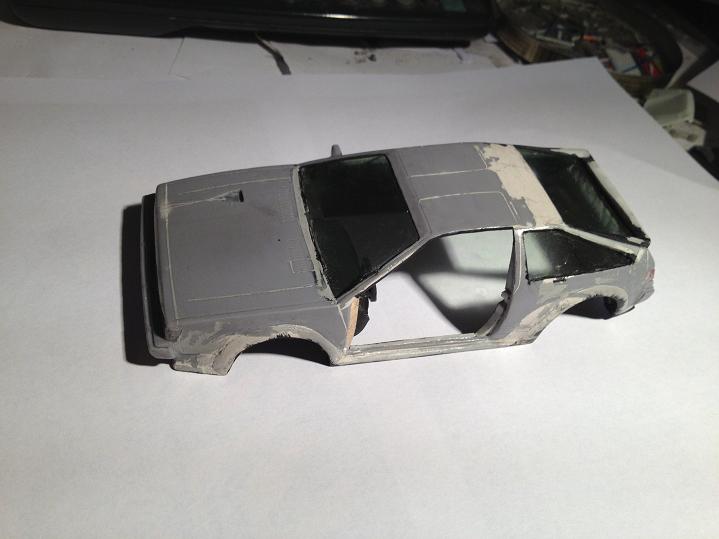
The finished Scirocco eventually received its Tiger suit in the same way as the Tonka, i.e. as a sort of full body suit. It even has the beer flux generator.


To all those that "persevered" until now: A big THANK YOU for the patience and for sticking along! I hope it was somewhat entertaining.
Till the next model ... TIGER TIGER TIGER!
© Alexander Breunig 2014
This article was published on Wednesday, June 25 2014; Last modified on Wednesday, June 25 2014