
Revell 1/32 Mirage IIIE to C conversion
By Ed Okun
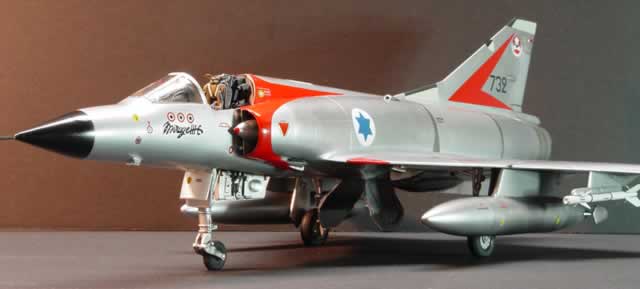
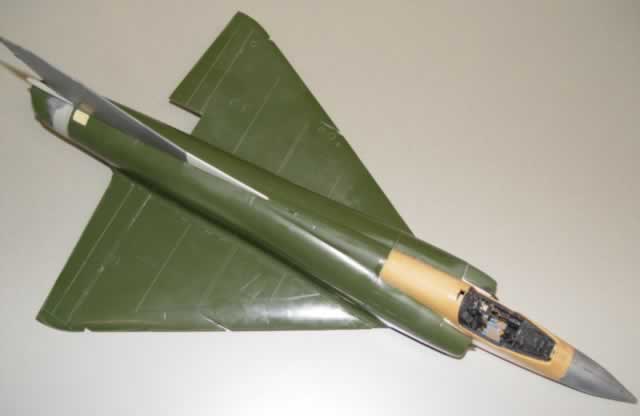
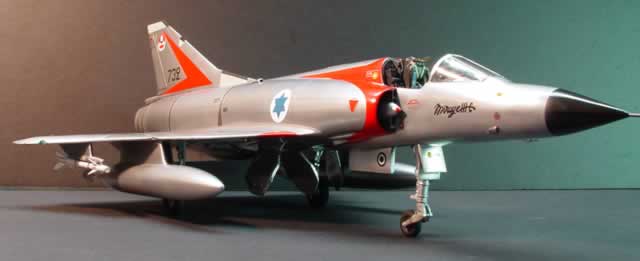
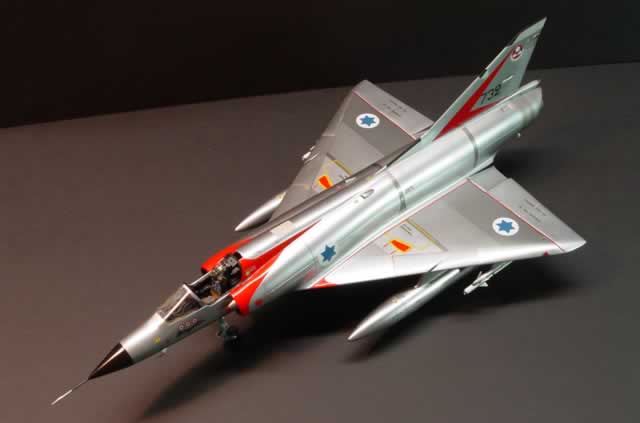
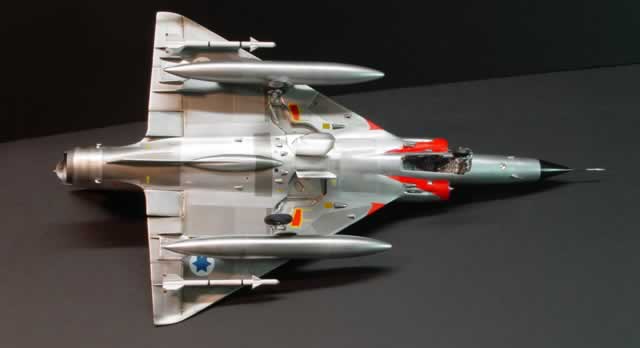
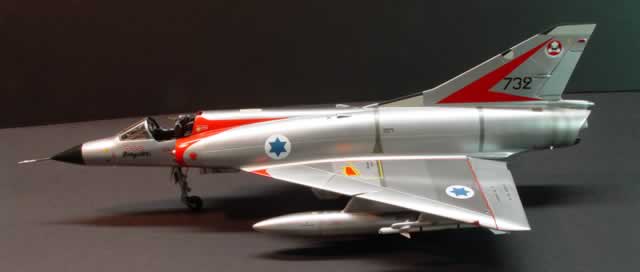
Here are some photos of an extensive conversion that I am making to a 32nd scale Revell Mirage IIIE. I converted this version to a IIIC version and intend to paint and mark as an Israeli IIICJ of the mid-sixties in natural metal scheme.
This conversion involved using multiple copies of the kit, so in case a portion died during surgery I could use parts from another kit. Eventually I used parts from 3 separate kits, and that's why the plastic colors are different. It makes it easy to see the conversion process.
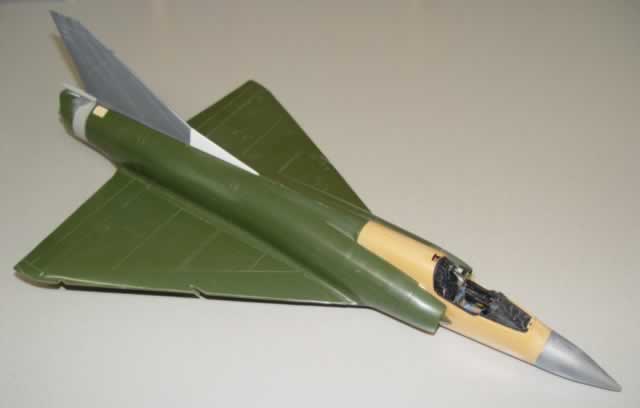
I started by cutting the forward fuselage from the intakes using a scribing tool and razor saw. This was fairly simple and a 10mm section was removed from the fuselage spine and a corresponding amount from the underside as well. Now my forward fuselage is 10mm shorter, which places the intake cheeks just a little shy of the midway point along the canopy line, rather than at the back end of the canopy as on the IIIE version provided in the kit. Note: take extreme care when aligning the forward fuselage back into place when your final assembly takes place. I eyeballed it one night (when I must have been tired) and next day I noticed that I had glued it together with a slight angle to one side which threw off all of the rest. I had to redo this step, and I damaged the parts in the process. Time to pull out another kit! Just make sure your initial cuts are straight and it should go together OK for those that may attempt this.
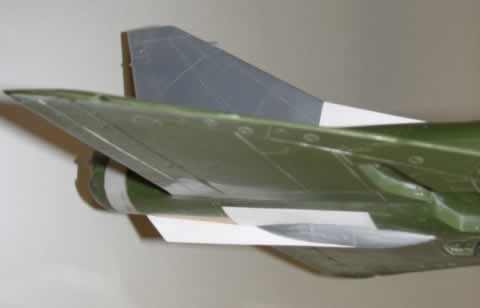
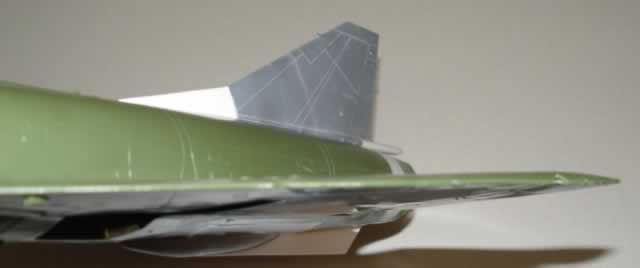
Next step is to rework the afterburner section to replicate the Atar 9B powered aircraft. The IIIE kit version is provided with a shorter tail section for an Atar 9C powered aircraft. I started by carefully sanding the back contours of the provided afterburner tail section until it looked right for for the 9B. I then had to extend the fuselage. This was done with an old F-16 tail section that I had laying in the spare parts box. Abit more sanding and contouring and I was nearly there.
By the way, I finally found a fine filler putty that can be sanded to a feather edge, has great adhesion and almost no grain. It is called "Permicron" fine putty #7715. Manufactured by "Spies/Hecker" for the automotive industry. I heard about it from an auto detailer who swears by it, and after using it I would suggest this material to anyone and everyone building fine scale models. It is sold in an 8.8oz tube. You can find their site on any search engine.
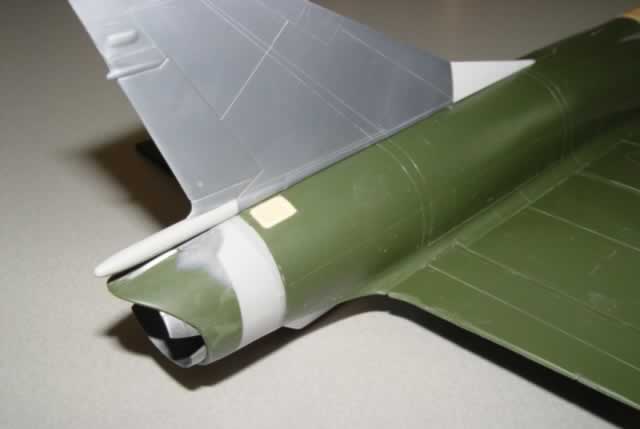
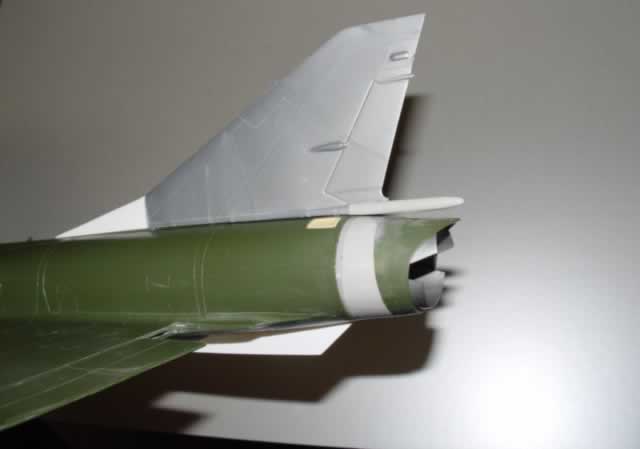
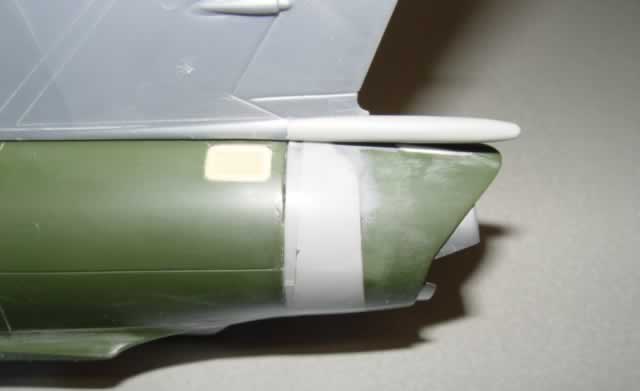
Next step involved the aircraft
underside. The IIIE version in the kit has the wide auxiliary fuel
tank fairing under the aft end of the plane. Almost every photo I
have seen of the Mirage IIIC has a blade type fairing, similar to
a MiG-21. I had to remove the wide fairing and fill in the resultant
hole. I decided to take it out to the panel line and replace the area
with sheet styrene. This done, an old drop tank was cut and used for
the smaller pod type fairing, with a flat vertical blade made of plastic
sheet.
The forward end of the tail section has a small "cranked"
extension which was also made with plastic sheet. The tail was cut
at the first vertical panel line to attach this extension where it
will meet the fuselage spine.
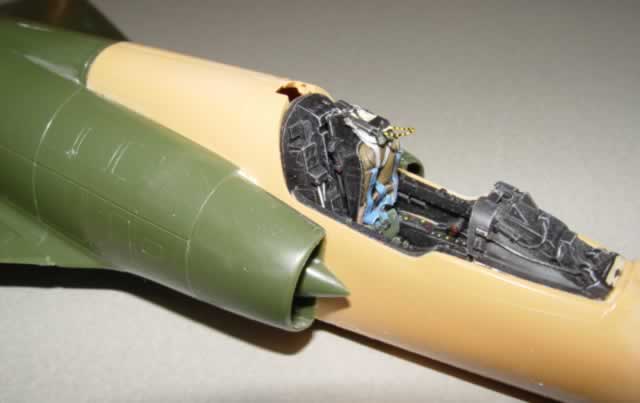
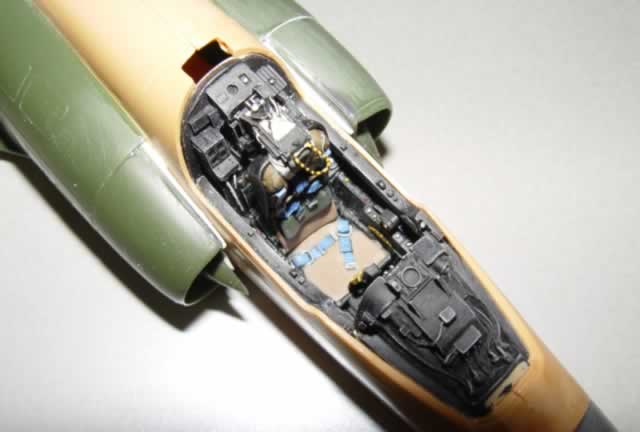
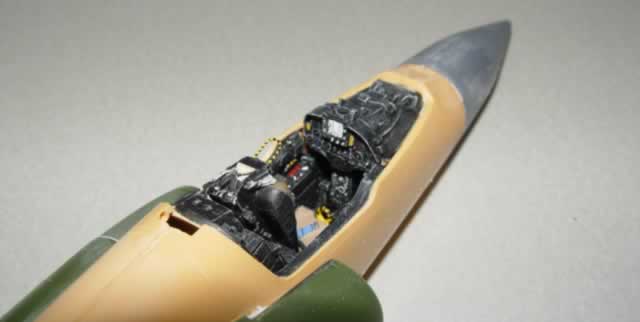
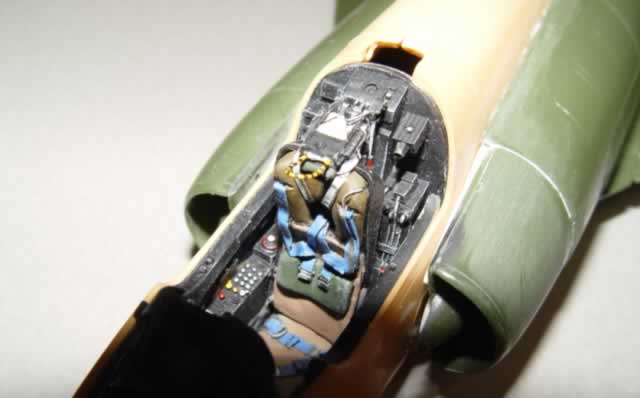
I used some aftermarket items for the cockpit, including parts from the "Tac Scale Dynamics" Kfir C-7 conversion set #32017 for this kit. Specifically the cockpit tub, and the instrument panel top cover piece (under the windscreen) were used.
Finally (am I there yet?) I decided to forego the small panel scribing on the wings and fuselage, as even with a sharp needle in a pin vise, I could not get really sharp lines on the curved edges of the tiny panels. I found some very thin styrene sheet, (actually thinner than a sheet of paper) and cut the panel sections with a sharp scissor. I sanded the corner of each panel with some fine sandpaper to get the corbner curves. A tiny spot of liquid cement fixed these firmly in place. Be careful not to use an excessive amount of cement as it will melt your panel. A light sanding to blend it all in, produced a good representation of all the panels I wanted.
I am now in process of preparing this model for paint and started out by giving it all a black gloss coat. ARRRGGGHH!! Now that all the deficiencies are apparent, I will spend the next few days to better prepare the surface for the eventual "ALCLAD" metal finish.
I used a "Cutting Edge design Martin-Baker Mk-4 ejection seat as well, slightly converted to appear as a 6.
The Finished Model
© Ed Okun 2006
This article was published on Saturday, October 17 2015; Last modified on Sunday, April 03 2016