
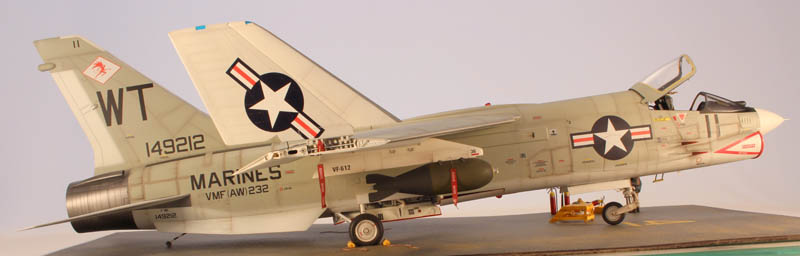
Trumpeter 1/32 F-8E Crusader
By Luc Janssen
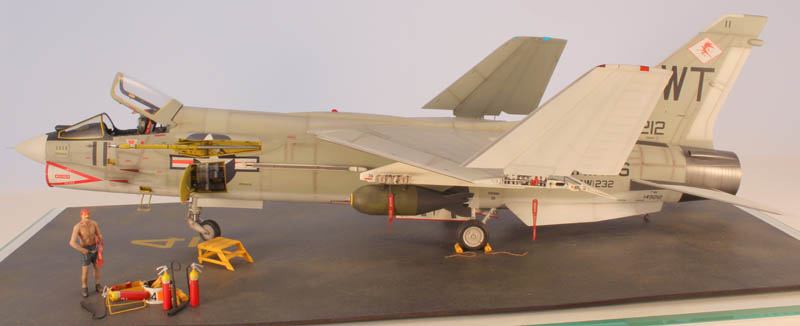
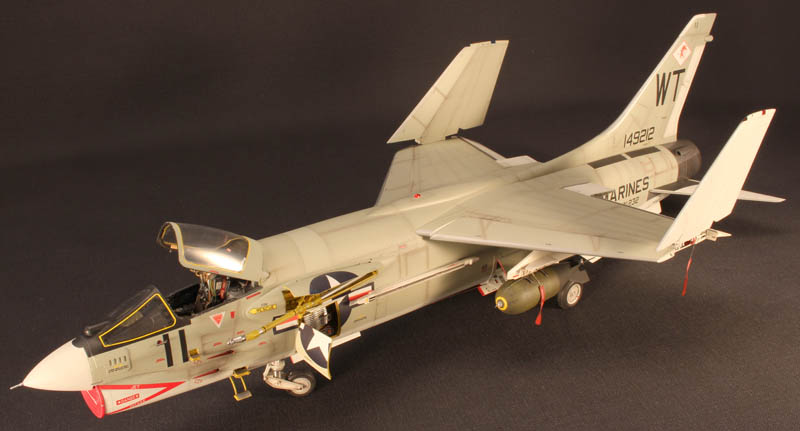
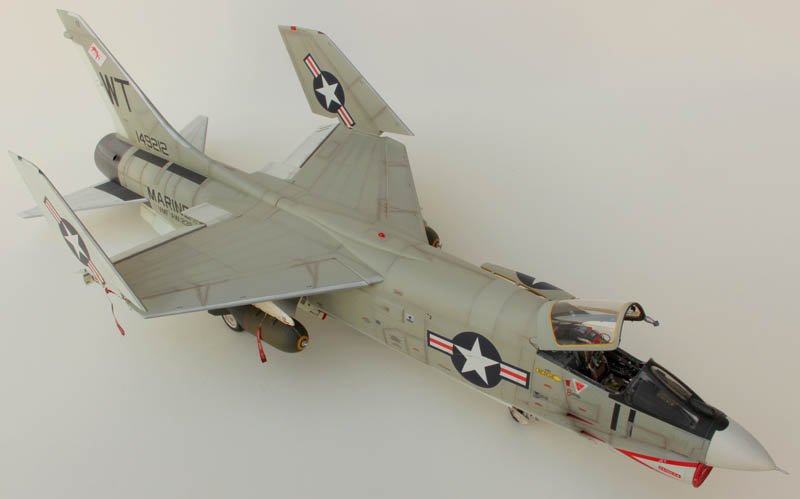
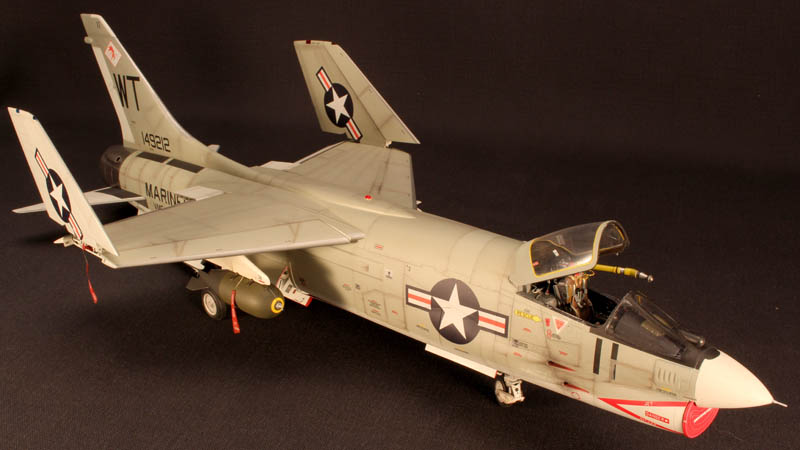
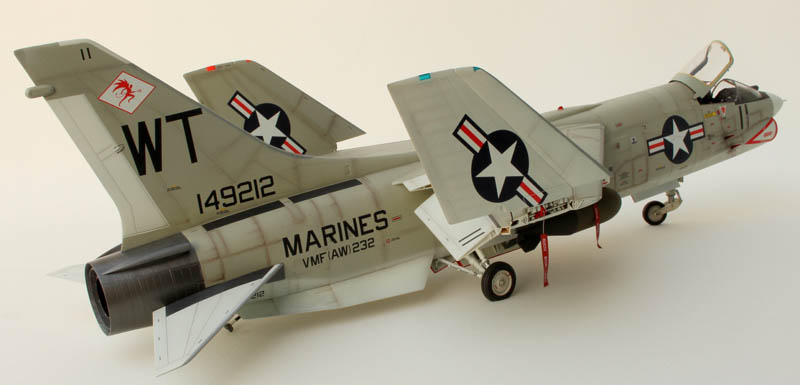
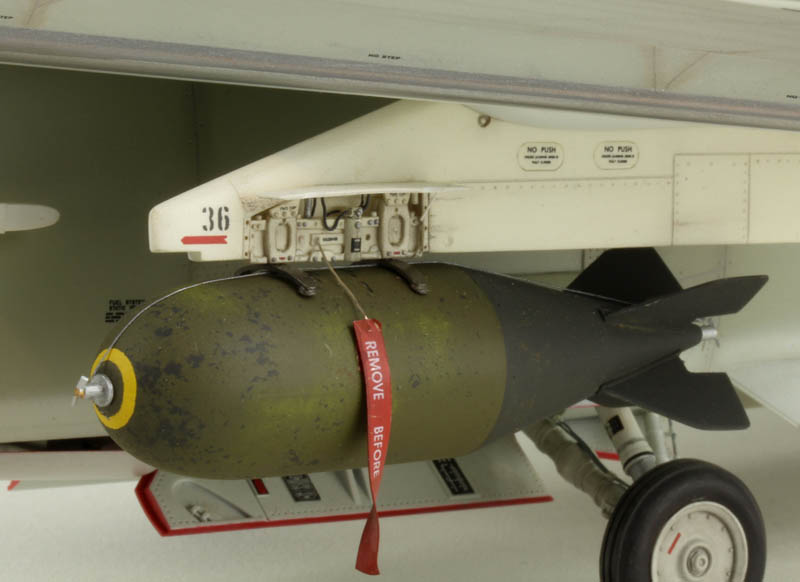
As I like US Navy and Marines aircraft used during the Vietnam conflict, off course I had to build the Trumpeter F-8E Crusader and, after checking my books, magazines and the net, I went for a Marines fighter-bomber based at DA NANG in 1967. Indeed, the only Crusaders I found equipped with 2000 Ibs "Fat" bombs, were Marines planes! The well-worn and weathered look of these aircraft and the unusual bombs they carry, make a model of a Crusader very attractive.
Building
The Trumpeter kit is good, but some detailing and upgrading must be done. The details of the cockpit, the wheel wells, the pylons, exhaust, gun bay, etc. are a bit on the heavy side and are sometimes just wrong!
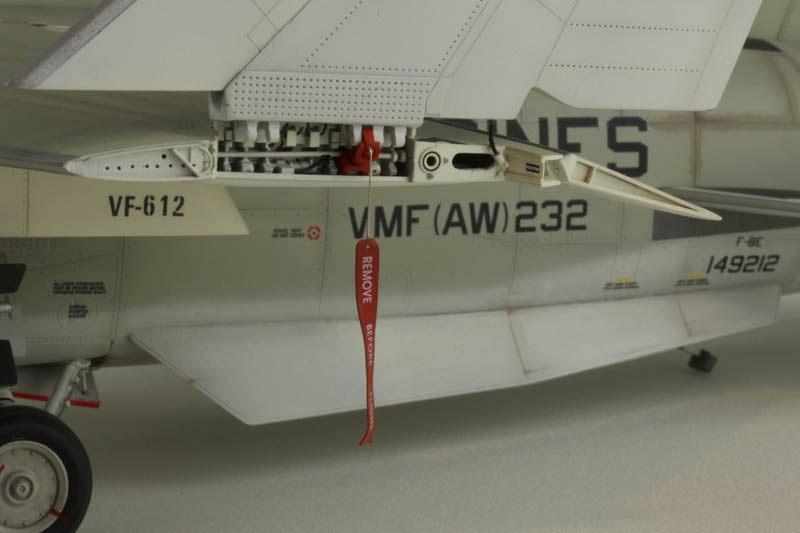
Although the kit offers the possibilities to lower the Ram Air Turbine (RAT), the air brake, to open the 2 gun bays and the refueling probe, to fold the wings and to give them a landing elevation, the beautiful lines of the Crusader are just too disrupted!
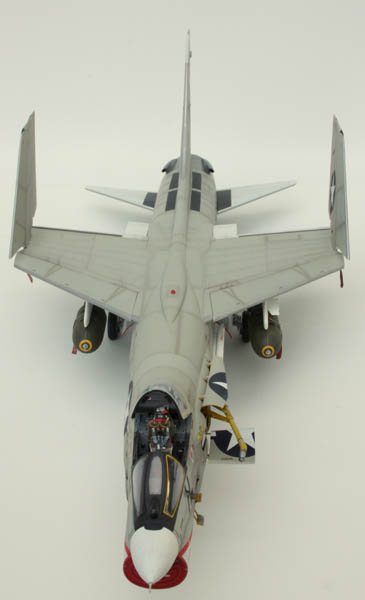
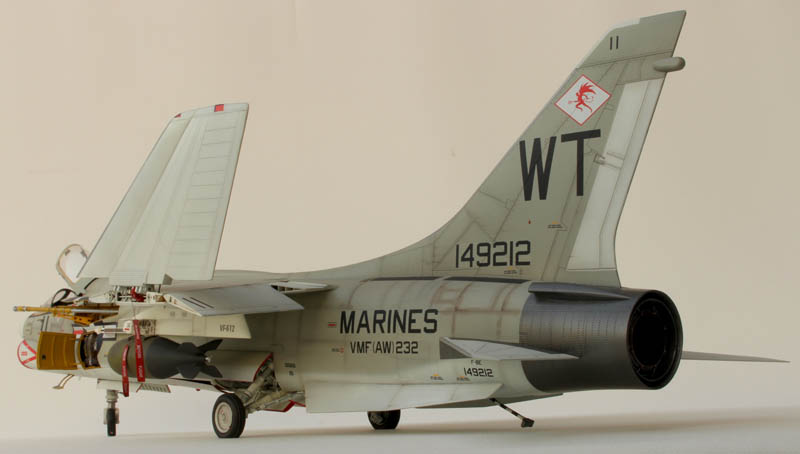
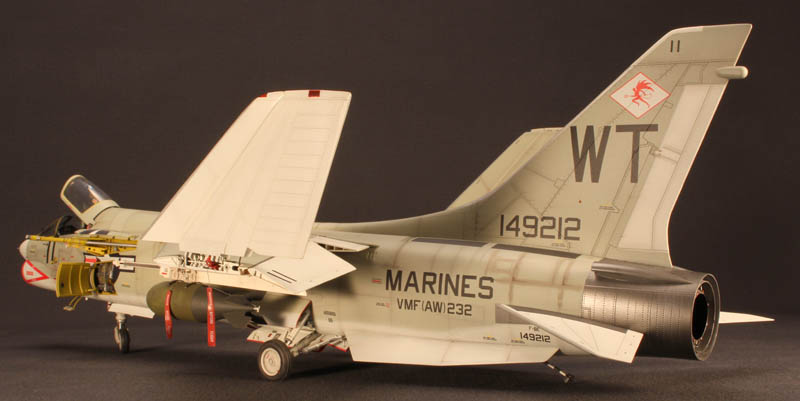
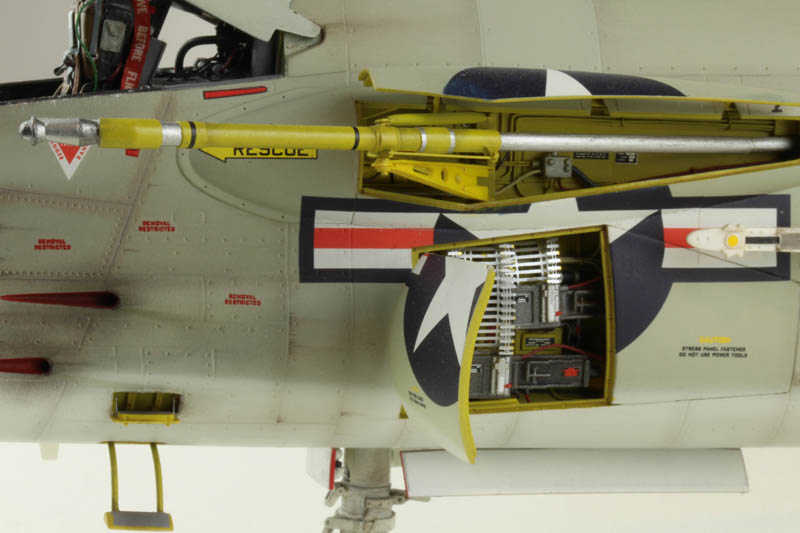
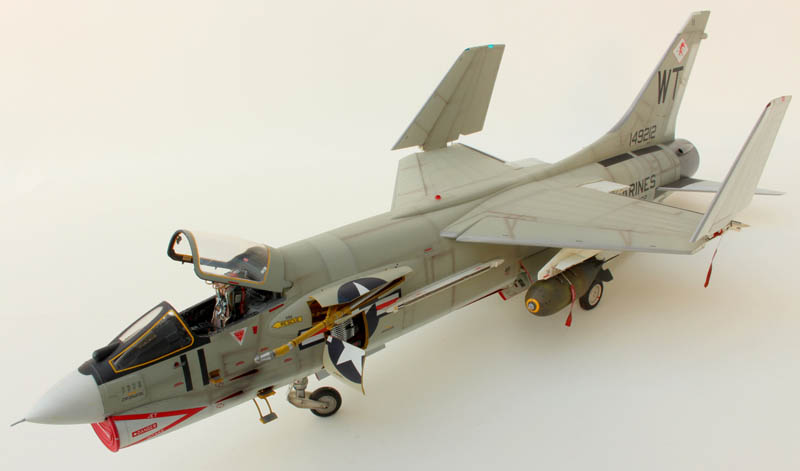
So, I decided to fold the wings, to open just 1 gun bay and to extend the refueling probe.
I used following after-market sets:
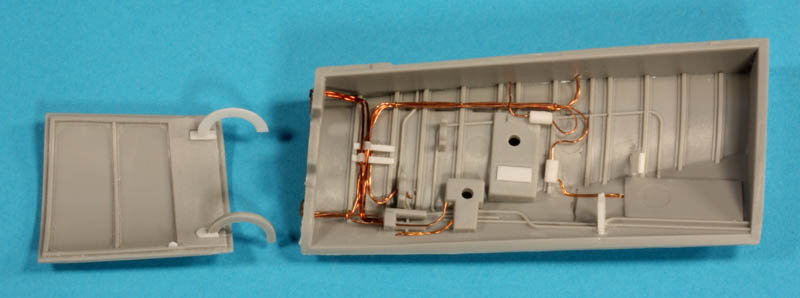
- Aires Wheel Bays set
- Aires Cockpit set
- Victory Productions Marine F-8E Crusader decals
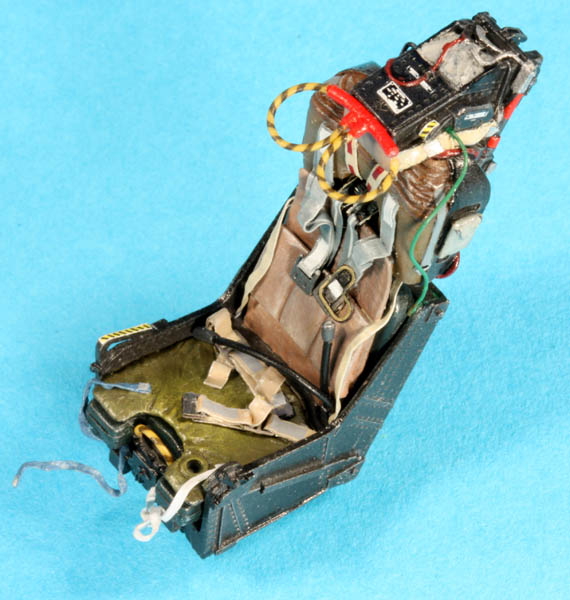
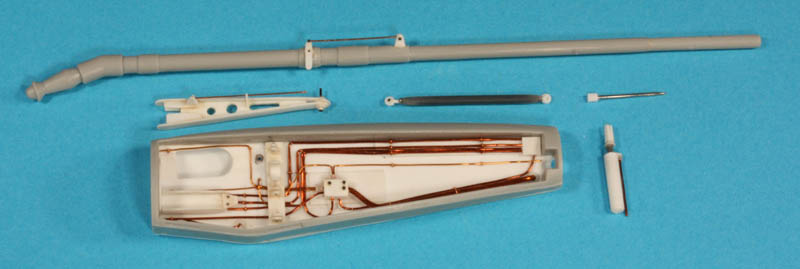
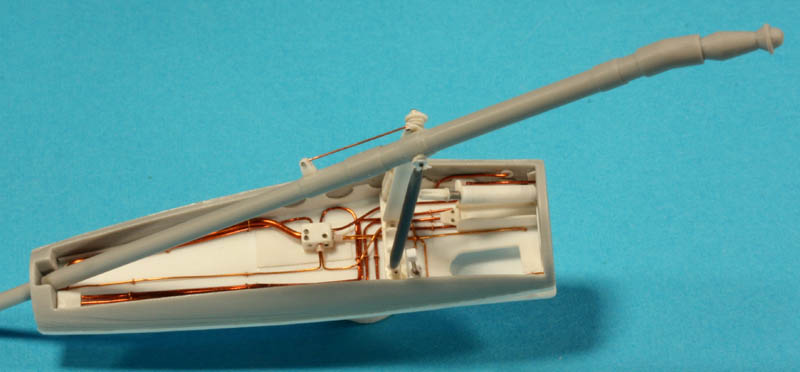
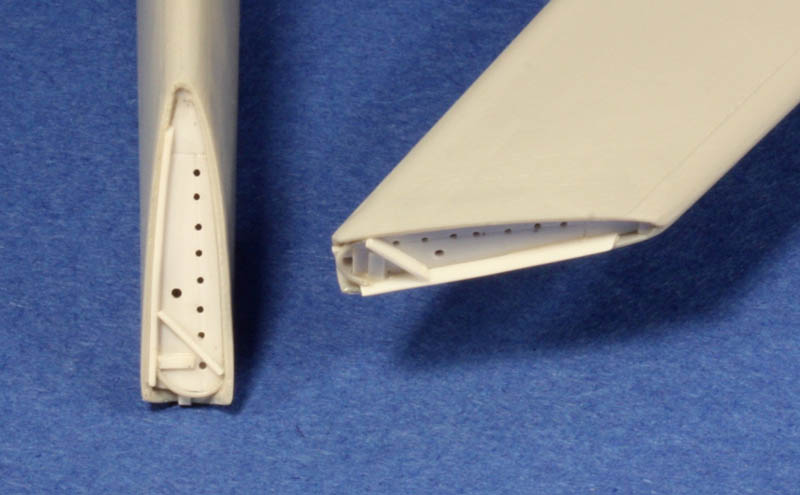
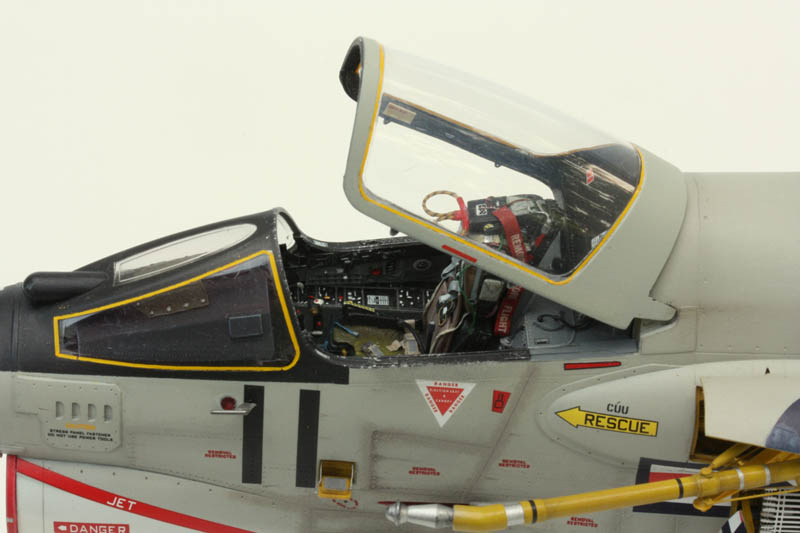
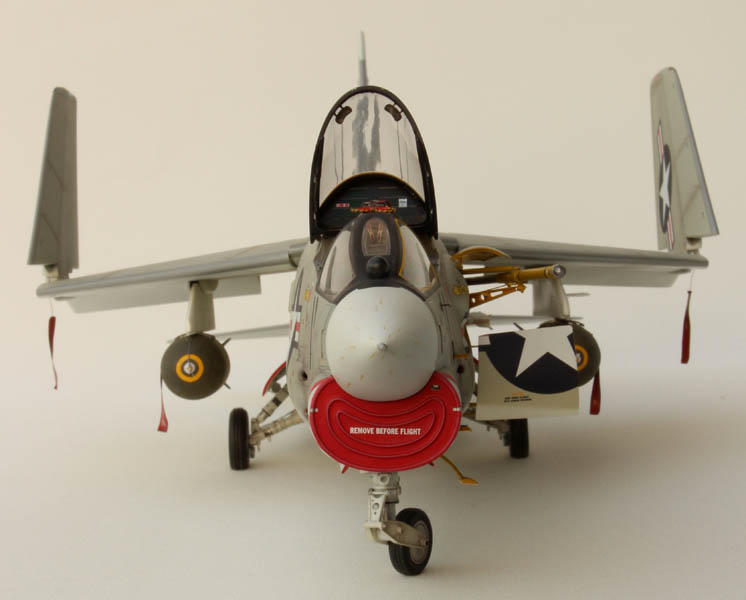
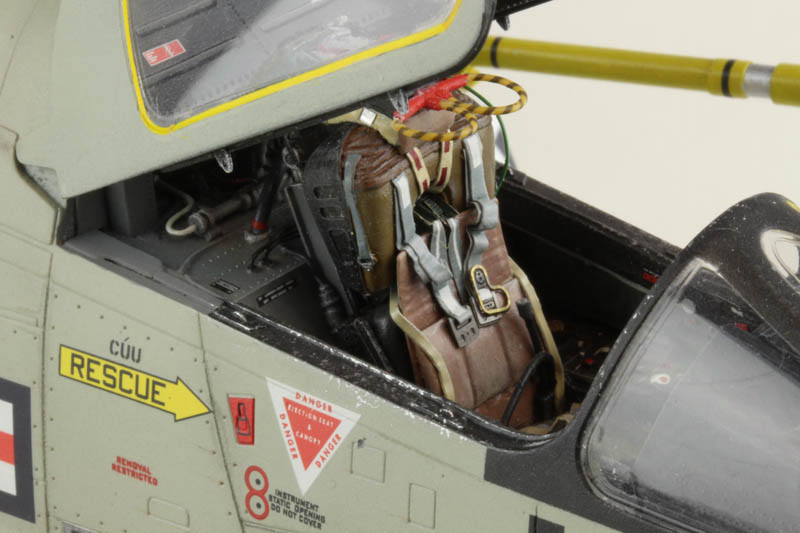
To give better detail to the model I reworked the refueling probe with its housing, the port gun bay, the edges of the outboard flaps and the slats, the navigation lights and the front wheel strut. From scratch, I made new underwing pylons (they have a wrong shape in the kit and they are much too narrow!), the port sidewinder rail, two 2000 Ibs "Fat" bombs, the inner flaps, a FOD- cover and the 3 steps to board the plane. Further detail was given to the exhaust, the main landing gear, the canopy and the cockpit area behind the seat. Some minor detail was added to the wing folding mechanism and to the ejection seat. For the seat, I made belts from lead foil instead of using the photo-etched metal part of the Aires set. I prefer lead foil belts as they offer a more natural look.
Painting
I started with the cockpit area, which was sprayed with a coat of Dark Gull Gray (FS36231) and dry-brushed with a mixture of Dark Gull Gray and White (oil paint). All details as knobs, handles, wiring, gauges, pockets etc. were then hand painted. The Mk-F5A ejection seat, which was first coated Flat Black and dry-brushed with a mixture of Flat Black and White (oil paint), received the same treatment. Once both items finished and thoroughly dry, I gave them an overall coat of Gloss Varnish. Again, once thoroughly dry, I added some decal placards and marks and sprayed another coat of Gloss Varnish. On this last (and dry) coat, I tried to create an "operational and aging effect " by covering it with pastel powders! The overdone of pastel powders then were simply brushed away and a coat of Varnish (5 parts Dull + 1,5 parts of Gloss) was sprayed over to finish the job.
The same procedure, but with the adapted colors, was repeated on the gun bay, the refueling probe with its housing and the wheel bays. For the wheel bays, an end coat of Gloss Varnish was used. The Aires Wheel Bays set produces an extremely realistic look for the undercarriage once painted and installed. Unfortunately, very little can be seen on the finished model!
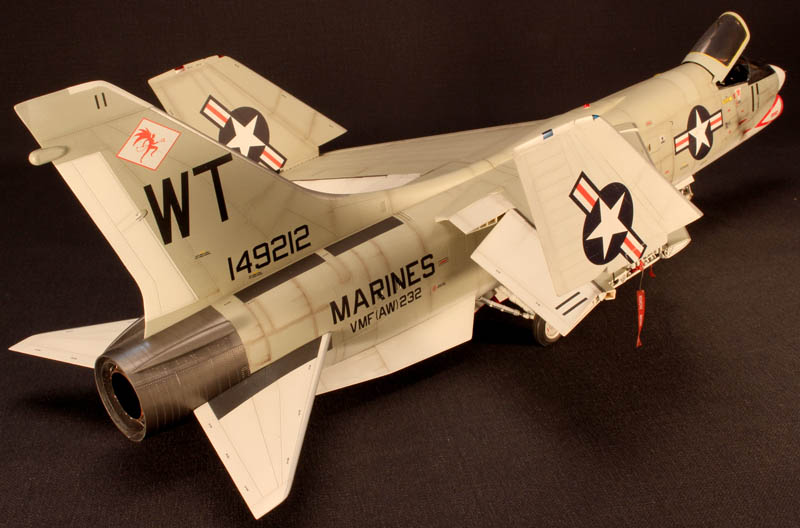
During the Vietnam war, the standard F-8 Crusader color scheme was dull light Gull Gray (FS 36440) upper surfaces and gloss Insignia White (FS17875) control and undersurfaces. I started to give the model an overall coat of Light Gull Gray. Then I sprayed some panels in the same, but slightly lighter color (I added some White) to create different tones in the overall appearance of the painted surface. The control and undersurfaces, the nose cone, the wheel covers and pylons were sprayed with Insignia White. The exhaust area was painted Flat Black and polished with Spray Metal polishing powder. The antiglare panel in front of the windshield and the walk areas were coated Cockpit Interior. This color gives a more faded effect than black.
Now the entire model was given an overall coat of gloss varnish.
Decals
I choose the Marine F-8E Crusader decal set from Victory Productions using the Microsol and Microset system and no significant problems were encountered. When putting decals on a model, it is extremely important to check and to check again that no silvering appears. With a fine needle, I repeatedly punctured the decals, putting Microset over and again, until all the small patches of silvering had disappeared completely!
Weathering
Before starting the weathering of the model, I cleaned the model with a lukewarm water with a drop of dish soap where after I sprayed a overall coat of Gloss Varnish (2 parts thinner - 1 part Gloss Varnish) and I left the model for 3 days to get the paint thoroughly dry and hardened.
On the glossy varnish
As always, I make pastel powder from pastel powder bars bought in the shop for drawing materials. With this pastel powder, I made a mixture of Dark Gray and a little of Burnt Umber and accentuated all the major panel lines of the upper surfaces. The mixture was put on the model with a brush no 3. For the undersides, I used a mixture of Light Gay again with a (very) little of Burnt Umber. Once this finished and the surplus of powder brushed away with a thick, flat brush, I ran over the panel lines of the upper surfaces with a sharp Dark Gray color pencil whereby I repeatedly sharpened the pencil. For the undersurfaces, I used a Light Gray color pencil. Some panel lines were given more thickness than others, following the reference pictures.
On the finishing coat of varnish
Once the first weathering was completed and the first look of the model seemed good, a finishing coat of Varnish (5 parts Gloss + 1,5 parts Dull) was sprayed over the upper surfaces and the sides of fuselage, without spraying the underside. Indeed, the underside of the model should not have a matt appearance. The later weathering softens the glossy effect to a realistic level!
On this finishing coat, I applied 'in the field paint' - patches with a slightly darker Light Gull Gray to simulate the maintenance work of the ground crew. As these Marines planes show rather heavy weathering, again I worked with pastel powder to give different degrees of weathering, but this time more carefully. On this coat of varnish, mistakes are easily made and very difficult to correct.
As last I simulated the airflow strains, some very dirty and others less pronounced, with Black, Dark Gray and Dark Brown color pencils and a brush no 2. The gun ports were created with Black pastel powder using a brush no 5.
Finishing the F-8E Crusader
All loose details as the canopy, the antennas, the boarding steps, the refueling probe with its bay cover, the gun bay cover with new hinges, the pylons and the Fat bombs, the Sidewinder rail, the arrestor hook, the folded wingtips, the pitot tubes, air brake, the wheel bay covers, etc were attached to the model, of course always checking the correct position on the reference pictures.
The Ground Base
I wanted to represent situation of a Marines F-8E being readied on a piece of tarmac. I used an unequal vinyl carpeting tile, cut it to the right size and sprayed a Yellow 4 onto it. The base was then given a weathered look with different tones of pastel powder and finished with a mixture Dull (5 parts) and Gloss (0,5 parts) Varnish.
On this base, I added the lightly weathered wheel chocks, some scratch built fire extinguishers in a cut in half gasoline barrel and a small platform used to access the gun bays.
Paints Used
- Alclad Dull Aluminium
- Model Master Paints
- Model Master Varnish
References
- Michael O'Connor - Mig Killers of Yankee Station
- Squadron/Signal Publications - Aircraft Number 70
- Squadron/Signal Publications- Walk Around Number 38
- Avions et Pilotes - Vought F-8 Crusader
- Osprey Combat Aircraft 7 - F-8 Crusaders units of the Vietnam war
- In Detail & Scale - F-8 Crusader
- Naval Fighters Number 16 - Vought's F-8 Crusader
- Replic - No 185 + 219
- Airmodeller - 37 Issue


PS for questions or comments go to: lucjanssen32nd.com.
© Luc Janssen 2017
This article was published on Thursday, March 09 2017; Last modified on Thursday, March 09 2017