
Revell 1/32 de Havilland DH98 Mosquito Mk IV, Built as a PR IV
By Suresh Nathan

Introduction
The de Havilland DH.98 Mosquito was a British twin-engined, shoulder-winged multirole combat aircraft, introduced during the Second World War. Unusual in that its frame was constructed mostly of wood, it was nicknamed the "Wooden Wonder", or "Mossie". Lord Beaverbrook, Minister of Aircraft Production, nicknamed it "Freeman's Folly", alluding to Air Chief Marshal Sir Wilfrid Freeman, who defended Geoffrey de Havilland and his design concept against orders to scrap the project. In 1941, it was one of the fastest operational aircraft in the world.
Originally conceived as an unarmed fast bomber, the Mosquito's use evolved during the war into many roles, including low- to medium-altitude daytime tactical bomber, high-altitude night bomber, pathfinder, day or night fighter, fighter-bomber, intruder, maritime strike, and photo-reconnaissance aircraft. It was also used by the British Overseas Airways Corporation as a fast transport to carry small, high-value cargo to and from neutral countries through enemy-controlled airspace. The crew of two, pilot and navigator, sat side by side. A single passenger could ride in the aircraft's bomb bay when necessary.
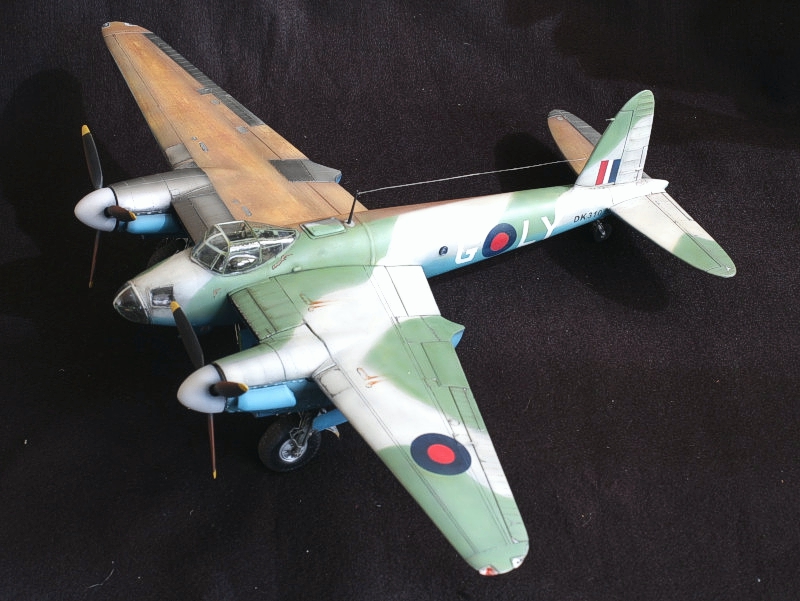
HB-IMO was built under Contract #555/C.23 as a Mosquito B Mk.IV Series II at Hatfield as part of the first batch of 50 aircraft between 11 April and 13 August 1942 and after conversion to PR Mk.IV, was delivered to No.1 PRU at RAF Benson where it received code LY-G. On 24 August 1942, Lt Wool had to shut down the right engine of DK310 on the return leg of a reconnaissance flight to Venice due to overheating. Realizing he could not make it back to the UK, he decided to land at Bern-Belpmoos where the crew failed to destroy the aircraft before the Swiss military took control. This aircraft was subsequently acquired by the Swiss air force for its purpose.
Model
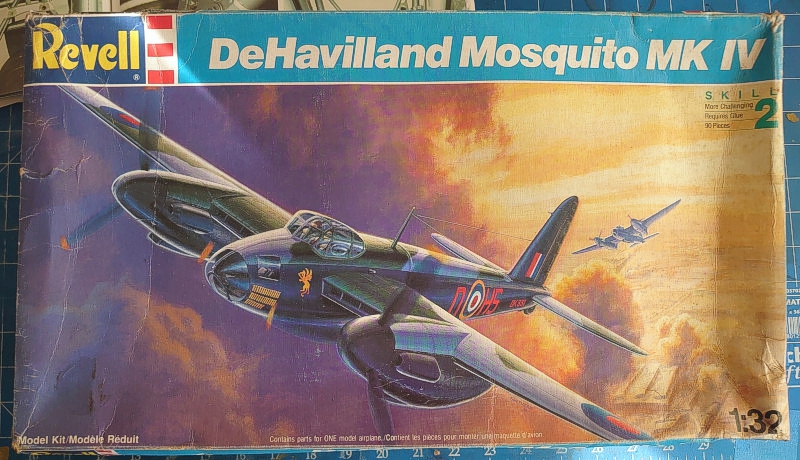
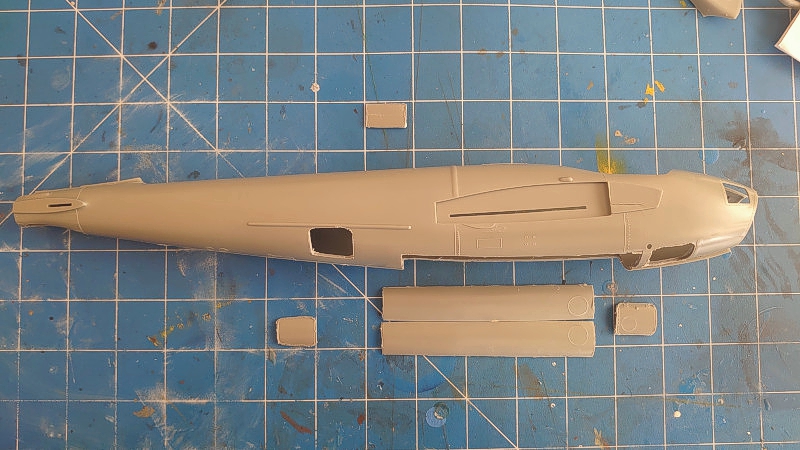
Revell produced this kit in 1971 (https://www.largescaleplanes.com/kitdb/details.php?kit=256). There were a few reboxings by Lodela. The kit is as one would expect, outdated by present standards. The cockpit is simplistic and the undercarriage bay inaccurate. There is no bomb bay detail. The pilot canopy is the early type (which is appropriate for the version I want to build) and the observer's cupola way too thick to let any detail be seen. Raised panel lines are reasonably laid out but various details do not line up. These all had to be re-scribed according to the plans from Squadron Walk Around and details on the internet. The rivet detail is quite accurate and appropriately raised and I chose to keep them. The engines are reasonable if closed and there are no engine bay details. The framework is inadequate. The engine itself is flat on top and not meant to be displayed open. The main parts used were the fuselage, wings and stabilizers. Everything else was scratchbuilt or aftermarket. There is of course the HK Models Mk IV which is about 10 times the cost. It has very rudimentary cockpit detail and bomb bay detail for which the Profimodeller upgrade parts were created. Test shots actually look quite crude and so the total cost on a HK Models Mk IV would actually be quite high.
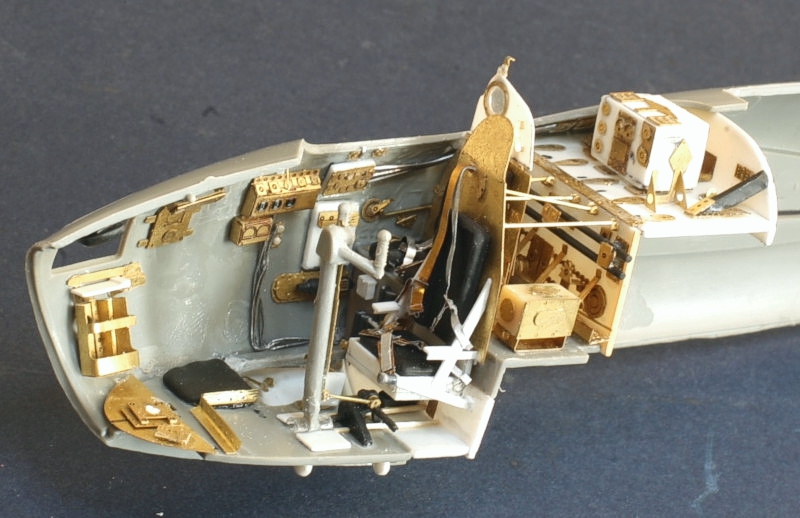
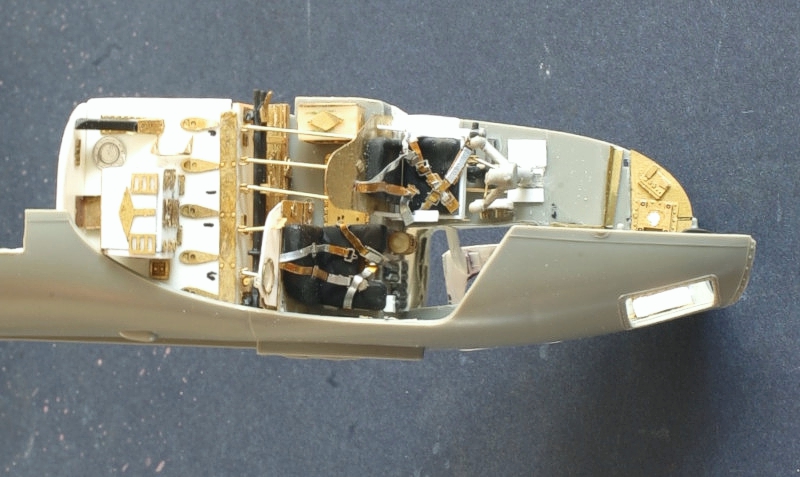
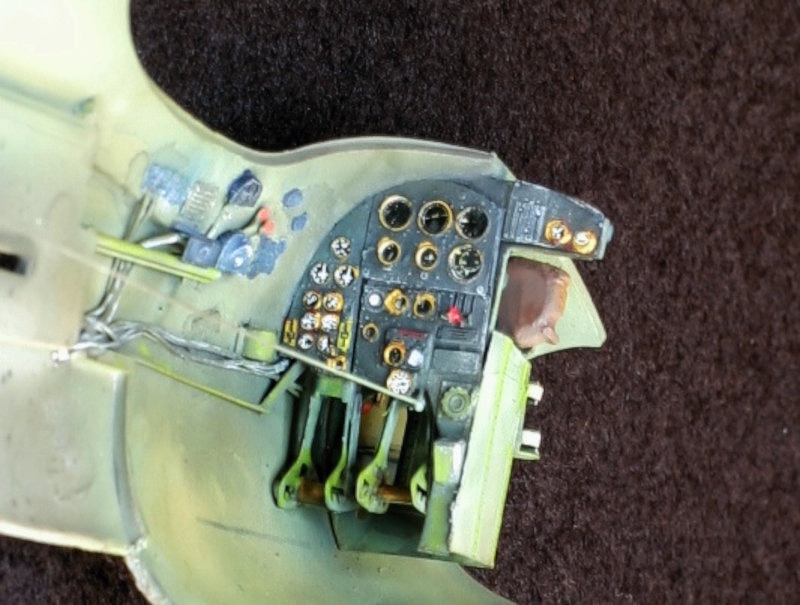
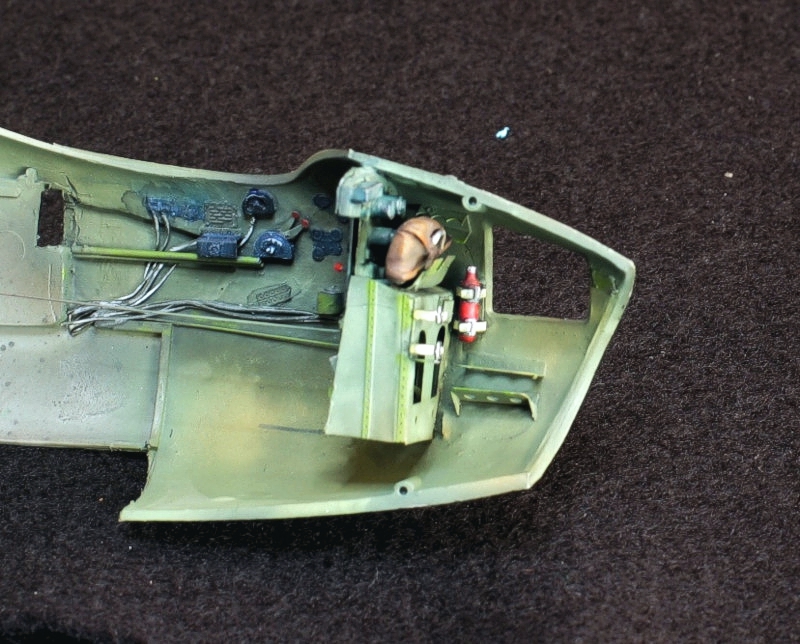

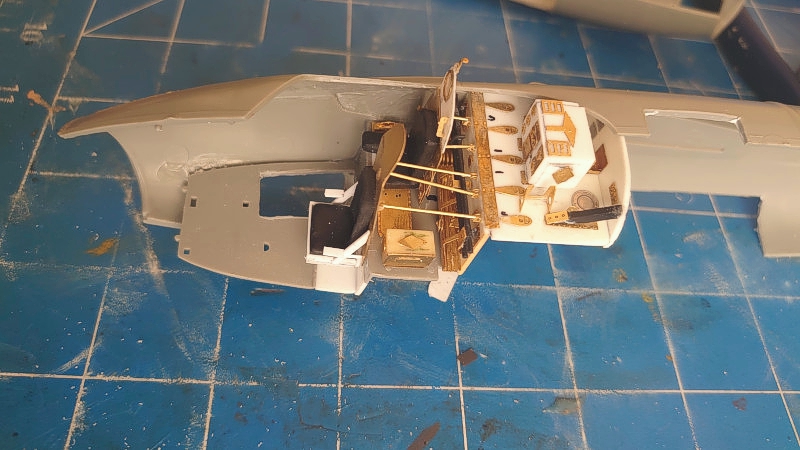
Cockpit
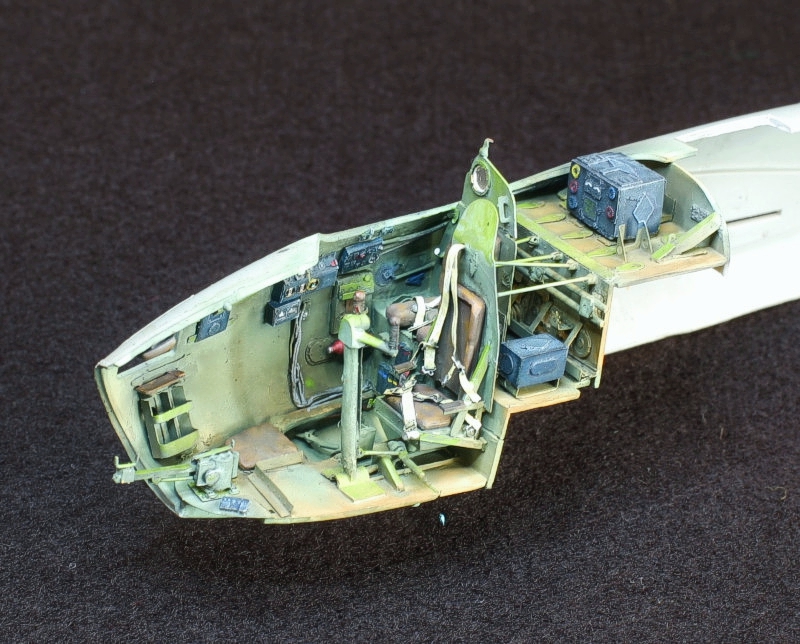
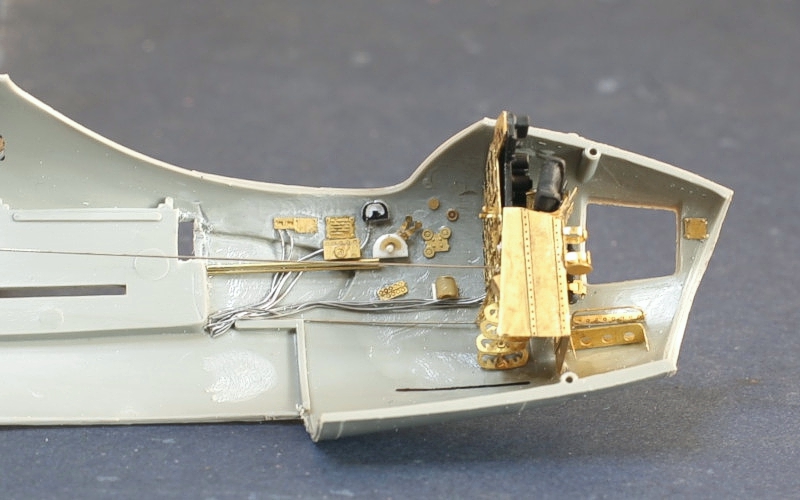
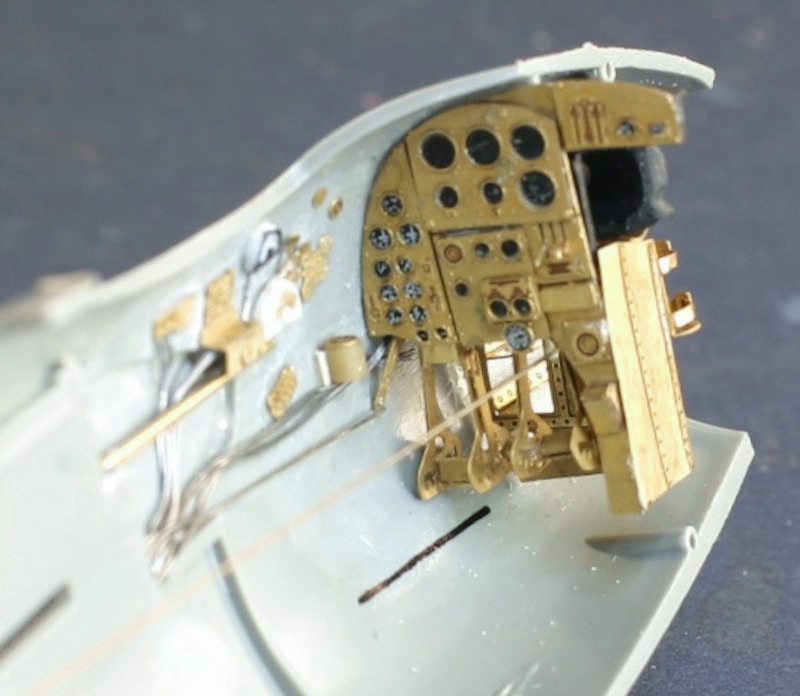
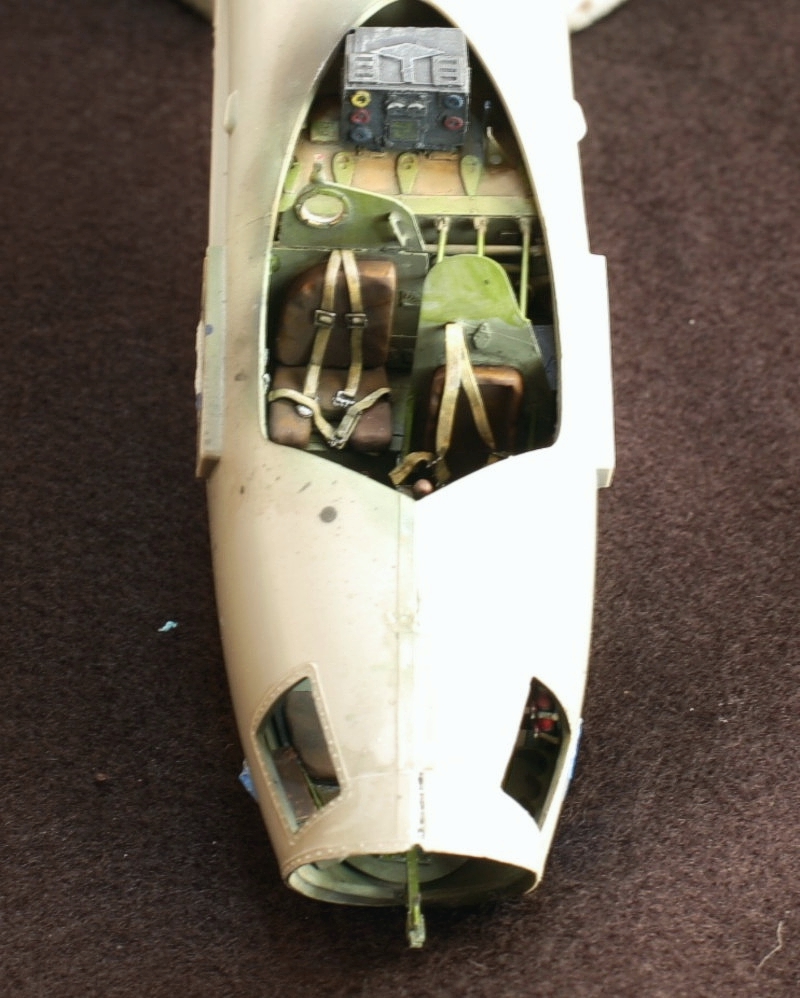
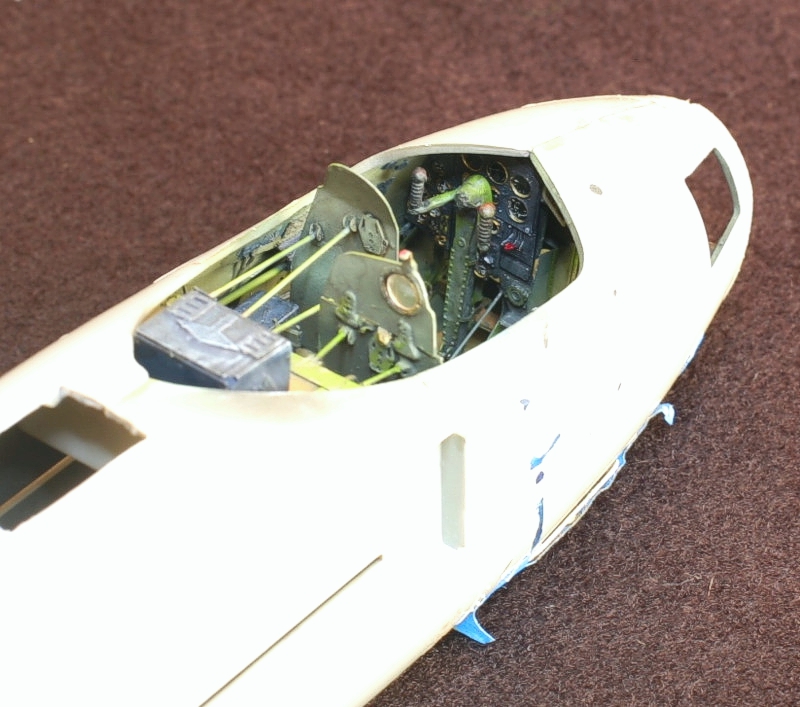
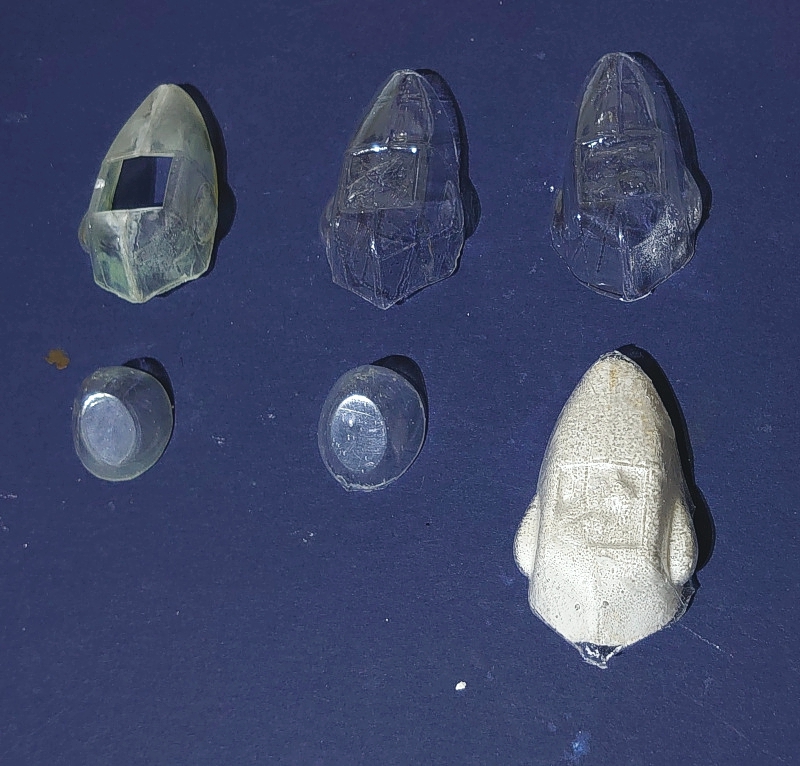
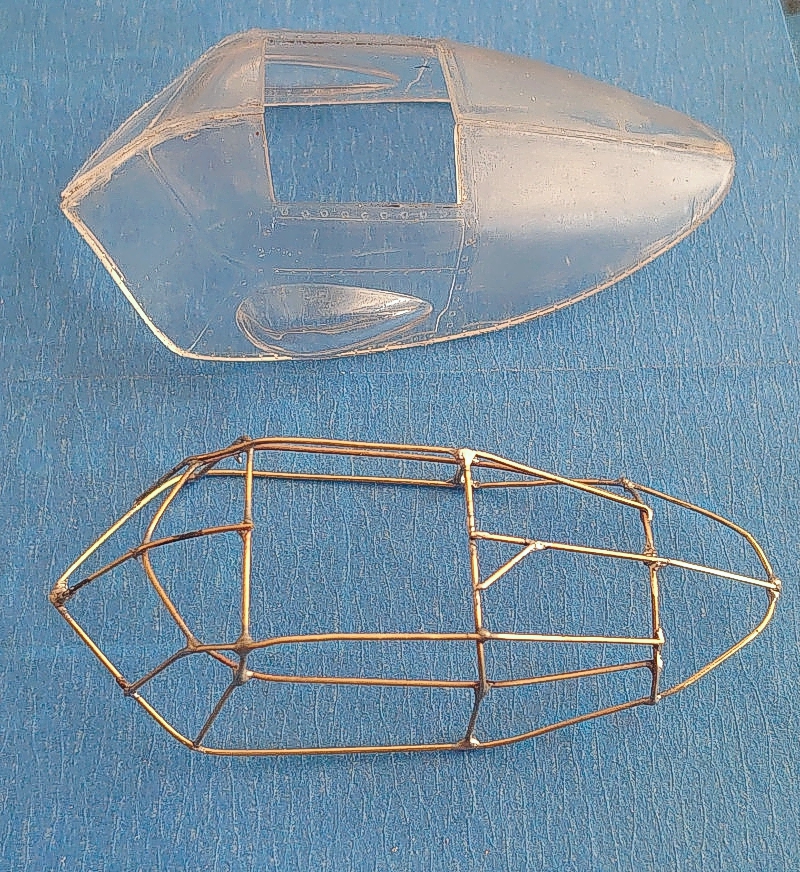
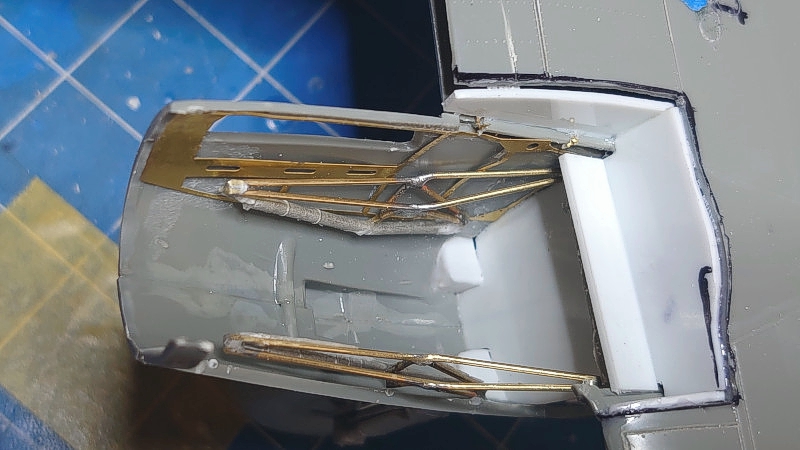
The cockpit is a complete rebuild with no parts used from the kit. The Profimodeller upgrade set is very good but it does not work with the Revell kit without additional scratchbuilding. The first step was to cut out all panels and hatches. This gives reference points into which bulkheads and floors/roofs/ partitions can be made. Radio boxes and general details are built along the way. One critical detail is the framework that goes deep to the canopy. I made this by soldering a framework of brass rod deep to the kit canopy. The canopy is moulded in 2 halves which makes it unusable after gluing together anyway. Nevertheless. it was used to give the dimensions of the framework. With this framework in place and all the major partitions in place, initial work had to be done in the bomb bay as this was the cockpit floor. (This in turn lead to the wing, then the undercarriage and the engine bays before I could come back to the cockpit). I finished all the bits and pieces of the Profimodeller set. Some of these would be modified to fit and there are many spares. The canopy was moulded in two pieces and results in an inaccurate seam down the middle. The bomber’s window and cupola are too thick and would obscure interior detail. I therefore decided to vacuum form new glass over the old transparent parts, and a plaster mould made from the canopy. The instrument panel was incomplete and supplemented with dials from Airscale for the paired engine indicators. Seat belts were made from wine bottle foil.
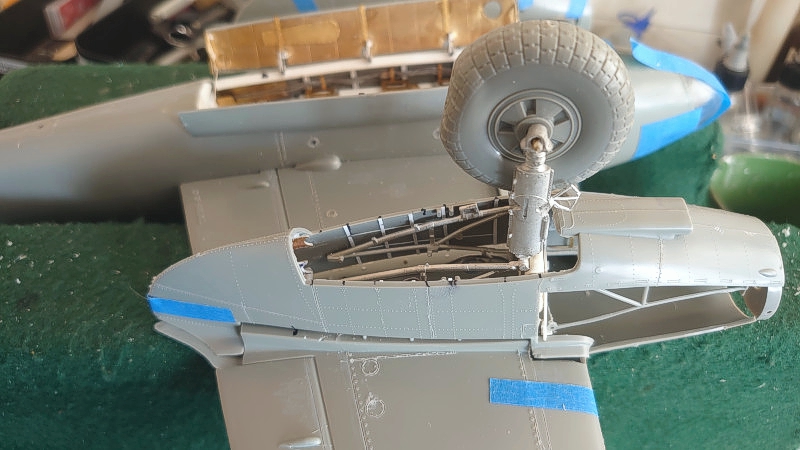
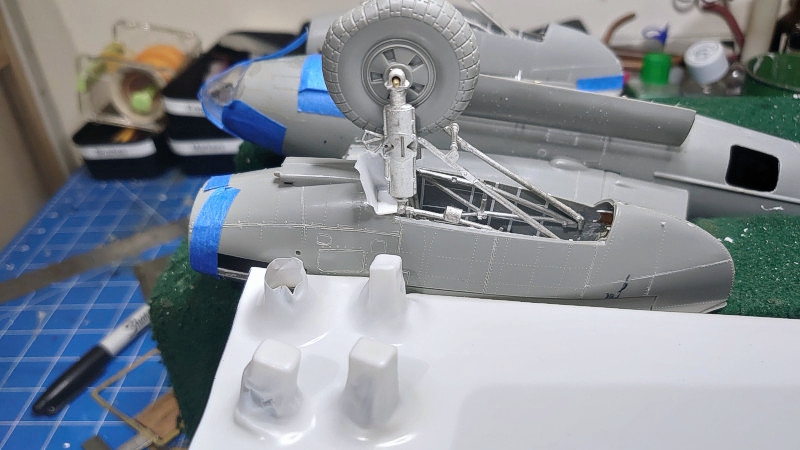
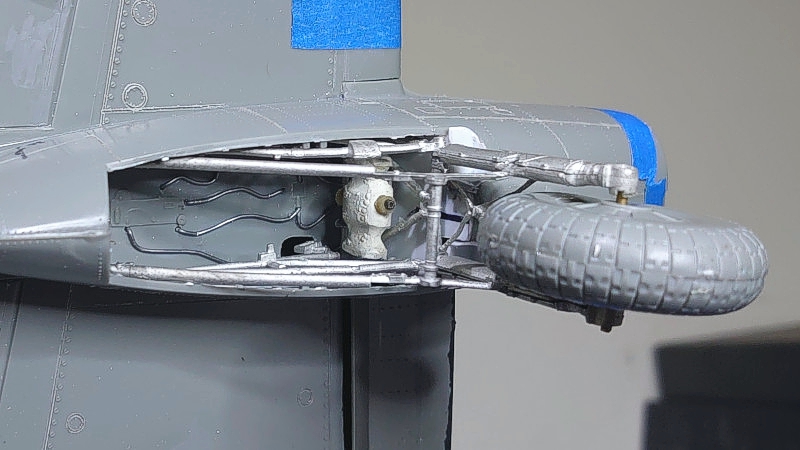
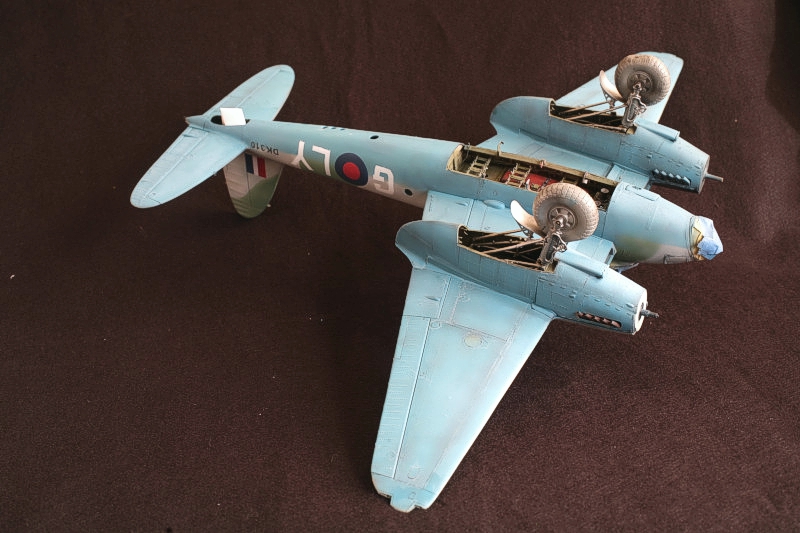
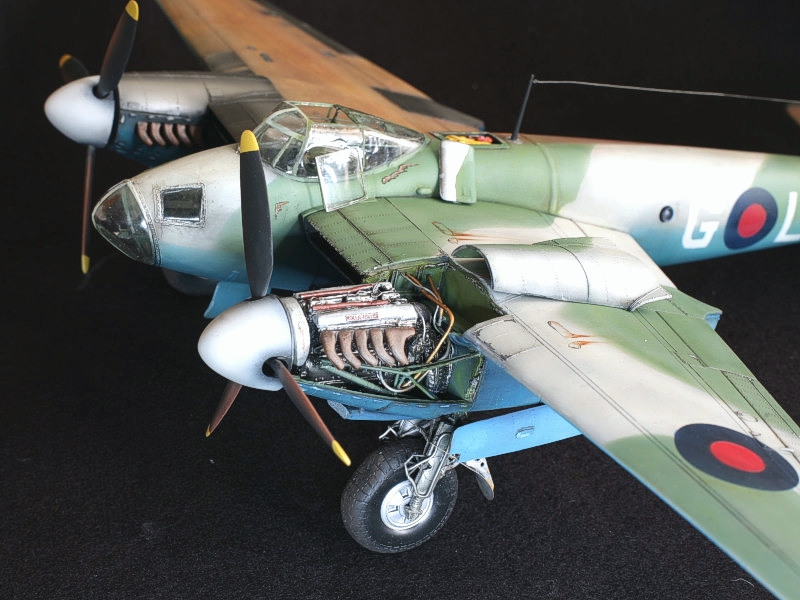
Undercarriage
The kit-provided undercarriage is reasonably accurate. Nevertheless, a kit of this size with its embellishments is heavy and I opted for the Scale Aircraft Conversions DH Mosquito Landing Gear (Revell). This comes with a rear wheel undercarriage strut. White metal does not always work well under weight but for these sorts of double strut closed undercarriage they are quite good. The Undercarriage doors needed some interior detailing and wiring which was done with sheet and strip styrene and solder. I made the auxiliary fuel tanks out of epoxy putty. The wheels were from the kit with a bit of reshaping for the spokes. Weighted effect was done with a hot gun. Brake lines were not visible on early Mossies from my references. Uniquely the actuators for the undercarriage doors are the undercarriage via wires from the undercarriage to the door. I wanted to capture this with fine wire – a lot of the Mossie actuators were wires and rope. The gap between the engine and wheel well was filled in using plunge-moulded scoops. One of the kit mud guards was moved to the rear as the tail wheel mud guard.
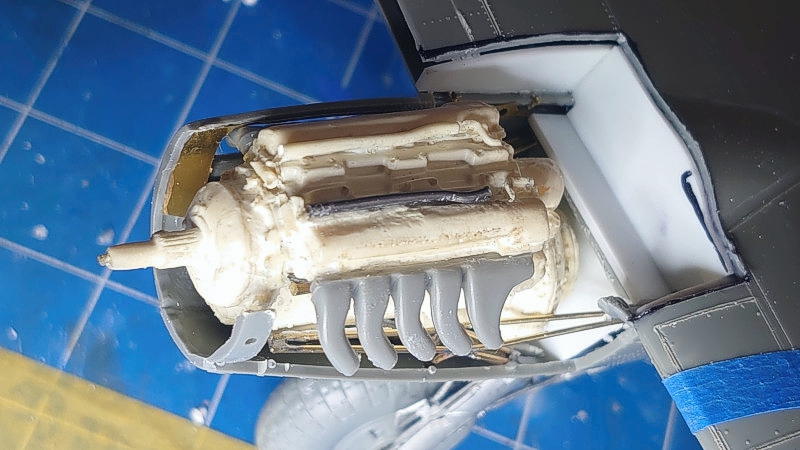
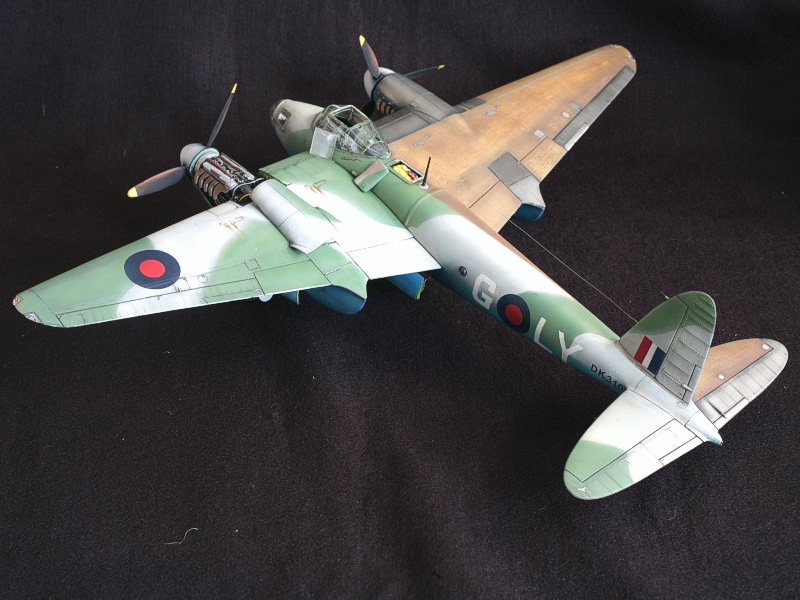
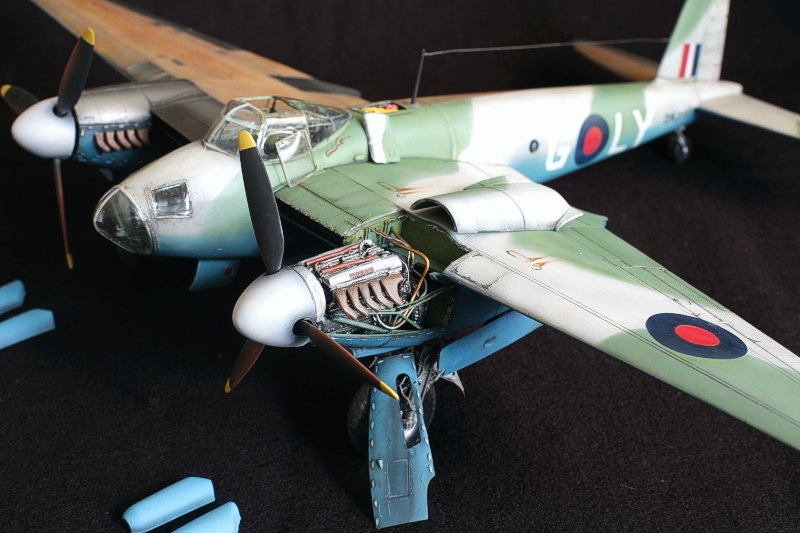
Engine Compartment
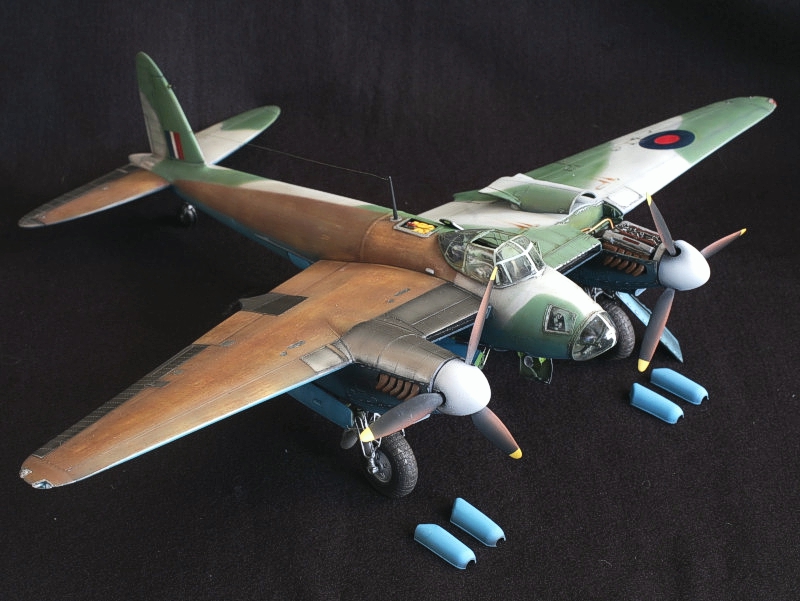
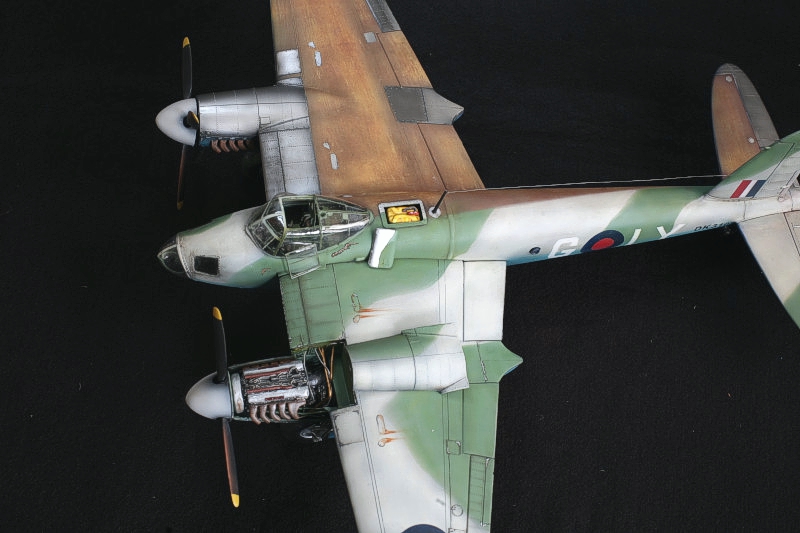
I wanted to show the model with one detailed engine. The port side engine was my own 1/32 Resin Rolls Royce Merlin engine that I sculpted and detailed for my earlier Boulton Paul Defiant build (https://www.largescaleplanes.com/articles/article.php?aid=3289). It is all resin but designed as a generic detail for any Merlin-engine aircraft. I made the engine mounts from drawings and photographs out of brass as it needed to be sturdy to hold up the engine and be accurate in this scale. The exhaust manifold was from the kit and ignition harness was solder wire and the final exhaust shroud was from the kit. All other details around the engine and fasteners came from the Eduard and Profimodeller set but I did not really use much and would say this was not so necessary for this build.
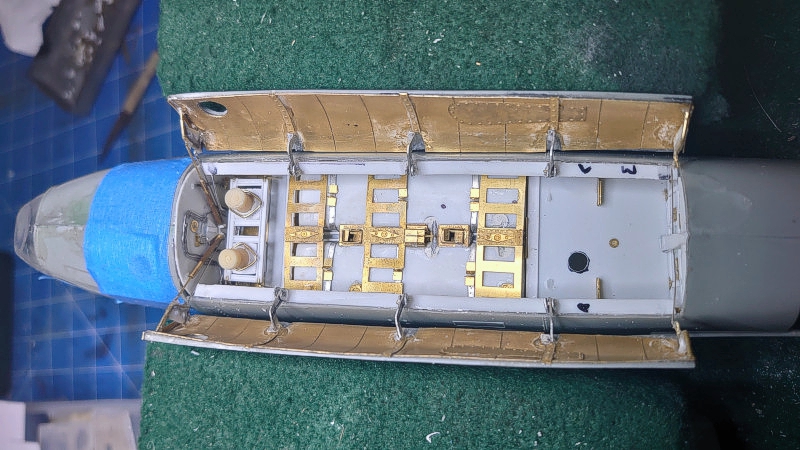
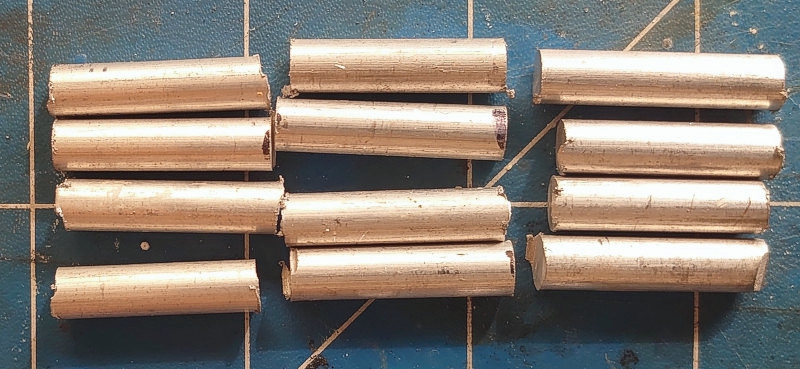
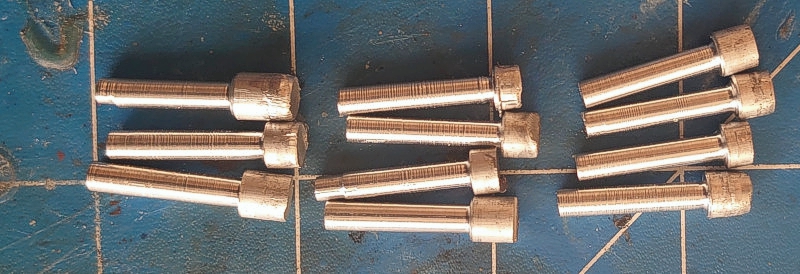
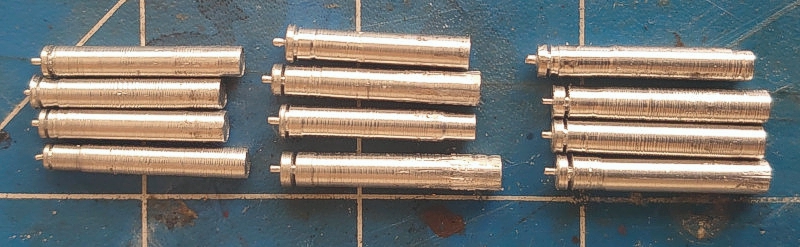
Bomb bay
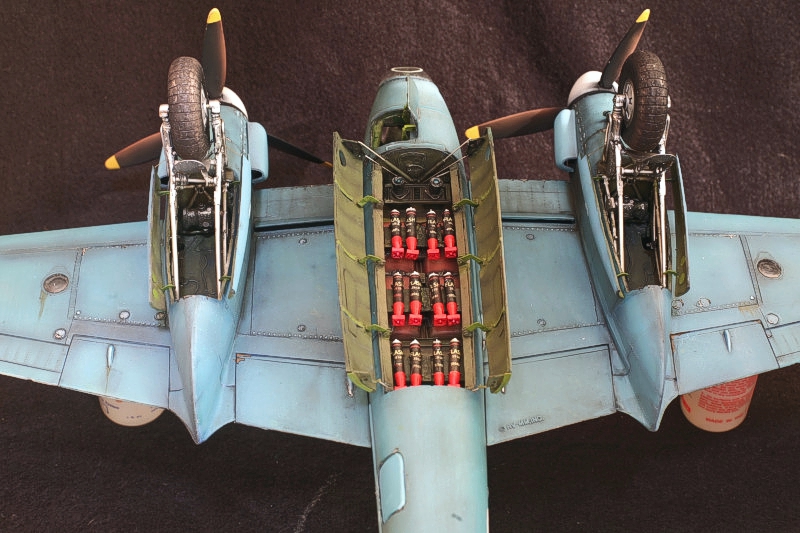
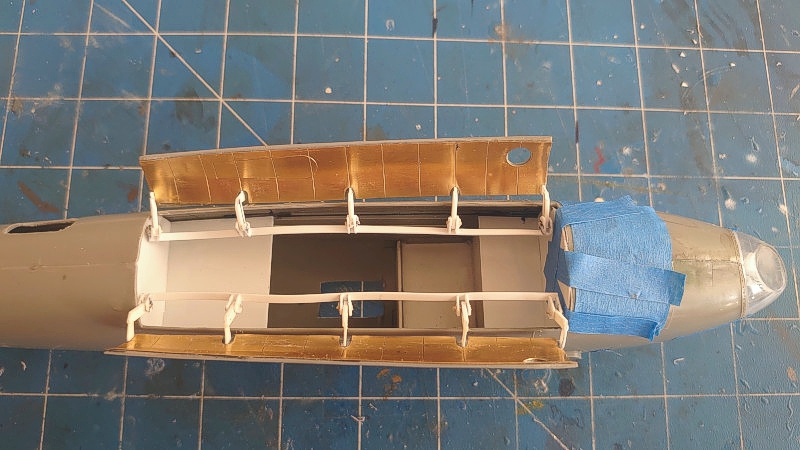
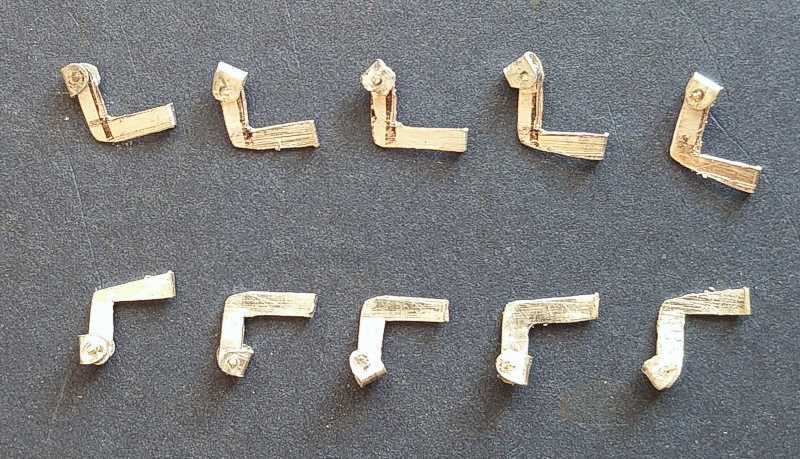
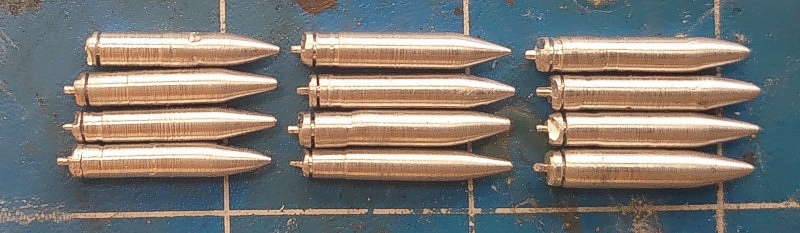
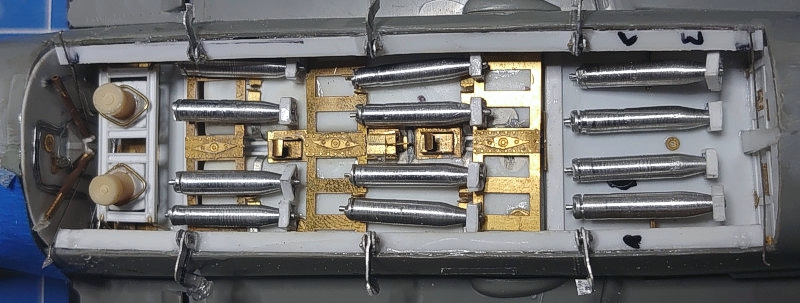
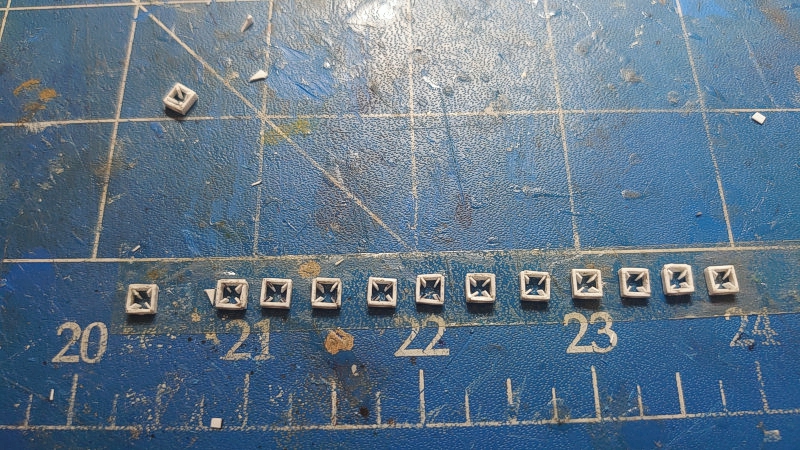
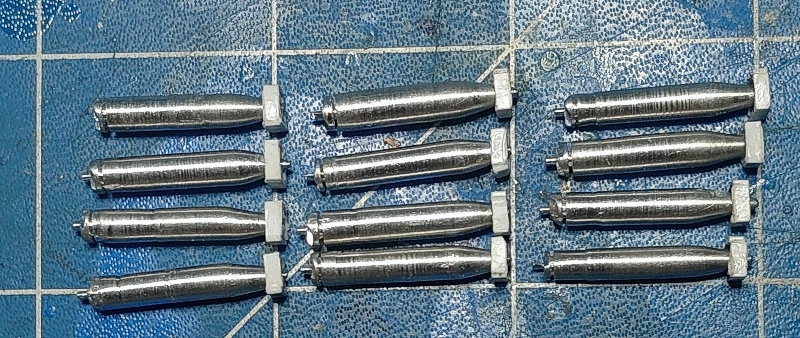
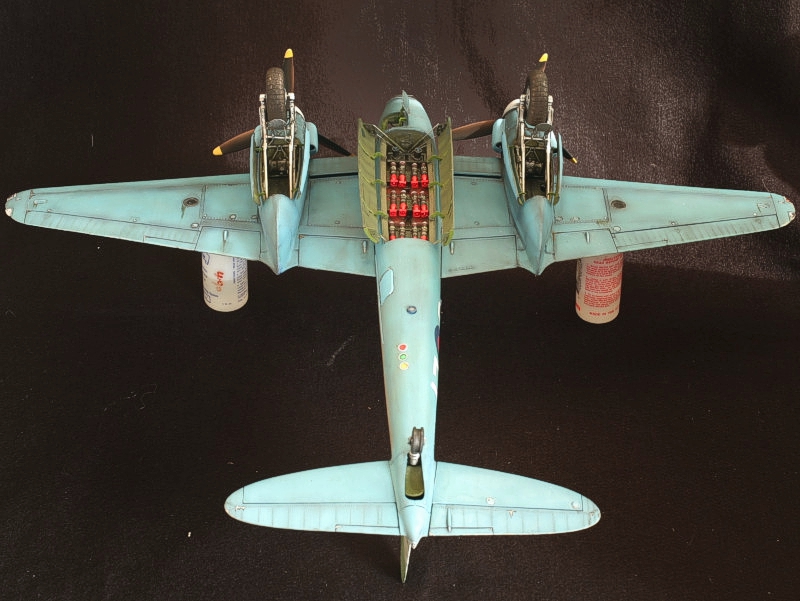
Detailing on the bomb bay was with styrene sheet for the basic structure. The Eduard set was used in some areas but the ultimate configuration of 12 photoflash bombs was not designed to be accommodated by this set. Again, I would not think that is a necessary acquirement. The bombs were scratchbuilt from aluminium stock turned on a lathe and styrene details. The cameras (two in the bomb bay, one ventral astern of the bomb bay and one on the portside fuselage were built from scratch on a lathe. Crew, life-raft and fuselage doors were vacuum formed over the cut-out kit masters. The actuators on the doors were initially made from styrene but fell apart so I made new ones out of aluminium sheet. They actually work but were held apart by the fragile hydraulic actuators.
Painting
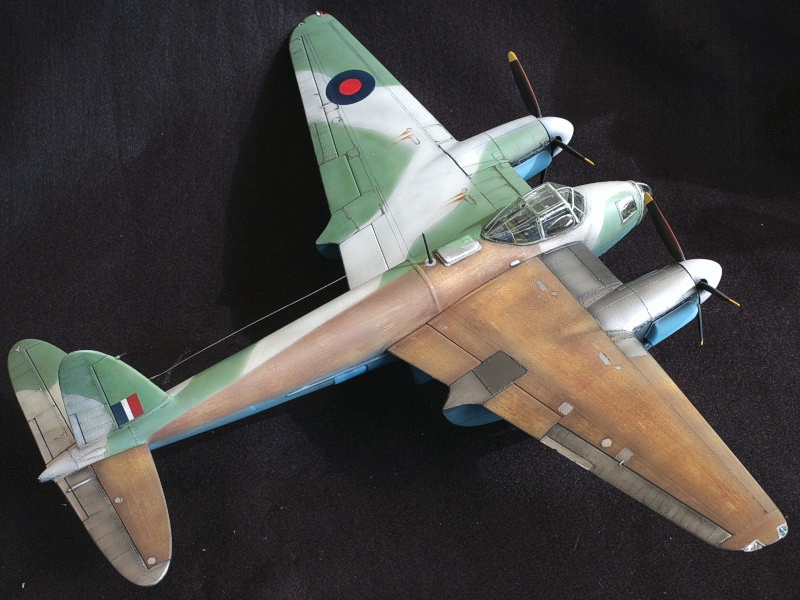
The model was base-painted in Humbrol Enamels, varnished with Future-Tamiya Flat acrylic, weathered with turpenoids and chipped sparingly. I used oil washes for weathering and drop filters for colour variation. Black was used as panel wash. The worn silver was a combination of sponge dabbing, silver pencil and undercoat and masking of silver with black overspray. All markings were hand painted to portray the aircraft DK310 which was delivered to No.1 PRU at RAF Benson where it received code LY-G. The masks were handcut from vinyl or masking tape.
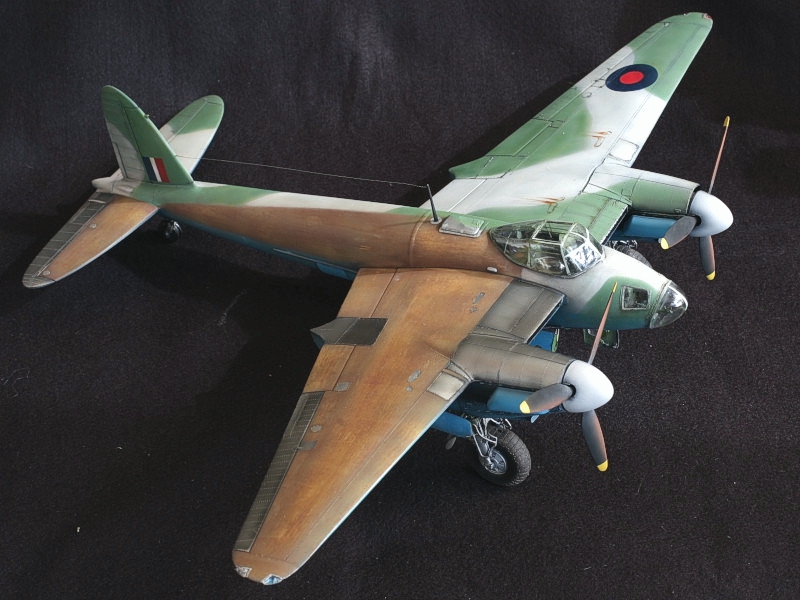
According to Paul Lucas excellent Combat Colours #5 (Mosquito PR and Bombers), it was decided that the early production B Mk.IV and PR Mk.IV was to be painted in the then newly introduced Day Fighter Scheme of the upper surfaces painted in Dark Green and Ocean Grey with the under surfaces being finished in Medium Sea Grey whereby the PR Mk.IV in PRU Blue on the under surfaces. Despite the agreement to produce PR Mosquitoes with the Day Fighter Scheme on the upper surfaces, this does not appear to have happened as when the first PR IVs began to appear in April 1942, they seem to have done so in a variation on the scheme applied to the PR Is. This scheme is said to have been Sky Grey and Dark Slate Grey on the upper surfaces with PRU Blue on the under surfaces. The source of this information is a former DH employee who made a model of a Mosquito at the same time as the PR IVs were being built in 1942, using the same paint which was applied to the real aircraft at that time! Paul then explains in detail that DK310 was painted in this scheme. Why this scheme was applied is unknown, but Paul’s theory is that there was some problem with the supply of the correct paint as Ocean Grey was a relatively new colour in April 1942 which might not have yet been available in quantity and Sky Grey and Dark Slate Grey would have been the closest colours which could be obtained in quantity at the time.
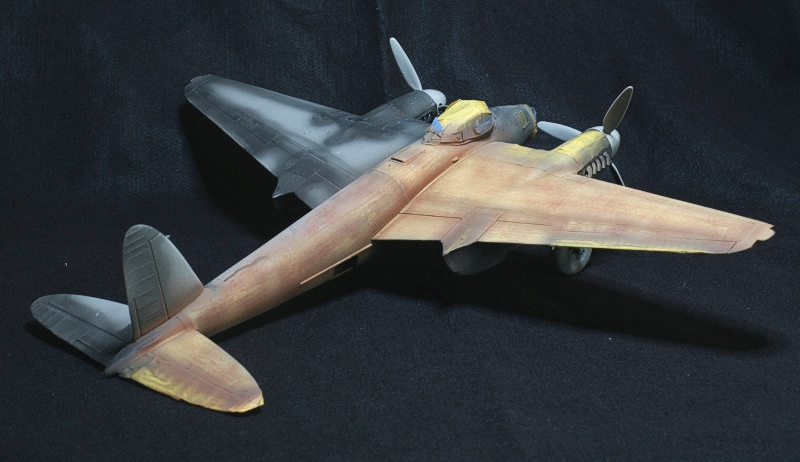
A special feature of my model is the wood pattern and exposed metal on the upper starboard surfaces. This was done using an airbrush through a mask with Alclad metal areas. I believe the final effect is more authentic than the decals that are commercially available.
Conclusion
This is one of the nicest old-tool 1/32 Revell models from the seventies. Having built and (made a mess of) one in the eighties I am really glad to have the opportunity to take another crack at it. The result is very satisfying, and I believe to be accurate. I did use a lot of aftermarket parts on it, but these are designed to be used with the Hong Kong Models kit of the Mk IV which costs 10 times the Revell kit. I do not believe the HK Models kit would turn out that much differently from this one and I did it at a fraction of the cost. At the very least it captures something of an age of modelling where things were more challenging for modelling in general.
References:
- Mosquito Walkaround from Squadron/Signal Publications
- Aircraft Anatomy from World War II from Chartwell Books Inc
- Cockpit from Airlife
- Allied Aircraft Piston Engines of World War II from SAE International
- The Mossie in Duxford
- Various photos on the internet
- The Airfix Mosquito I built earlier
Aftermarket parts:
- Profimodeller Mosquito Cockpit for HK Models Kit – needed
- Scale Aircraft Conversions DH Mosquito Landing Gear (Revell) - needed
- Profimodeller Mosquito Bomb Bay for HK Models Kit- not needed for this version
- Airscale instrument dials used for the engine dials which seem to have been missing from my Profimodeller set
- Mastercasters DH98 Etched grill set – not really needed
- Eduard Mosquito Mk IV exterior/engine – not critically needed
© Suresh Nathan 2021
This article was published on Tuesday, May 04 2021; Last modified on Friday, May 07 2021