
Hasegawa 1/32 P-51D Mustangs Part 1
By Chris Novak

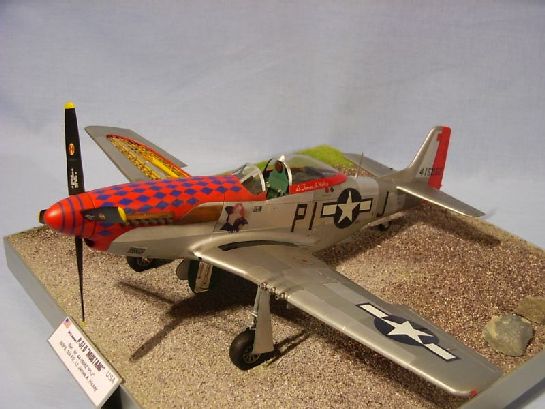
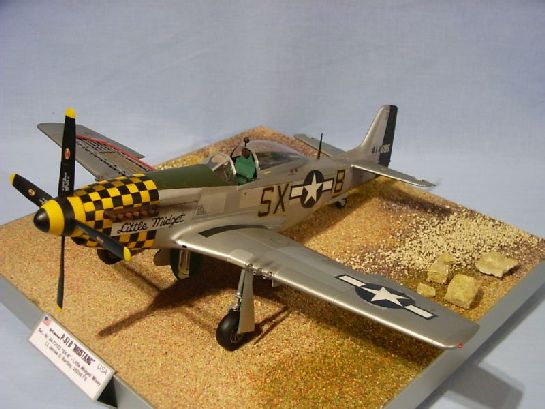
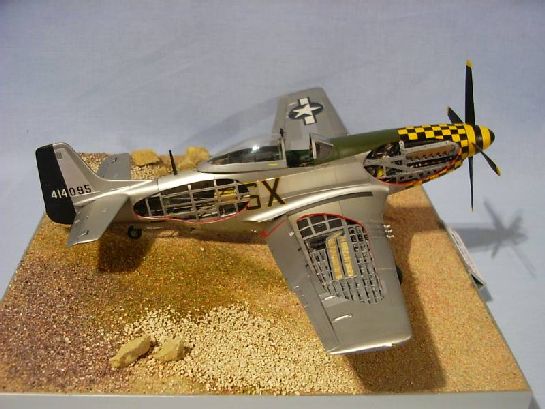
After having finished the "Silver-Bubbletop-Jug-project" earlier this year and getting a kind of routine with the NMF I was thinking ´bout what to start next. The Mustang has always been one of my favourite WWII planes (in my eyes the most beautiful fighter plane because of it´s wonderful outlines OK, OK, Brian's Spitfire comes next ;-) ) and although I have two green cammoed stangs in my collection (including Bud Anderson's "OLD CROW) I thought the time has come for a "silver-stang".
Unfortunately late in August, after a visit at Peter Randall's great site (www.littlefriends.com) with lots of beautiful Mustangs for much more than one modellers life and right before starting with the first one the insane idea of a combined "Thunderbolt and Stang"- display at our clubs next expo while the "Modellbau Bodensee 2004" at the weekend of 19/20/21 November came into my mind and after checking the time plan for being ready just in time (nearly three months?..more than enough!?!?!?!) the decision was made: alea acta est...this will become a "three-silver-stang-marathon-build !
I had enough HASEGAWA Stangs in the closet to get started whereby it´s important to say that this three Stangs were´nt build simultaneous, on the contrary one kit were started while the one before was ready to be painted and needs it´s time to dry so I had the best result of using my time left and also an effect of learning some tricks while building one bird which I used at the next one.
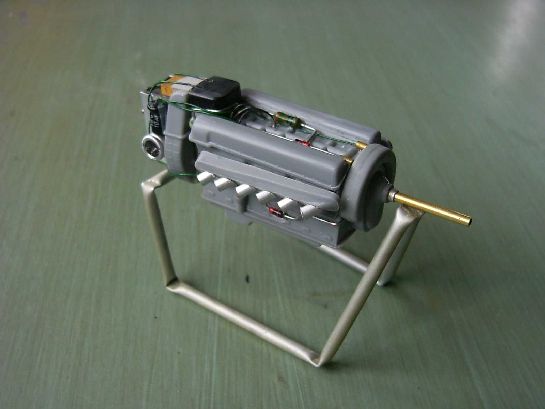
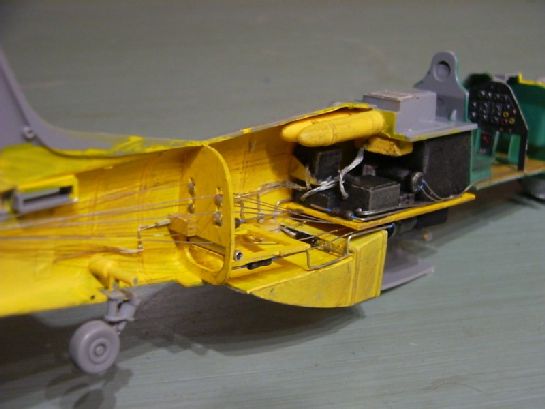
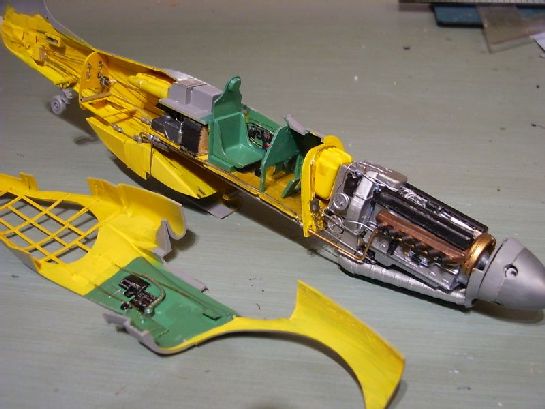
Each bird was started as usual with the motor (including a little electro-motor inside the kit's Merlin), adding some detailing like replacing the kits exhausts with short aluminium tubings and doing some wiring.
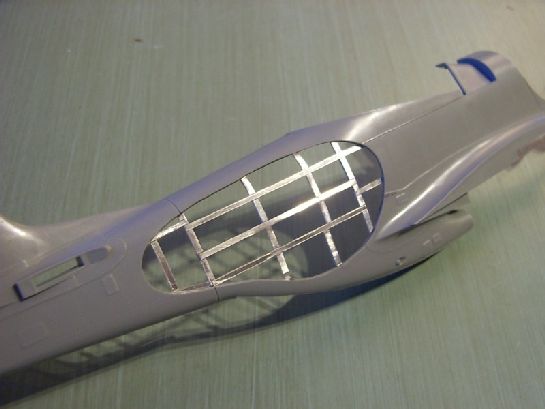
The cockpit followed next, then construction of the cutaway area of the fuselage started. Contrary to the normal technique I use for the fuselage ribs by makin them of modelling-plywood this time I used small stripes of aluminium for the Stangs construction-details, this made it easier to work on the inner side of each fuselage halves and looks more realistic than painted wood cause it´s real aluminium.
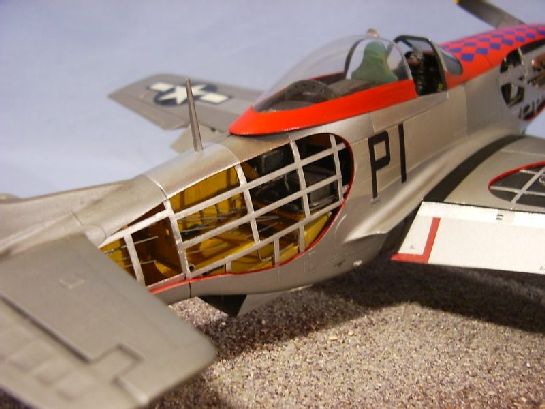
After filling the portside-half with interior like radios, oxygen bottles, wiring for the rudders and doing the paint job the fuselage halves were ready to be mated.
© Chris Novak 2004
This article was published on Wednesday, July 20 2011; Last modified on Saturday, May 14 2016