
Revell 1/32 P-47D "Bubbletop" Part 2
By Chris Novak
Part II: Fuselage and wings
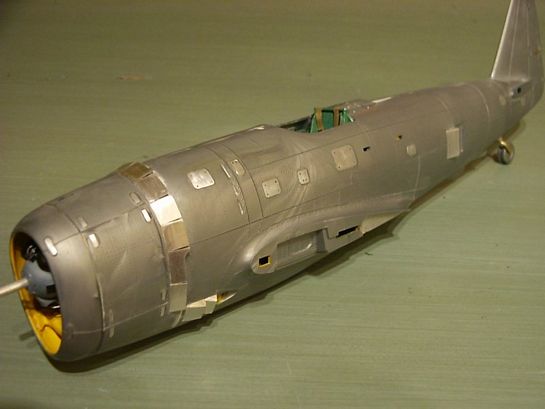
Because the REVELL Jug is one of the older molds on the market the panel lines are raised and so they need the most hated work of a modeller: sanding them down and rescribing them. OK, after a few hours rescribing is done but the REVELL kit can bear a little bit more of detailing to look accurate. The following pic shows some areas which will be modified:
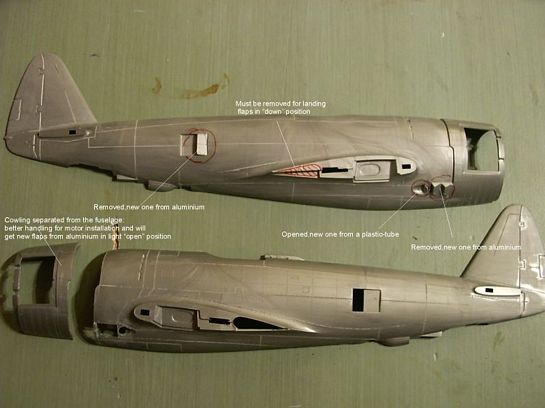
- The cowlings are cutted from the fuselage halves for better handling and motor installation, also the cowling will get new flaps from aluminium in "light opened" position
- The main vent on the after fuselage is also removed and will be replaced by a aluminium one
- the small vents after the cowling on both sides of the fuselage are also removed to be replaced by aluminium-vents
- the exhausts are drilled out to be replaced by a small tube with the right diameter and filled with a opened flap
- Important: because we want to show our Jug with landing flaps "down" the area at the wing root where the flaps fit into the fuselage and the upper wing needs to be reworked by removing the marked area. The next pics show the finished fuselage modifications

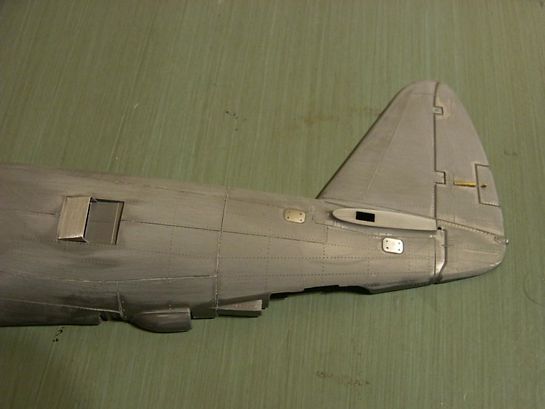
Visible on the next pic: the in-molded small cover for the vertical-rudder trim tab ( both sides) is also removed and replaced by a small piece of a brass tube, sanded to the right shape. After finishing the paint job a small piece of wire can be inserted to make it look right. This can also be done with the trim tabs for the horizontal rudder, although they are on the underside.

Now its time for some real modelling fun:
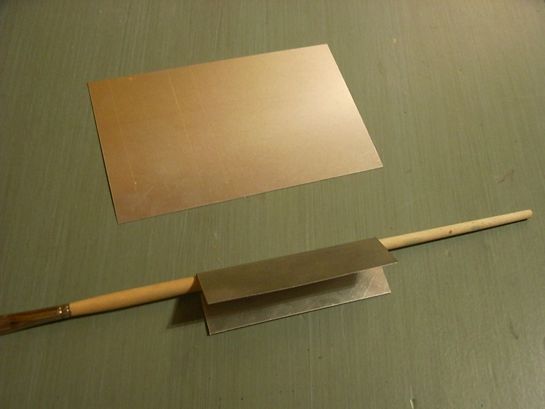
After rescribing the panel lines on my first jug and getting nearly mad by trying to scribe those many access panels on the jugs surface I was searching for an easier and better looking solution. I checked my references and many pics in magazines, books and the internet and found out that some panels, especially those on the fuselage, are not really close to the surface of the plane, so why not try to make the models access panels look the same? That´s how I developed what I call the "hot-metal-technique" which I will describe now while modifying the wings. All you need is a hot soldering iron with a very small tip.
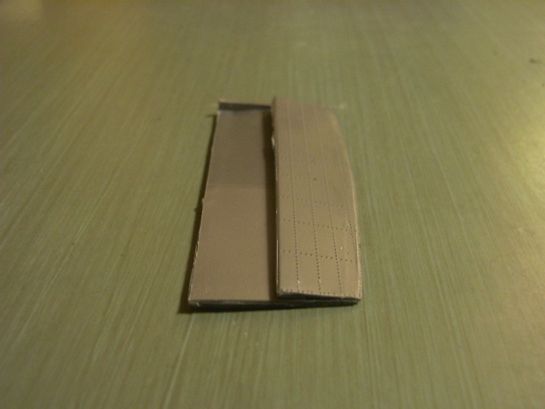
First we cut some small pieces of modelling aluminium (thickness ca. 0,2 mm) to the measurements of the panels we want to remove. The angles are rounded by sanding with 280 sanding paper. Then these small panels are carefully applied with only a tiny drop of super glue onto their places.
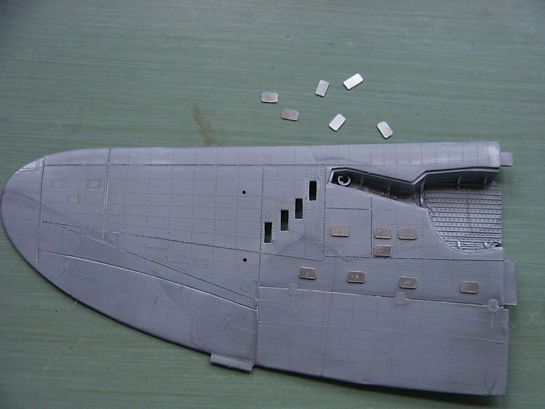
Then we need the hot soldering iron: we put the hot tip of the iron onto a panel with a little pressure for about 3 -5 seconds, depending on the heat of your iron. What happens? The iron heats up the aluminium panel, the panel heats up the plastic and begins to sink into it. Be careful with the pressure you put on the panel, it should only sink into the plastic for about the half of it´s own thickness! And don't push with an angle ´cause you will replace the panel and have some areas to be reworked with filler. I f you have a scrapped kit it´s recommended to do some practise before doing this on your actual build!

The next step is numbering the panels with a permanent pen, one number on the panel itself and the same number right above on the wing. Then the "in- melted" panels are carefully removed with the tip of a x-acto without bending them too much ( that´s why you should not use too much superglue to fix the panels on the plastic)

As you can see the hot aluminium left a edge of melted plastic around the panels sinkmark which now can be removed with a sharp knife, finally make the surface clean by sanding it with 320 - 400 paper. Then the alu-panels can be applied again on their places ( did you number them?) with super glue, don't worry if they are a little bit higher than the plastic surface, that´s what we wanted! To make them a little bit more flat and to break the sharp edges of the panels you can sand them very carefully with 4oo - 6oo wet-paper, finally add some screw holes or access pins where needed, e ´ voila…that´s it. This technique works with any kind of panel, it´s up to you to give an aluminium piece the right size and shape to be applied. Try it, it´s real fun! Next pics show upper wing and lower wing after getting the "aluminium inlays"
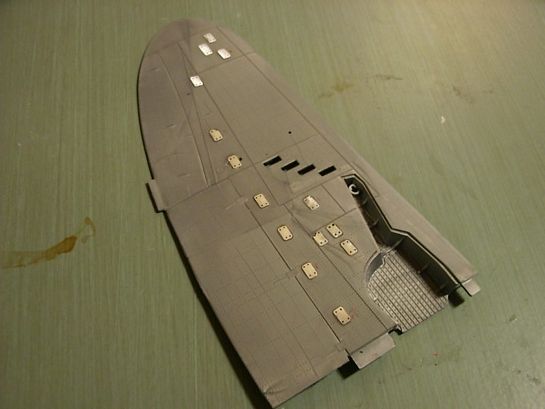
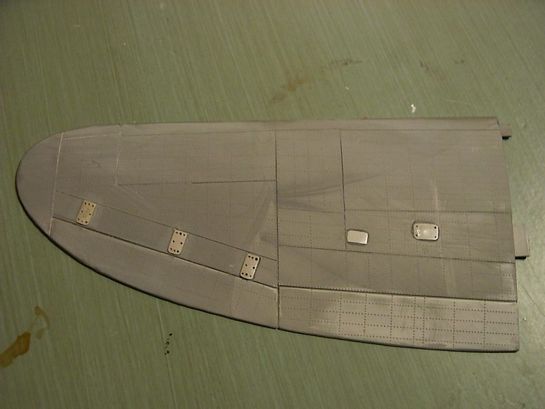
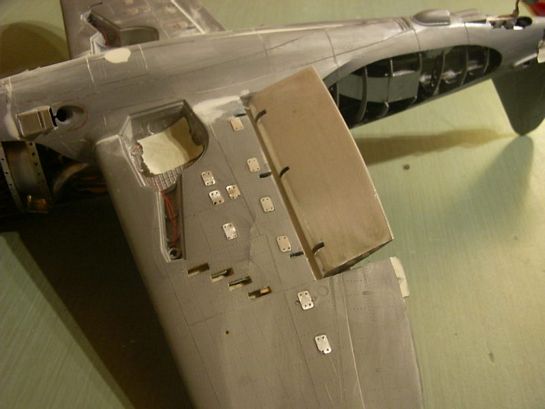
Also the big panels on the fuselage are made of alu and "melted" into their places.

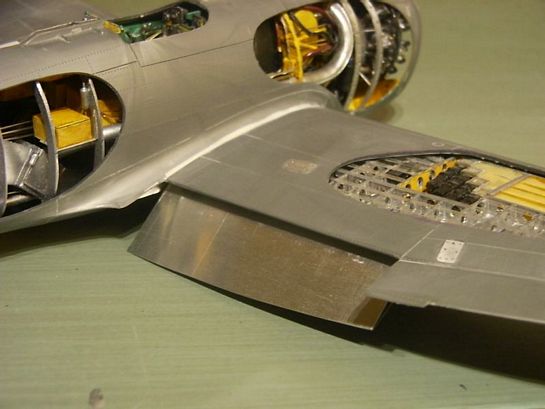
Here´s the modified cowling with new flaps of...yes, aluminium and as you can see even smallest parts like the buckles of the cowling can be applied with the hot iron ( as said before depending on the tip of your iron).
The next (and hardest) part is to modify / replace the kits landing flaps to be shown in a down position. Problem here: the flaps of the original Jug are formed like a little wing itself, fitting perfectly into their place at the end of the wing. If you cut the kit´s flaps off from the upper and the lower wing half you may notice that the upper half of the flap is too short to be shown in down position.
You can try to fix this problem with lots of filler and sanding-sessions until it fits, but the result isn´t really satisfying. So I decided to make new flaps from a piece of aluminium. After cutting it to the right size I bend it carefully over the stick of a brush, and because the stick gets smaller at the end the flap will do so too and get its aerodynamic shape. The ends of the aluminium piece are bent close together and the original flap is used as a template for the right shape. When the new flap is perfect in size and shape the ends are glued together with a good 2K-epoxy glue. Note: the inner areas of the flap where the epoxy is applied needs to be sanded with 22o paper to make the alu`s surface a little bit rough and give the glue a good adhesion. After the glue has dried the whole flap can be filled with putty or any other filler to close the sides of the new flap.
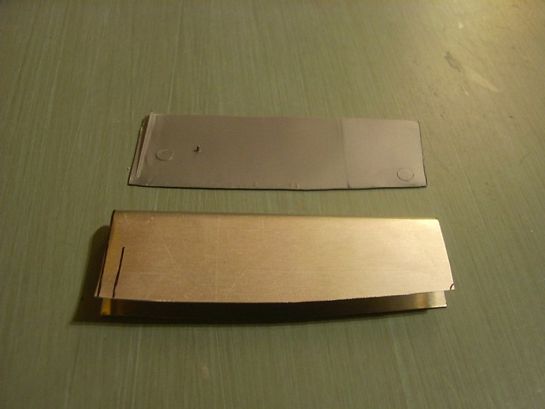

Next two pics show a test fit of the new aluminium flap
The flaps are painted separate and mounted when the paint job of the bird is done. Note the opposite openings for the extension mechanics, to be inserted after the flaps are mounted.
© Chris Novak 2004
This article was published on Wednesday, July 20 2011; Last modified on Saturday, May 14 2016