
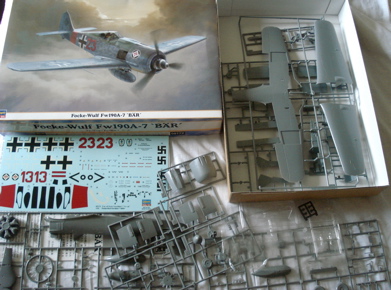
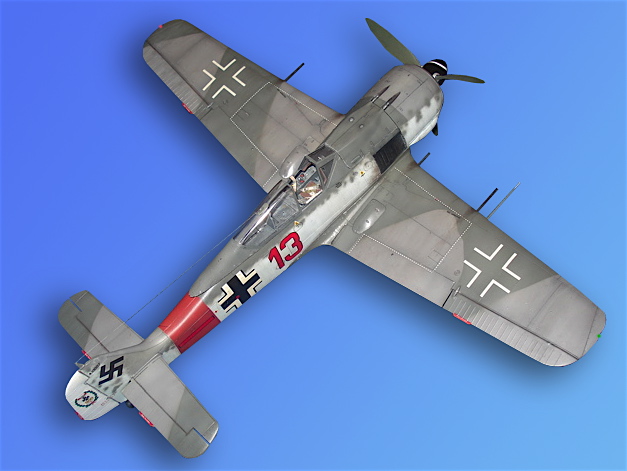
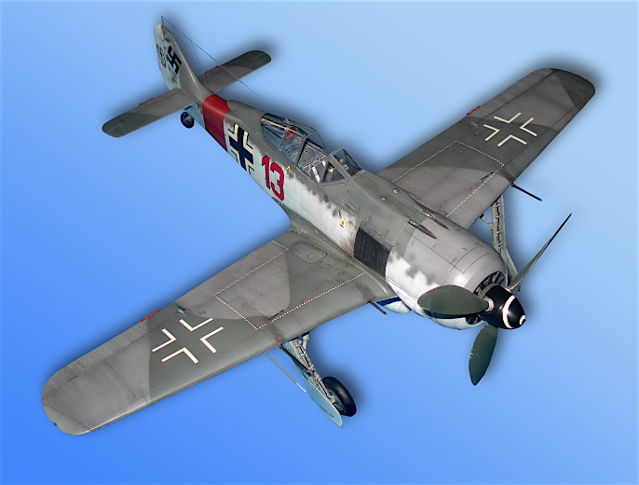
Hasegawa 1/32 Focke Wulf Fw 190A-7 "Bär"
By Raul Corral
Built out of the box!
Alright, here you go, my first submission to LSP... How to start, well what about describing the kit?
As usual I really like the "old" 1/32 Hasegawa planes (I said "old" because it has been a while since this kit has been released). They are very well detailed (I like specially the crisply engraved panel lines) and normally you get them at normal prices. I got this one years ago for a reasonable spending and I was very satisfied with what I found inside the box. To be honest I found Hasegawa to be better in this large scale than in 1/48 (where they are overpriced). In 1/32 they offer excellent kits, affordable, simply to build and accurate in outline. For this particular kit, you will be able to build two different Fw 190A-7s flown by the famous german ace Heinz Baer. An additional A-7 colorful marking for a plane of the Stab. JG1 is also in the box!
This kit had an amazing box art that caught my eye straight away. I was also a fan of the pilot, Heinz Bär, a truly remarkable Luftwaffe ace, that was not very popular among the high officers but was on the other side admired by his pilots. He finished the war with 220 aerial victories, 124 over Wester-flown aircraft (he was also shot down 18 times!). He flew more than 1,000 missions and achieved aerial victories in all the fronts: over European, African and Russian skies. An absolutely record in hands of very few pilots... By the way, he was also one of the best jet aces of WWII, flying the Me 262, and achieving with it 16 aerial victories!
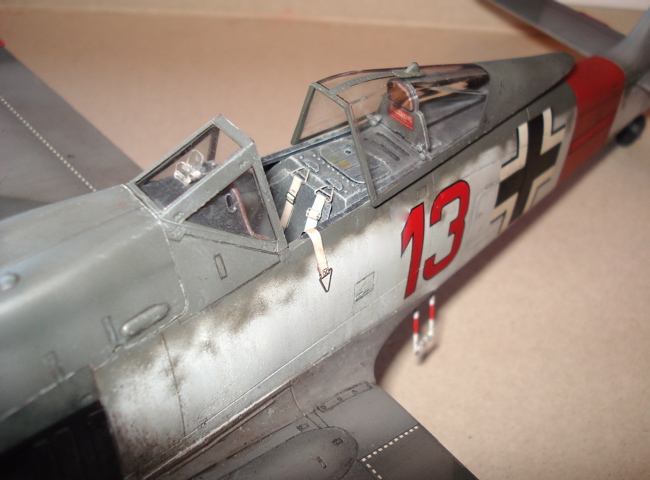
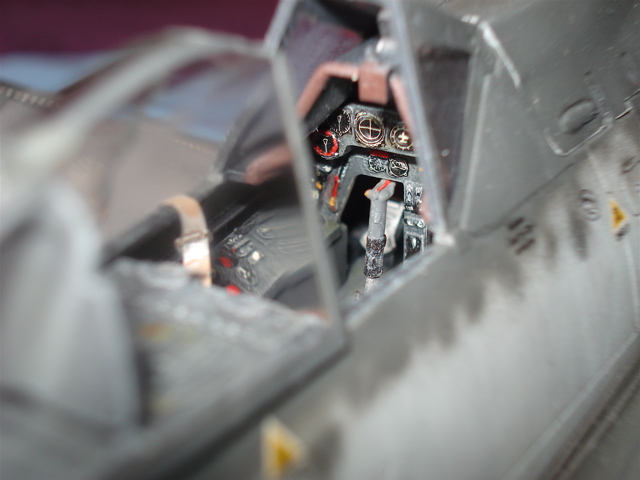
Well, back to the kit, the construction was very straight forward, staring with the cockpit. The general level of details is more than OK and you can get very good results using even the decals for the control panel provided by Hasegawa. All what I added was the seat-belts from Eduard and some cables here and there, homemade with plastic.
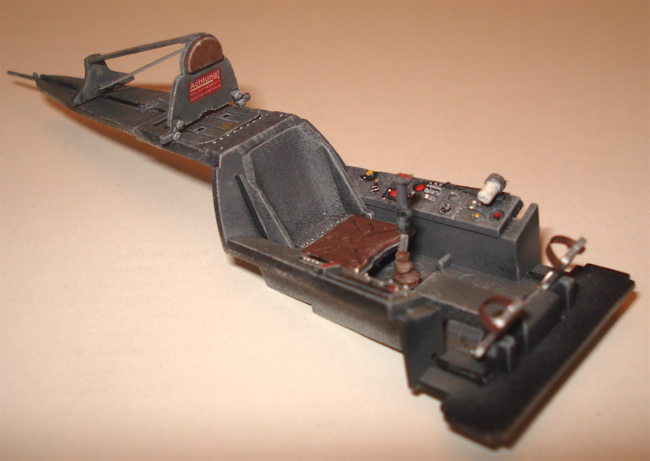
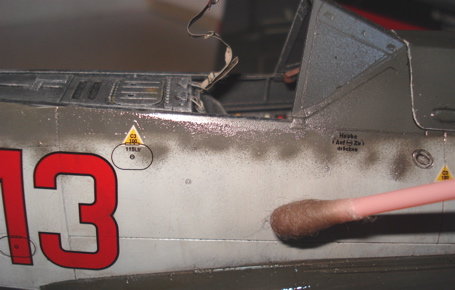
First I painted all in overall Dark Grey from Gunze Sangyo. Then I applied some light hands of bright grey dry-brushing carefully and highlighting slowly all the fine details of the cockpit. Finally I used the decals provided in the box, for the instruments and back of the seat. The rest of small details were picked up with a fine brush and Humbrol colors: red, white, black, yellow... A little bit of dirty and chipping added some extra realism.
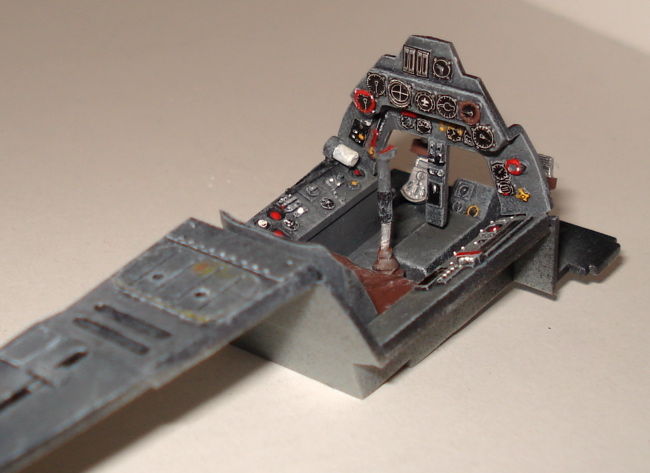
Once installed it looked really good (to my eyes at least) and I am happy I did not purchase any additional aftermarket parts...
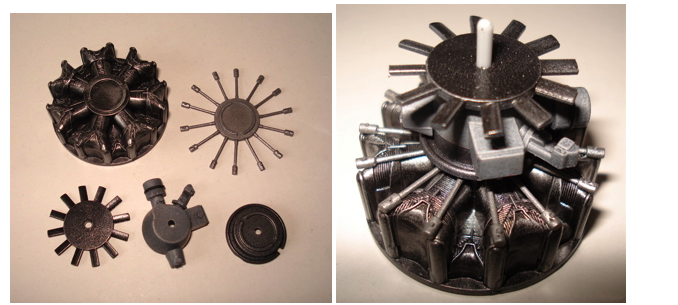
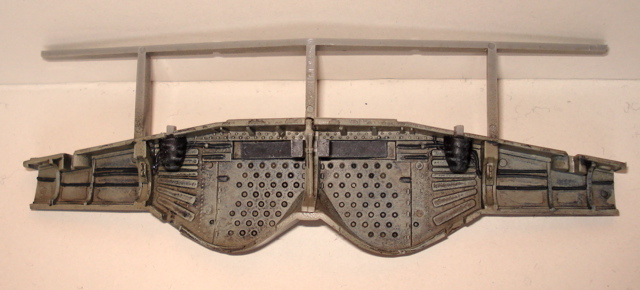
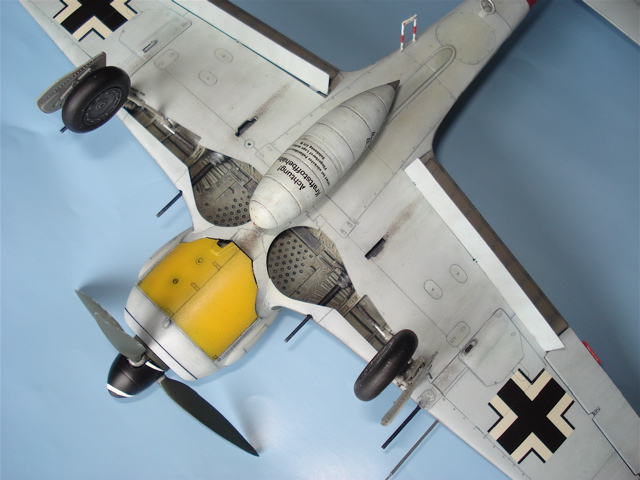
Once the cockpit was finished, I went for the engine and wheel well. The level of detail is in general very good.
Let´s see first the engine and cowling parts getting ready:
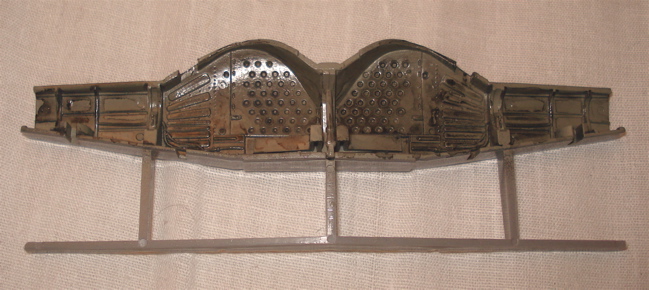
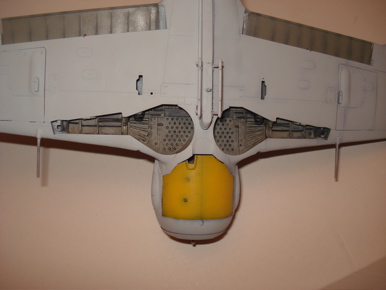
Also for the wheel well some oil washes in black and dry-brushing in bright green and grey gave me a good general impression and highlighted all the details, again, a good work from Hasegawa.
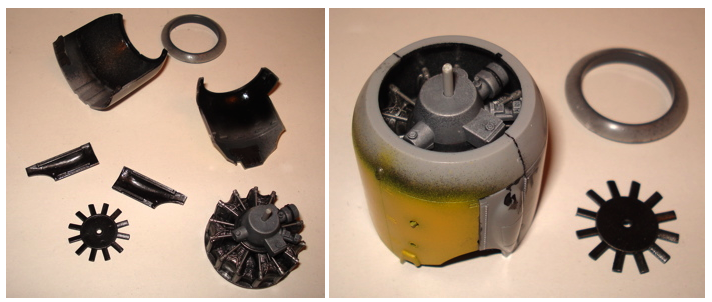
After a black oil wash:
After some sessions of dry brush:
Installed in the kit:
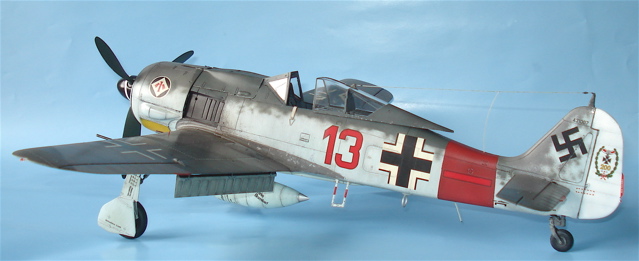
For the upper and under surfaces: I used the standard colors of Gunze Sangyo, i.e. RLM 74, 75 and 76. For the latest I used several fades of the same color (mixed with another blue or with white) so the final appearance was not very "boring" (unfortunately this is not visible quite good in the pictures as the flash reduced the weathering effect).
First, pre-shading in black:
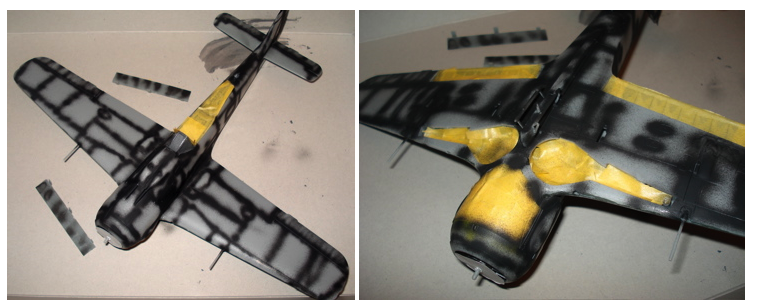
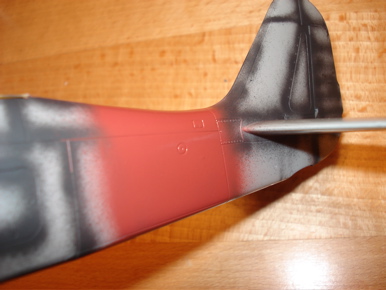
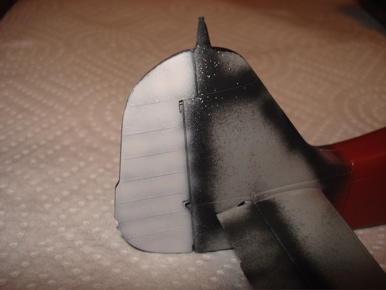
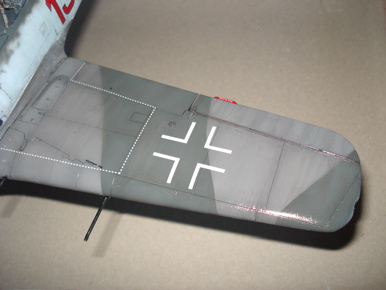
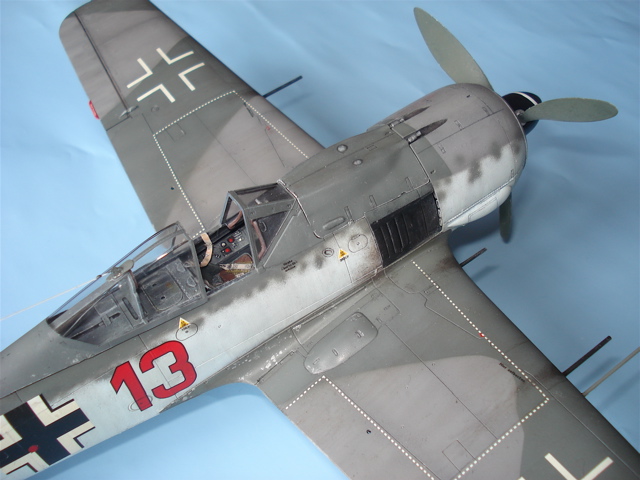
Second, fuselage band and rudder in their respective colors following original photos of this plane:
Third, RLM 76 airbrushed in different shades...
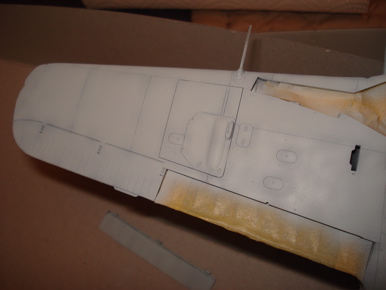
Fourth, RLM 75, a final light hand airbrushed only in interior panels highlighted some of the beautiful lines of the kit´s surface. Same was done with the RLM 74:
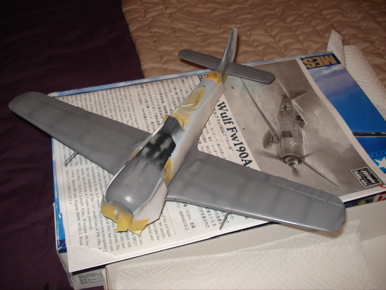

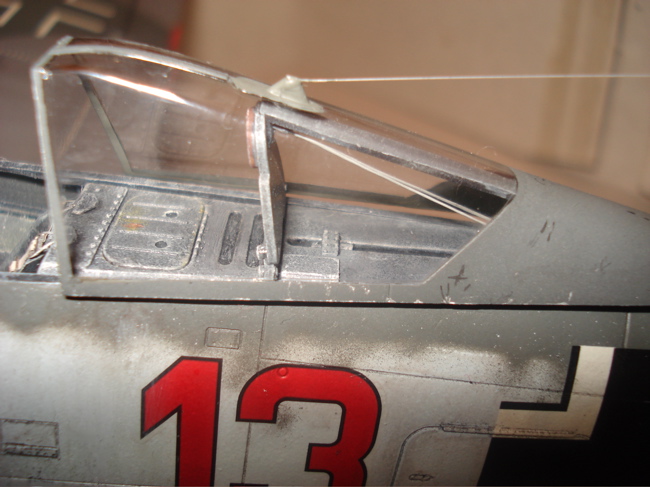
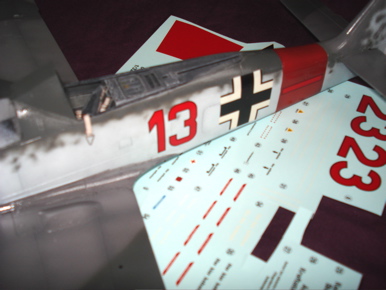
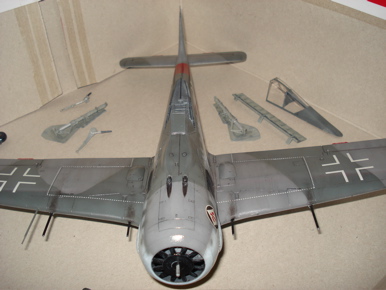
Getting now altogether for the "decaling": Hasegawa decals could be better, I used then anyway but they could be definitely improved in the future! Of course I varnished all the plane with Tamiya Clear before applying any decals:
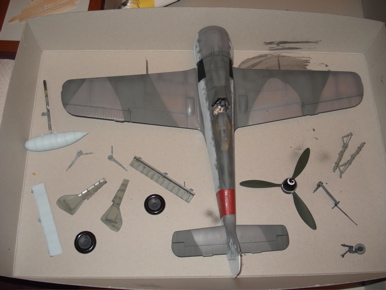
Weathering, not very strong, the photos of this plane showed a moderate weathered plane so I chose not to exaggerate at this stage:
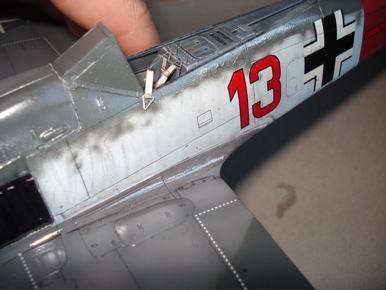
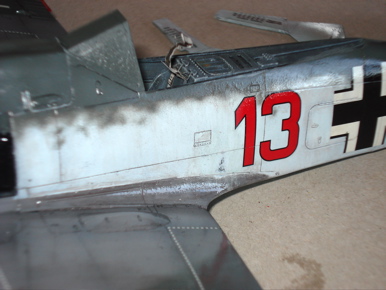
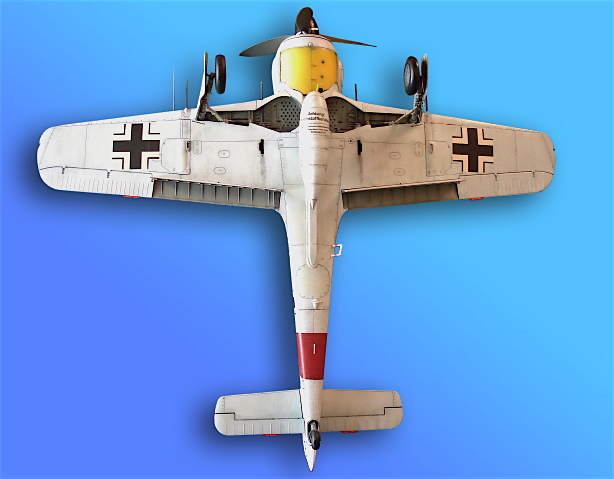
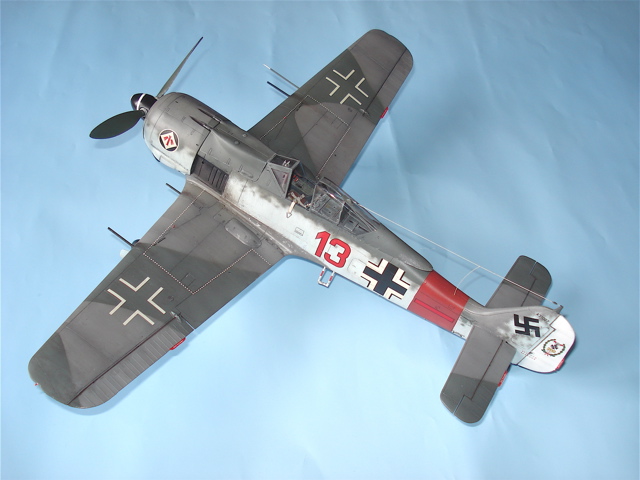
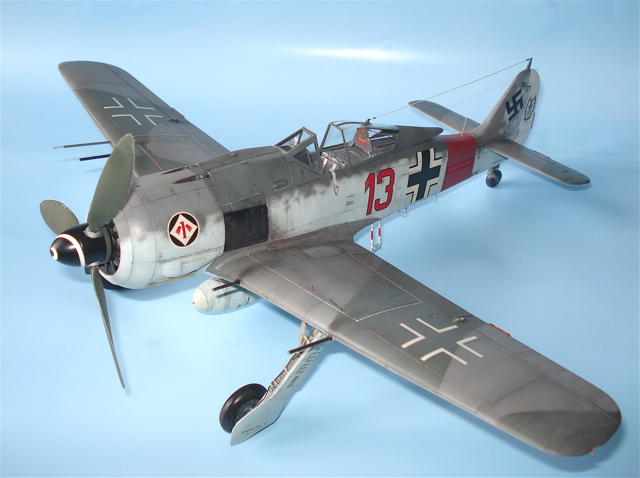
All more or less ready, the thing is looking very good, I really like the beautiful lines of this fighter:
Some coats of Tamiya Clear and finally (after days of let everything dry) a coat of Humbrol Matt, brings the whole work to a final.
It was worth! Hasegawa´s Fw 190A-7 in 1/32 looks like the original one!

Hope you like the final pictures...if you can speak a little bit of Spanish and want to have a look into more pictures and details of this build and also of few others, you can visit my website called www.webmodelismo.com
Well, ready for the next!
All the best!! Hasta la vista!!
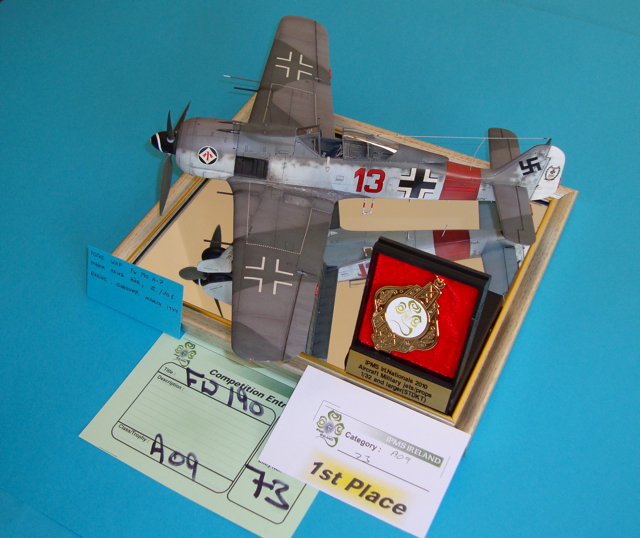
P.S.: I had the honor to win the gold medal for this kit (best 1/32 plane built out the box) in the first Ireland IPMS Nationals hold in Cork, in April, 2010
© Raul Corral 2010
This article was published on Wednesday, July 20 2011; Last modified on Tuesday, May 30 2017