
Elite Forces 1/18 F6F Hellcat Part 8 - Cockpit Air Vents & Gun Camera Lens
By Rodney Williams
Somehow I forgot to add these photos to my first segment on the "Center Wing" section of this story.
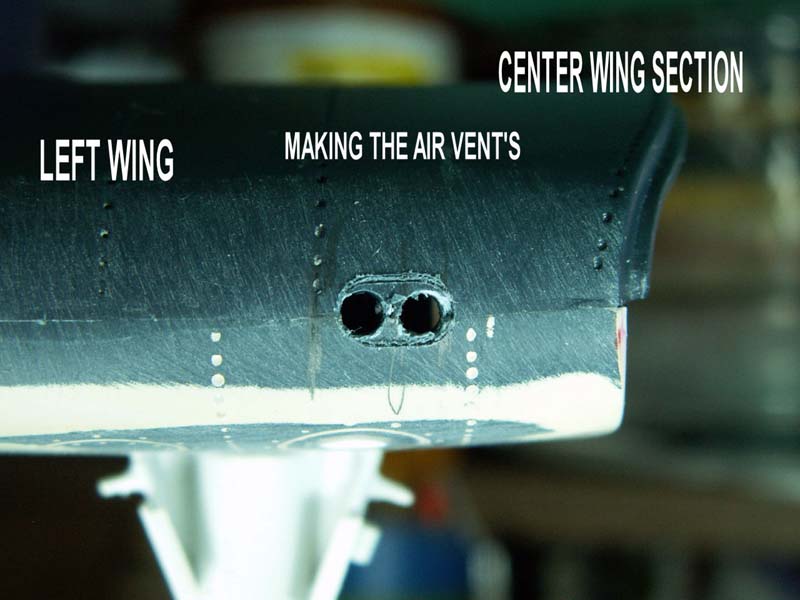
AIR VENTS
I looked at a few photos of the real F6F and then guessed at the proper size for the two wing inlet air vents. I made a scribing template out of my old standby .005" thick aluminum can material and centered it on the leading edge of both wings. I used my pointed pin which has been in my "pin-vise" for a couple of decades and scribed in my cut-out lines.
I drilled some holes into the wings and cut the rest of the material out with a sharp #11 blade.
My first photo shows the 2 holes that I drilled inside the scribed panel lines.
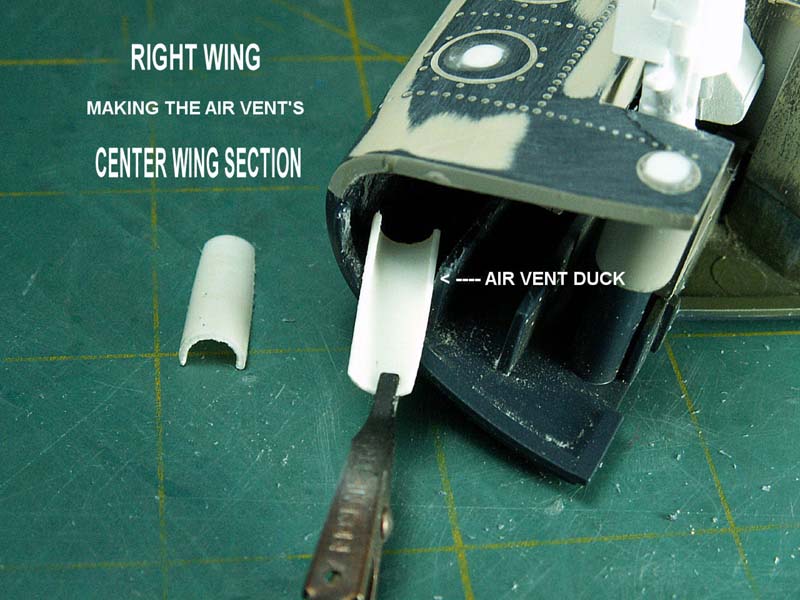
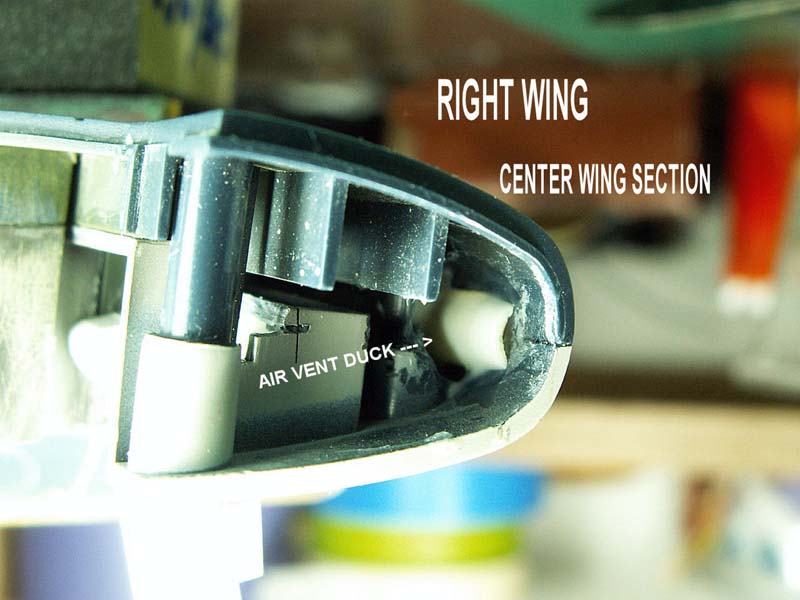
I used some round tubing (1/4 inch diameter.) and cut it in half down it´s center line and inserted some small section of it into the insides of the wings. I call this my "backing plates" which to me will represent the tube vents, which will go to the cockpit.
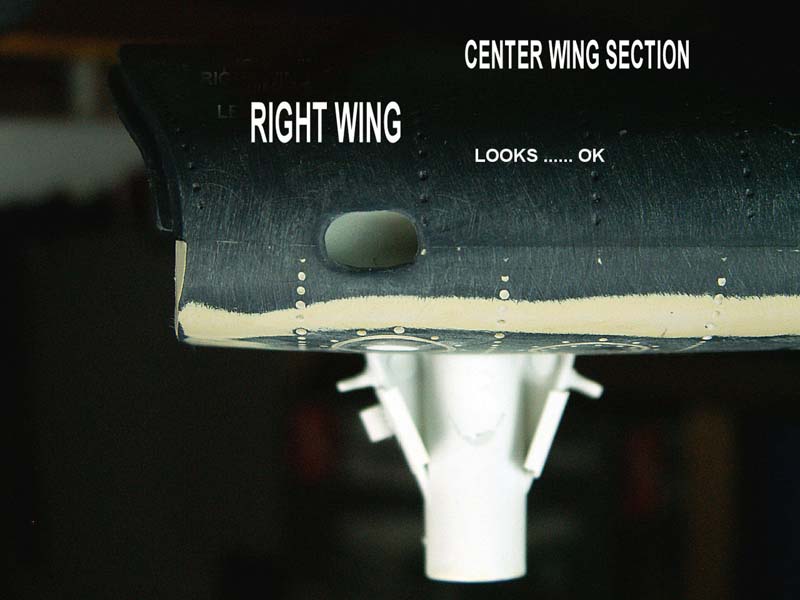
Of course, before I glue these tubes in place, I look inside the front section of the sanded inlets and see if they look somewhat real...like what is on the REAL F6F.
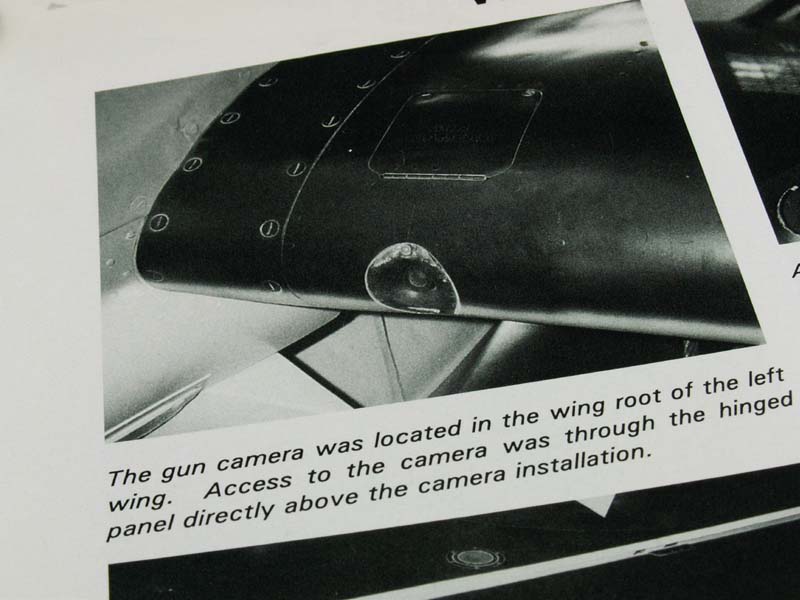
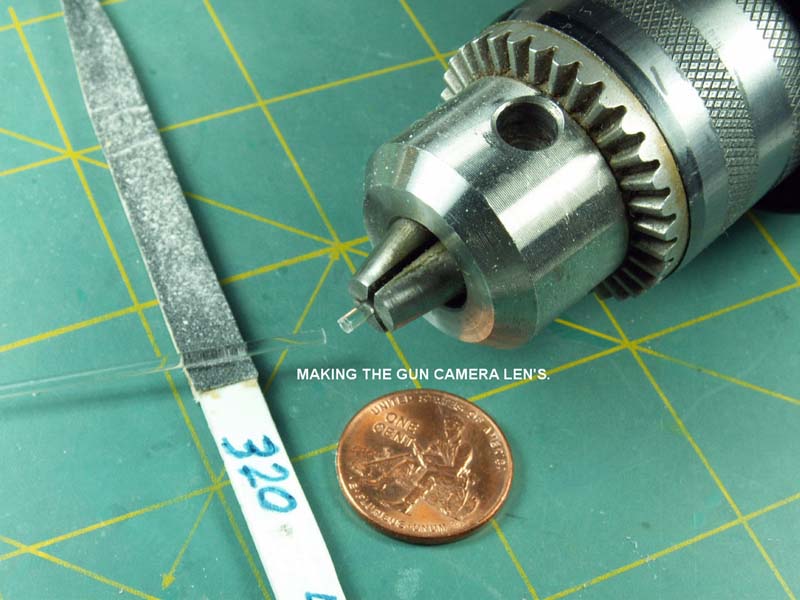
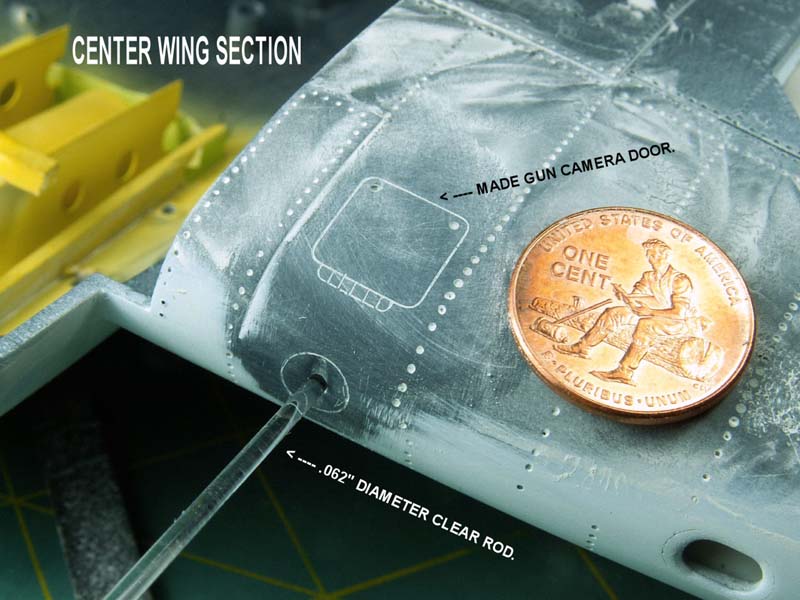
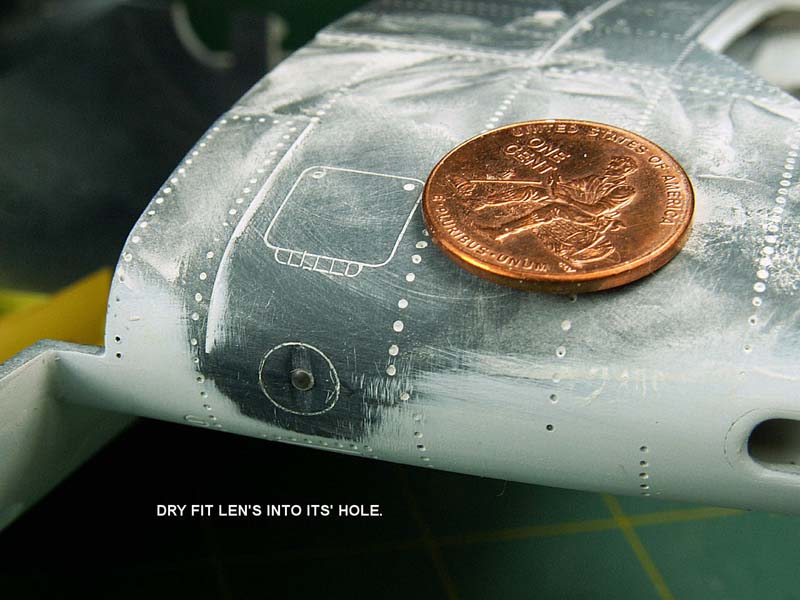
GUN CAMERA LENS
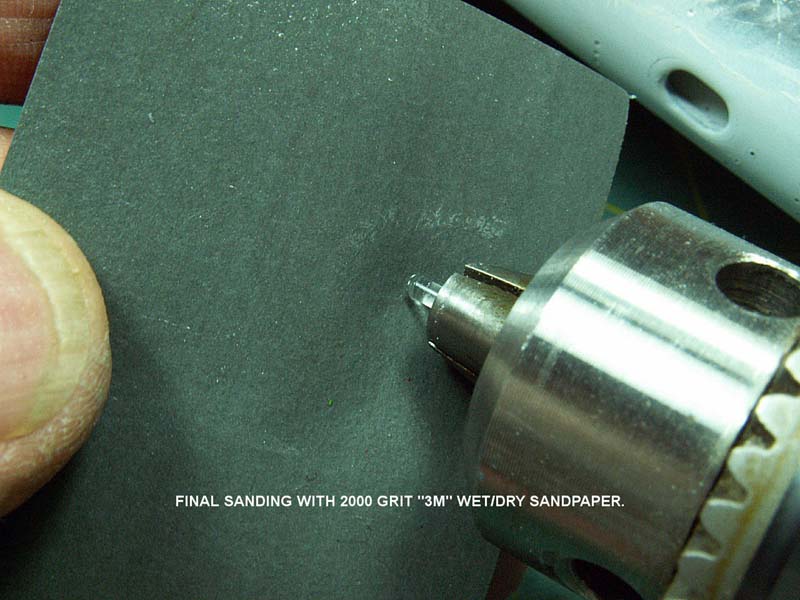
My next operation is to make and install the gun camera lens. I find a photo in the F6F book that shows what I need to do so on with progress. I sand and polish a short section of my .062" diameter clear rod that I got about 15 years ago...wow...everything I have is old. These remaining photos show that I have recessed the leading edge of the wing and have scribed in a round panel line including a square looking type of access panel.
The lens was removed so I could paint the wings and it will be re-installed on final assembly.
My next segment deals with the landing and recognition wing lights.
Until then...it's just the old model builder getting back to normal after his wonderful trip to the 2010 IPMS/USA National Convention.
Was it hot in Phoenix you ask... about 110F by ten in the morning.
Part 1 | Part 2 | Part 3 | Part 4 | Part 5 | Part 6 | Part 7 | Part 8 | Part 9 | Part 10 | Part 11 | Part 12 | Part 13 | Part 14 | Part 15 | Part 16 | Part 17 | Part 18 | Part 19 | Part 20 | Part 21
© Rodney Williams 2010
This article was published on Wednesday, July 20 2011; Last modified on Saturday, May 14 2016