
Airfix P-51 Mustang 1/24th Scale - Part 1
By William Joyce
I decided to work on the Airfix kit (Big Beautiful Doll) to try some different looks and colors (for me) in the cockpit and work on my air-brushing before I tackled the JUG. I was digging thru my old kits and came across a Hasegawa 1/32 Mustang kit...jeepers probably from the '70s. I have a ton of kits from the '70s and '80s, some still shrink-wrapped. I loved the paint job used for the box art. It is a combination of blue, silver, and yellow. It kinda reminds me of those German Luftwaffe paint schemes but with an American twist. My approach to this build is to use as much of what I have been given, add some plumbing here-&-there along with some appropriate hosing (no pun intended) and let's see what we end up with! Oh, I received a couple of inquires concerning my work space...well here it is...the kitchen table!
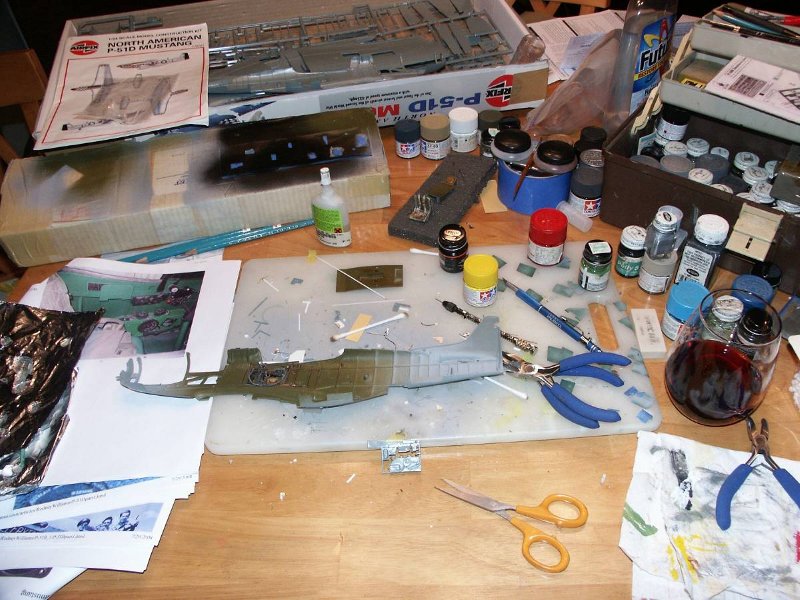
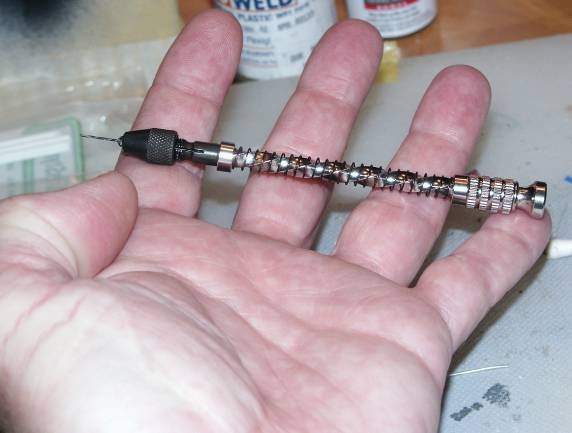
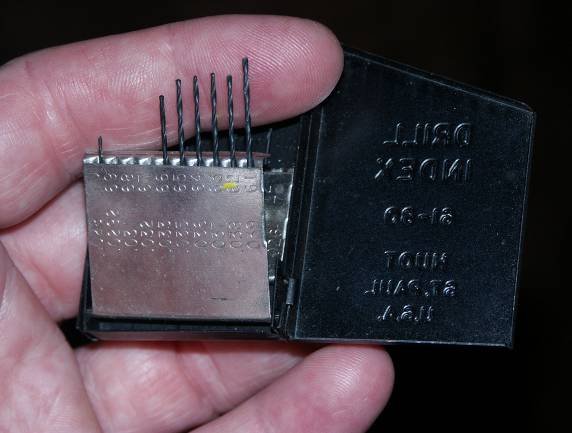
I seem to take it over on Friday nights and surrender it back on Sunday evenings (Weekend Warrior kinda thing). You can see I work out of an old fishing tackle-box and I have to say thank you to my wife for letting me commandeer the area. When I airbrush it's outside to the patio table for a day sometimes two. Additionally, to anybody reading this you are on a great reference site...LSP, there are so many "MOST EXCELLENT" builds documented to date. The articles provide outstanding references that I refer back to time and time again...this build is no exception. There are several builds of Mustangs that I have gone to for ideas, what I like to do is take the best parts of different builds (what I think I can accomplish) and try them out for myself. I also suffer from lack of patience so I try to make it easy and fast...key word being "try". With that being the case I discovered a new tool (new to me) at Hobby Town USA, great store, great folks, it's a hand drill. The best $8-bucks I've spent that I can remember! When it comes to adding plumbing and wiring this hand drill is the deal. Using the drill, along with some very small drill bits my father had, I can pre-drill holes for wire/hose placement. I was using the Dremel but no more, it's a bit clumsy and fast for the task. The hand drill really provides the control needed to place small prep holes for wiring.
OK on with the build.
ENGINE
Not gonna do it, building the kit without it...now that's fast!!
COCKPIT
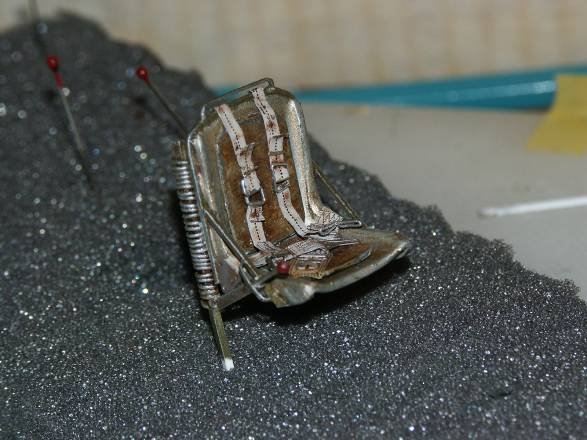
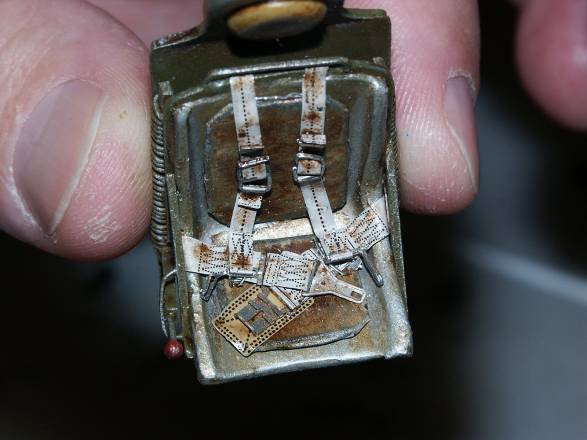
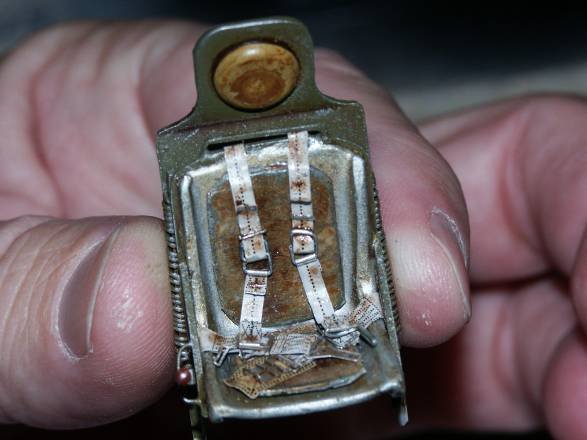
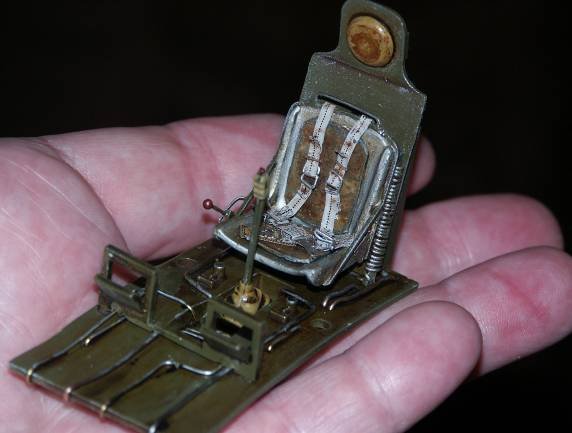
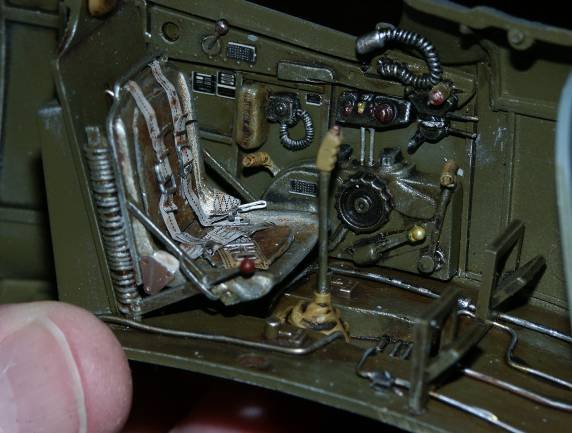
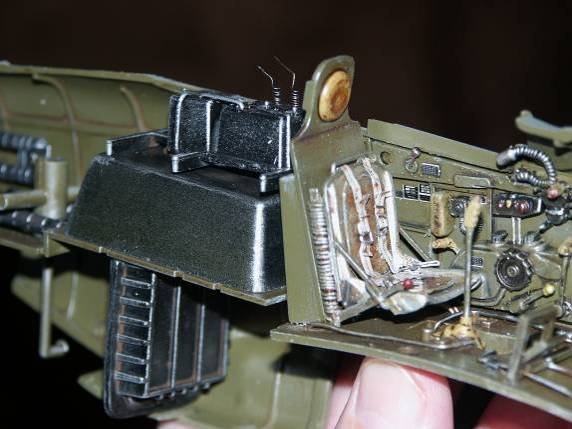
I started by rebuilding the seat. The kit seat had those high sides so I began by Dremeling them off; I wanted to open up the cockpit a bit. I didn't take a picture of the seat before I started…sorry about that. Then I rebuilt the back support structure (Evergreen styrene), added a seat adjustment lever, butt and back cushions, and finally Eduard belts (the buckles were fabricated from staples). The completed assembly was then finished (painted, Futured, oil washed, and dry brushed with silver).

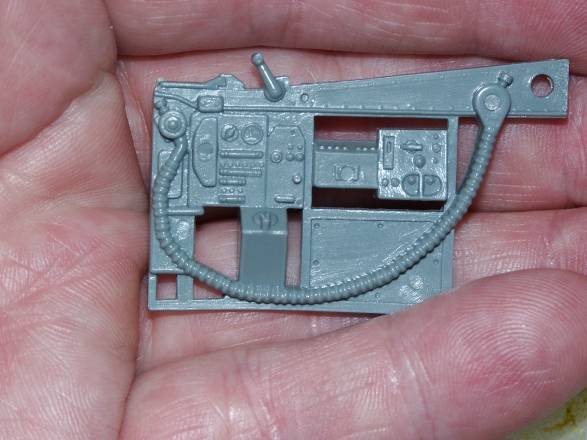
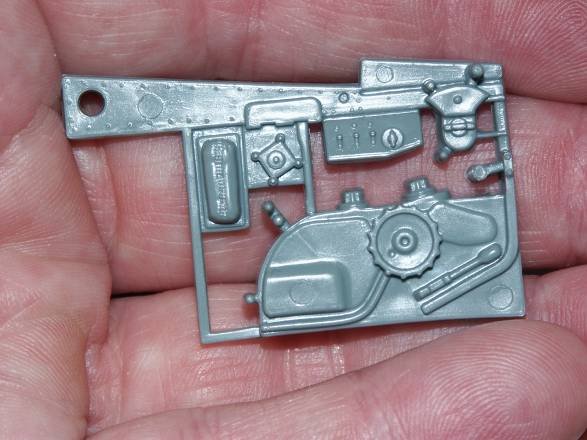
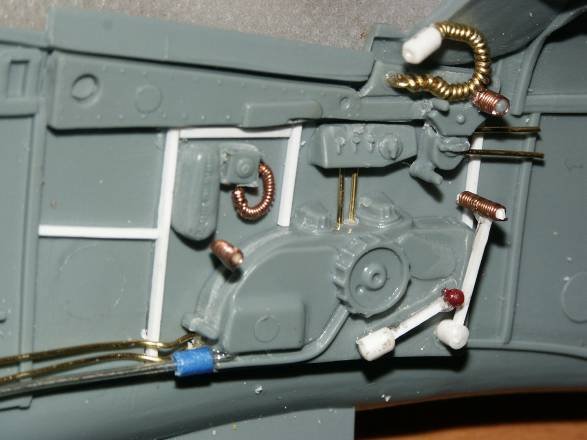
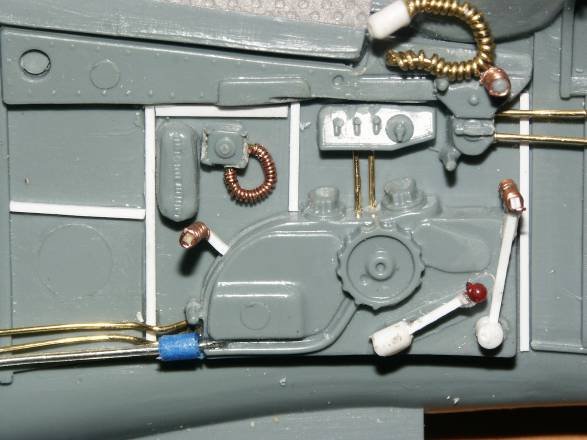
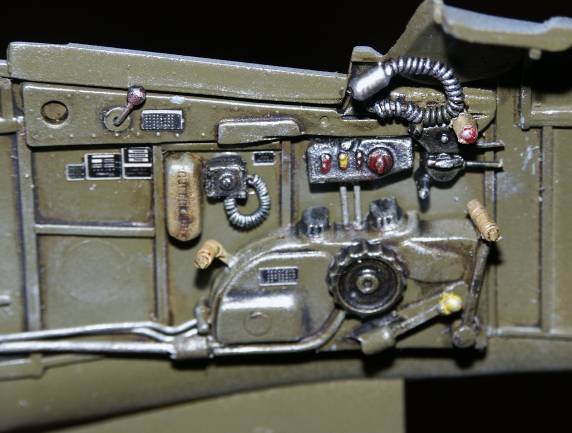
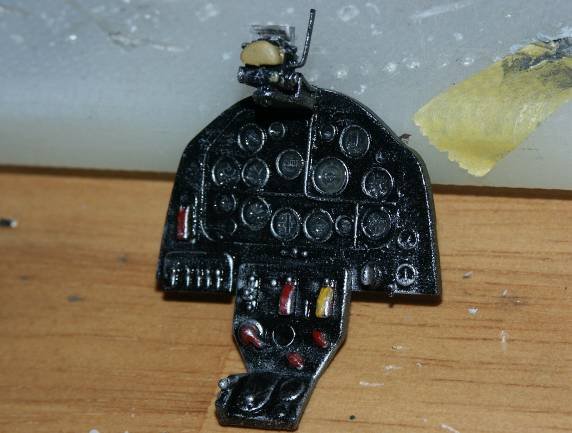
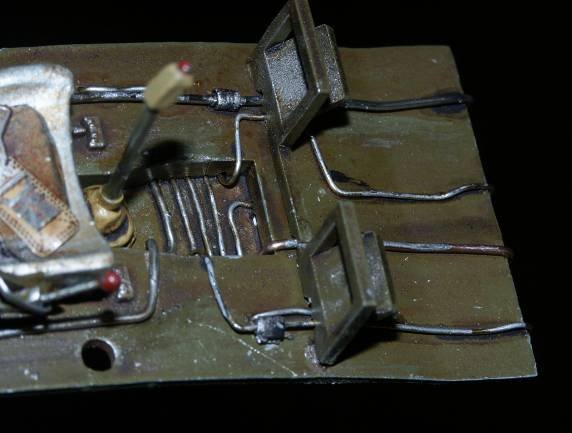
Next I worked on the right side of the cockpit wall. The kit has pretty good detail here...I cut the elements apart to crisp it up a bit, I used Evergreen styrene for the panel reinforcement and wire for the plumbing. Model Masters Olive Drab was used for the main interior color. For the oxygen hose wire wrapped around wire. The map/document pouch was made from the back of a note pad (cardboard piece cut to size) then covered with heavy duty aluminum foil. I used an oil wash throughout that was heavy on the Burnt Sienna due to the dark olive drab back round...so far I like the results.
Same approach for the left side of the cockpit except I tried to take a few more pictures along the way.

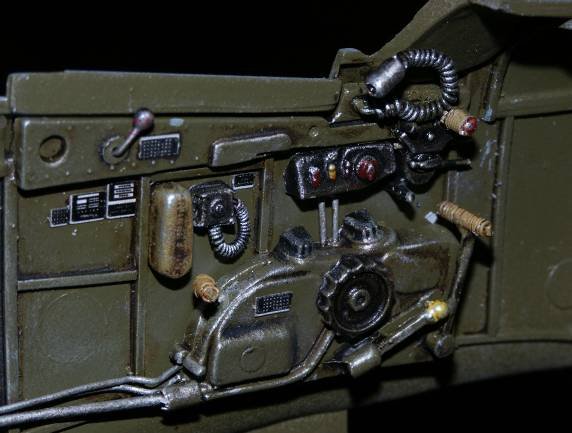
I also plumbed out the cockpit floor. The floor was constructed out of wood in the real deal, and is represented by some very fine wood grain. I still painted it olive drab because they seemed to paint everything olive drab back then! Now I'm sure most if not all the hydraulics and electrical wiring were located under the floor, however, applying a little artistic licensing the lines just seem to appear. Hey, what's the first thing you see when you look into a finished cockpit...the seat then the floor, so why not dress it up! The instrument panel was painted then dry brushed.
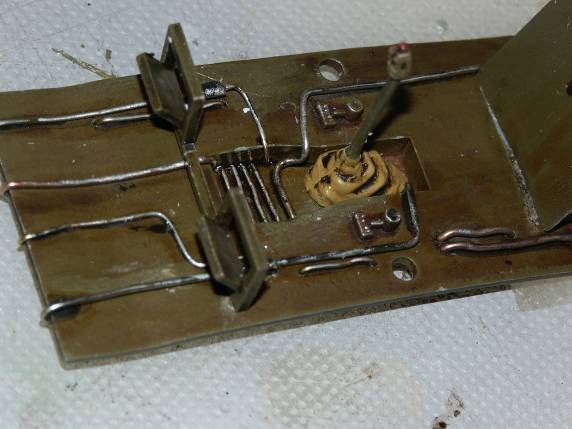
With the floor and instrument panel complete I attached the seat.
I then married up the completed floor/seat assembly with each left and right side of the fuselage for a test fit.
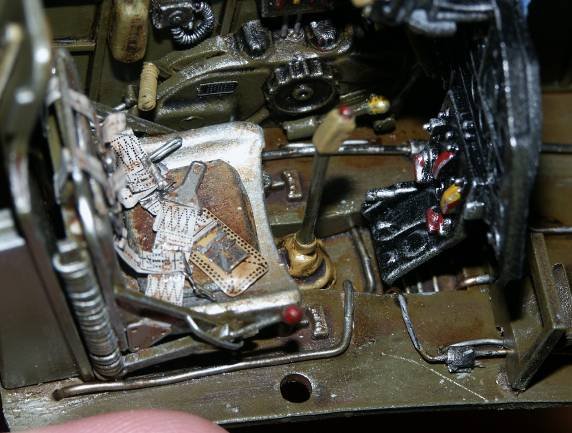
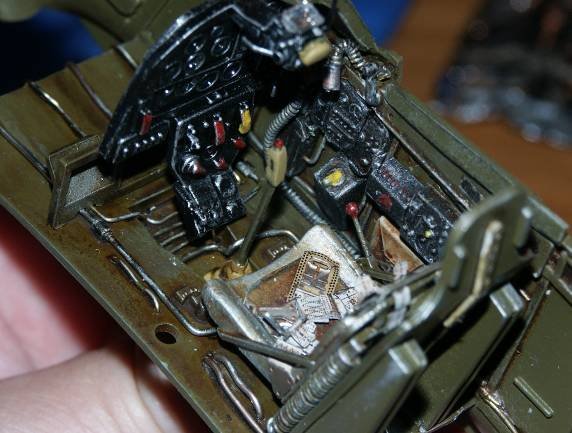
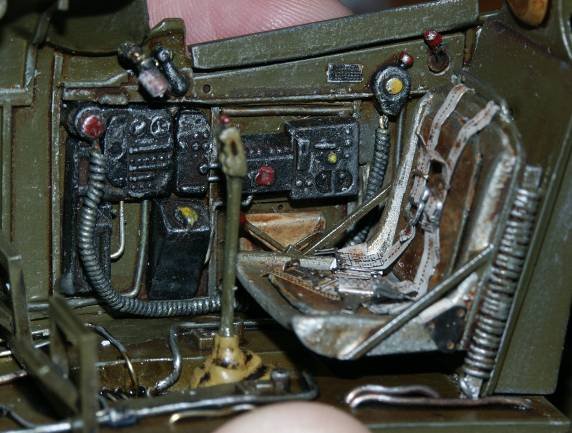
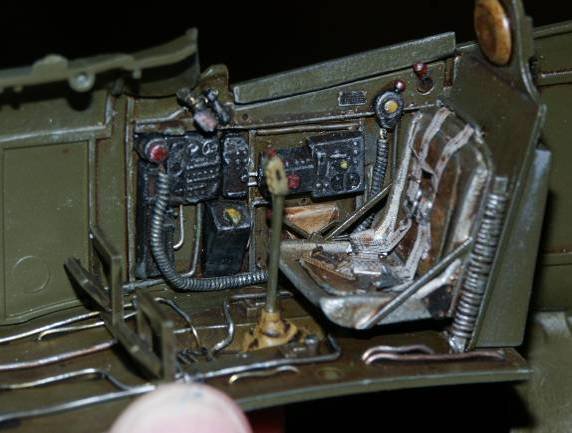
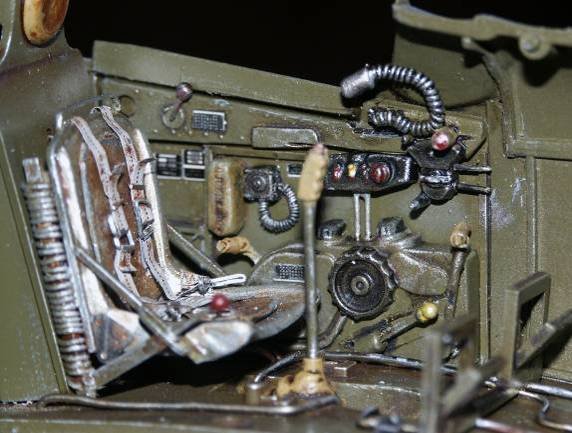
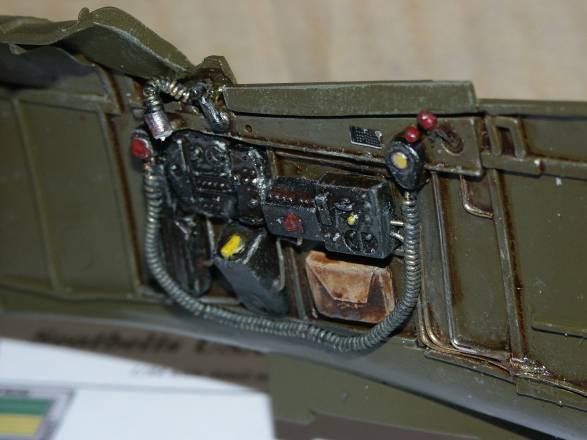
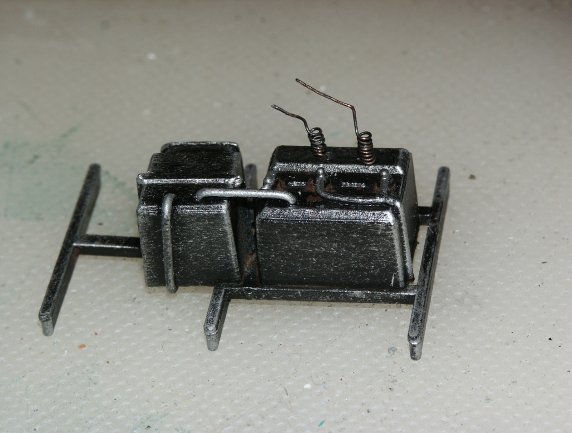
I felt the radio assembly located behind the pilot needed a little something….I think it's the radio? So I added some plumbing to tie the two components together and a couple antennas...it's a radio for crying-out-loud! I know there's an outside antenna, but a radio needs an antenna…..heck why not two! Not sure which unit is the actual radio, so I just picked one...I thought the unit immediately behind the pilot looked the best? Each antenna was made from speaker wire wrapped around a small drill bit. I painted the unit black, applied and oil wash, then dry brushed with silver (I use enamel paints for dry-brushing they seem to apply best).
I finished up the miscellaneous items inside the fuselage, tail wheel assembly, radiator, and fuel tank.
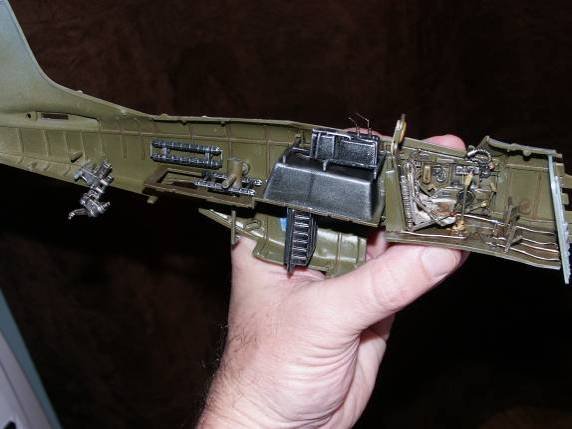
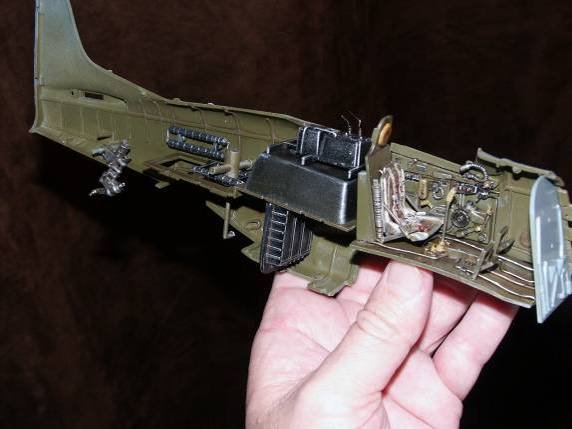

These areas are kinda out-a-sight so nothing being added here. So it's complete the fuselage assembly and on to the wing sections.
THE WING SECTION
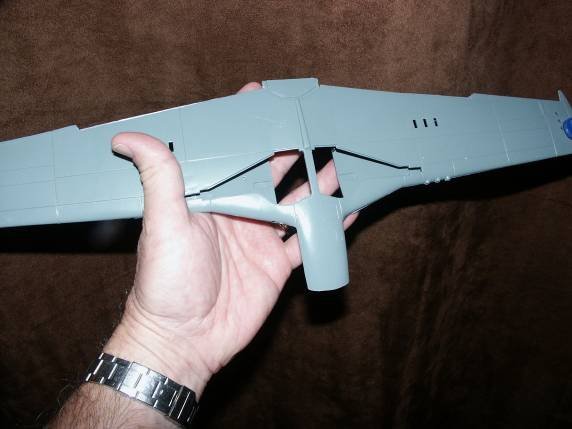
Buttoned-up the fuselage fit was OK, it did require some filling, most likely due to the kits age. I have to reiterate my intentions on this build. I really wanted to focus on the cockpit and paint job. I thought I would add a hydraulic line here and there to the wheel-wells, a good oil wash and be done with it. Well you know what happened to thought...thought he farted and soiled his drawers!! Once I took a closer look at the wheel-wells they were completely void of detail...Zilcho, Nada, absolutely nothing was represented! Never having purchased a Trumpeter kit I'm sure this is one area that has been improved.
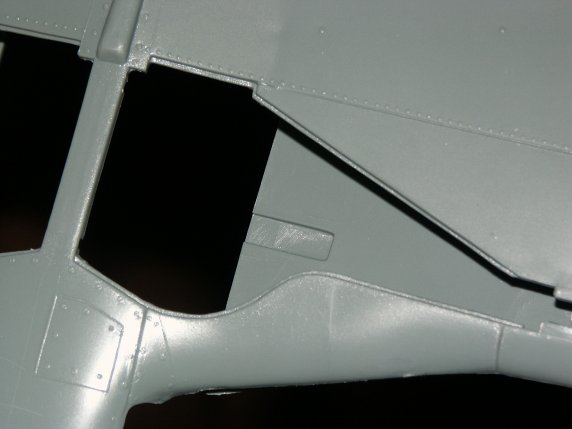
So it was regroup, take a look at my LSP reference material, to add a bit of detail. Using Evergreen styrene and wire I dressed up the wheel-well sections and cut the flaps to allow them to be displayed in the down position.
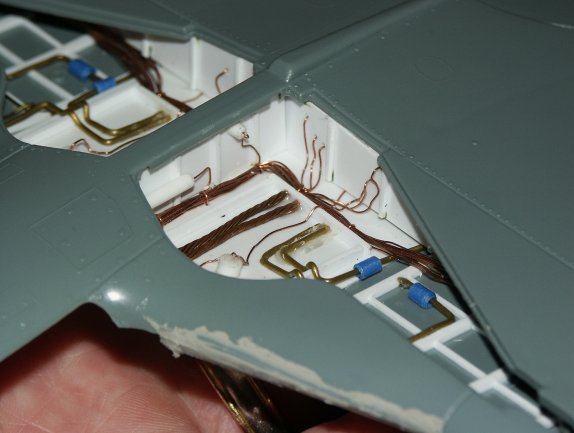
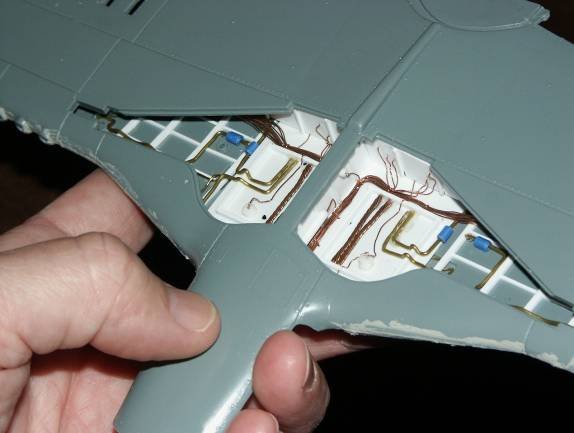
For the wing guns brass tubing is what I like to use.
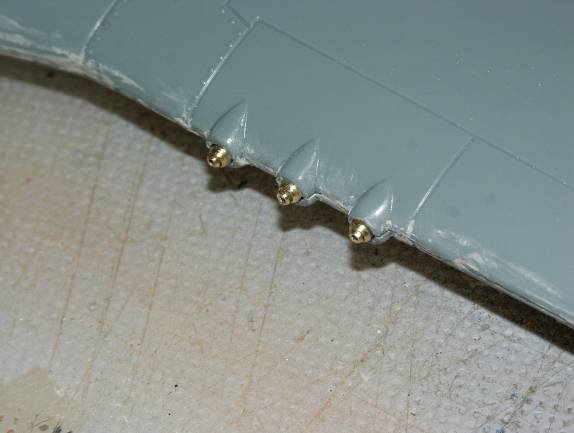
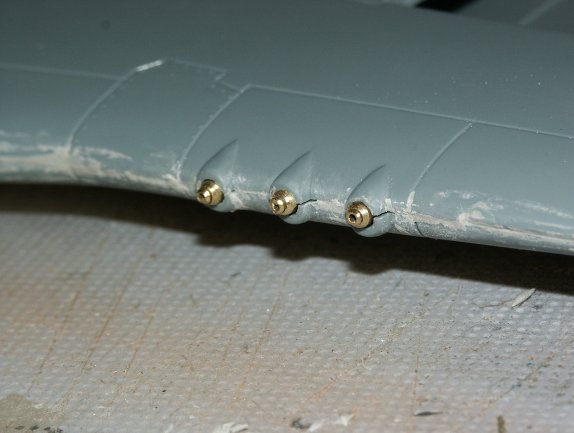
I think brass tubing provides a realistic representation for gun barrels.
All that's left to do is fix the wing section to the fuselage, some filling and sanding, then finally the paint job.
Everybody have a Merry Christmas and a Happy New Year!!
© William Joyce 2008
This article was published on Wednesday, July 20 2011; Last modified on Saturday, May 14 2016