
Aeroclub | Biplane Assembly Jig
Reviewed by Ray Peterson
From my tool stash is this assembly jig that has sat in its box for too long. With my growing stash of Silver Wings, Lukgraph, and Wingnut Wings kits, I decided to pull this out and set it up so it would be ready when I decide to tackle another one. With the demise of Aeroclub, this set is no longer in production, but if you get a chance to buy one hopefully this will inform you on what you are getting.
What’s in the Box

The jig is made up of a pile of photo-etch and another pile of fasteners. The photo-etch is much thicker than what you normally see in a detail set, with all the parts being about 0.5mm thick. They have all been double etched, many with tick marks in millimeters to aid in setting the jig.
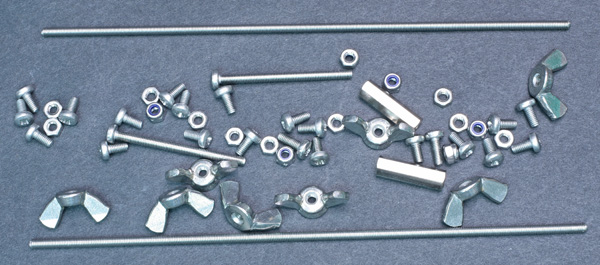

There are screws and nuts provided in different lengths, and some threaded rod as well as wingnuts. A great help is many of the nuts have been already soldered on the small PE parts that are used to adjust the jig. Some of the larger pieces have been pre-bent to the correct angle to speed up assembly. A sheet of grid paper is also provided for setting up the jig for use.

Included are several printed A4 sheets with both verbal and pictorial instructions. They provide guidance in constructing the jig as well as detailed instructions in its use. The jig assembly is a little confusing, but close study of the parts and photos help get it done.
Construction

The first step I took was removing all the photo etched parts from their sprues and sorting them. I then filed and sanded all the edges. This is to remove all the sharp nubs and corners. The etching process tends to undercut the film making for some very sharp edges. This was mind-numbing, but hopefully will reduce the chance of slicing my fingers to shreds, not to mention the chances of scratching pre-painted wings. Aeroclub also suggests, and I agree, wrapping some tape over contact points to reduce scratching.


I then assembled the two frames. This is the 2.0 version of the jig, with doubled ‘stagger arms.’ This version provides much sturdier support when you flip the jig.

Once the two frames are assembled, it is a simple task to add the threaded rod and wingnuts to finish off the assembly.

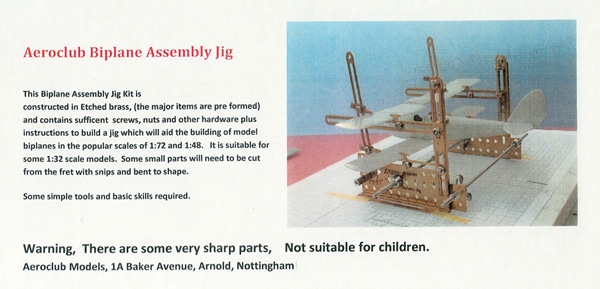
Here is the jig with a 1/32nd Ki-43 wing showing how it is fixed in the jig. The clamps hold the wing securely. For 1/32nd models like this one, I suggest purchasing some longer threaded rod to set the frames more towards the wingtips.

The clamps allow the builder to flip the jig upside down while still firmly keeping the model in place. This will greatly assist in gluing biplane wings, giving great access for gluing struts and for rigging, too.
Summary
This is a useful, innovative tool and I salute John Adams for his design. It will be extremely useful in holding biplane wings at their correct heights and offsets. I also think it can be very useful in setting dihedral or anhedral in monoplanes. The instructions mention the future release of a jig dedicated to just that, but I don’t think it was ever released before Aeroclub ceased doing business due to the sad loss of one of its principals.
Highly Recommended.
Review copy courtesy of my aching wallet.
© Ray Peterson 2016
This review was published on Friday, August 19 2016; Last modified on Friday, August 19 2016