
Grey Matter Aviation | Curtiss P-40F/L Nose Conversion
Reviewed by Ray Peterson
Grey Matter´s latest 1/32nd offering, the Curtiss P-40F/L Nose Conversion (kit no. GMAC3202) is the latest set from the talented hands of Derek Bradshaw. It is designed for the recent Hasegawa P-40 kits; the best donor being the Kittyhawk Mk.I/Mk.III kit as it includes both the short tail for building early P-40F´s, and the long tail for P-40F-5´s through P-40L aircraft. However, the P-40E kit (for a short tail) and the P-40M kit (for a long tail) can also be used.
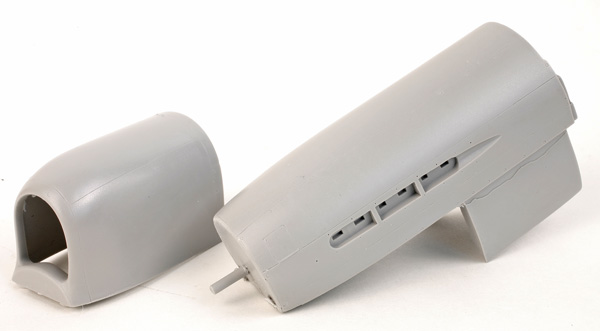

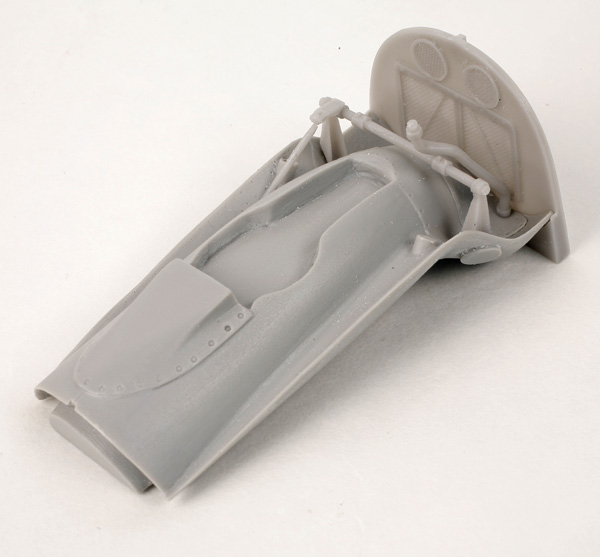
The conversion consists of 17 crisply cast parts. They must have been centrifugally or otherwise pressure cast as they have very small casting plugs to remove, and are nearly bubble free. The largest parts are the two outer nose replacement parts. Five more parts include the two radiator faces, the interior of the front scoop, and two parts to make up the new nose underside. The only flaw I could find is a thin rod is missing from the front radiator face, apparently a flaw in the casting. Other examples may not exhibit this flaw.
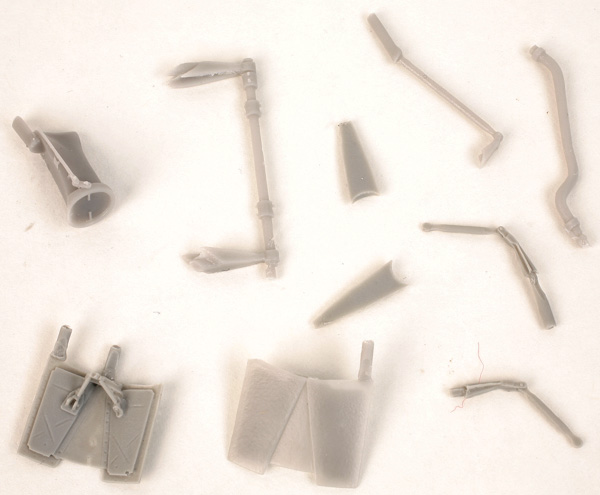
The smallest parts include an additional the round intake for the nose, piping and control rods for the area behind the radiators, and the flaps. The flaps are noteworthy for their incredibly petite control rod detail cast on. Also included are two small triangular plugs for the recesses behind the exhaust outlets. Some aircraft do not have these recesses. (Check photos for the aircraft you wish to build for this feature. I haven´t been able to reliably tell if the recesses are variant specific or not.) The only flaws I found were a few tiny bubbles in the flap castings (you can just see them in the pic); nothing a few drops of superglue won´t cure.
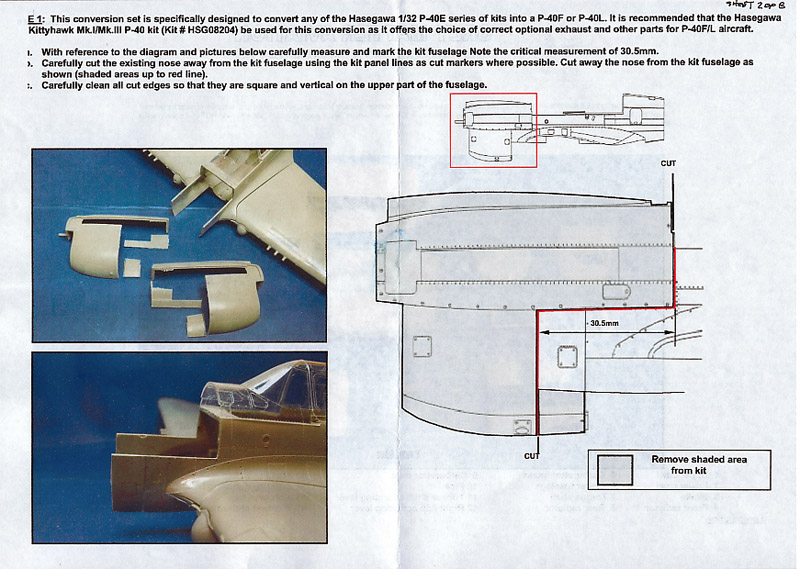
The instructions consist of 4 double sided A-4 sized pages, consisting of photos and diagrams printed in color. I have shown a sample here. There are also a couple of color photos looking in to the lower rear of the nose showing some of the plumbing and linkage of a restored example provided by our own Matt Gannon/LSP Matt.
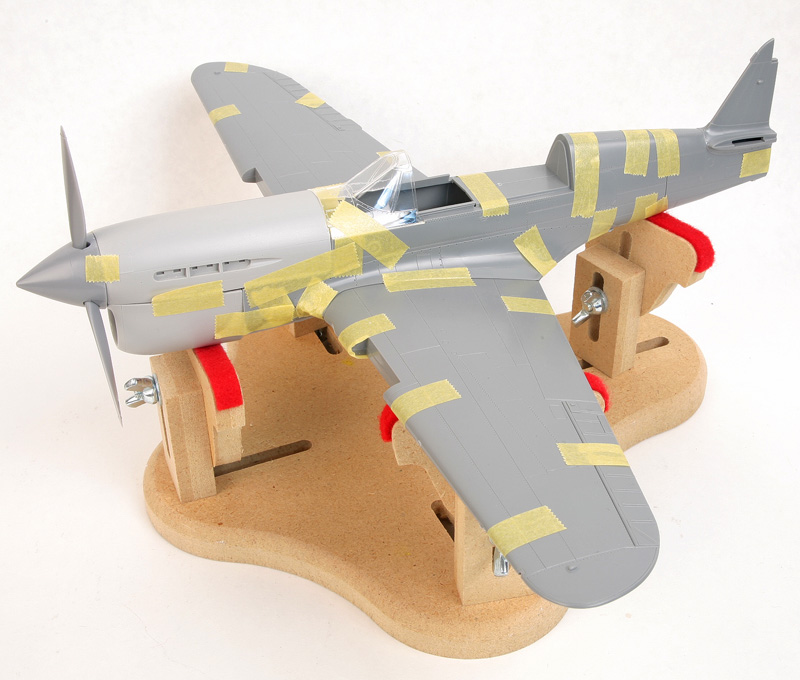
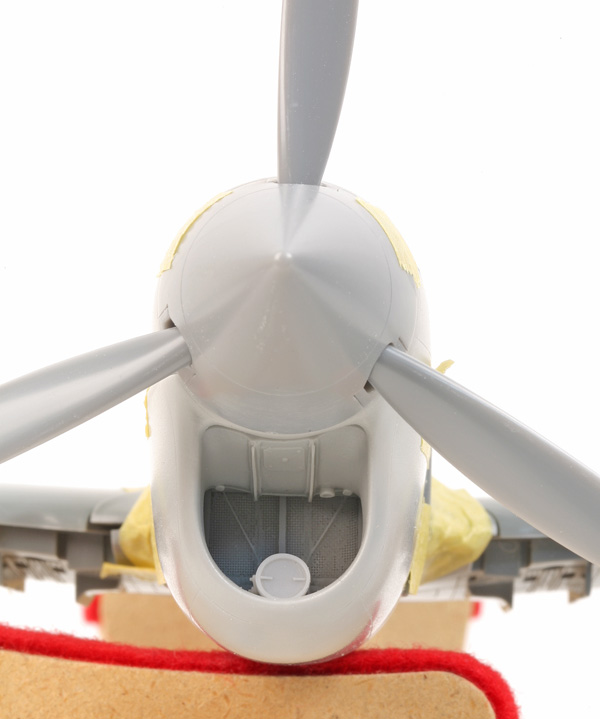
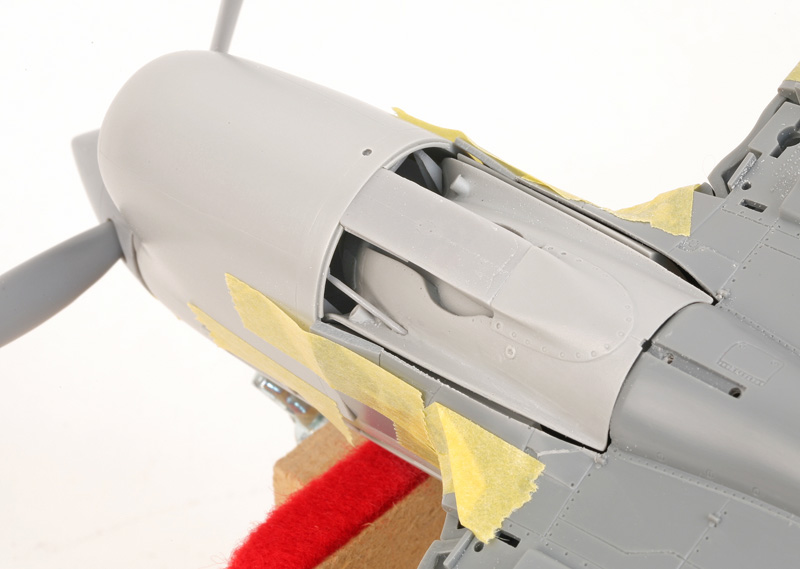
I have gone ahead and started the conversion by cutting up the donor kit and test-fitting the nose. Comparing the test-fit model to photos, the conversion looks very good. I have already glued in the front radiator parts and they will look very nice once painted. The engineering of the parts is first rate, allowing for nice detail in a complicated area. Note on the radiator front on the test-fit model, both fine wires are missing and I didn´t catch it till after I glued; will be a little tougher to fix now!
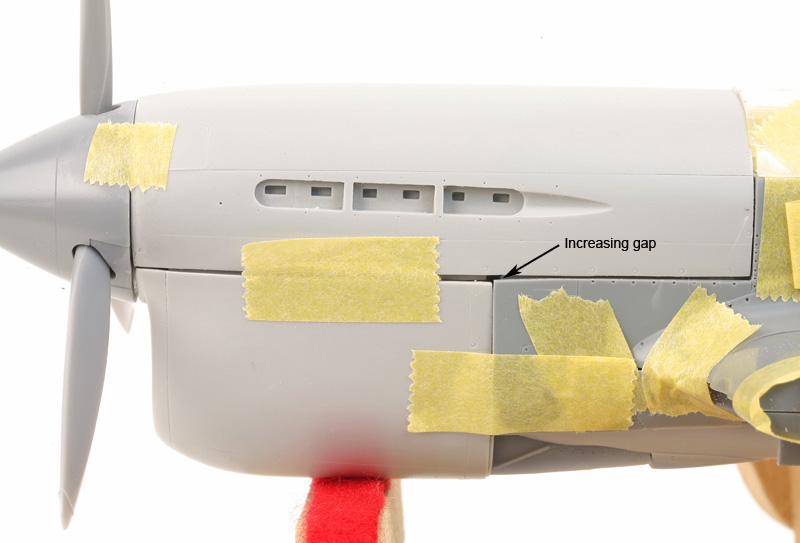
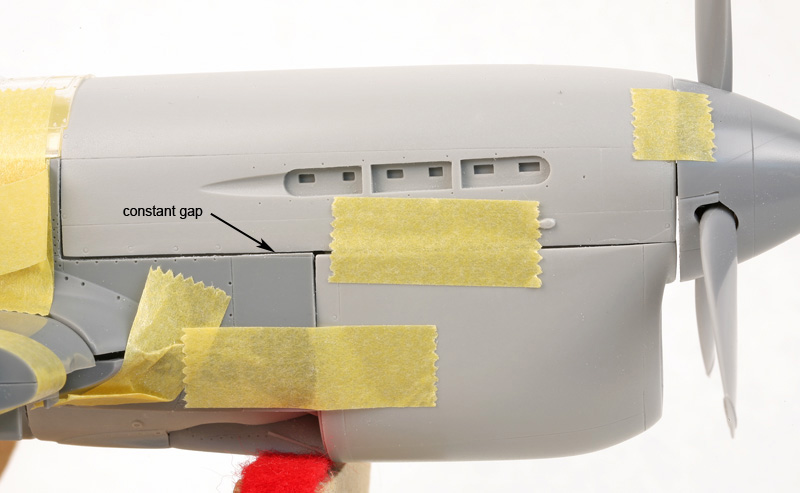
With the test fitting, I do have a couple of comments on construction. First, if you cut the fuselage along the panel line as I did on the port side, you get a slight widening gap along the new nose. This is because the Allison-engined panel line curves slightly down and it goes toward the nose. The Rolls-Royce (or Packard?) engined F and L´s have a straight panel line. Therefore I suggest cutting a straight line through the front of the panel line and file till you have a consistent fit. You will still have to fill in a short length of panel line, but I think that is an easier task. Also, some sanding or filing of the original kit fuselage and windscreen insert will be required to blend in better to the new nose. The windscreen insert sits a little high on my example, creating a small step. And the upper part of the fuselage where the windscreen insert sits doesn´t quite match up with the new nose as the nose begins curving towards the top a little lower than the original nose. A bit of time doing a little careful sanding should take care of it.
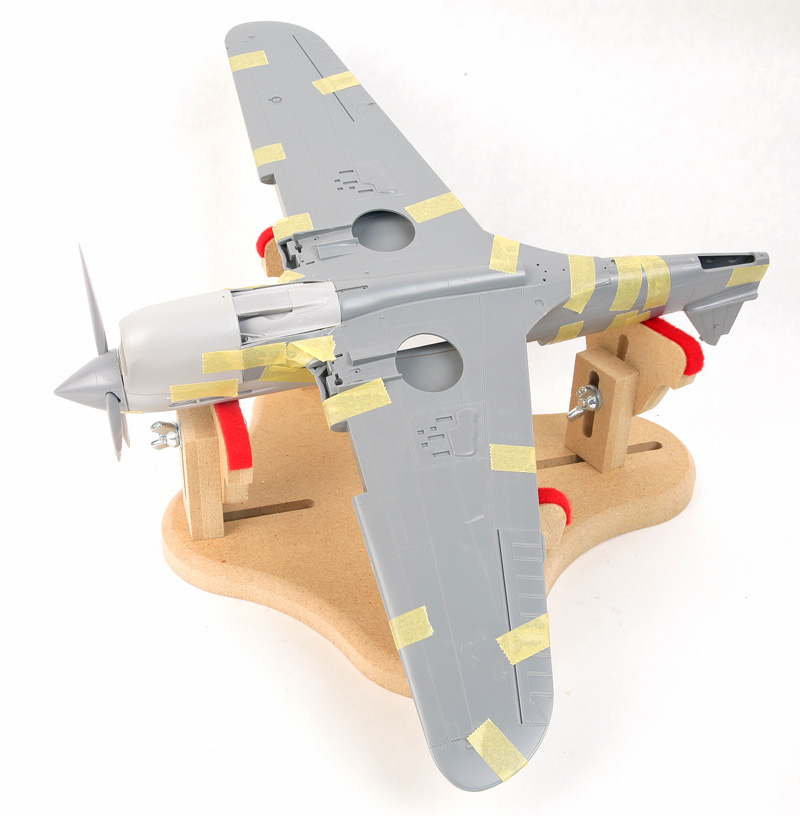
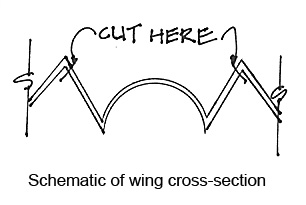
The trickiest part to match up to the new parts was the lower wing part for the re-shaped underside. I tried twice and still got pretty large gaps. Milliput to the rescue here! After my experience, I suggest cutting inside of the two ´peaks´ one the underside and test fitting and filing away until you get a decent fit; see the schematic below. I only have glued the rear radiator face to the new lower fuselage part and glued in the drain line and main actuator arm and rod. I felt this was the most I could do before painting. I will leave these parts separate until final fitting and gluing as I believe this will allow for the most adjustment for best fit. Note I haven´t tried to test-install the pairs of cooling flaps yet, as there is very little attachment area and I would probably just knock them off. It will be a bit tricky making fitting the tiny arms between the main rod and the connection on the flaps! These little details will look great when finished, though! I did find that the elbow of the arm on the starboard side was fowling slightly against the lower nose as I tried to fit it. I shaved a tiny piece off the end of the arm and bent the elbow a bit and it fit fine.
In summary, a great looking conversion set to allow construction of some important variants from the African desert theatre. Once matched up with the Zotz decal release for the P-40F/Ls will provide for some stunning models! You can see one already built up on the In the Works section, by John Bardwell: http://forum.largescaleplanes.com/index.php?showtopic=32589.
Highly recommended!
The conversion can be found at: www.greymatterfigures.com.
© Ray Peterson
This review was published on Saturday, July 02 2011; Last modified on Wednesday, May 18 2016