
Werner's Wings | Bf 109V-14 Conversion
Reviewed by Chris Savaglio
A few years ago, Werner’s Wings, a very high quality aftermarket company producing mostly helicopter parts, came out with a 1/48 conversion to turn a Tamiya Bf 109E-3 into one of the DB-601 powered prototypes that would become the basis for the E models. I wanted one, but by the time I found out it existed, it was sold out. So, when WW announced they would be doing a 1/32 conversion, I quickly pre-ordered it. Even better, the kit was based on the Eduard 109 series, which remains my favorite set of 109 kits. Hopefully, this article will help those who are building the Eduard 109 closed up out of the box as well.
I was able to pick up the kit directly from Floyd Werner during a business trip to the Maryland area and Floyd is a great guy to deal with. Although I didn’t have it shipped, the conversion is well packed and I don’t see it having any issues surviving the post office.
Inside, there is a nice instruction sheet detailing out the history of the 109 version, some helpful hints, and a full set of build notes to guide the conversion. The decals are in 3 small sheets, which are printed by Microscale. The heart of the conversion is the resin, which consists of 20 parts, all perfectly cast. I was unable to find a single flaw on a visible surface and most of the parts had pour gates so small that it was hard to tell where they were.
Clean up was done in one sitting and all of the resin parts were ready to go in about 20 minutes. The resin is extremely high quality and while it’s easy to sand and cut, it’s slightly flexible, which helps a lot when installing the big upper cowling part.
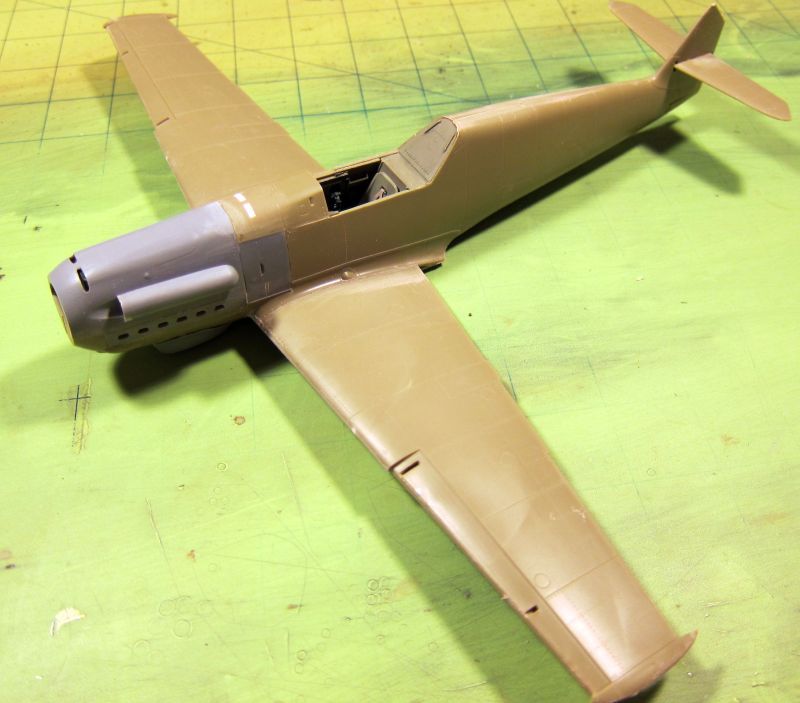
For the most part, the resin parts are direct replacements for their Eduard counterparts. There are a few areas where minor surgery is required, but, trust me, it’s outpatient and the average modeler won’t break a sweat.
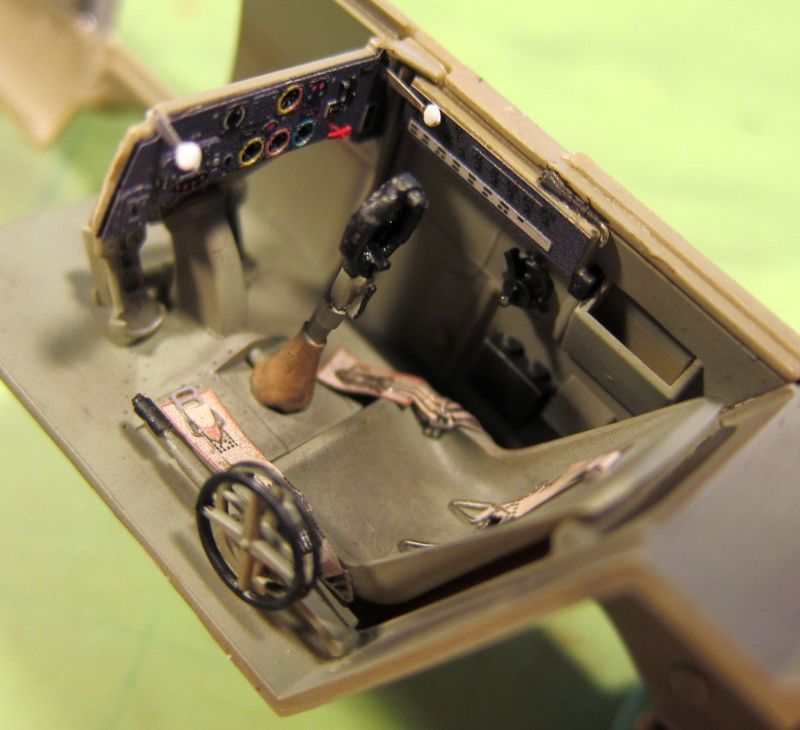
— The cockpit remains relatively similar to the kit. The kit’s control stick was replaced with the spade style one, the oxygen tank removed and it’s mounting slot filled, and the gun sight left off and a blank off panel made with a bit of styrene.
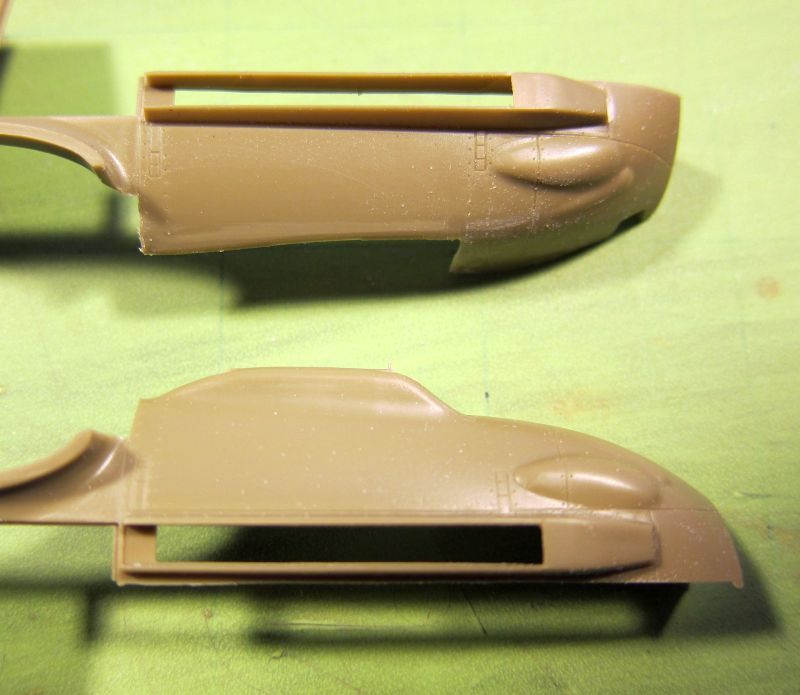
— The exhaust shrouds need to be removed so that they can be replaced with the new resin streamlined exhaust panels. These are cut off along the existing panel lines and took a couple minutes with a new blade. This was my first of two self-induced fit problems. Be careful how much is removed from the front. I removed a little too much and ended up with a gap behind the panel. This was easily filled with a piece of plastic strip, but there was no need on the second side since I was more careful about how much I cut away.
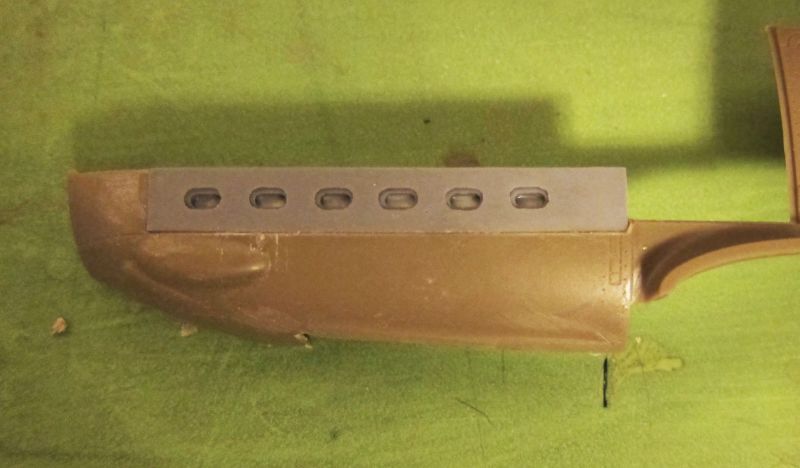
— The wing radiator panels are streamlined versions what would later be used in the E production. As such, the radiator blocks on the wings need to be sanded down quite a bit. I used a 100-grit sanding stick, as this surface can’t be seen. Check the fit often until the resin radiator covers fit flush. The kit photo-etched radiator panels need to be trimmed to match.
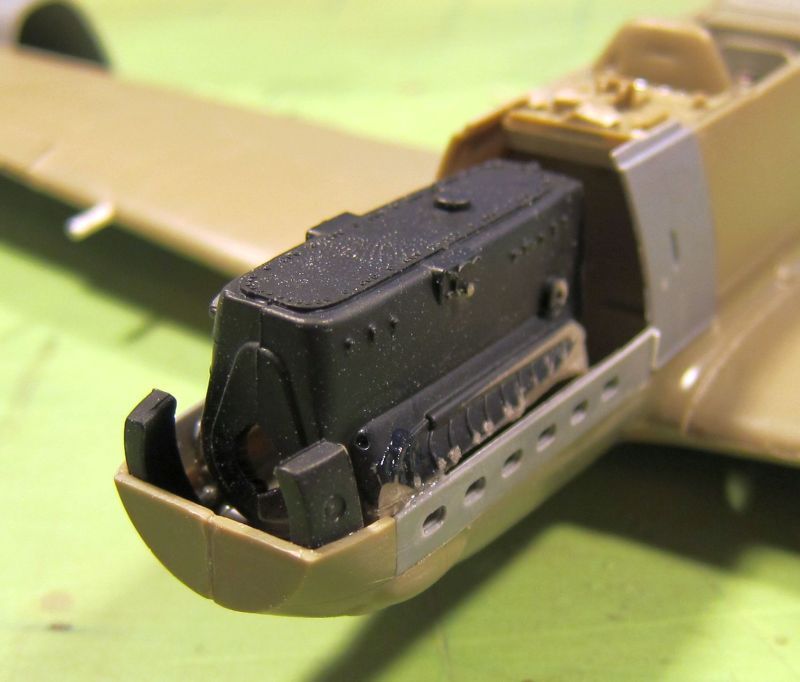
— This note applies to both the kit and resin upper cowling parts. The nose is a tricky issue on the Eduard kit and seems to be where most modelers have problems. There are two issues when building the kit closed up. The first is that the instructions have you use a set of alternate parts that do away with the engine since the complete assembly won’t fit under the cowl. This leaves nothing behind the cooling slots in the nose, giving the model a hollow appearance.
This is the 3rd Eduard 109 I’ve built and after experimenting on the first one, the solution is use the engine in stripped down form. If building the kit OOB, use the two main halves, the upper cover part, prop shaft, front cover, and the oil reservoir. The oil tank can be glued to the interior of the nose and the motor can be glued to the oil cooler ramp, shimmed up to the right height with plastic stock. The exhausts can then be mounted directly to the motor. Without all the accessories, the motor fits under the cowl and it looks like something’s there, because it is.
For the conversion, I used the two halves, top plate, and oil cooler. I bored a hole in the front of the engine since the new resin spinner has a prop shaft on it already. I did have to cut down the sides of the engine where the exhausts ports are to clear the resin exhaust panels, although I could have thinned the resin panels instead. What this means is that, with a little extra work, it’s possible to display the model opened up, although the air cleaner and intake are different and would have to be scratched.
The second issue is that the nose can be fiddly. The fit with both the new resin parts and the original ones is very good if assembled properly. The trick is to work from the rear forward and allow the parts to set before trying to mount the next ones.
— All of the gun ports have to filled. This includes the ejector chutes under the wings, the holes for the barrels, and the two cooling slots in the fuselage gun cover. This is why it’s better to start with the E-1 kit instead of the E-3. If using the E-3, the wing bulges for the cannons need to be removed and the holes filled. This was all done with bits of scrap styrene glued in and sanded smooth.
— The only other problem area I had was with the chin mounted oil cooler and this was self induced as well. The original one has to be removed from the fuselage halves. I believe I removed a little too much and I ended up having to fair the resin part in with a little bit of Apoxie putty. The contours of the resin part look spot on if I had left a little bit of the original cooler’s fairing instead of sanding it totally flush.
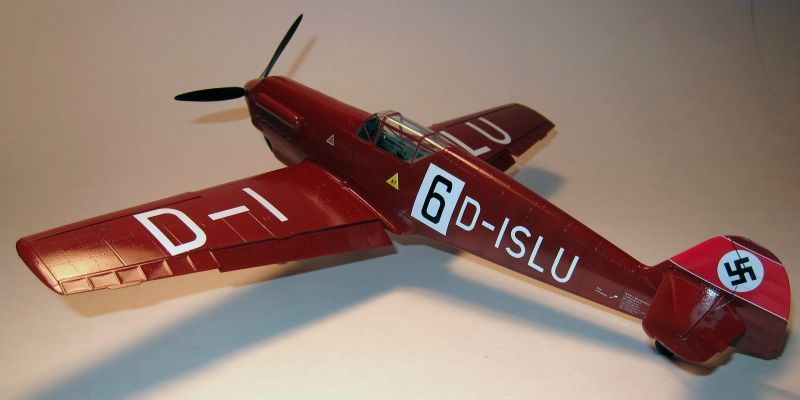
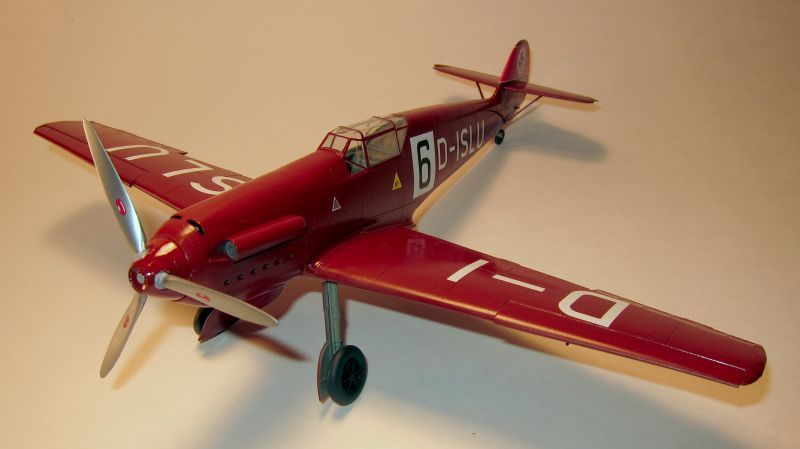
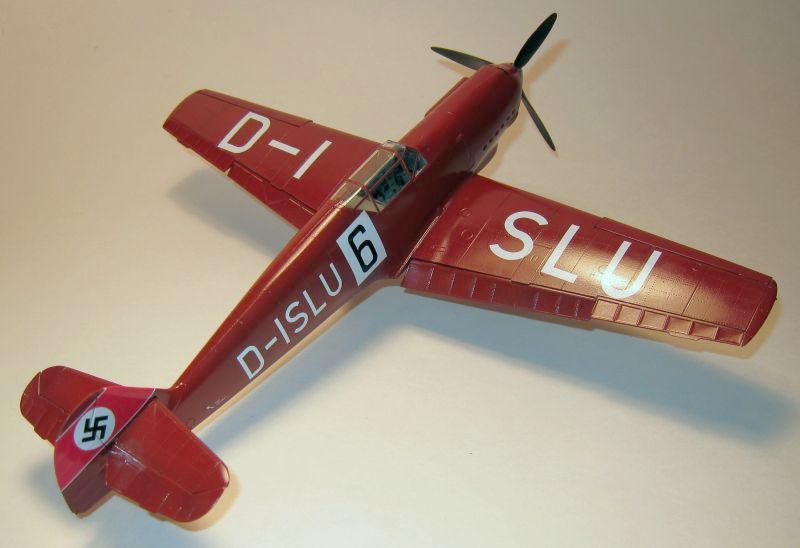
The last bit changed was the antenna mount on the rear canopy part. More than likely, the aircraft had no mount for the antenna mast at all, but removing the pad from the kit clear part looked like a pretty difficult proposition and I chose to simply fill the slot for the mast and leave it looking like a blank off panel.
The instructions note that the plane probably had its panel lines puttied over and sanded smooth, but I have never cared for the way this looks on a model. I think it can make it look very toy-like.
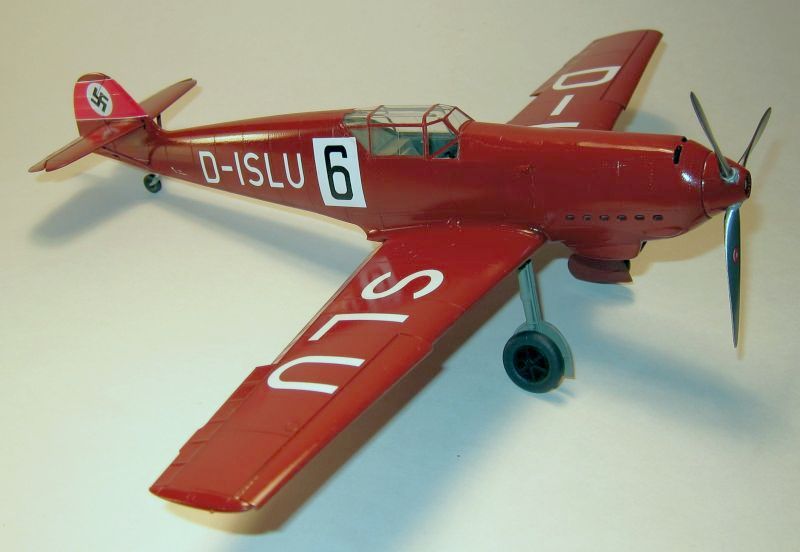
I had a hard time mixing up a paint color I was satisfied with. Believe it or not, I ended up using red oxide lacquer automotive primer (redneck red…..), sprayed from a rattle can. I sprayed it lightly to make sure that the pre-shading was still subtly visible. This was given a good coat of Future to get it ready for the decals.
The decals performed great and the only ones that needed any help were the rudder bands since there’s some intricate molded on detail there. I used a light application of Micro Sol (go figure, Microscale decals worked great with Microscale products…) and they settled right down. My only complaint is that the red on the rudder bands is a little on the bright side. I would have preferred the discs/swastika and white stripes to be separate decals, so I could paint the red. Once dry, another good coat of Future was applied and the final bits added on. The new resin gear doors fit perfectly.
In conclusion, this is a great conversion set that doesn’t add a significant amount of build time but does leave you with a very distinctive Bf 109 that you won’t have any difficulty picking out of the crowd. Very highly recommended, even to those who want to do their first resin conversion.
The set is available from Werner’s Wings direct at http://www.wernerswings.com/.
© Chris Savaglio 2011
This review was published on Sunday, July 31 2011; Last modified on Wednesday, May 18 2016