
Scratchbuilt Northrop HL-10
By Angelo Picardo
The HL-10 was one of a series of test aircraft used by NASA to try out the lift body principle. This is where lift is generated by the shape of the actual aircraft body forming the aerofoil section, rather than wings, as in conventional aircraft. The other designs were the M2-F2 and, the X-24, A and B.
Developed in the mid sixties they were flown up to the mid seventies, being air launched from a B-52 at the Dryden Flight Research Centre, next to Edwards Airforce Base. Though mainly a NASA project, the USAF were also involved. These revolutionary aircraft were being flown in an era where on board computers were considered science fiction. The pilot had to control some very un-stable aircraft.
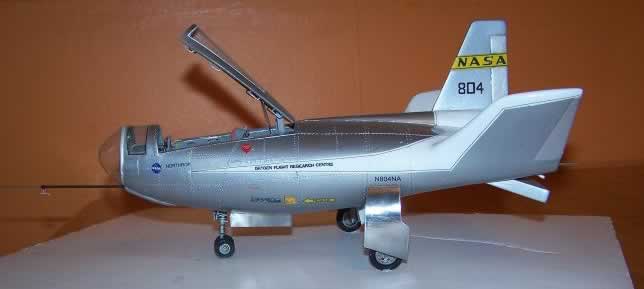
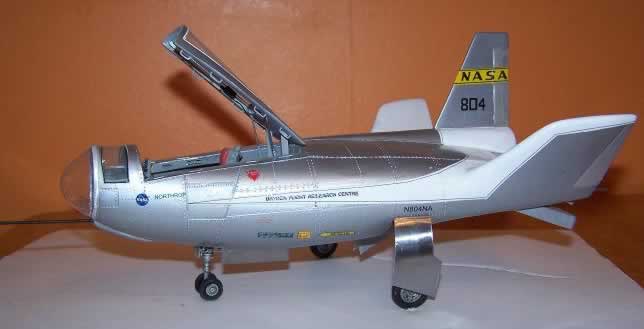
The HL-10 was modified after the first few flights when it was discovered to be virtually un-controllable. The leading edges of the two winglets were modified which is why the plane had the white trim painted on to mask the modifications.
The M2-F2 was so un-controllable it actually crashed after developing a rolling motion the pilot could not stop. This crash was filmed and featured in the opening title sequence to the The Six Million Dollar Man as did the launching of the HL-10. Though the test pilot's injuries were not as catastrophic as Steve Austin?s, he was seriously injured and did loose an eye from complications arising from the injuries he received.
The HL-10 flew un-powered and powered missions using the same type of rocket engine as the Bell X-1. It was supersonic and, in latter missions, flew to an altitude that required the pilot to wear a Gemini project pressure suit. The HL-10 and the M2-F2, rebuilt after the crash, along with the X-24 A&B, helped to develop the technology that lead to the Space Shuttle, even though the Shuttle is not a true lifting body, it has wings. The Shuttle?s design was based on the information these diminutive test aircraft discovered by pushing back the limits of aerodynamic knowledge in a time when computers took up a whole room and, had a memory capacity less than most mobile phones today. Computers could not be used to predict flight characteristics, a test pilot had to take up a revolutionary aircraft and see how it flew.
My interest in these aircraft and, particularly the HL-10, came from seeing the ?Six Million Dollar Man?. I was fascinated by this unusual looking aircraft and started to find out as much as possible, which was not much. A couple of years ago I discovered the 1/48th scale kit by Collectaire and got one. Sitting there looking at it I decided I wanted a bigger model. To do this I would have to scratch build it. I have done some major conversion work before but, never a complete scratch built model.
Construction
I had the 1/72nd plans that came with the kit enlarged to 1/24th and, using the kit as a 3D set of plans, I got to work. The basic shape was cut from balsa wood and planked out roughly with more balsa. I then used P-38 car repair filler to start to refine the shape.
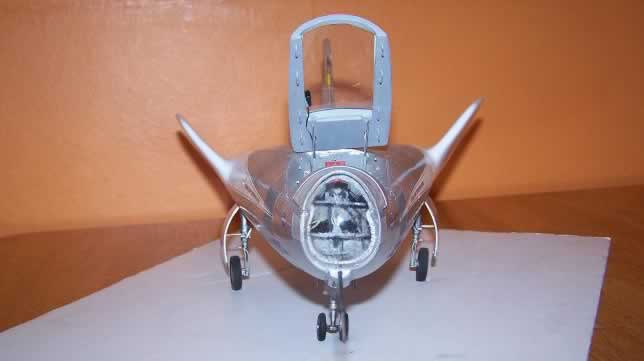
After this I hollowed out the cockpit area and lined it with thin plastic card. I used this plastic card to skin the body too. I cut out parts to match the panels and super glued them to the P-38 filler. The fins and winglets were cut from Perspex sheet and glued in place. The winglets were contoured in with Milliput.
Once this was done, I covered the whole thing in Mr Surfacer 500 as the superglue had caused the plastic card to become brittle and crack. This coating also gave me a uniform finish to work on. This construction method means that the model is quite heavy, about 1.5lbs (600 grammes) for a model 10 inches long (250mm).
References through out the project were scarce. I had the plans but became more and more sceptical of them. There are a vast number of photographs available on the net, especially at NASA. These photographs were showing a number of discrepancies between them and the plans on the contours of the nose, which is why I had to reshape it a few times with Squadron green putty. I did shelve the whole project about a year ago as I was so fed up with the lack of reliable, clear information available. I tried to e-mail NASA and Northrop for help, but I never received a reply, cheers guys! What?s the point of having archives and public relations departments?
I did find a book called Flying Without Wings by Milton O Thompson and Curtis Peebles, published by Crecy (ISBN1-947554-78-5). This is about the whole lifting body project, starting with the micro light prototypes and carrying on to the full size machines. I recommend it to anyone interested in this subject.
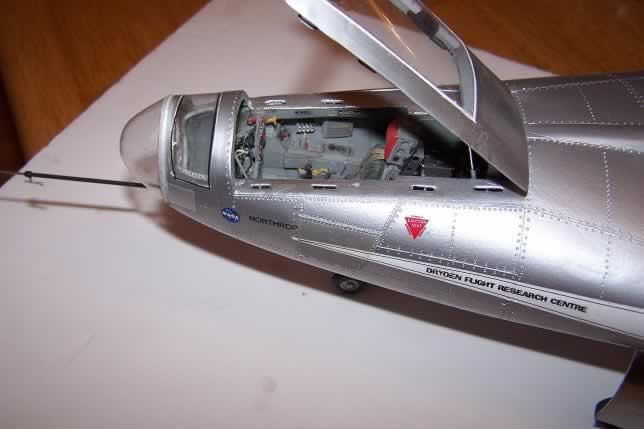
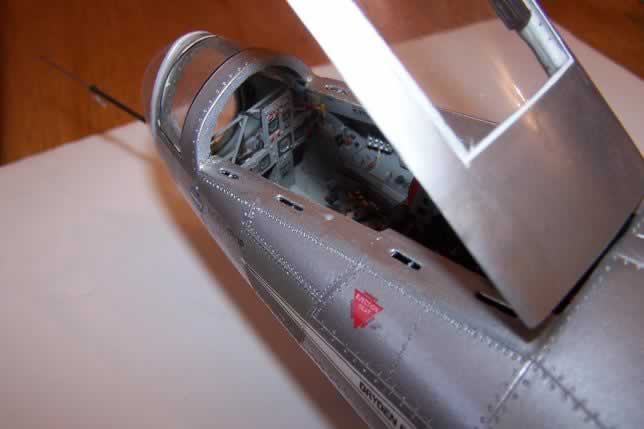
If the exterior was proving a nightmare, the inside was worse. I only found one picture of the inside that showed the port side consol only. An online flight simulator provided an idea of the control panel lay out as did a dodgy picture of the actual flight simulator for the HL-10. I then discovered that it had a very similar cockpit layout to the M2-F2 and there were some good photos of that planes cockpit.
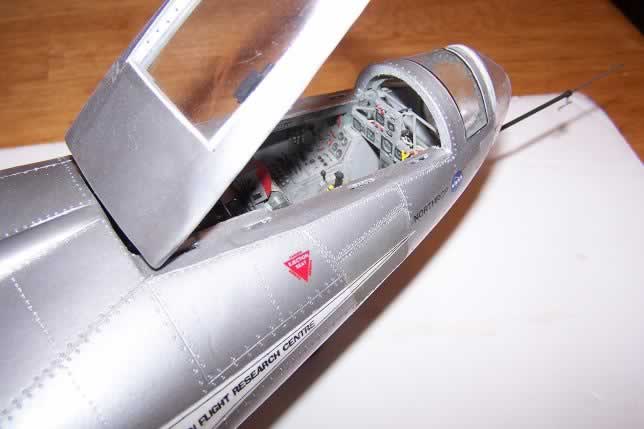
The instrument panel was made using Waldron instruments and bezels. When I use Waldron instruments I copy the supplied film and use that to make the instrument panel rather than using the original film part.
The rest of the interior was made using plastic card, wire, stretched sprue and the tiny porcelain beads that come out of water filters. As the back of the panel is un-shrouded all the instrument backs and wiring have to be made too.
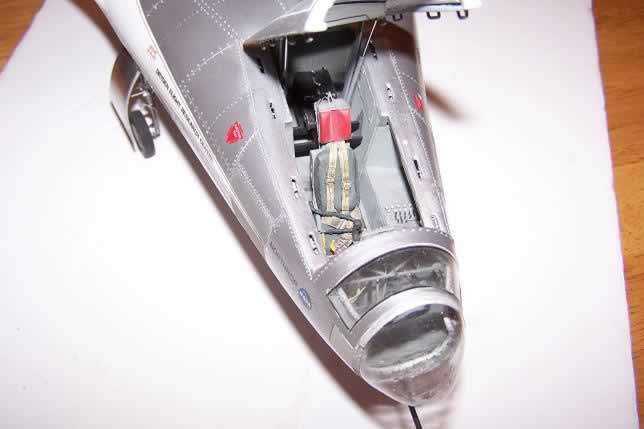
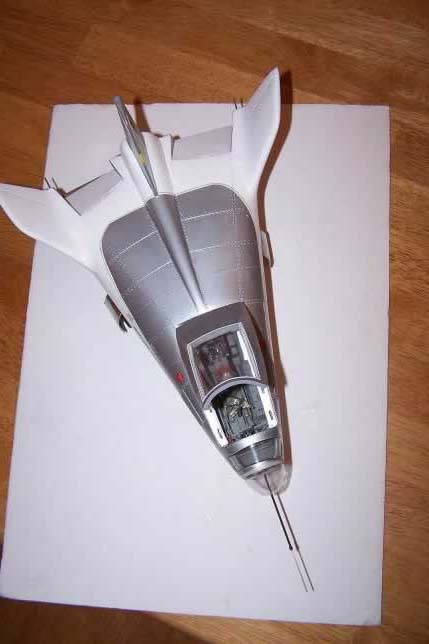
The ejector seat started off as a 1/24th Harrier seat heavily modified to look like a seat out of the F-106 which was used in the HL-10.
The Undercarriage was made from spares, as on the real thing where a T-38s main gear and a T-39 nose gear was used. For the model the main gear was from an F-15 and the nose gear was part Phantom, part scratch built. The undercarriage doors were made by laminating thin aluminium sheet over plastic card.
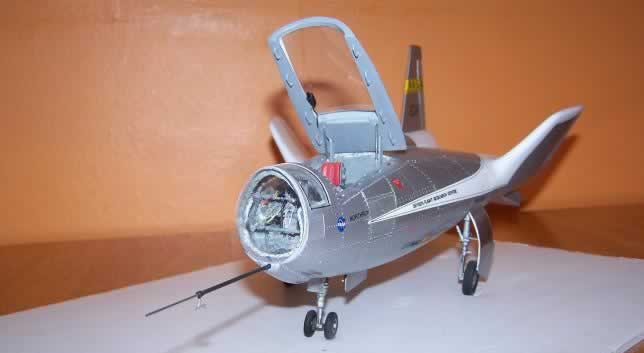
The HL-10 was initially all over bare metal apart from the markings. Following modification to the winglets, a white trim was applied over the leading edges of the wings and the rear fuselage. This was the finish I wanted. I was not sure how to do the metal finish. Options were: Bare metal foil; Alclad; or Humbrol metal cote.
With previous experiences of foil finishes, I couldn?t get them to stick and, there were some complex curves to the HL-10, especially around the winglets. Alclad is excellent, but expensive, and I was on a budget here. I opted to use Humbrol Metal cote.
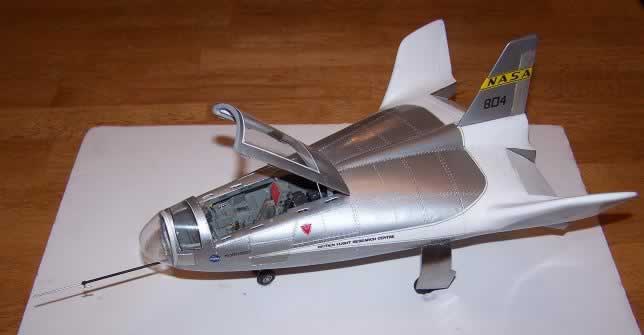

I used both the matt and polished aluminium. Individual panels were shaded by applying a matt varnish. Other panels had small pieces of Bare Metal foil applied. To paint the white trim I studied all possible references and started by using thin strips of Tamiya masking tape (1mm wide) to lay out the area before I masked the whole thing off. The paint used was Tamiya gloss white acrylic. After painting the area I had to apply a very thin black pin stripe using decals, not a fun thing! The rest of the decals were from raiding my spares box.
I was very lucky to have a set of decals from Revell?s old X-15 as the NASA tail flashes were a perfect fit. The Meat Balls came from Cutting Edge. The Northrop and Dryden logos were printed onto clear decal film. The transparencies were left until last.
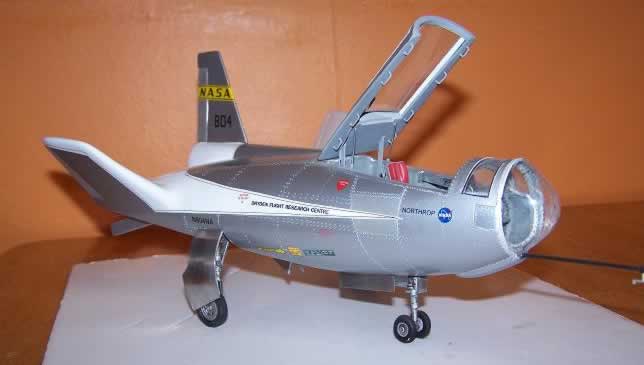
I used thin acetate for the main canopy, simply gluing it over the plastic card frame I built. The clear area was masked and I painted the rest aluminium. The nose transparency was plunged formed over a Milliput master. I burnt myself doing this so I am even more upset that it does not look quite right. As I said before the whole contour of the nose of the HL-10 varies from picture to picture. The nose probe was made from telescoped steel tube.
I have learnt a lot from this project, especially about how much I could actually do and how easy some things were to do, compared to my original assumptions. I enjoyed the project despite loosing heart part of the way through.
© 2005 Angelo Picardo
This article was published on Wednesday, July 20 2011; Last modified on Saturday, May 14 2016