
Hasegawa F-16C
By David Horn
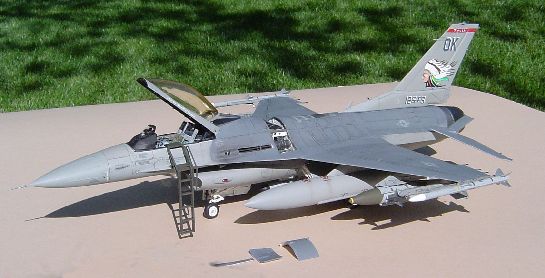
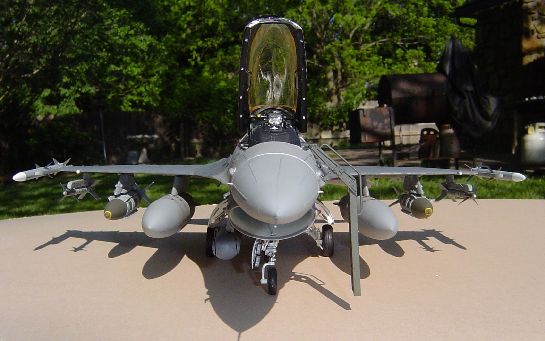
Building the 1/32 Hasegawa F-16C and getting it correctly updated to a block 42 aircraft was a real challenge. The Hasegawa kit was really showing it’s age with both raised and recessed panel lines along with missing or incorrect panel lines. Overall shape of the kit from what I could tell was acceptable but as mentioned, a lot of work lay ahead after I opened the box two years ago.
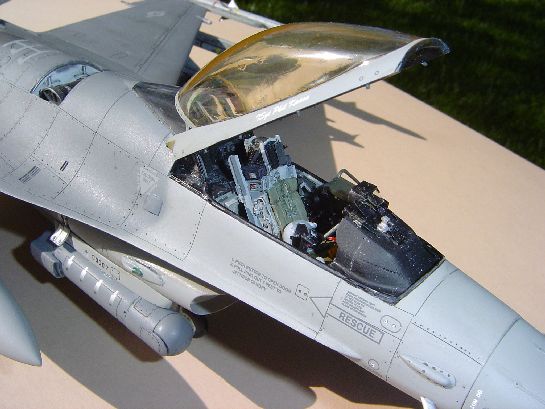
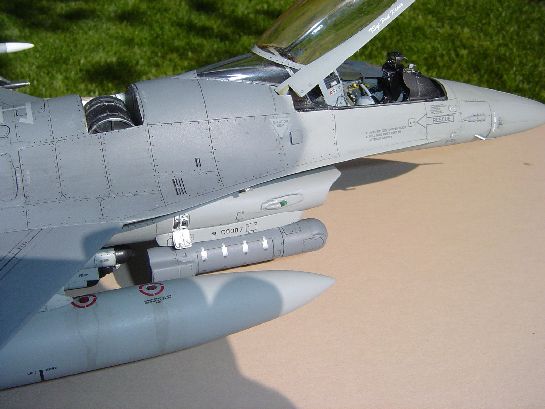
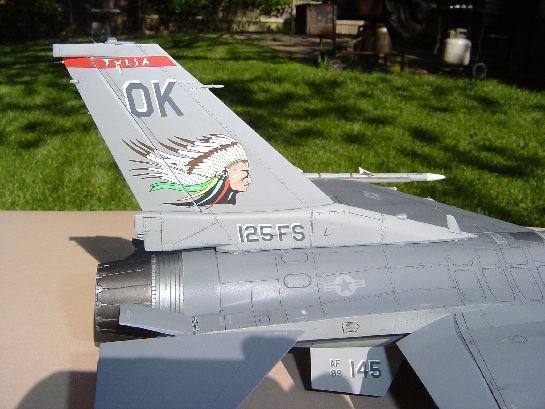
When I started on the kit, there was no other decent 1/32 F-16 on the market and it was before the word on the Tamiya or Academy kit surfaced. The first rule of business was to get a better quality office in the kit so I purchased the Black Box cockpit set which is an exceptional kit with the WAR style HUD which I needed to make the Oklahoma ANG Block 42 model. The only thing I was disappointed about the cockpit set is the lack of canopy internal details so I had to scratch build the necessary details. There were other details that needed to be address to make a correct block 42 bird that the guard has. Most noticeable are the stiffening or reinforcing plates on the top of the fuselage, landing lights on the nose gear door and provisions for pods on station 5A and 5B that house the targeting pods. The reinforcement plates were simple to produce using .010 inch (.25 mm)thick plastic sheet and a template was created using CAD software. Next were the landing lights which were made from rectangular plastic strips and clear resin for a lens. Now for the challenging updates.
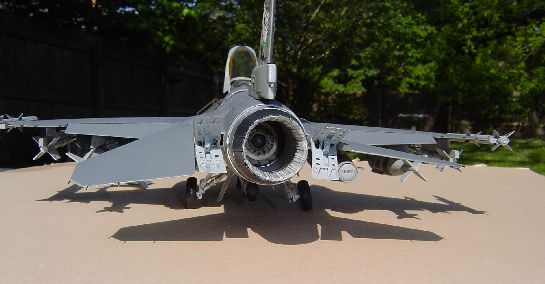
At the time of building the kit, the Tulsa jets were getting upgraded engines replacing the F100-PW-220 with the newer PW-229 engine. Two noticeable differences include the carbon fiber “turkey feathers” and a different afterburner augmenter ring. If I was going to detail the new engine, correcting the Hasegawa afterburner section depth was needed. Using my CAD software, I made a drawing of the afterburner section I needed and had a machine shop produce a master part so I could make a resin copy as needed. I mated the new burner section with the Cutting Edge nozzle and 1/43 carbon fiber decals from Scale Motor Sport and the engine was complete.
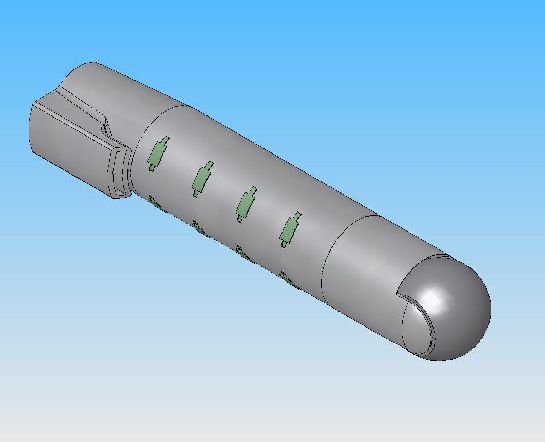
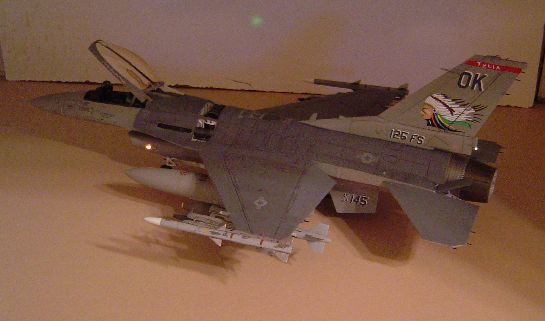
Next was the Litening pod (there are not any available to modelers in any scale) which looks similar to a Lantirn pod from a distance but the differences were extensive enough that modifying a Lantirn would be tough. With technology at my disposal, the next part was going to require me to push the envelope a bit so with various references sources, I made a 3D model a Litening pod and had a part electronically formed using SLA (Stereo Lithography) which converts a 3D CAD file to a solid using a special resin and lasers where the part literally grows at .008 inch (.20 mm) layers. There was still a lot of work to do to get the pod to the final stages like scribing all the panel lines and a few fine details. I used this master to create resin copies for future projects so all that work will not be repeated.
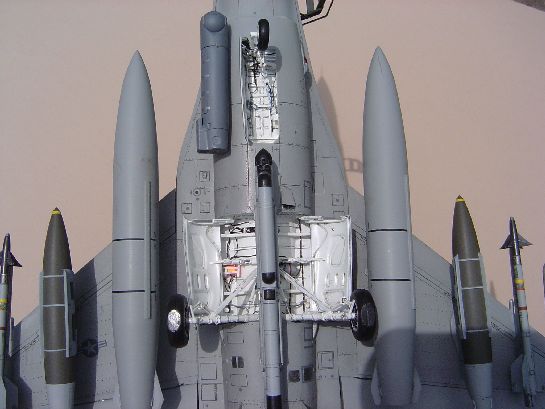
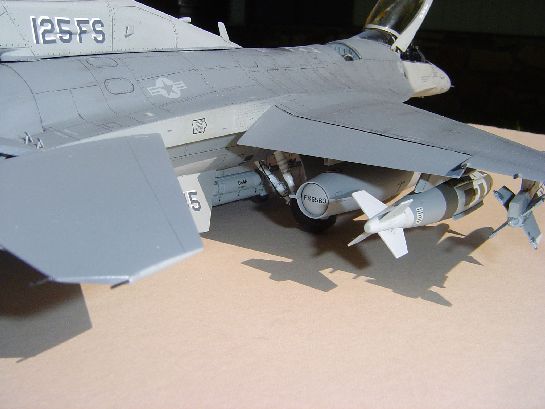
Just to spice a few things up, I decided to open the external power panel and corrected the access panel to the gun barrels. I also added some necessary structure to the gun bay. In the landing gear bay, I tried to make it look a little busy so I added an accumulator bottle, battery and a few other details including miscellaneous wiring. An to top it all off, I added working NAV lights on the intake sides and a anti collision light in the tail using miniature incandescent bulbs and fiber optics. The battery is stored inside below the tail and can be accessed by removing the engine while a switch is located under the removable radome.
Painting was fairly straight forward using Xtracolor enamels, future Acrylic (to add a barrier for enamel wash) and then a coat of Model Master dull coat. The canopy did need to be tinted so with a few practice runs, I mixed up a batch of Future Acrylic with yellow food coloring and poured that to the inside of the canopy. The color is still a little light but with the F-16, the canopies appear to have all different shades as well as the newer jets being clear.
Decals were a mixed bag, Hobby Decal dry transfers were used for the insignias and stencil data while Eduard color placards were applied to the landing gear and ID plate in the aft canopy. The Distinctive markings of the Oklahoma Air National Guard were produced by Fox One decals out of Wichita and printed by Cartograph in Italy which these decals were the best I have ever used. I am a little partial to these since I was involved in getting some of the pictures to produce these decals for Fox One.
Indeed the Hasegawa is showing its age but a great and accurate model can be built with a little work. Now that Tamiya and Academy are on the market, some of the fun may be taken out of the build.
© David Horn
This article was published on Wednesday, July 20 2011; Last modified on Saturday, May 14 2016