
1/32 KAI F-4EJ Phantom
By Dr Menelaos Skourtopoulos
Introduction
Aahhh!, Japanese Phantoms! It sounds always exotic to me and since we have the big Phantom Kits in 1:32 scale in the market, I though it would be a very nice work to make one of them in the Japanese colors.
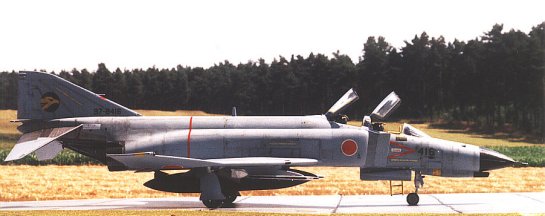
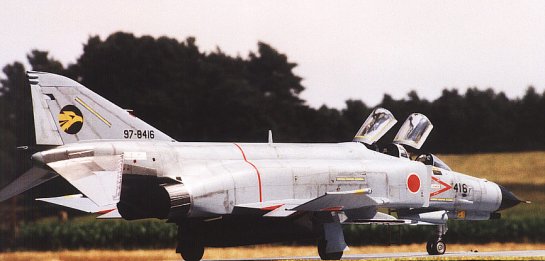
In 1971 the first of the 140 F-4EJs (J for Japan) arrived in Japan directly from St. Louis. 125 of them were constructed in Japan by Mitsubishi (what an irony, if you think, that some decades before they build the famous Zero-Sen…).
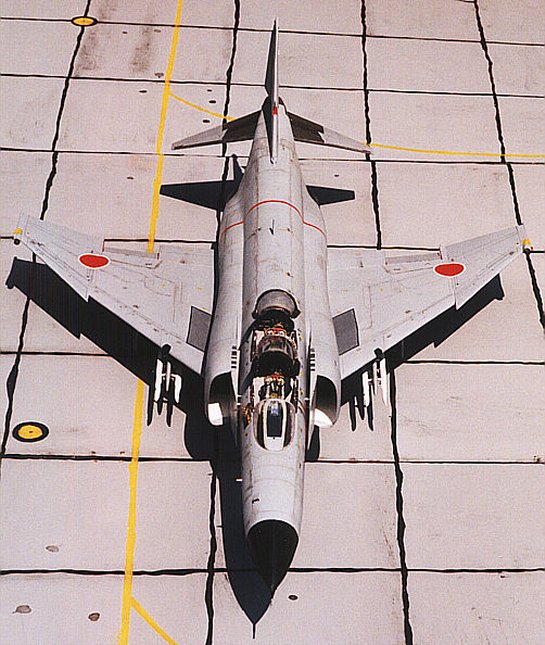
They were different as the US-F-4E version. They didn't had the bombing capability and no leading edge slats on the wing.
Six units flown the F-4EJ and today two of them they fly now the F-15J/DJ. In 1984 the JASDF began with an improvement program called KAI and this would make their Phantoms (about 96 aircraft) flying many years more…that means, that the active time is grow now from 3000 to 5000 hours, a new radar (Westinghouse APG-66J), a new HUD (from Kaiser) and cockpit layouts, an IFF system from Hazeltine and many more electronic systems were installed.

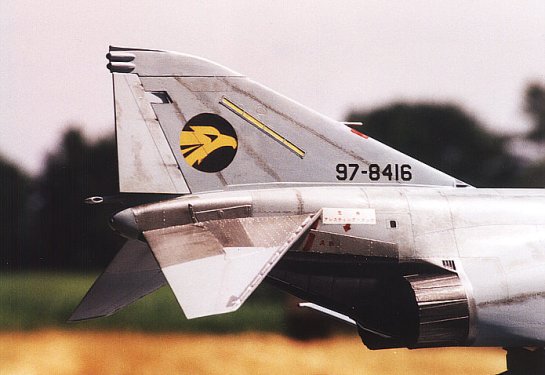
How you can see the differences between a normal EJ and a KAI?
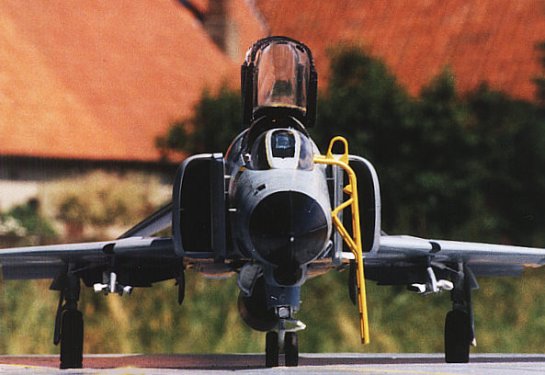
- Well, first of all there is a double RWR antenna on the top of the fin.
- A big UHF antenna on the middle of the fuselage
- Big RHAW antennas (like the F-4E) on the wing tips.
- A strait antenna on the big front gear door
- The radome has now some enhance strips on it.
- The F-15 centerline tank

Converting the F-4F into a KAI for the F-4EJ-KAI
I used once more the Revell F-4F. The F-4F kit offers very good seats but not so good instrument panels as the F-4E kit and has not the slatted stabilators. So I had to order them again together with the right fin of the F-4E Revell-USA kit from the States because it is just very difficult to make them from scratch (once more, many thanks guys!). One more problem is the wrong radome of the F-4E/F kit, so I had to rework it to make it looking right. As I wrote before the kit has its problems and here is what you have to do:
- The F-4F has no slated stabilators and I had to order them from Revell/Monogram
- The F-4EJ has no leading edge slat on the wings, so I order the outer wings of the RF-4C kit from Revell and make some changes on them to make them looking right (you need to cut the RHAW antennas from the slated F-4E and glue them on the non slated outer wing of the KAI)
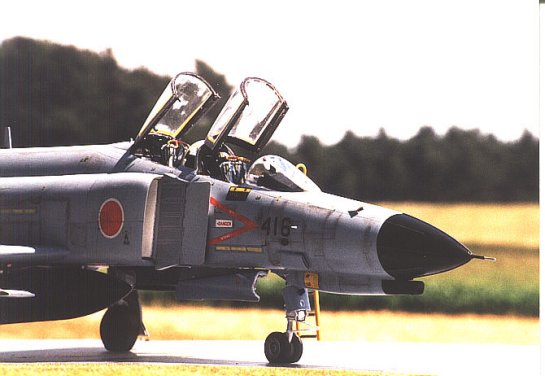
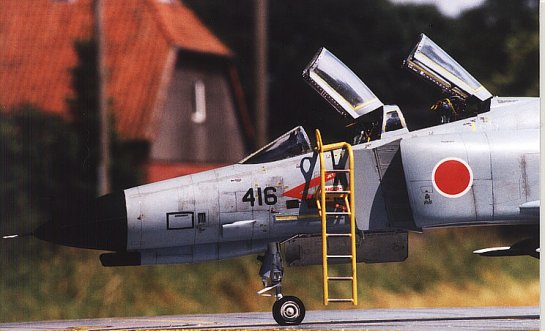
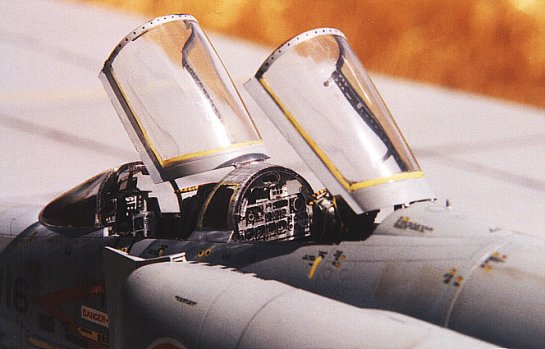
- The front cockpit has now two big screens instead of the APQ-120 scope. They made easy from plastic card. I had to make the HUD and the whole region around it from scratch and some room for the new screens. The back cockpit has no big differences. Only the radar scope is something different (it's a digital multi-screen in the same position as the old scope). I used here the upper part of my broken Tamiya Phantom…(see previous F-4 articles)
- The upper part of the fin (part no. 208) is not correct and I had to rework it, or order it from Revell-Monogram (in the F-4E kit you'll find the right one!)
- I cut off the rudder and flaps and glue them in an other position.
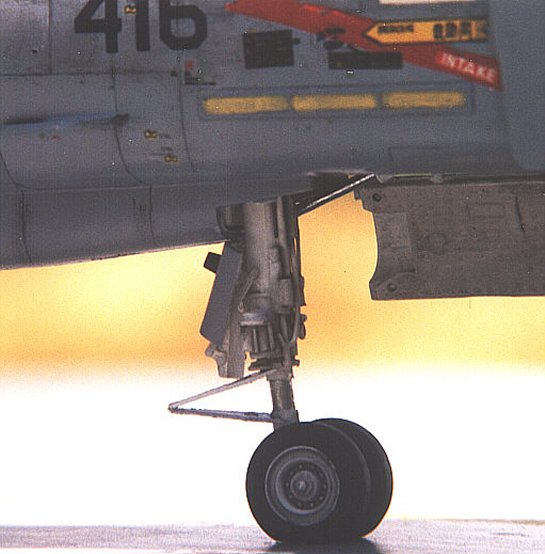
- I had to build the nose gear leg from scratch, because it is out of scale. (see part I and II for further information).
- You have to cut off 0,3cm of the main gear legs, because the Model seats too "high" in its main gear. I had to drill a hole in the middle of each main wheel to make it looking better; otherwise the main gear legs are done very well.
- Once again the back cockpit is too deep and I had to rework it. I had to cut it away from the front and back wall, and glue it again 0.5cm higher. If you don't change it, you'll have to put the seat much higher and it doesn't look right ... otherwise the situation in the cockpits is OK.
- The cockpit detail sets of Eduard (032-24 and 032-32) were used to show the high degree of details, that you see on the Phantom in that region. I also added some cables in its back to simulate the typical F-4 ... cable chaos there. For the canopy rails I copied the brass set of Hasegawa's F-4 special series in 1:48 up to the 1:32, and used that copy to simulate the canopy rails…
- I had to rework the radome to make it looking better. The KAI radome has also some enhance strips on it. I made them from stretched plastic.
- I also had to make some work inside the canopies. I used sheet styrene and putty to represent the structure of the front and the back canopies and the Eduard sets to represent the canopy rails.
- I had to open the bleed air doors under the fuselage between the centerline tank (do it before you glue the fuselage halves with the wing) and glue them in the open position.
- The RWR antennas on the top of the fin were made from some Sidewinders in 1:48 scale!
- The big UHF antenna on the fuselage is made from a Sparrow fin!
- The Sidewinder rails are a bit too long, and I had to make them shorter…
- I used once again the excellent resin seats from CAM
Painting and Decals
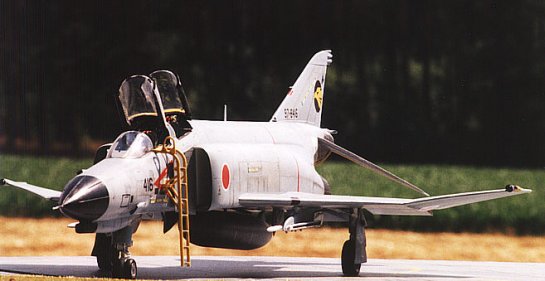
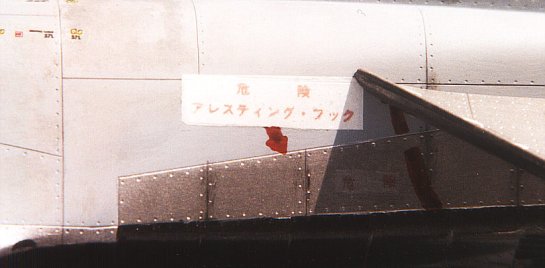
Today the KAI are painted in a one-color scheme (FS-36320) with smaller red disks and almost all stencils written in...Japanese!!
That's a big problem, because I had no decals from an aftermarket sheet, so they have to be a self-made project.
I was lucky enough to have the decals of the Hasegawa F-4EJ in 1:48 scale. I used the red disks and the serials numbers of it. The F-4Ejs have in the '70s and '80s big red disks and numbers that in the '90s would be getting much smaller for lower visibility reasons. That was what I want, because the big stencils in 1:48 scale have exactly the dimensions of the smaller markings in the 1:32 scale, if you build a KAI!
But I had to make many of the warning stencils myself, e.g. the Sq. badge, the "ARRESTING HOOK" and "RESCUE" quadrants and the red chevrons. I had to find the proper Japanese font for typing those letters and that was …..very difficult!
I chose the 506 Sq. badge because is a two color badge and easy to draw with my PC. I first paint a transparent decal sheet in yellow and then print the contour of the eagle head on it (with Corel Draw). The big "416" came from Verlinden Productions sheet of USAF-letters in 1:48…
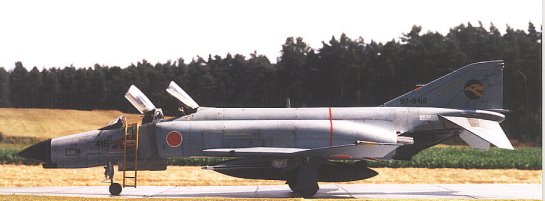
The weathering effects on the JASDF Phantoms are very high, so you can see the amount of dirt I put on my model…
I used only enamels (Humbrol No. 128 and 126 for weathering) and no spray guns, everything is made by brush…
I think such a conversion is something different and the Japanese Phantom is a real beauty beside the other … Hellenic F-4s of mine!
References
- www.f-4ej.com (great site, but in Japanese, but just click around to find just…everything!)
- F-4 Phantom II in detail and scale (Part 2, 1, 3)(Bert Kinzey)
© Dr Menelaos Skourtopoulos
This article was published on Wednesday, July 20 2011; Last modified on Saturday, May 14 2016