
Trumpeter 1/32 A-6E TRAM Intruder
By Daniel Sahling
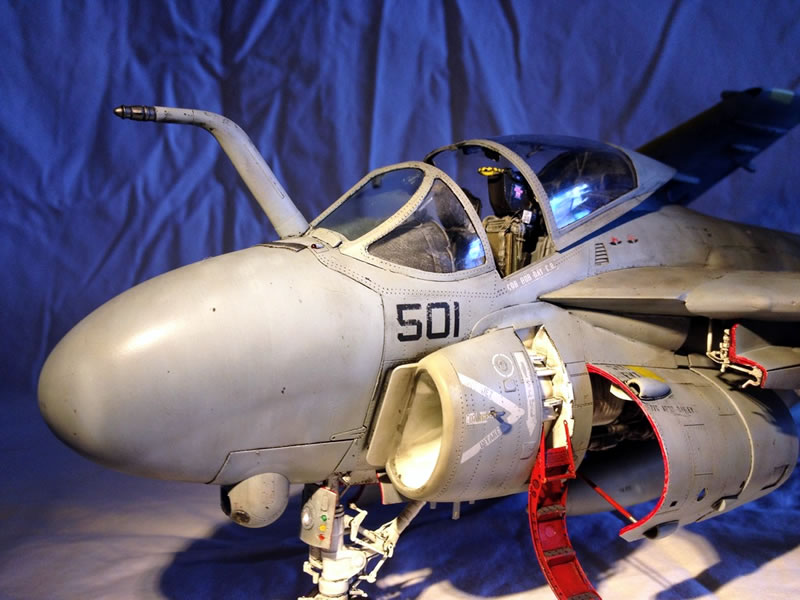
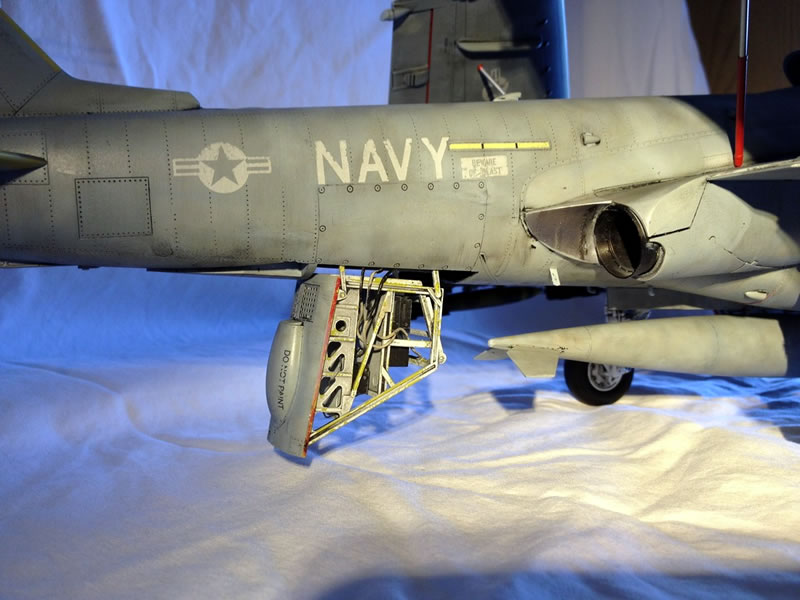
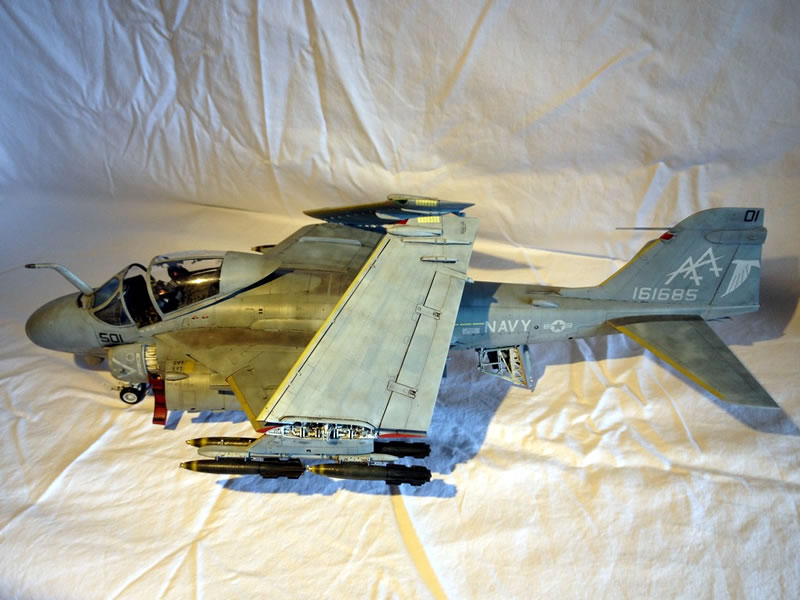
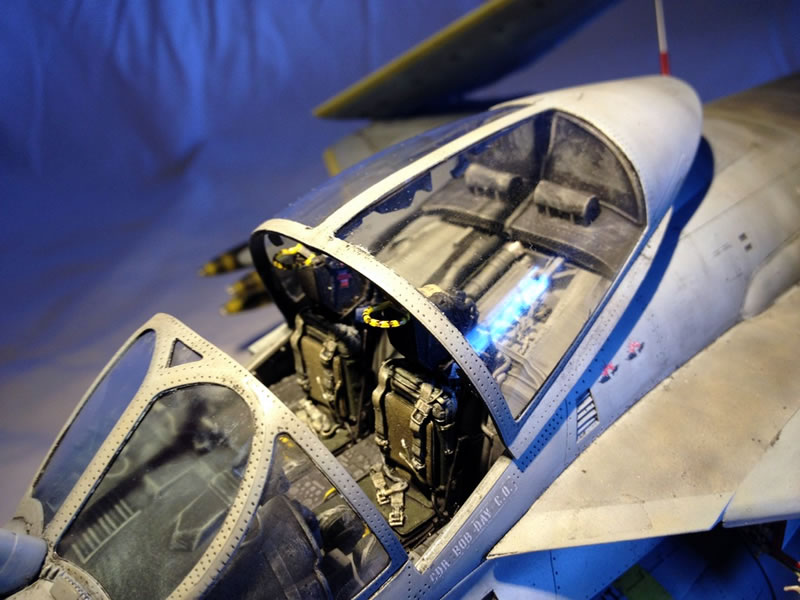
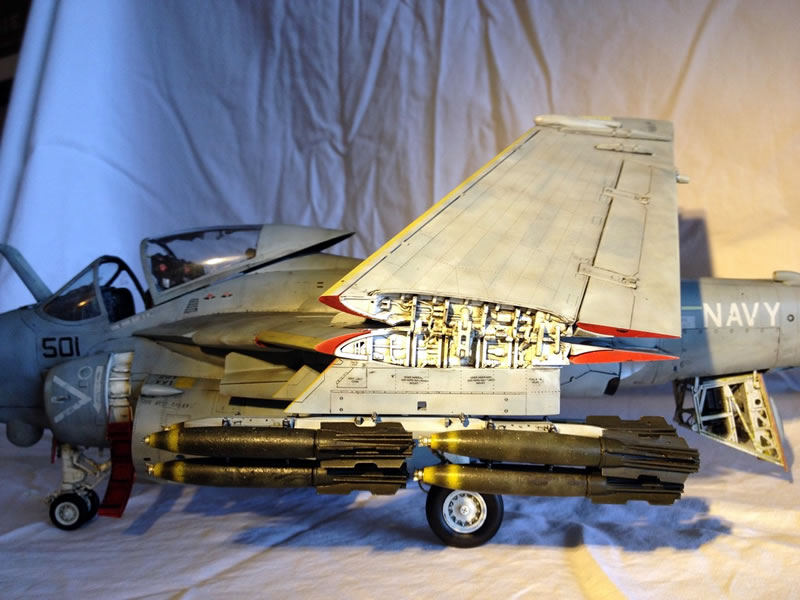
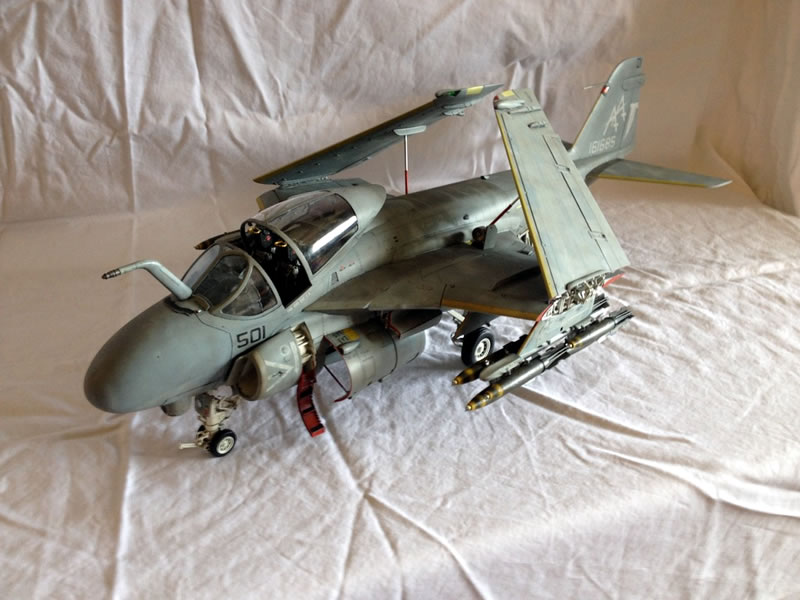
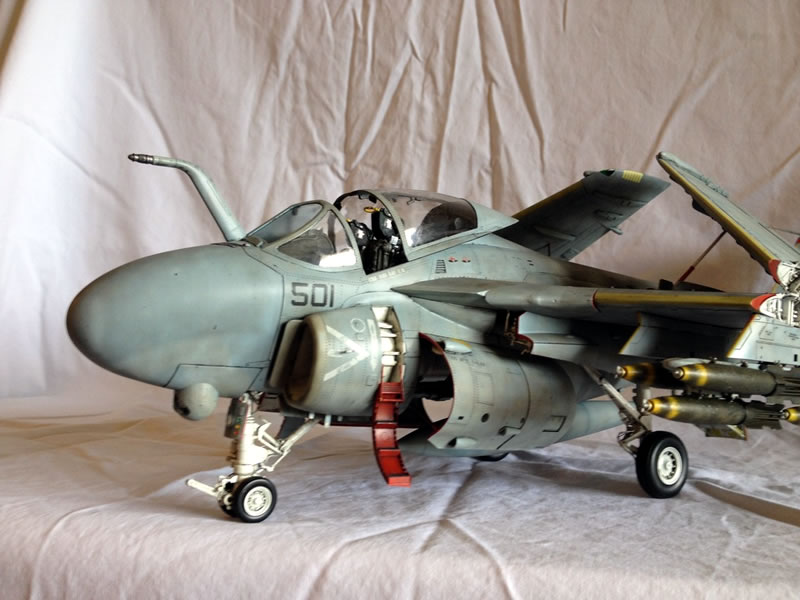
It's with great pleasure that I get to present Trumpeter's new 1/32 A-6E Intruder. For starters, this is an AMAZING kit. The fit is top notice, I'd say it almost rivals Tamiya in this department, on tricky spots were fitting the engines inside (and this is optional) and some of the wing folding mechanisms. There is a ton of very sharp detail throughout the entire model, a resin cockpit isn't really that necessary at all (I didn't use one). The landing gear installation is solid and relatively easy, at least in this configuration I have (resin bombs) the plane is perfectly balanced I didn't use any ballast (you might want to use some with other configurations though).
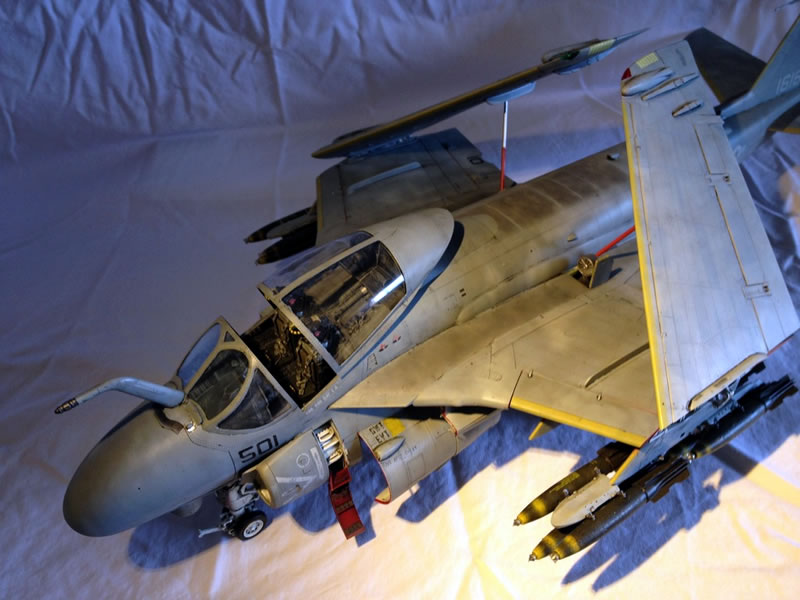
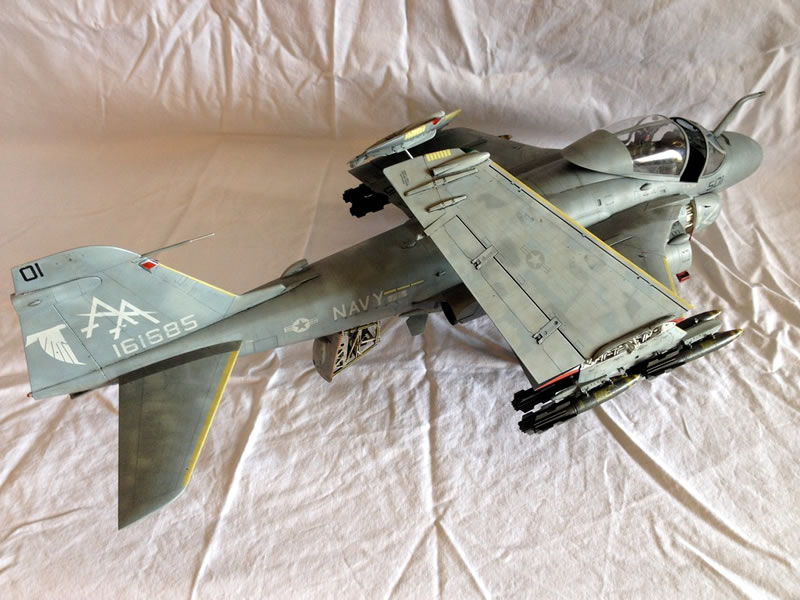
The basic aircraft is OOB, I used Northstar Models 1/32 Mk.82 Snakeyes which have great detail and really enhance the kit in this respect. I also detailed the landing gear with hydraulic lines using lead wire as well as the engine. If you're wondering why there aren't any photos of the engines its because I attempted this and one of the wings snapped off! Luckily it was easily fixed and due to the weathering and overall dirty appearance of USN aircraft I dare to you find it. Also, AOA Decals' "Sandbox Intruders" decals, kudos to them on this set it has a lot of options, they're thin and tough (I had to really almost scrub the decals with sandpaper to weather them) they also give you some instructions on panel lines to fill in, etc to make a more accurate A-6E. True Details' GRU-7 ejection seats, really nice piece of resin with good detail but they were missing the ejection handles, however, I still would recommend them.
I modeled this after an A-6E that was involved in the Libyan attacks of 1986, there weren't many reference photos of this specific one (I only had 2) so I had some fun using my imagination on weathering and touch-up painting. Some people think the TPS is boring, I would argue differently, that if you enjoy airbrushing and weathering then they are an absolute blast to paint. I used mostly Mr. Color paints with some Tamiya acrylics, an oil wash for highlighting detail and some weathering & blending. For painting I used my usual method of going very slowly and detailing almost all parts & panels with various shades of browns, tans, and greys before misting the base colors to blend it in, the demarcation lines between the two greys is subtle and on par with how it looks in real life (if you look close there is very little uniformity to the paint finish, this keeps it interesting to the eye. I hope you enjoy checking it out and have as much fun as I did building it.

© Daniel Sahling 2015
This article was published on Saturday, August 01 2015; Last modified on Thursday, October 27 2016