
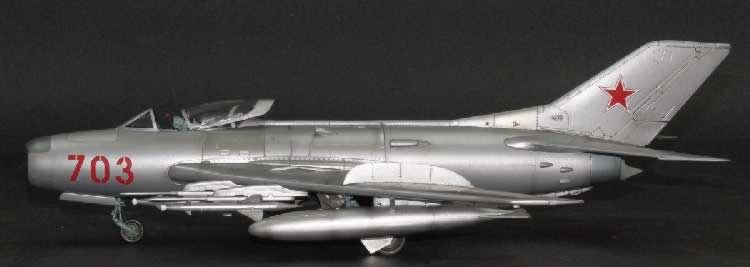
Trumpeter 1/32 MiG-19PM NATO codename "Farmer E"
By Jeffrey Brundt
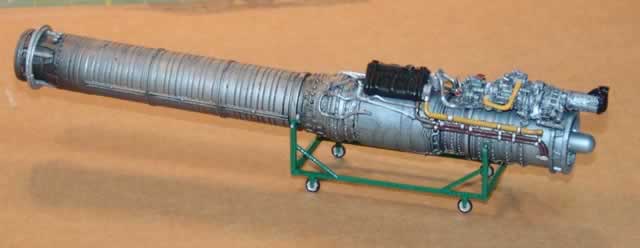
The Trumpeter 1/32 MiG-19 is an often overlooked model. The kit is nicely done and is a very good effort on Trumpeter?s part. It comes in a pretty good sized, sturdy box with a LOT of sprues. The same kit can be used to build a Chinese F-6 version so pay careful attention to the instructions as to which parts to use and what holes need to be opened up. There is nicely engraved surface detail (which is not overdone as on other Trumpeter kits) and two excellent, well detailed Tumansky RD-9 turbojet engines with resin parts that depict the accessory section of the turbojet engines. There are plenty of weapons sprues as well, including two versions of the AA-1 Alakali (RS-1A/RS-2) missiles along with various other bombs. The bombs are not used on the Farmer E (they were only used on the earlier, Farmer C models) so you can relegate them to the spares pile.
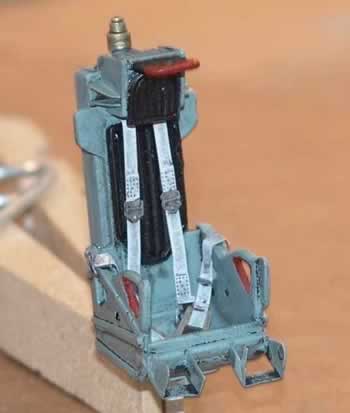
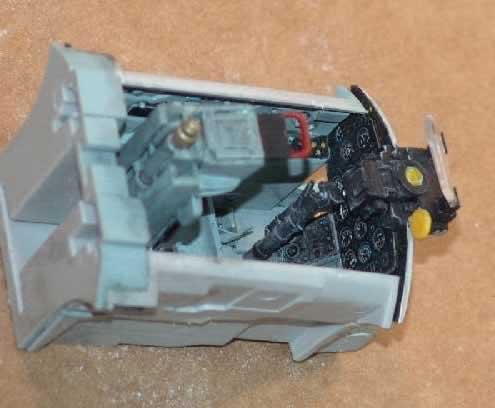
While the stock cockpit is nice I enhanced mine with Eduard?s PE detail set. It really makes a difference, especially on the instrument panel. The ejection seat alone contains over 10 parts. The interior was painted RLM 76 which is a very close match to Russian interior blue/grey. It was then given an enamel wash to bring out details. This plane requires quite a bit of nose weight to prevent it from being a tail sitter. I was able to epoxy lead shot and BB?s in the nose air splitter intake halves before gluing them together. The air splitter is then glued to the cockpit assembly and they are then sandwiched between the fuse halves.

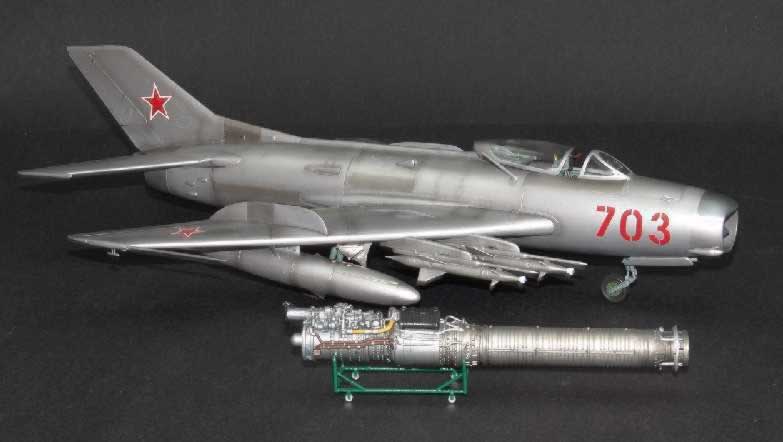
Trumpeter provides engine exhaust nozzle covers to hide the fact that if you build the engines and leave them out of the model for external display you won?t have gaping holes in the tail end. It seemed to me quite a shame that in order to be able to have a model with uncovered and visible exhaust nozzles I would have to close up inside the fuse those beautifully detailed Tumansky RD-9 turbojet engines. I opted instead for some extra engineering and made the forward and aft fuse halve separate their intended splice line to allow for the aft fuselage section to be removable so as to view the finished engines. In order to do this I added some music wire guide pins and mating holes to the aft and forward fuse halves. These pins help hold and align the fuse halves together. In addition, the installed engines themselves also provide for added rigidity. One engine was glued in place to its fuselage mount and the other was allowed to be removable so it could be displayed next to the finished model on its included display stand. The engines have quite a few pipes and hoses that need affixing. The various burner sections are made up of several pieces for both length and circumference. Building one engine is time consuming enough and doing two takes even more effort. These engines could be complete kits themselves. Once they were done they were sprayed with various shades of Model Master metalizer and Alclad II paints. After the paint had dried they were then given a black enamel wash to bring out the detail.
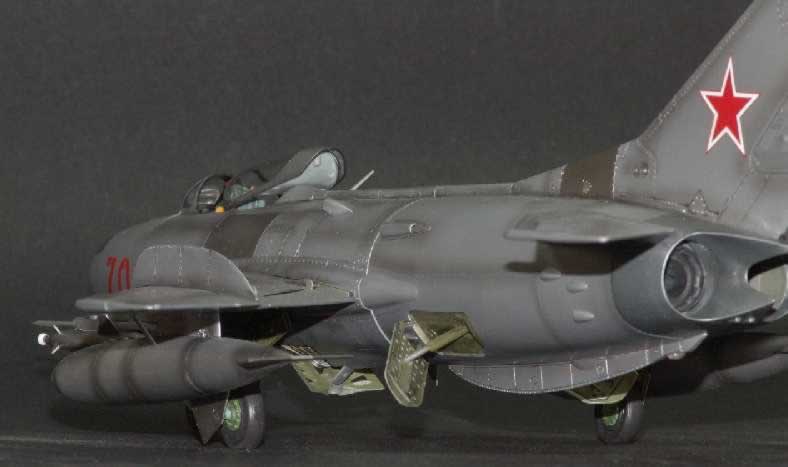
The model is built in several sub-assemblies; nose and forward fuse, aft fuse, wings. When the wings were completed they were joined to the forward fuse. Fit was excellent. Trumpeter did a good job of making seams on this kit correspond with actual panel lines of the real aircraft. I primed everything with regular grey auto primer. Because this was going to be my first NMF model I was a bit nervous. NMF can be quite intimidating because every surface flaw or imperfection is magnified a hundredfold. I knew I would need as perfect a surface as possible to lay the base metal color on to so the entire model was wet sanded with 8000 grit Micromesh. This got me as smooth a surface as possible. The first color laid down was Floquil old silver. Most Soviet era aircraft have different shades of aluminum on the various panels so I reproduced this by masking off random panels and spraying them with different shades of Alclad II. I then did some post shading along the panel lines with Alclad II duralumin. I think this resulted in a good effect of showing a well worn MiG that has been relegated to some rear echelon area while the front line units are equipped with top of the line MiG-21s. Following this the panel lines were highlighted with a wash to really bring out that fine surface detail
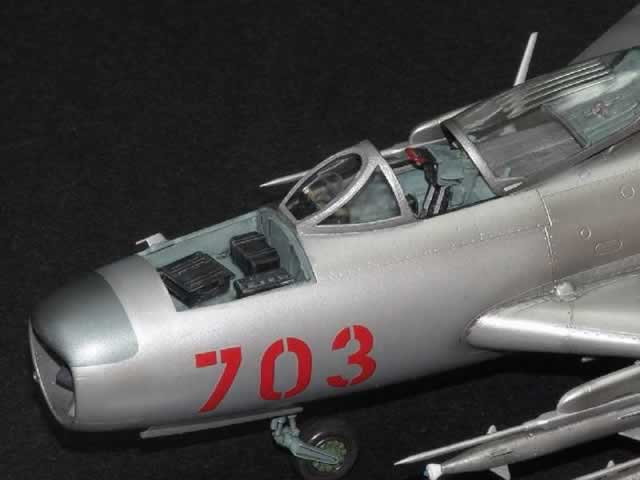
Once the basic painting was done all the fiddly bits came next; landing gear, doors, flaps, antennas, missiles, launchers, pylons, drop tanks etc. These fiddly bits can take almost as much time as the model. When these sub-assemblies were done and ready for installation the model was then decaled. I didn't use any of the placards provided. There are just too many. My thought was that if this was depicting a worn fighter than most of the data placards would be gone anyway. So it was just red stars and unit numbers on the nose. Now all the fiddly bits could be attached. When I was finally able to set the model on its gear my nose weight that I added early on proved to be more than adequate. With everything attached I gave the model a final coat of PollyScale satin acrylic to seal everything in.
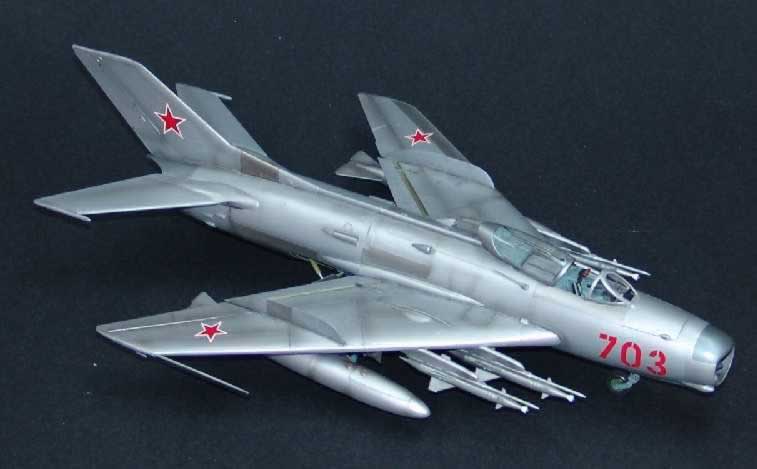
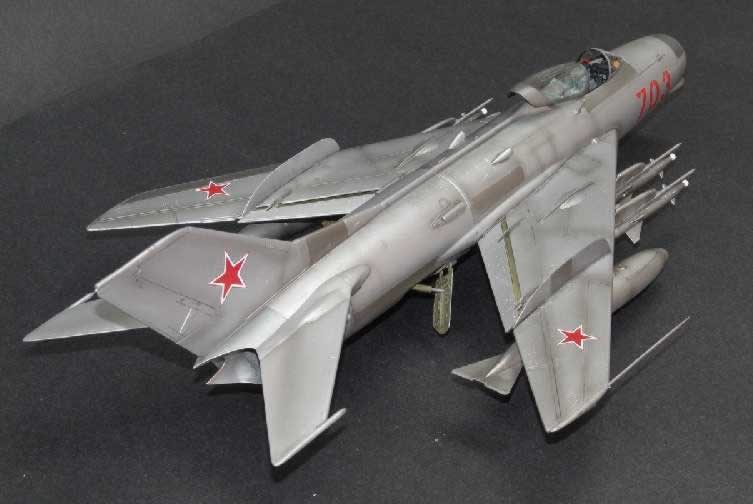
So there you have it. A really nice model of an overlooked Cold War fighter.
© Jeff Brundt
This article was published on Wednesday, July 20 2011; Last modified on Saturday, June 09 2018