
Paint Jar Shelves
By Scott Dunn
The Bill of Materials
- 1" spaced pegboard, as much as needed
- 1 and 1/2" by 3/4" wooden studs to mount the pegboard to the wall Wood screws, long enough to mount the studs to the wall
- More wood screws, short enough to mount the pegboard to the studs.
- 1/2" aluminum angle, as much as needed
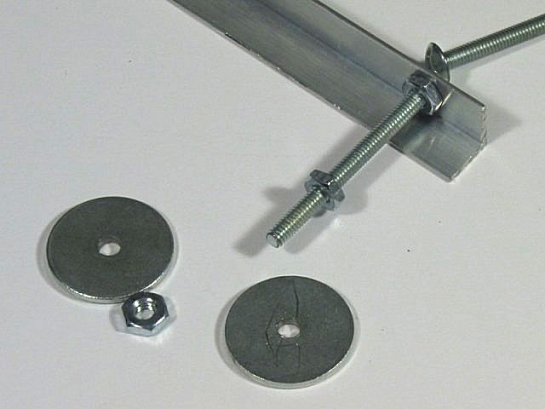
- 1/8" slotted head machine screws, two for each length of angle. The length needs to be at least 1/2" longer than the widest paint jar you plan on storing, to make up for the width of the angle, pegboard, washers, and nuts, but not so long as to touch the wall after the whole mess is mounted.
- 1" washers, two for each screw
- 1/8" hex nuts, three for each screw.
Construction
1) Cut the pegboard to fit the desired area. Mine is about 4' by 3'.
2) Cut lengths of angle to fit. Mine are about 18"
3) Drill a 1/8' hole in each end of each length of angle. The holes MUST be space a whole number of inches apart, as they will need to match up with the holes in the pegboard.
4) Insert a screw in each hole in the angle and thread a nut onto each screw. Tighten thoroughly.
This is Where it Gets Fun
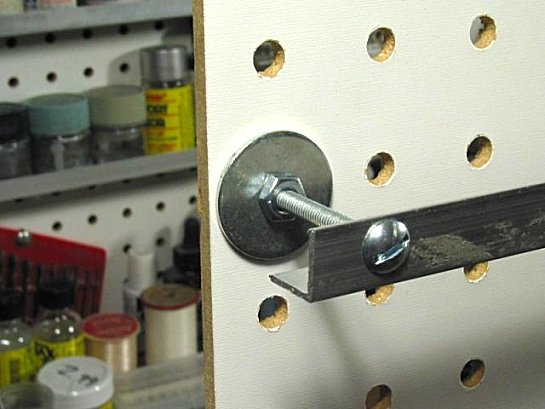
5) Thread another nut onto each screw. The nuts should be set at the same length from the angle. Slip a washer onto each screw and fit the assembled angle to the pegboard. Slip another washer on each screw behind the pegboard, and thread the last nuts onto the screws. Slip a few paint jars into the rack to set the spacing. The spacing between the angle and the pegboard will need to be close enough so that the paint jars don't fall out the bottom, but far enough to allow you to pull the paint jars out. I allowed about 1/16" to 1/8" of slack. Once you have the spacing set, tighten the whole thing down VERY thoroughly.
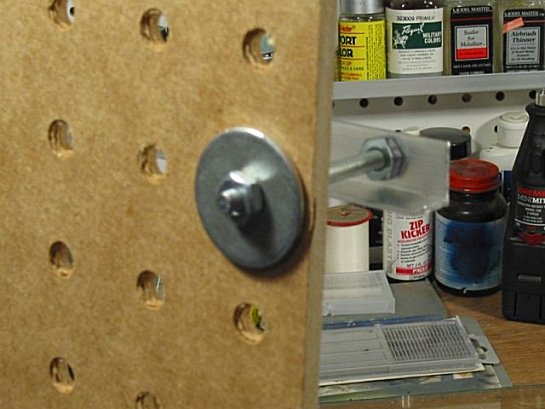
6) Repeat until you have all the rack fitted. Allow enough space between rows so that you can pull the paint jars out without skinning your knuckles. Make sure that none of the screws extend farther than 3/4" out the back of the pegboard. You may have to cut any excess off with a bolt cutter or hacksaw.
7) Once you're happy with the result, mount the studs to the wall. Use a stud finder to find the studs inside the wall, and mount the studs so that the outside edges match up with the edges of the pegboard. I used one stud at each side of my rack, and two spaced evenly inside, to keep things sturdy - it's going to get heavy when loaded with paint.
8) Finally, mount the pegboard to the studs and load the rack.

© Scott Dunn 2001
This article was published on Sunday, November 01 2015; Last modified on Sunday, November 01 2015