
The Sud-Est SO-8000 in 1/32 Scale
By Frank Mitchell
I have always liked prototype aircraft; they can be incredibly interesting or make you wonder what the designers were thinking. They also, of course, can be great, but challenging, subjects for scratch building that often require different ideas and approaches. Kits are great (you should see my basement), but somehow, having to figure out how to make something that doesn’t otherwise exist is also a lot of fun.
The Aircraft
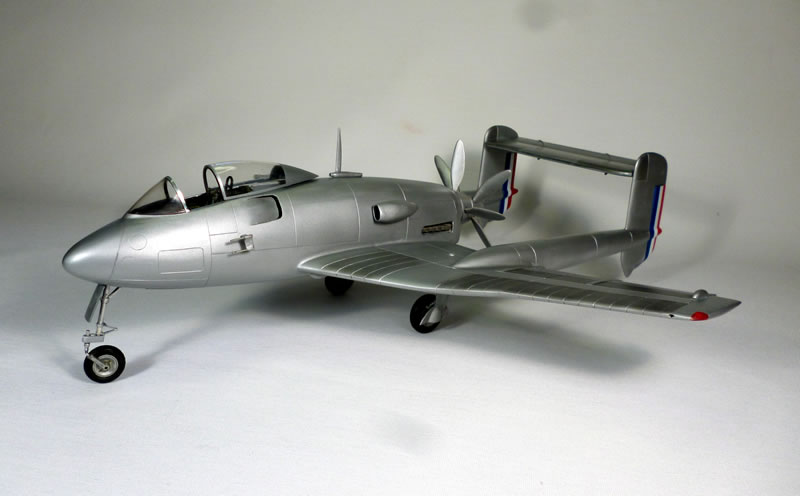
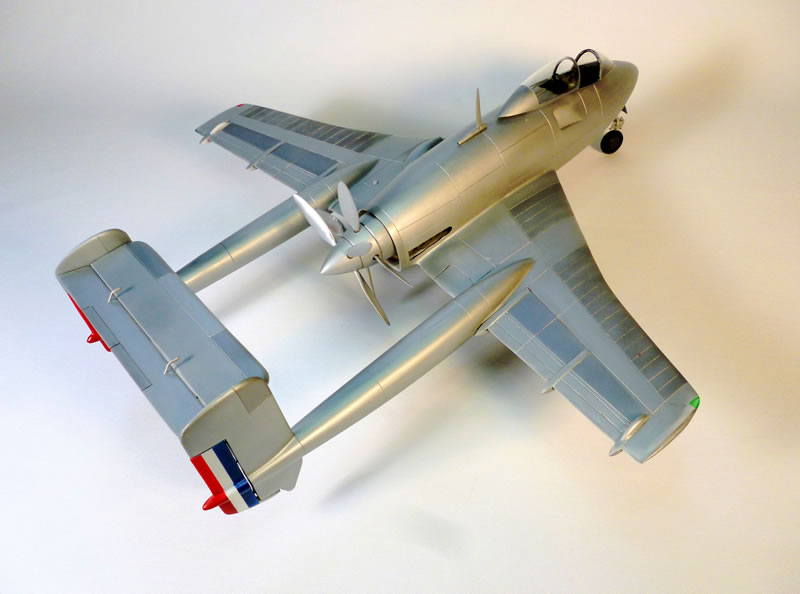
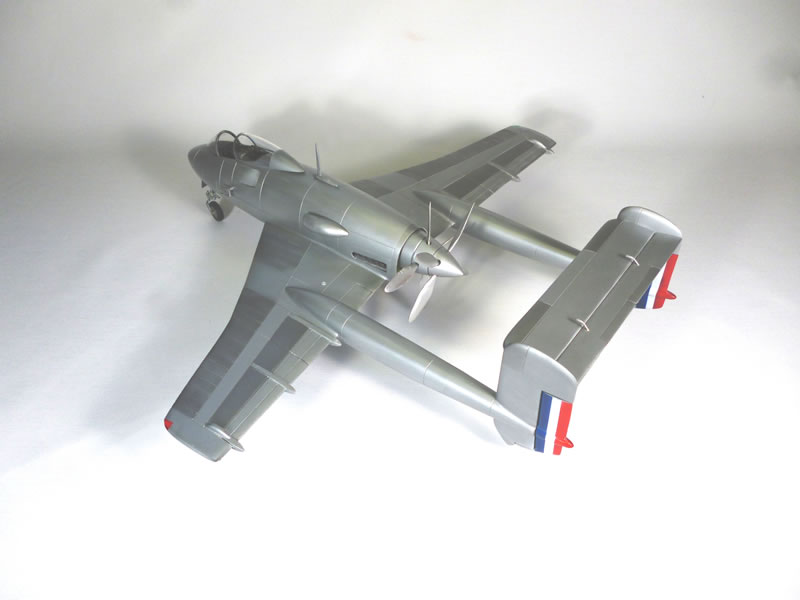
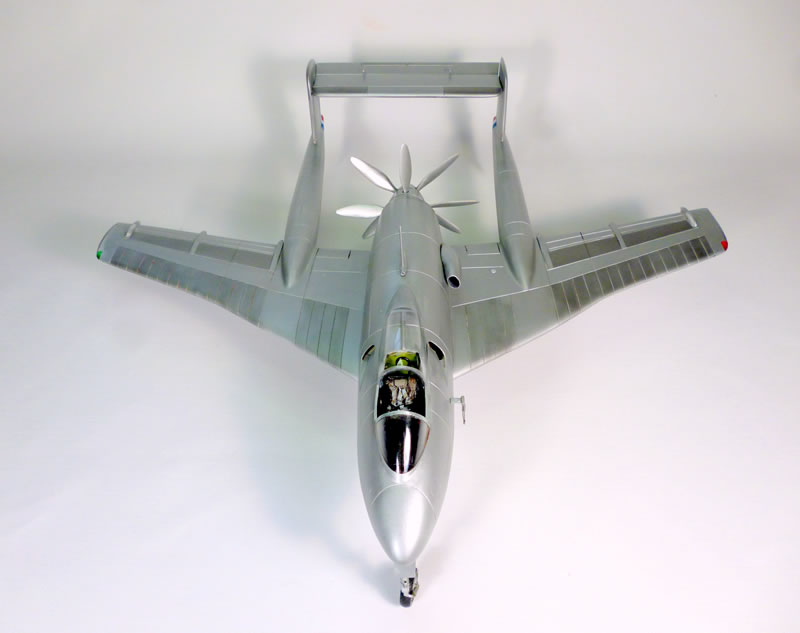
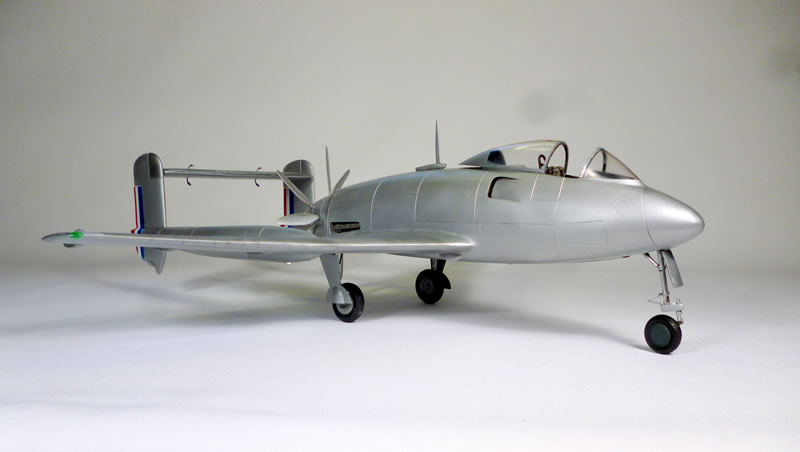
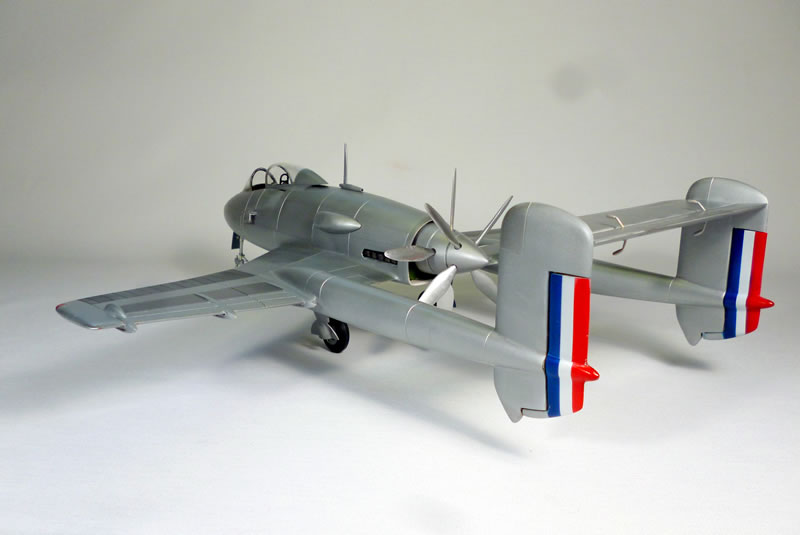
The French Sud-Est SO-8000 was an example of the many new approaches that were explored by many countries in the years immediately following WWII. The aircraft’s development began in 1946, the goal being a shipboard fighter and attack aircraft. Two prototypes were built, both powered by a single Arsenal (Junkers Jumo 213) engine driving contra-rotating 4-blade pusher props. Proposed armament was to be six 20mm nose-mounted cannon plus external ordinance.
As might be imagined, the development was lengthy and complex. In fact, the first flight did not take place until 1949, and, as might also be expected, many problems were experienced with both the airframe and the engine. These problems, along with the rapid development of all types of aircraft and propulsion systems during this period, caused work to be discontinued in 1950. However, both prototypes were flown, although not much, and both were dismantled after brief testing.
The Build
Work on the model began about 4 years ago, but after carving and molding the basic components, they got relegated to a box, primarily because I could find only 7 different photos of the thing. In fact, I have never found any additional ones. A couple of drawings were found, along with a 1/72 kit, but they were not the greatest. However, since I have never believed in allowing a total lack of information to stop a project, the pieces were eventually retrieved from their box and work resumed.
Construction
As usual, the photos really tell the story, but a short written description may help.

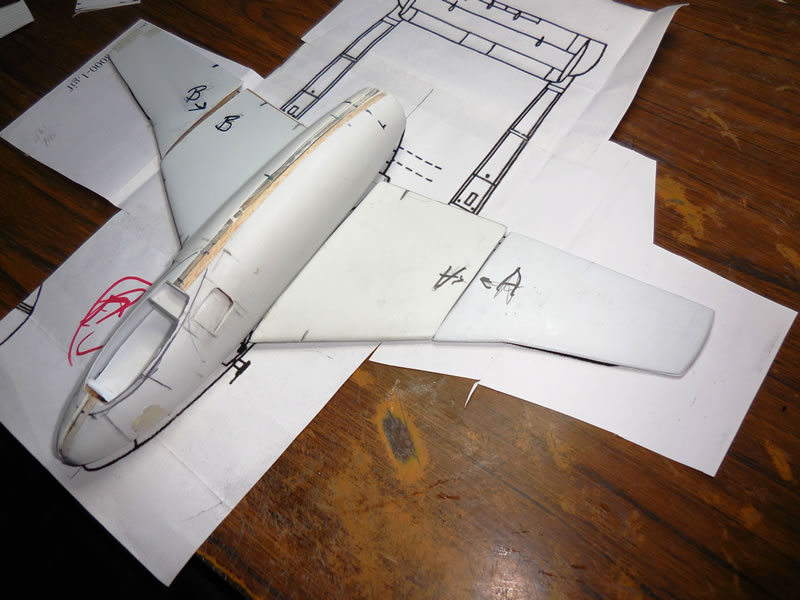
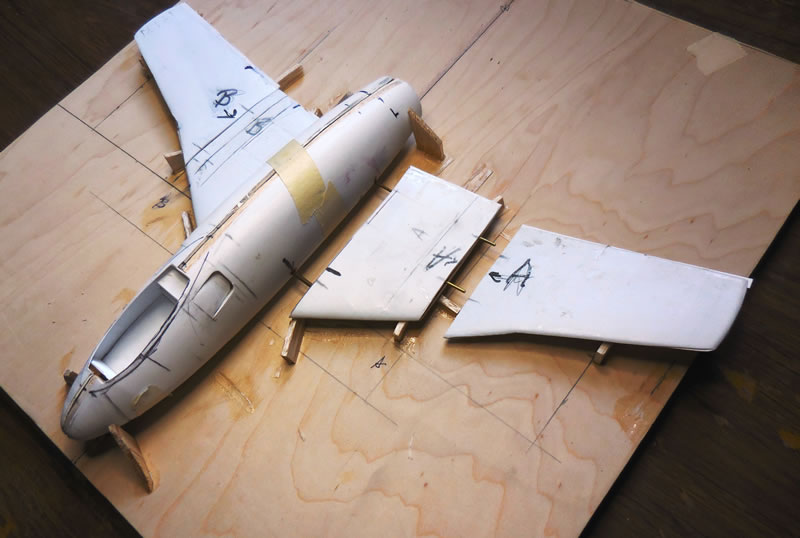
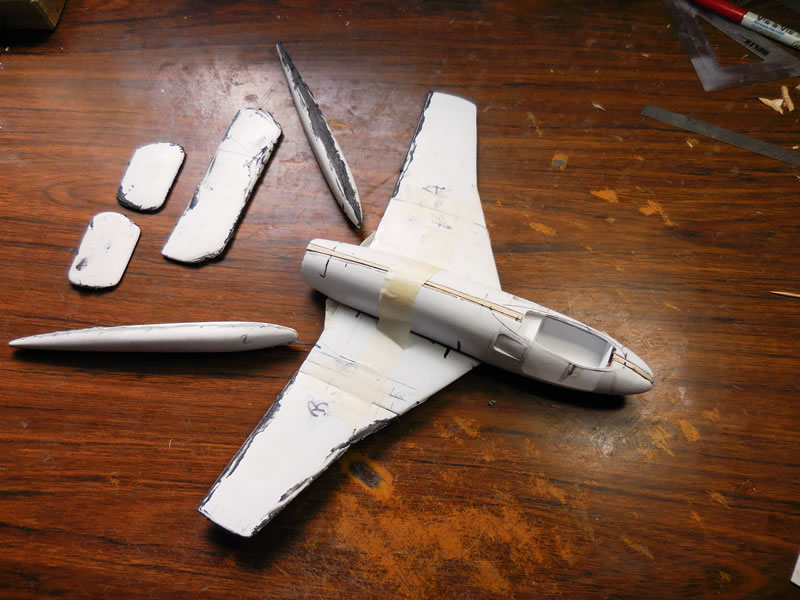
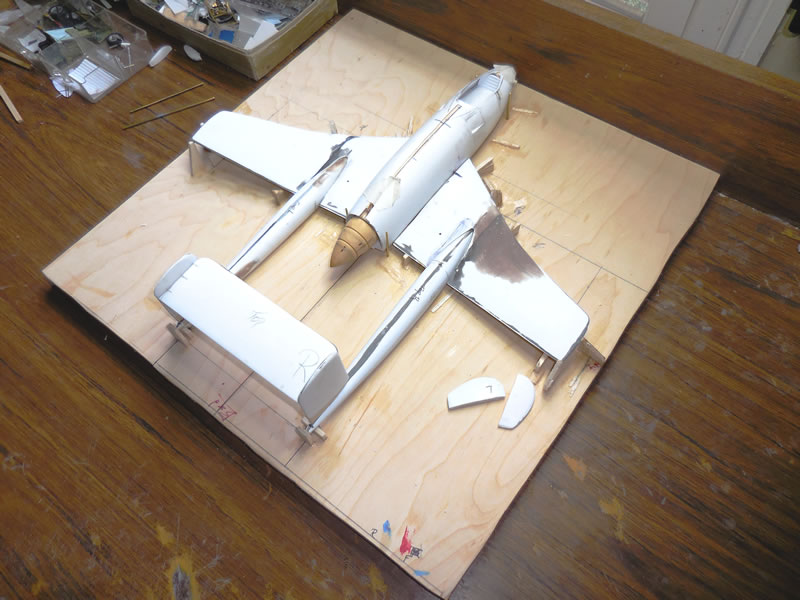
Due to its configuration, this is obviously a model that demands the use of a jig, so the first step was to cut a base of high-quality, conformed-flat ¾ inch plywood. That, along with fast-cure superglue, and soft balsa scraps allow fairly easy removal and re-positioning of parts during the build.
Molds of the major parts of the aircraft (wings, tail(s), fuselage, booms, etc.) were carved from soft balsa and molded from .030 styrene sheet using a home-made vacuum-form and my wife’s oven. The parts were then cut out so that work on the actual model could (finally) begin.
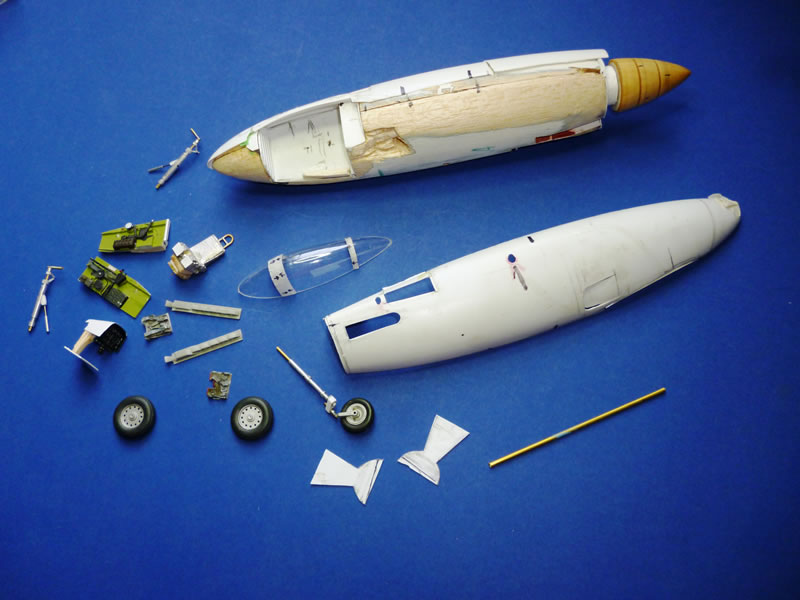
All interior areas that would be visible were cut from the basic molds (cockpit, wheel wells, etc.) then the interiors of these spaces were lined with styrene sheet, then detailed and painted. In addition, brass tubing was added where necessary to mount the landing gear, wings, etc. to the fuselage and booms. This is where the jig comes in handy since it allows adding (and subtracting) pieces where necessary.
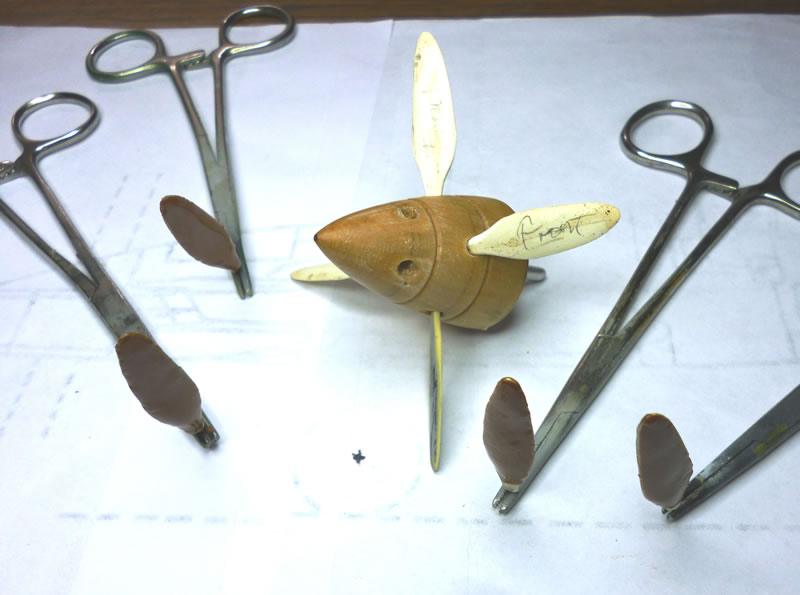
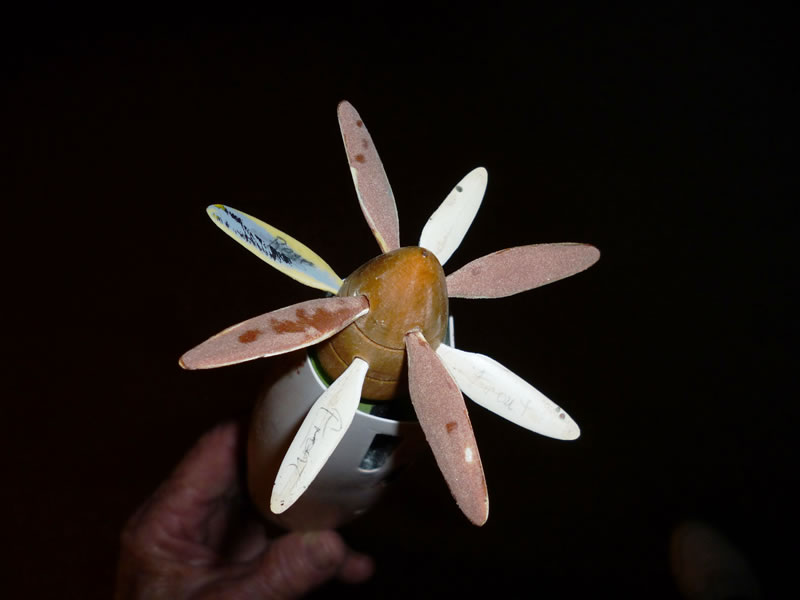
The propeller was an interesting project. The spinner was first turned from a scrap piece of hardwood. A line of separation was turned between the forward and aft sections, but the spinner was not completely divided. Holes for the propeller blades were drilled at 90 degree angles in the two sections. The blades were carved and sanded from basswood making sure that the forward ones were slightly shorter than the rear so that the outer tracks of the props were the same. Brass wire was used to actually mount the blades.
I did not have much information on the interior, but did find one, grainy, picture purporting to be the SO 8000 cockpit, but since I had no proof of that, I just used it as a general guide. I did find some decent pictures of very early European ejection seats, so just added and subtracted until it looked reasonable.
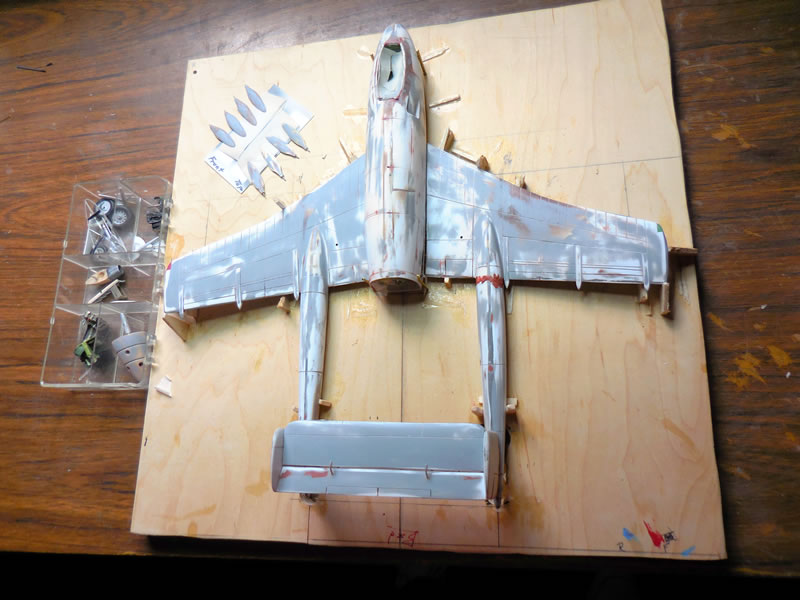
The landing gear was made up of soldered brass and aluminum tubing for the main sections, with styrene used for adding details. Suitable wheels were found in the scrap box, and weight was added inside the nose area to make sure the model would sit properly on its gear.
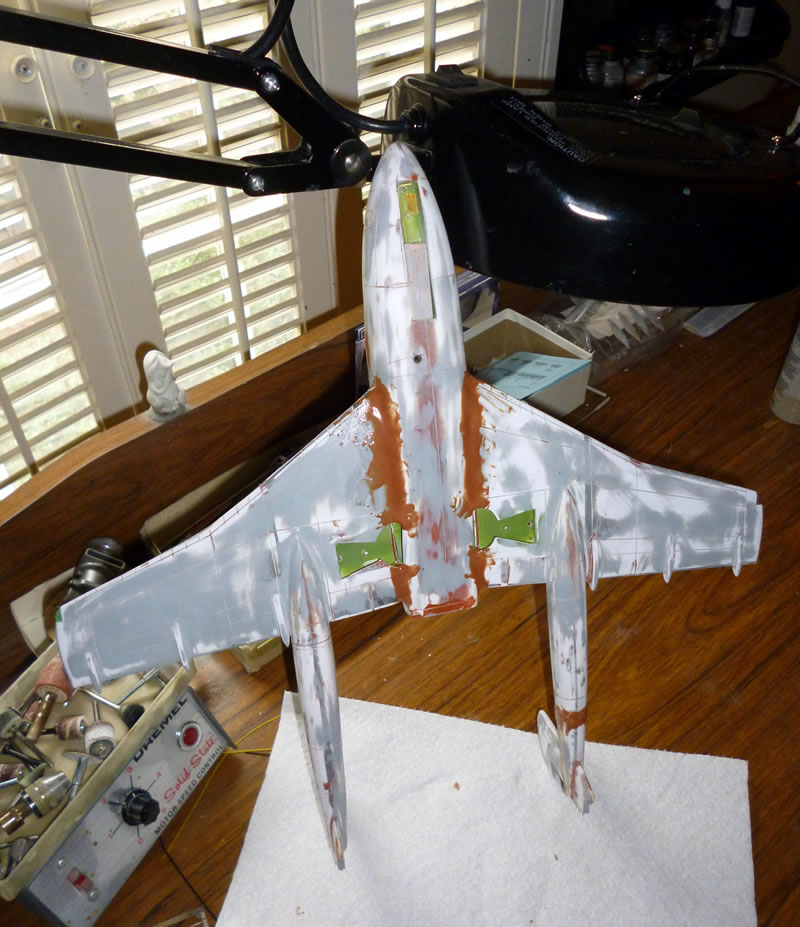
The finish was pretty simple; the airplane was in various shades of natural aluminum. The only markings were the stripes on the rudders.
I have no idea why the leading edges of the wings were composed of separate pieces or why they are noticeably darker, but they do add a bit of interest to the model.
No decals were used since in none of the (few) pictures I had was there any sign of the more common reminders and warnings (serial numbers, Do Not Step, etc.) found on most other aircraft.
This was an interesting model to both research and build. While I am obviously aware of the incredibly wonderful kits that are out there these days (see the above note about my basement), I think there is still fun and interest to be had in building something different, and in my view, it even gives you some new tricks to use in building the great kits that are currently available.
© Frank Mitchell 2015
This article was published on Friday, December 11 2015; Last modified on Friday, December 11 2015