
Tamiya F-4G Wild Weasel Part 2
By Paul Stoner
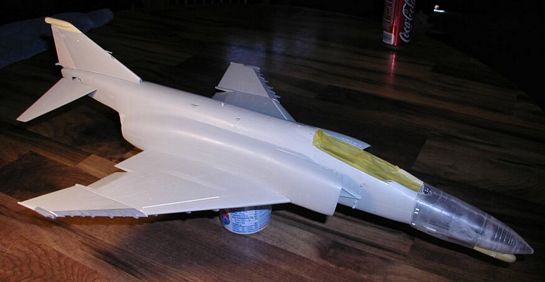
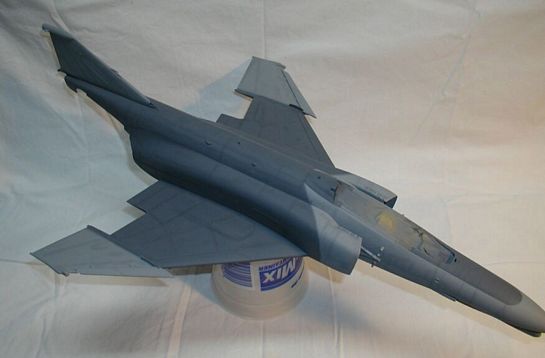
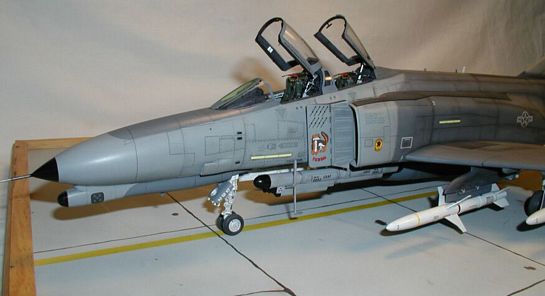
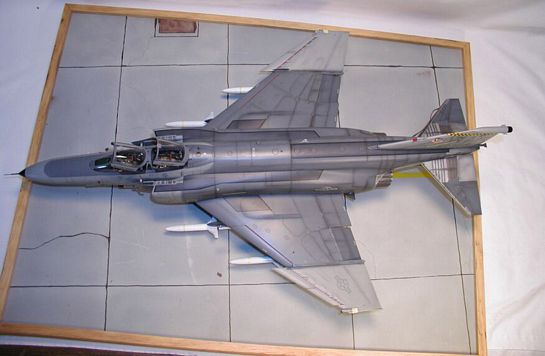
Now that all the major building was completed and the cockpit is snug in it's place, it was time to put this beast together. All the raised details that are found on this kit were sanded smooth and panel line were scribed to the same thickness and depth as the rest of the kit. The tail control surface was cut off and repositioned just enough to notice to match the rudder pedals in the cockpit. The wing tips when glued on have the wrong dihedral and this can be fixed with a small strip of stock glued to the wing tip where it attaches to the top of the main wing. A little bit of sanding and a jig made of thicker stock with a 12 degree angle was used to get the correct dihedral. Once things are together and fit properly the beast was prepped for a primer coat and then wet sanded to remove any imperfections. ( note, you can see where the splitter plates were removed to free up the part of the fuselage that gives me the most trouble getting a good coat of paint in this area.)
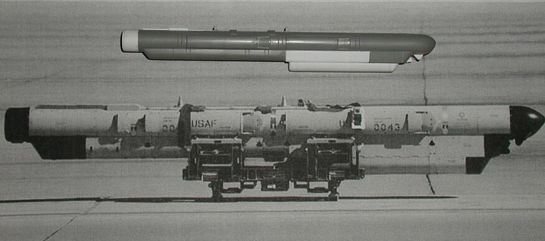
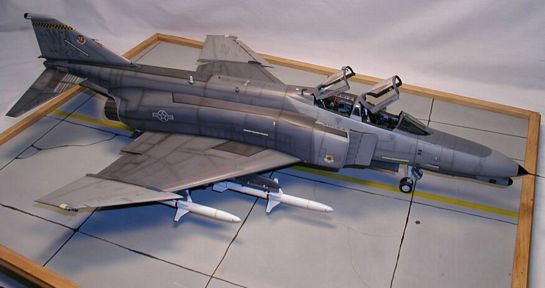
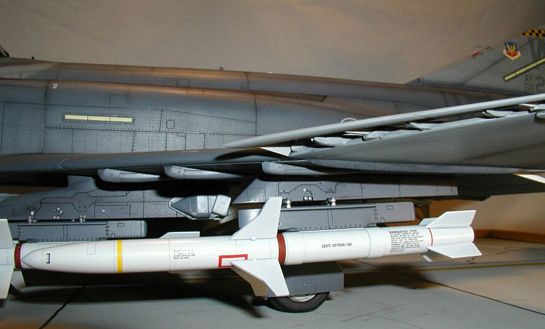
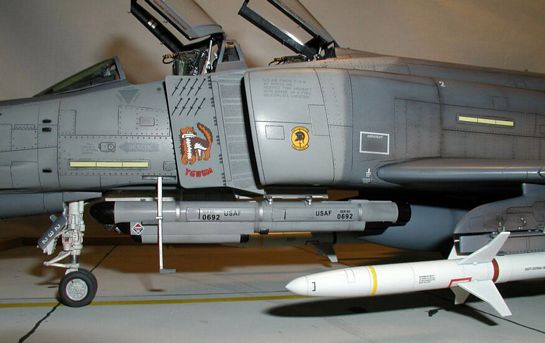
While the primmer coat was drying I decided to do a little robbing from other kits in the shop to help with this build. From the Revell F-4E kit I used the High Speed 600 gal center line fuel tank and the AN/ALQ-119 that was converted to a AN/ALQ-184 that was standard on F-4G's at the time of Operation Southern Watch. The -119 was a good place to start since the top portion was the same. Also since I wanted to load up this Weasel with 4 AGM-88 HARMs I had to make a correct outer wing pylon. Tamiya's F-4J(marine) kit has the pylons with a adapter that was cut off and then all panel lines were filled and rescribed to match a photo of the real thing. One thing to remember if you want to try this is that the outer pylons tilt slightly outward and not vertical as the inner pylon or the outer pylon with a fuel tank. This was easily done again with some stock strip and a little sanding.

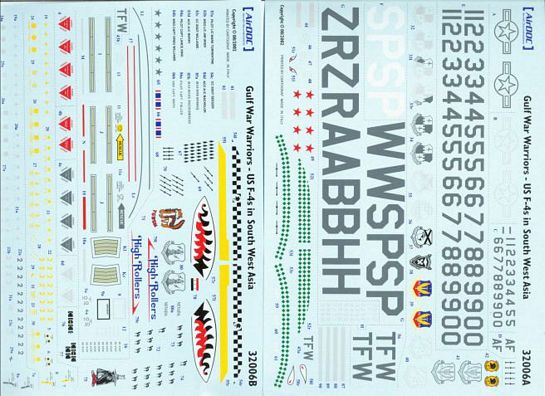
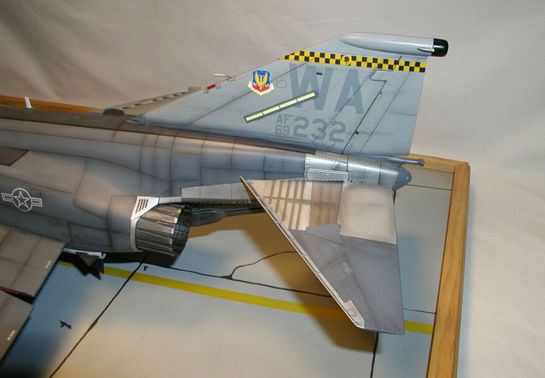
Model Master Enamels were used to paint the Hill Gray scheme ( FS 26118 & FS 26270 ) and sealed with Model Master acrylic gloss. After the seal was dry I went over the panels with darker shades of grays used to high light things. Tamiya smoke was used to darken the lines and then once again a seal coat of acrylic. Wet sanding with buffing sticks were used to get areas to except decals as smooth as possible and then it was time to get the decal sheet out. AirDOC sheet # 32006 Gulf War Warriors- US F-4s in South West Asia were used since they have a great sheet for F-4G's and RF-4C's that fought in Op Desert Storm and Op Southern Watch. A very colorful sheet with art work found on several Phantoms, great data and stenciling and easy to follow instructions and color chart. Micro Set and Micro Sol were used to get the decals to sit down. There was only a few problems that I had with the decals and these were easily fixed, first the sheet gives two emblems for the 561st FS when the real jet had one on the left intake and the right intake had the 57th FW on the right. I found the 57th FW emblem on Two Bob's F-16 sheet and it was of right size and was used. Another thing was the instructions don't mention the walkways, and some of the jets at the time had dark gray walkways and some with a black boarder and some had just a light gray outline of the walkways. Do a little research for what jet you plan on building to get these right. The jet I was doing had the darker gray with black boarder and was done with black lighten down a bit and then masked for a black boarder.

Weapon load was 4x AGM-88, 2x AIM-7 all well stole from the Academy F-18 kit which in it's self is a great source for weapons. F-4G's that flew during OP Southern Watch carried a standard load of 2x AGM-88, 2x AIM-7 and 3 fuel tanks for long periods of loitering, but I just couldn't resist loading this beast up with 4 HARMs because I think it looks really tough. Final wiring was done for the APR-38 panel and Eduard's PE set finished off the canopy details and this beast was done.
I hope that at least one of you get something out of this article and enjoy building a big Wild Weasel as I did. Take care and have a great day.
© Paul Stoner 2004
This article was published on Wednesday, July 20 2011; Last modified on Saturday, May 14 2016