
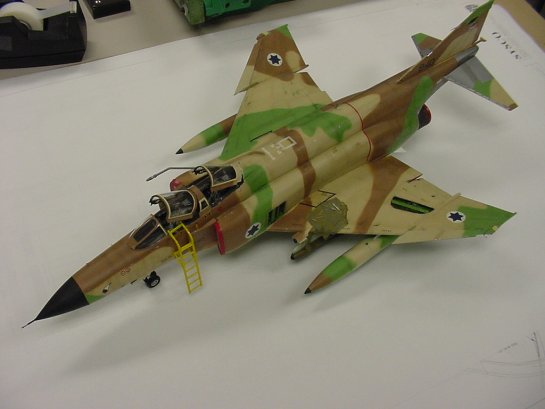
1/32 Israeli F-4E Phantom
By Rick Cotton

OK, OK, I know the Revell 1/32 F-4E is about as accurate as the Taliban Radio News, but I suffer from a malady that many of my fellow modelers have- stingius maximus- , i.e., I'm not loaded with spare cash. Sure, I'd love to take the Tamiya F-4C and plug the Cutting Edge F4E conversion on the front, add some resin goodies, or plunk down $165 USD for Tamiya's clear nosed monster, but I'd have to sell one of my kids to do it. So, when I spied the Revell F4E at a recent model show, opened, with a missing front canopy and a $15 price tag, I was hooked.
No, it's not Tamiya, but it's light years ahead of the first Revell F-4 issues, and I did manage to trade some stuff to a fellow for a pair of True Details resin seats, so I figured I could at least try to turn out a half-decent phantom. Revell was also kind enough to send me a replacement canopy. The panel lines are nicely recessed, and the shape is more or less accurate overall. There are some glaring deficiencies, of course.
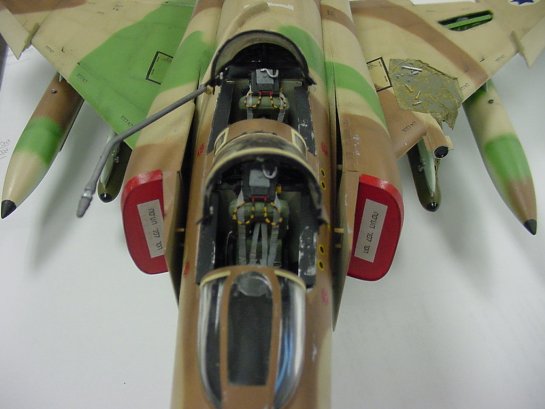
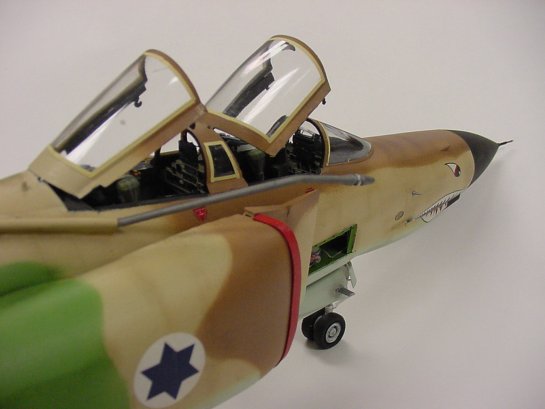
The worst one is the cockpit. Although the panels and consoles are not too bad, there is nothing where the big fuse panel should be in the GIB'S ("Guy In Back's") cockpit on the starboard side (A note here…..Navy Phantoms lack the console arrangement on this side. Check those pics). I scratchbuilt one from plastic card and fine wire, along with filling in the space between the top of the consoles and the bottom of the canopy sill with various bits and pieces in all cockpits. Also, there is no canopy sill in the Revell kit at all. I scratchbuilt one from plastic sheet.
The cockpit floor is far too deep, so scrap plastic was added to bring it up to where the tops of the seats would be at a more believable level. I also added wiring and bits and pieces to the back of the RIO's panel to help fill in the space and make the area look more "busy". Some fine wire switches and buttons went in at various places in the cockpit After painting, a dirty brown wash, dry brushing, and final detailing, the cockpit was set aside for awhile. By the way, all of this surgery can be avoided now; Legend Productions out of Korea has a new cockpit set for the E model Revell Rhino, running about $38 USD. Haven't used it, but it looks pretty good in the box.
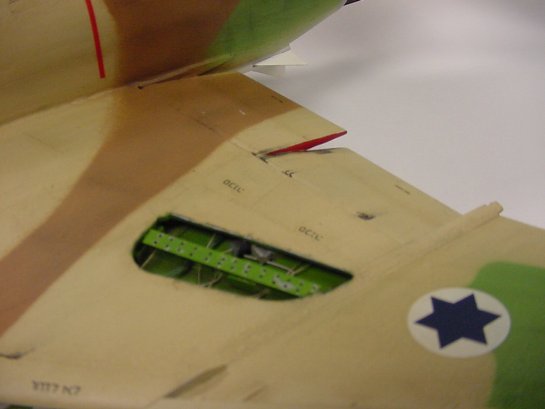
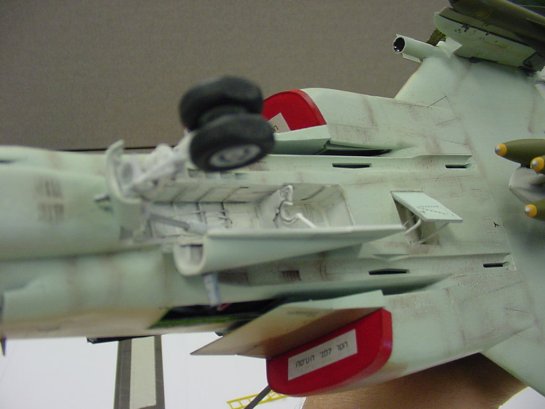
I got out the razor saw, and detached the flaps and rudder for repositioning, and removed some access panels for interior equipment detailing. Verlinden's excellent "Lock On - F4E Phantom" issue was invaluable in creating some of the mass of wiring, cables, piping, and other items under the Rhino's skin. The Phantom does not have the modern quick-access panels prevalent on the newest fighters, so each opening required a thin plastic card flange with lots of Dzus fastener holes around it. These were drilled out, one by one, with a pin vise. The bays and flanges were painted a dingy chromate green and washed in an equally dingy brown watercolor/detergent wash.
Materials for interior detailing vary from modeler to modeler. One of the places I like to get stuff is from old stereo headphones, especially wire. Most cheaply made (and that's what I get) headphones have a very soft, easily malleable wire in them, which can be painted and used as is, or stripped for really thin copper wire (excellent for detailing engines. This stuff is great for replicating the masses of plumbing found in modern jet wheel wells, equipment bays, or wherever. Modern jets also often have bundles of wiring that I simulate with multiple strands of painted sewing thread that I twist, superglue, and then wrap with thin-cut strips of masking tape. Paint them white, or whatever's appropriate , and they're ready to install.
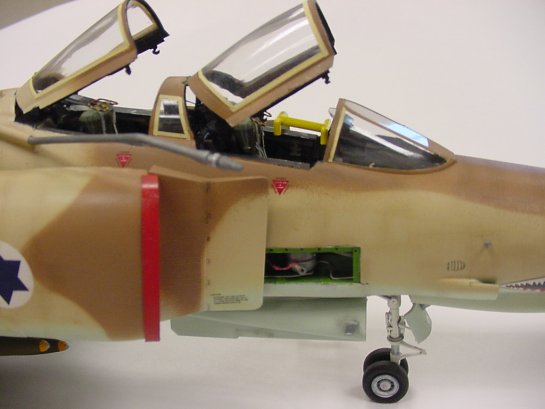
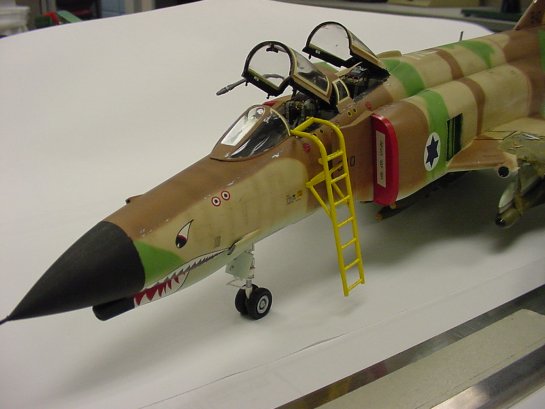
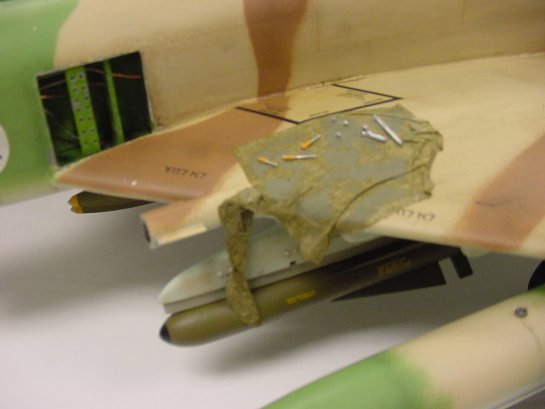
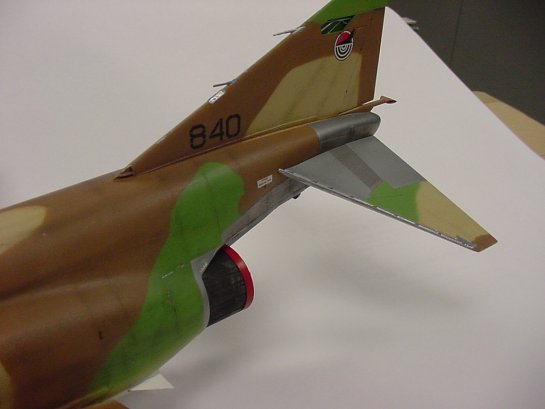
The Tiseo electronic camera mounting was made from an old Revell Sparrow missile body and scrap plastic card, and was blended into the wing with Squadron White Putty. I also installed a Cutting Edge resin refueling probe. The maintenance tarps are tissue soaked in a white glue mixture and painted when dried in place.
Assembly of the main components of fuselage and wings went with a minimum of hair-pulling and swearing. I left off the elevators until later to ease the painting. After filling the seams, masking the bays and canopies, and priming, I was ready to paint. I don't use anything fancy to paint with, just a simple single-action Badger airbrush and cardboard masks. I'm a tightwad, remember?
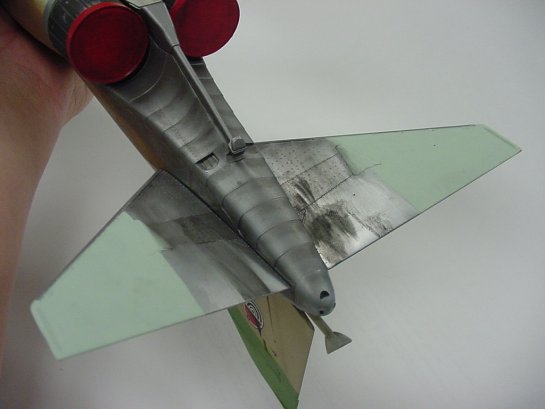
The light blue undersurfaces went on first, followed by the topside tan, green and brown in that order. Spray color in light-to-dark order and you'll avoid a lot of problems. I sprayed on Future, did the decals, gloss and flat topcoats, and when everything was bone-dry, I masked off the natural-metal panels on the tail end and shot them in several shades of Metalizer. Weathering was accomplished using pastel chalks, with a few oil stains made by brushing ink back with a finger in the slipstream direction. Heavy black-brown chalk stains were applied around the engine nozzles (look at those reference photos!).
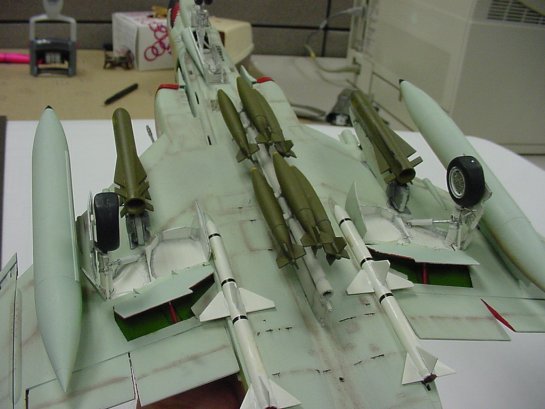
I used a mix of kit, Superscale and Cutting Edge decals, plus homemade Hebrew stencils printed on my Alps printer. Ordinance was scavenged from various kits and the parts box.
Super-accurate Phantom? No. Never counted rivets before, not gonna do it now. I like the way it looks, and I have to live with it, plus I've still got cash to wander the vendor aisles with at the next show...are you listening Mr Tamiya?
© Rick Cotton
This article was published on Wednesday, July 20 2011; Last modified on Saturday, May 14 2016