
Trumpeter 1/32 MiG-3
By Karim Bibi
I wanted to have a dry run at all the new modeling techniques while at the same time working on a subject I am familiar with. I didn't want to royally screw up my first WW1 kit so I thought why not try out all the techniques on a wood and linen WW2 airplane where I could still have some camouflage work done and I could weather it out too.
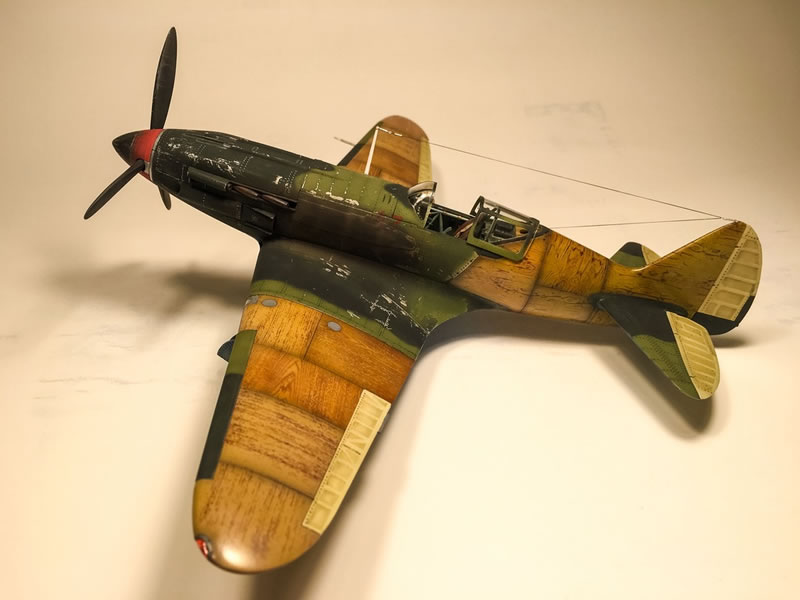
The kit is Trumpeter's MIG-3.
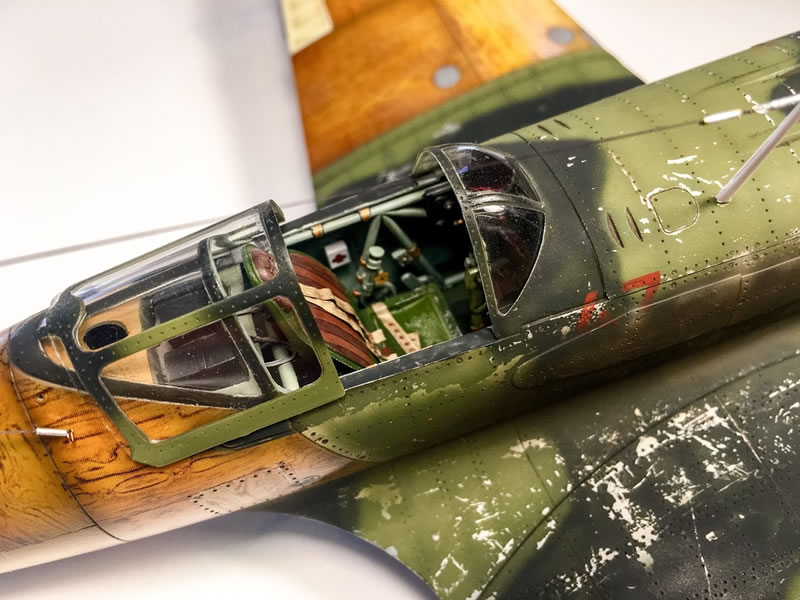
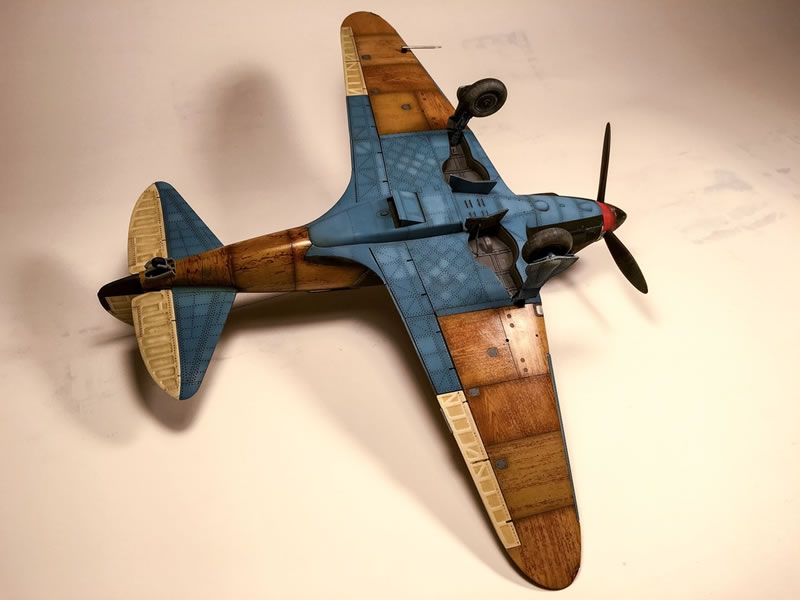
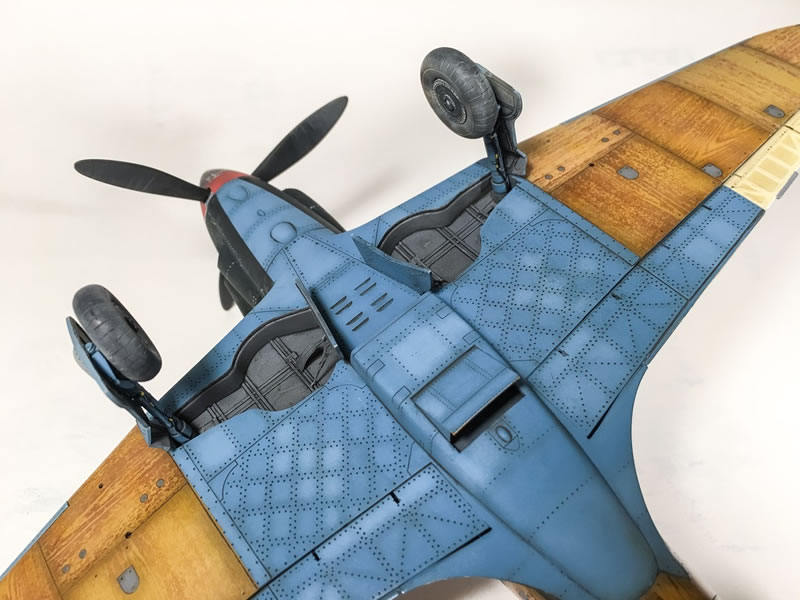
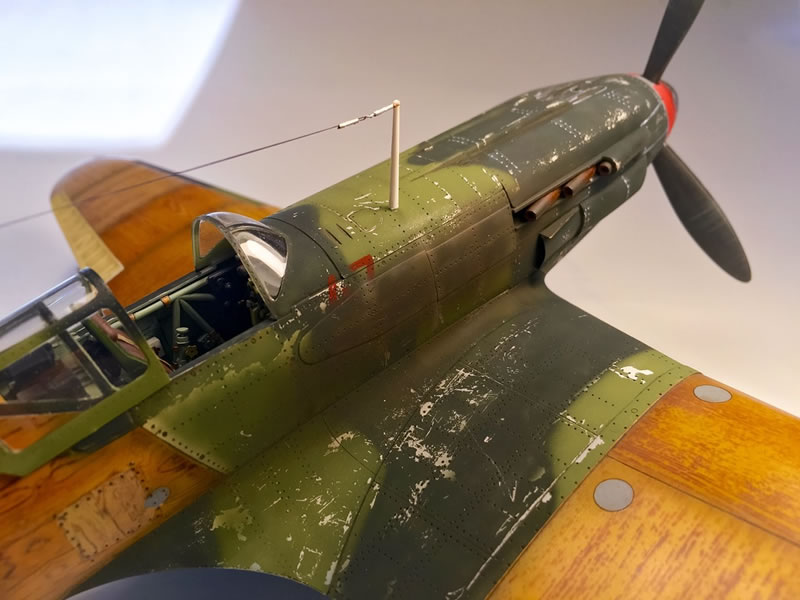
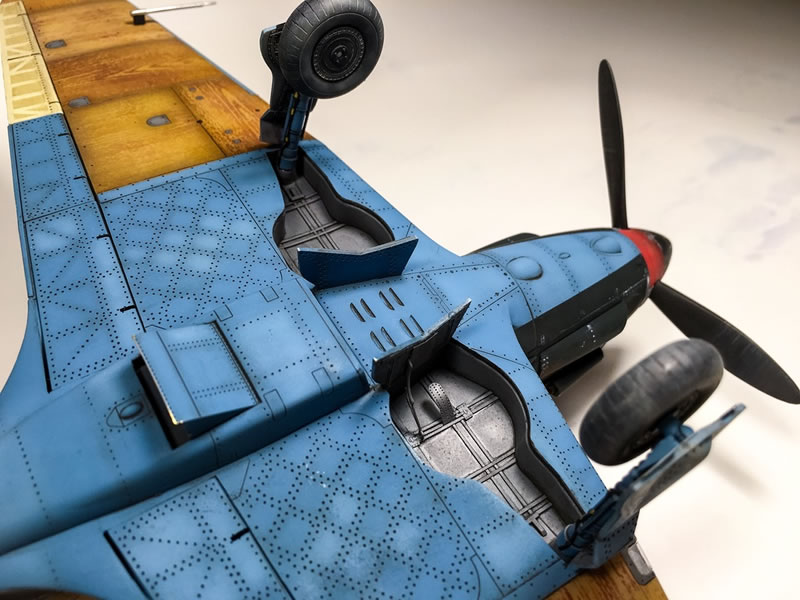
The kit is very straightforward to build with no real headaches to be honest. I used the Eduard photo-etch set for the kit which added alot to the interior and specially to the wheel bays which were almost bare (and still are).
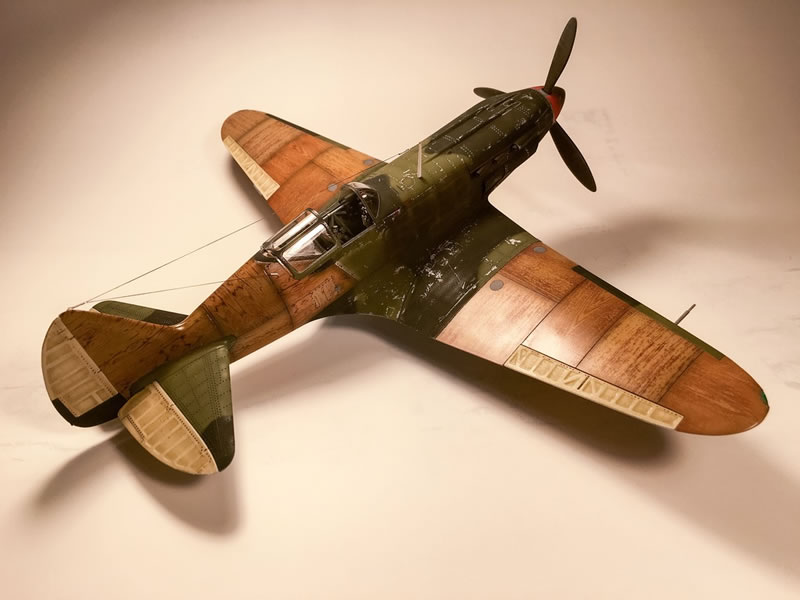
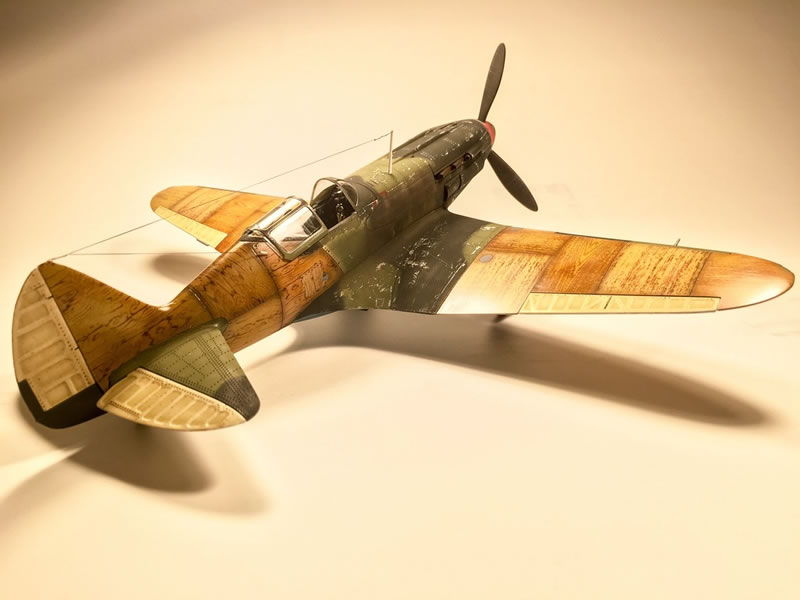
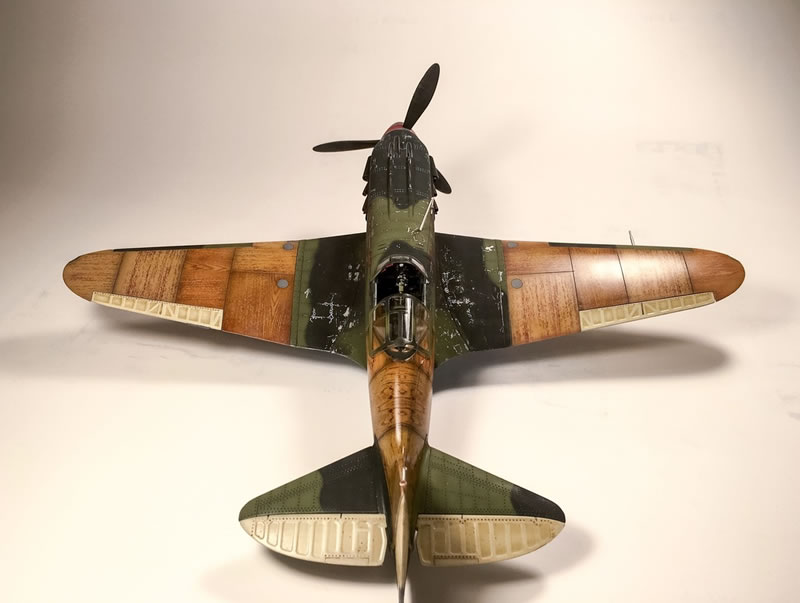
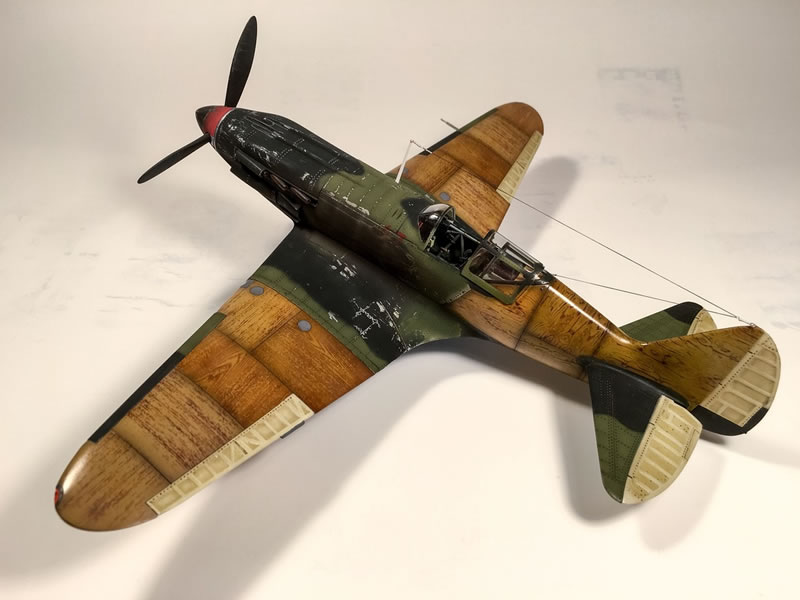
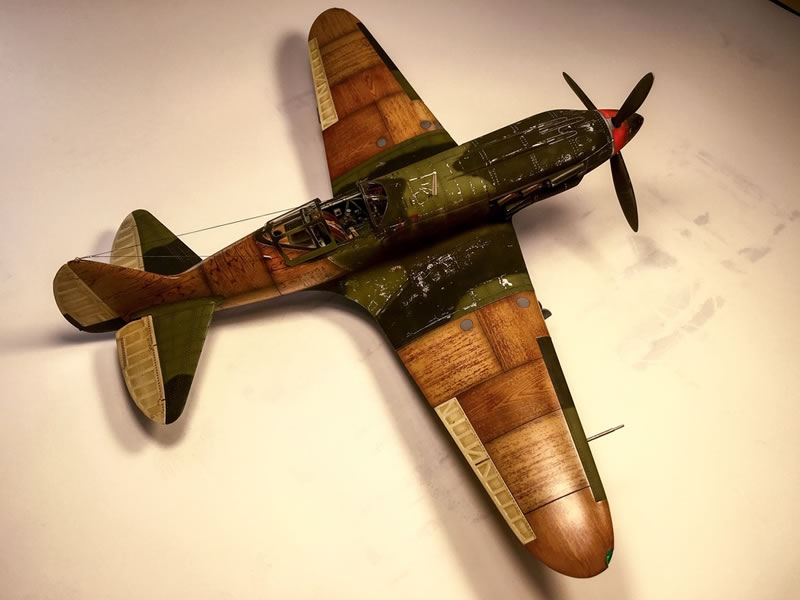
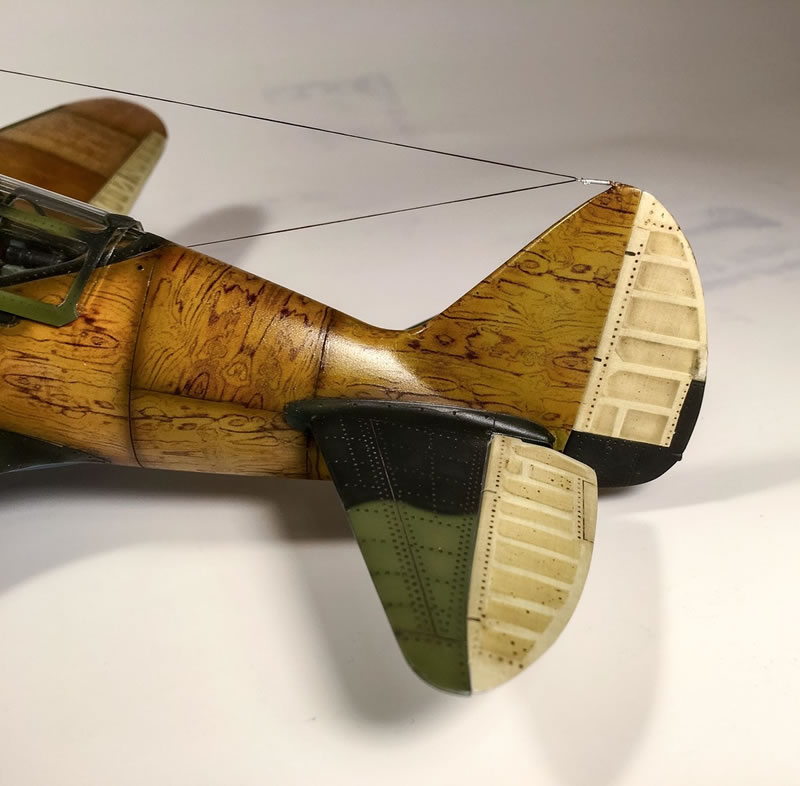
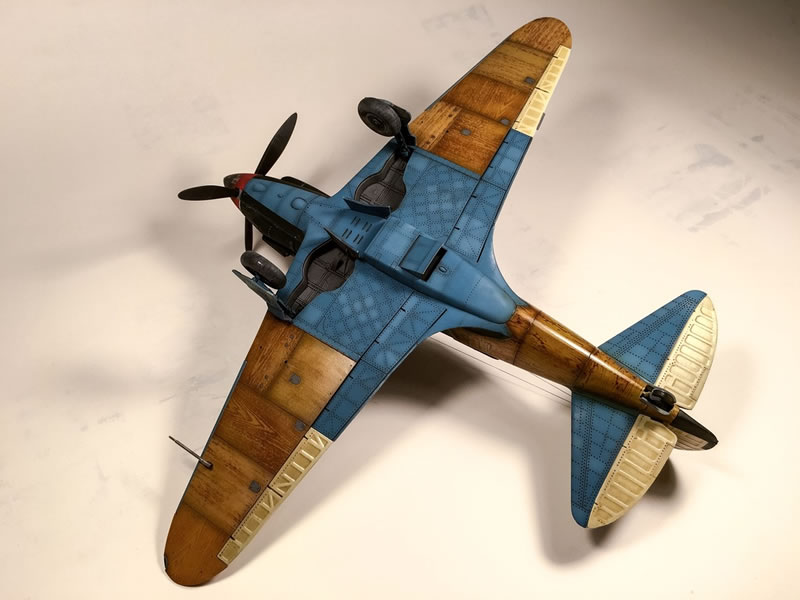
For the woodwork, I used the two RB etched stencils which I found to be fabulous when you can work out the dilution and how to blend in the woodgraining. I also used UVDR Clear woodgrain decals for the tail section to give a bit of variety (and also have a go at trying decal woodgraining to know what to use for the ww1 kits). Both of them give a beautiful rendition of woodgraining albeit the UVDR would be nicer on big panels. I now have ordered the much finer woodgrain decals from Uschi...
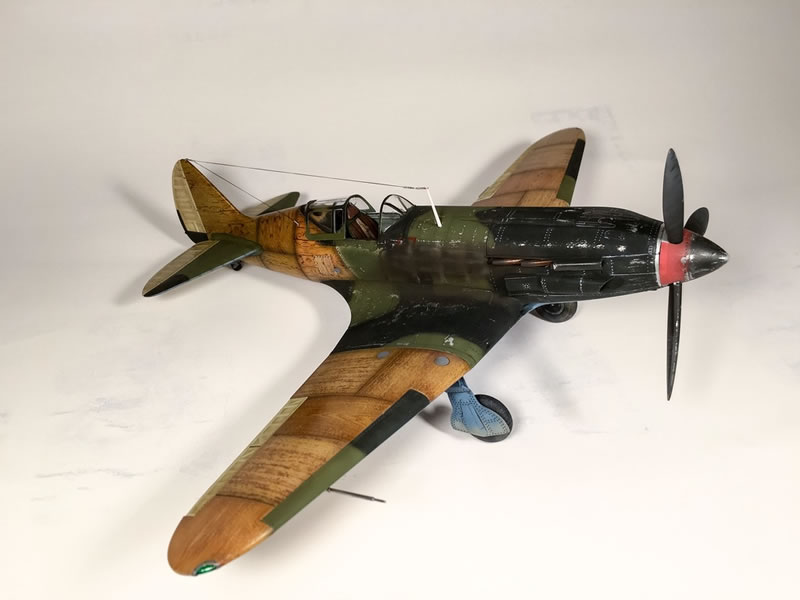
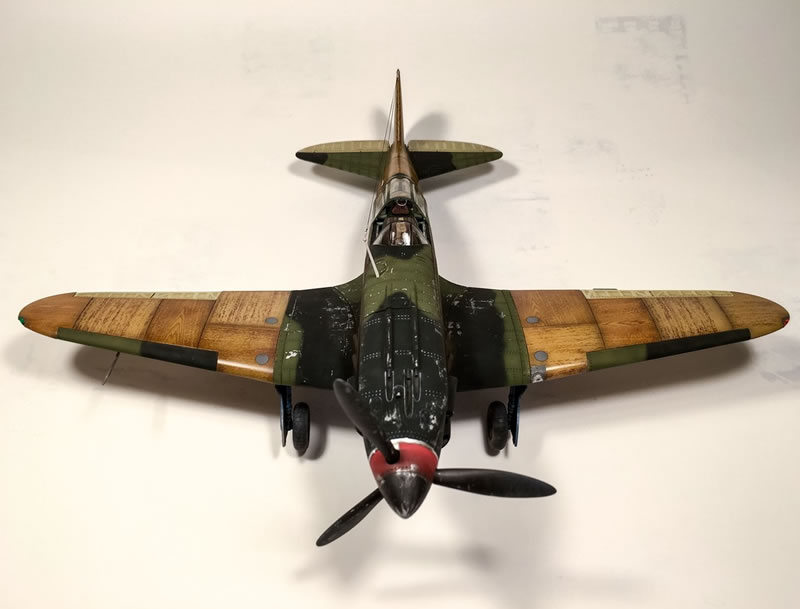
Everybody that has build the MiG-3 naked has left the whole body in metalizer as it should be so I thought for a change id give it the camo treatment and make it look like the airplane was in for a change of planking and of linen on the moveable surfaces hence the 'two tone' and the title. This would also give me a chance to have a go at weathering and chipping which melikes. The Linen areas are covered with Aviattic linen decals, I used the clear light french linen for those after painting the ribbing and weathering the areas to show through the decals.
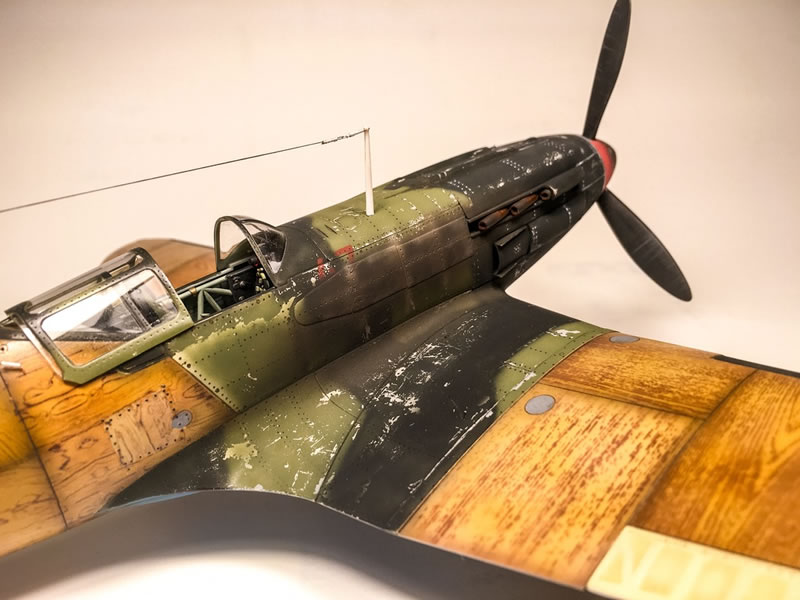
Another first was the rigging of the antenna. I did the eyelets like I will on the ww1 airplanes and did the tubing from Albion brass cut to length using my homemade cutting jig. I actually found rigging the antenna therapeutic so I am looking forward to the challenge of rigging a whole aircraft!
Weathering was done using Flory Models clay washes, AK enamels and some pigments. Oils used were Abteilung and w&n for the fading and dirt.
The paints used are Tamiya and Gunze and for the chipping I used light chipping from AK Interactive.
Also while masking the wood to matt coat the camo areas some of the UVDR decals pulled out. Good excuse to cut a piece out and add Archer rivets to simulate nailed lines on a panel fix! Lesson learned make sure the tack is super super low on the UVDR decals!
Very very enjoyable build I must say.
Also thank you to Massimo Tessitori for the wonderful website and references...the aircraft I modelled is after one on his website.

© Karim Bibi 2016
This article was published on Saturday, September 17 2016; Last modified on Saturday, September 17 2016