
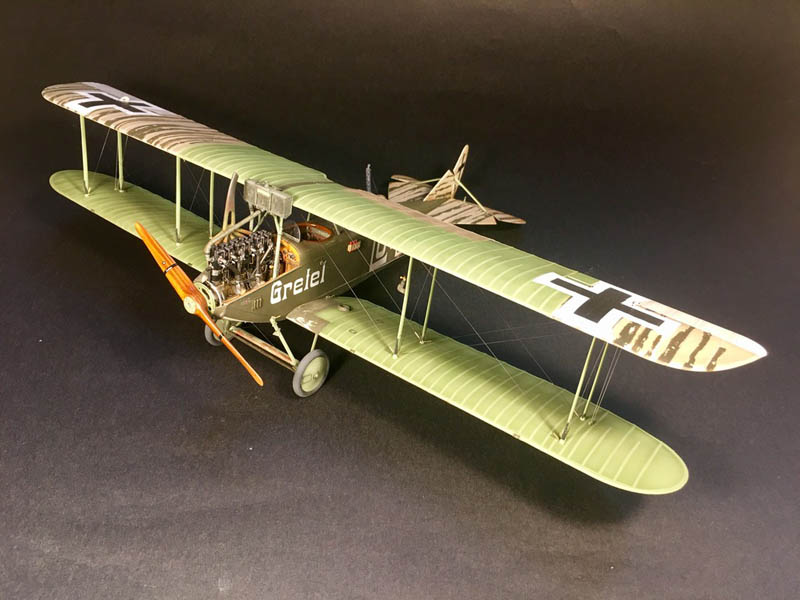
Wingnut Wings 1/32 DFW C.V. Late
By Karim Bibi
Model factoid:
- Wingnut wings DFW C.V late
- HGW superset
- Gaspatch for the armament
- EZ Line
- Bob's buckles and eyelets throughout
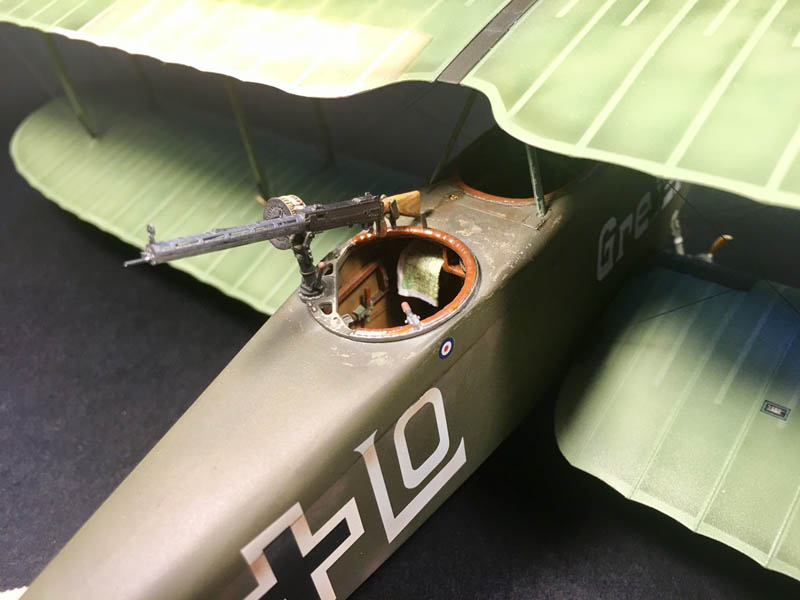
- Aviattic Dark linen and light linen for the CDL surfaces and cockpit
- Uschi VDR plywood decals for the insides of the cockpit fuselage
- Windsock Datafile #53 and the internet for references and inspiration
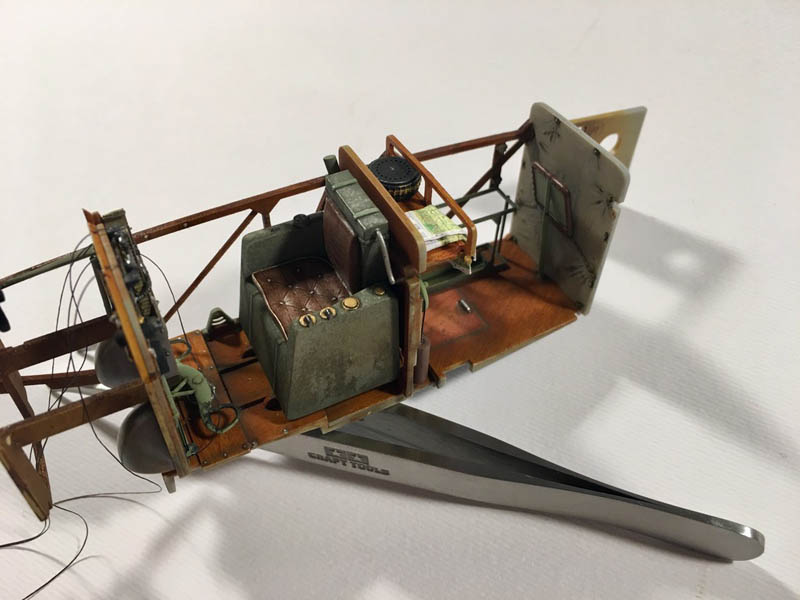
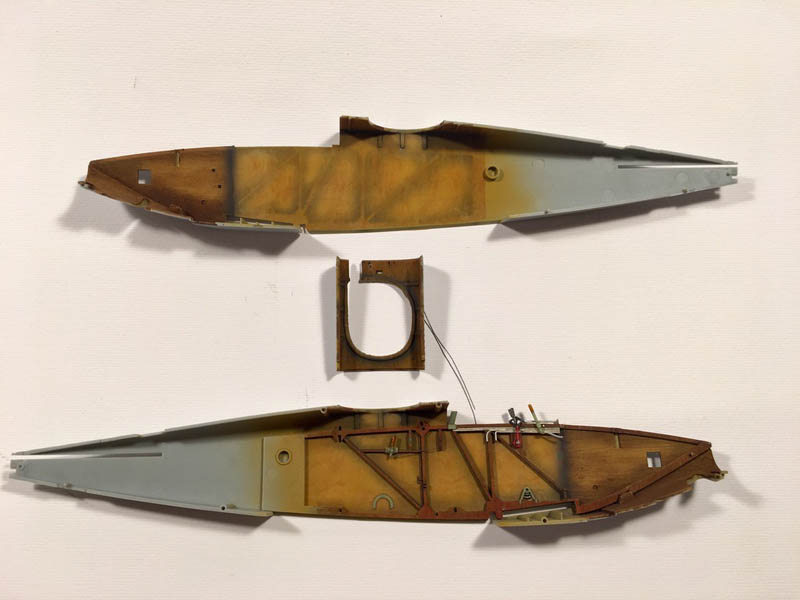
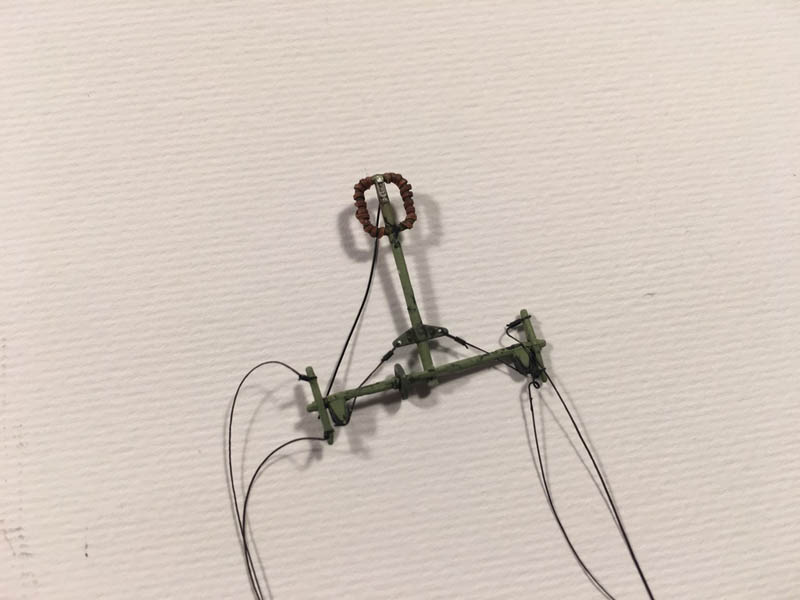
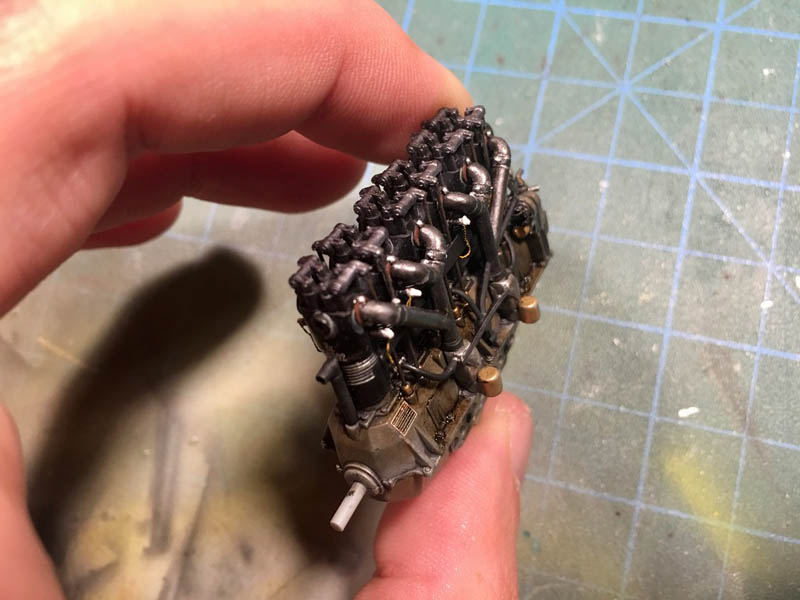
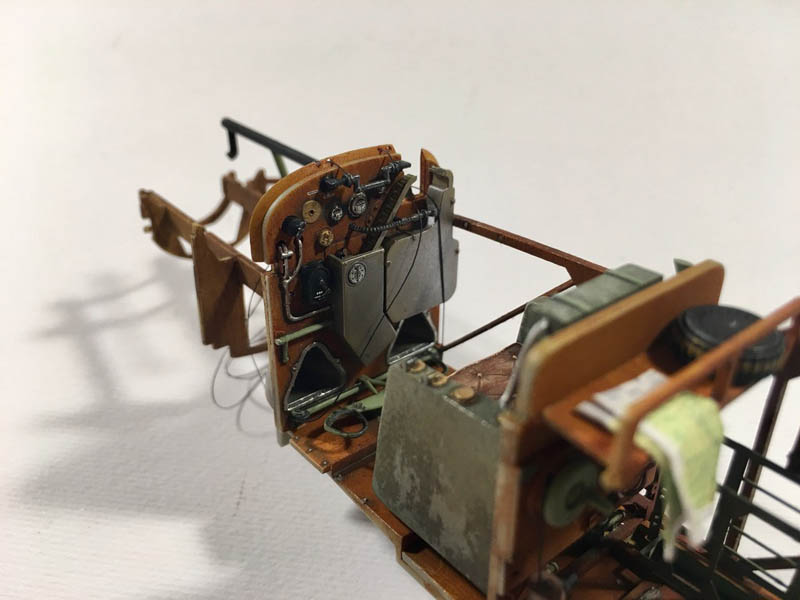
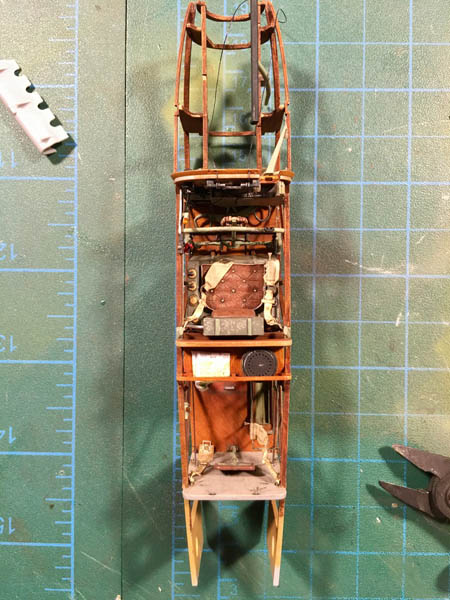
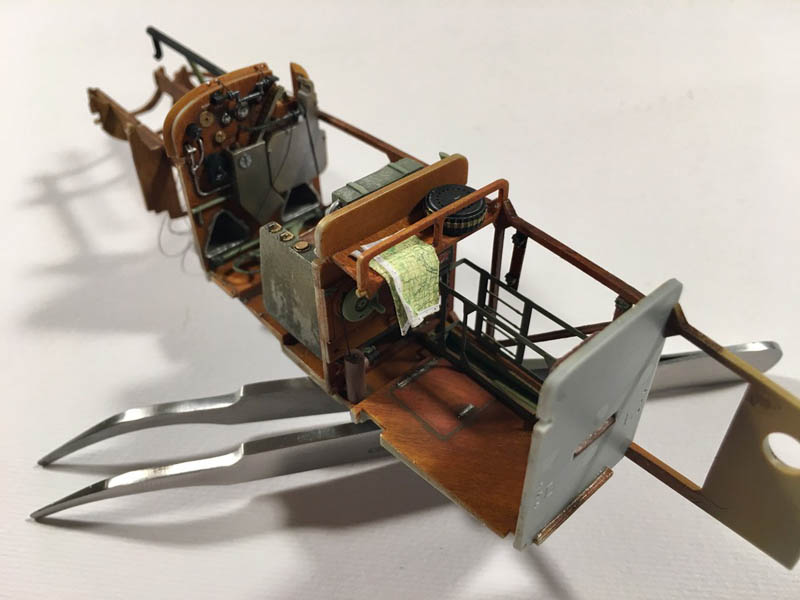
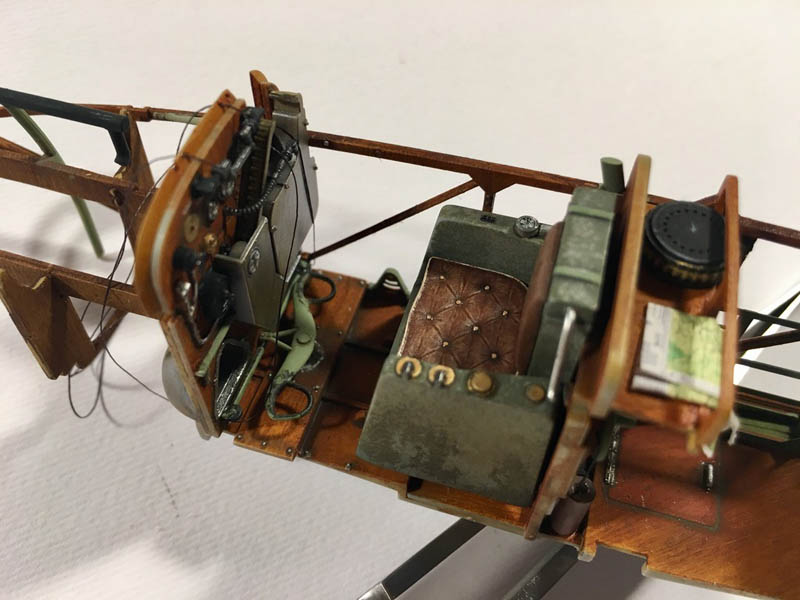
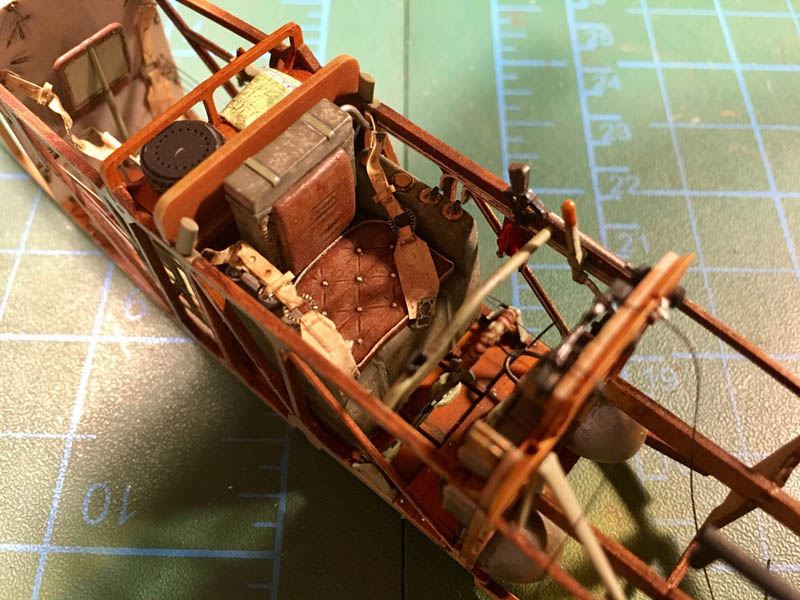
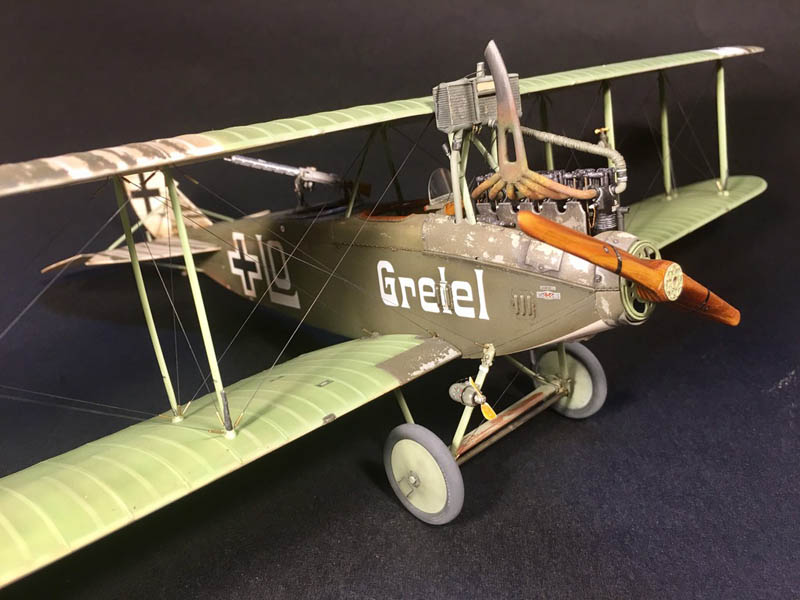
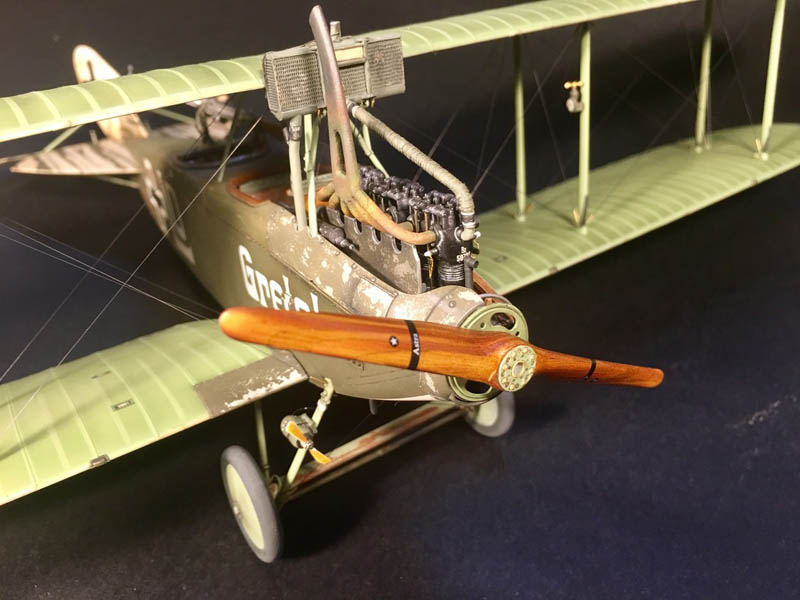
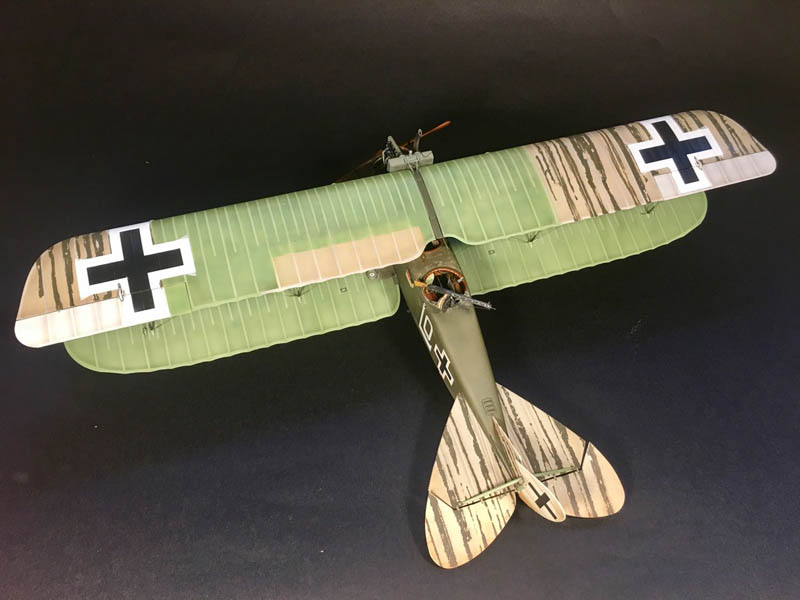
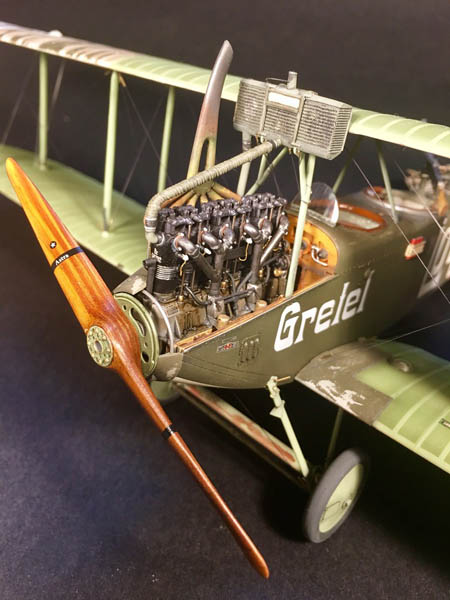
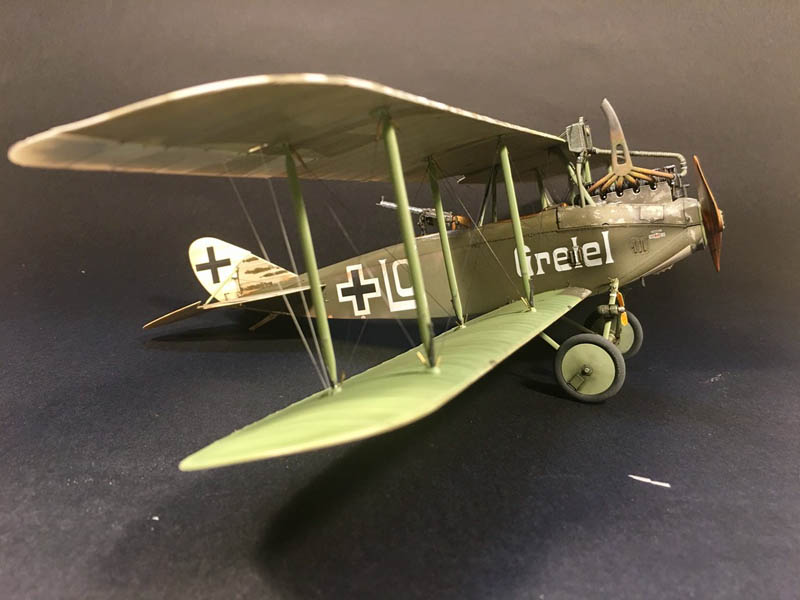
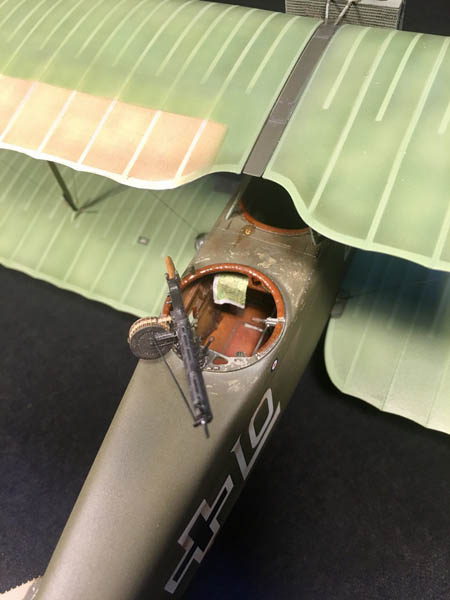
The kit goes together really well and I didn't find any trouble there. A little more filler needed than I am used to in my previous wingnut wings builds specially at the bottom of the fuselage where you have the bottom horizontal part of the fuselage that joins the two fuselage halves. For some reason I have found that on this particular kit the tolerances were a bit more relaxed and I didn't need to scrape the paint off of the mating surfaces specially on the cockpit unit. Woodwork is a mix of oils, RB templates and colouring pencils. I have modified some parts to better resemble the actual aircraft like the radio wire that hangs below the aircraft. The engine is beautifully rendered and you do have the cylinders without the molded on pushrods, although Wingnut Wings doesn't have this written down anywhere on the instructions. In came those parts, to which I added brass 0.5mm tubing that I had left in burnishing liquid. The spark plugs are nicely molded and I did not need to modify those. I added the wiring harnesses and the wiring harness cover, that one scratchbuilt from sheet styrene. I also added the two control rods for the carburators. The engine was painted gloss grey and then I used UVDR's fantastic buffing metallic pigments. Weathering on the engine was done with oils from AK and W&N.
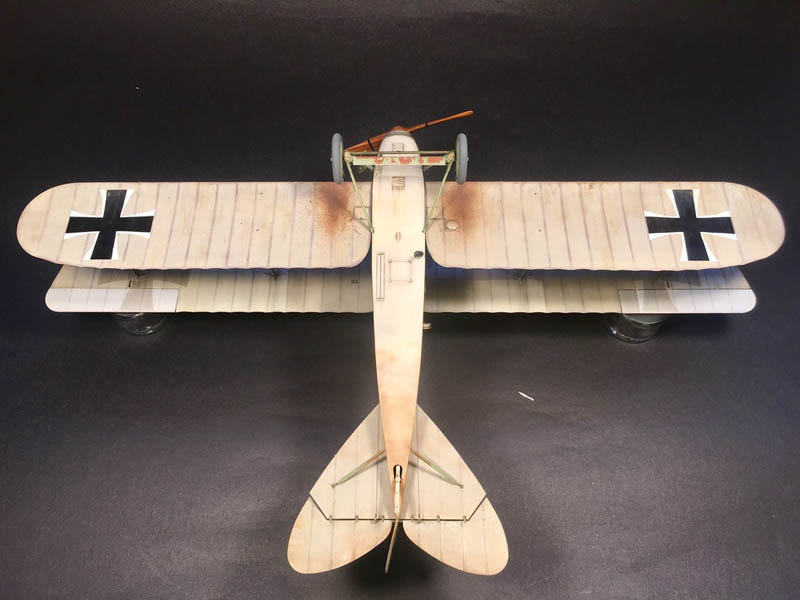
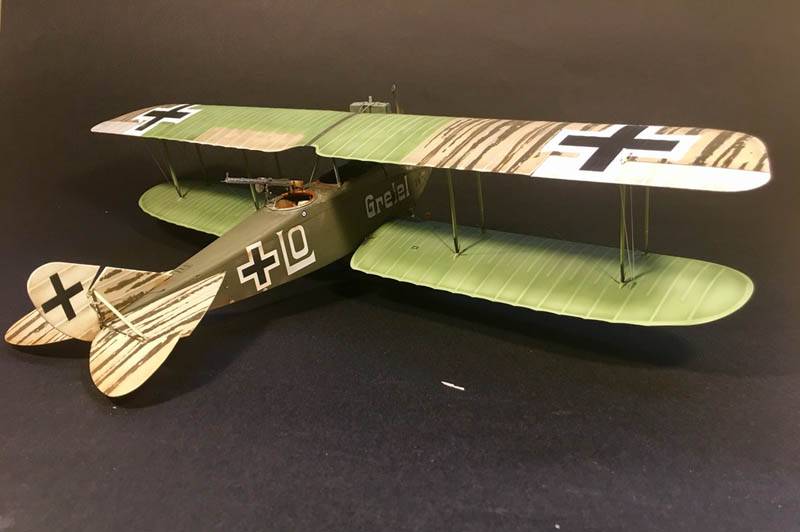
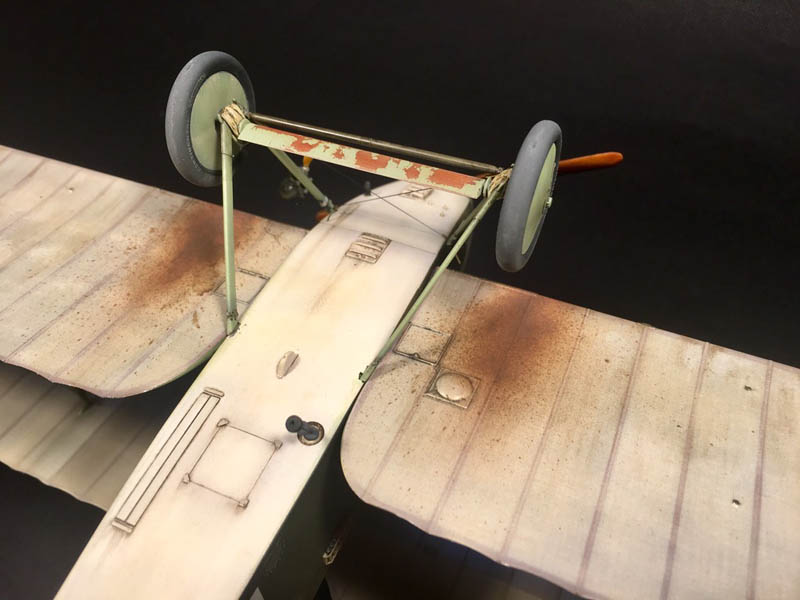
The paints used were Tamiya acrylics. For the streaking I used AK worn effects chipping fluid on top of Aviattic's lovely dark linen. I was worried at first how the chipping would work on top of the decals but it actually worked out fine. Rigging was done with EZ Line and with the lovely help of Bob's Buckles for all the rigging hardware. Weathering overall was made with oils, oil filters and sparingly using Flory Models clay washes!
Build Photos
Gallery


© Karim Bibi 2017
This article was published on Monday, March 20 2017; Last modified on Monday, March 20 2017