
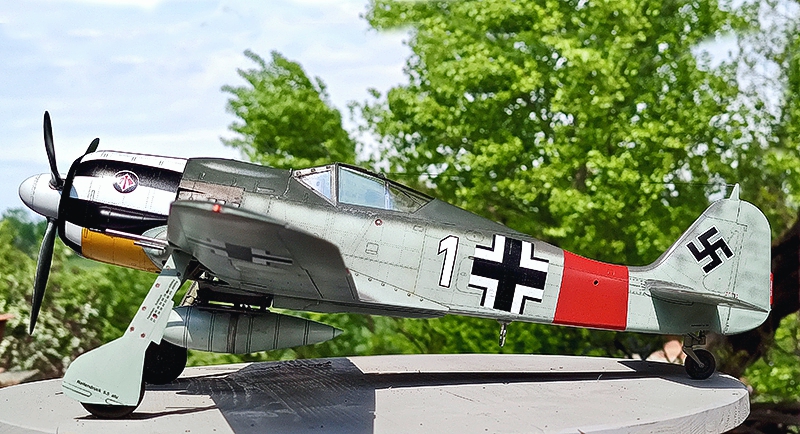
Hobby Boss 1/18 Fw 190A-8, Converted to a A-7
By Andrea Ferrari
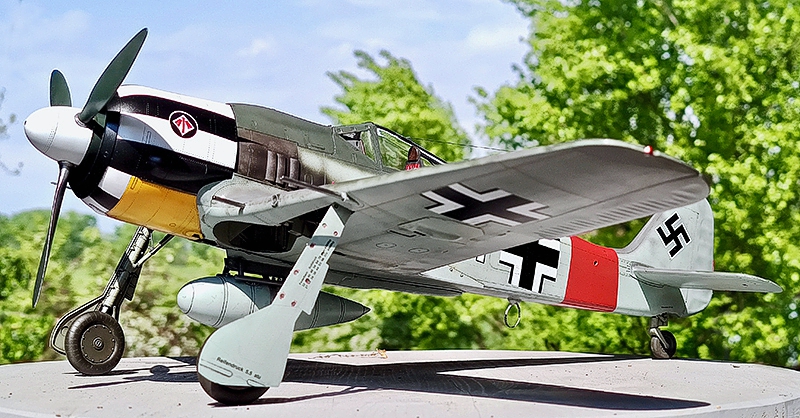
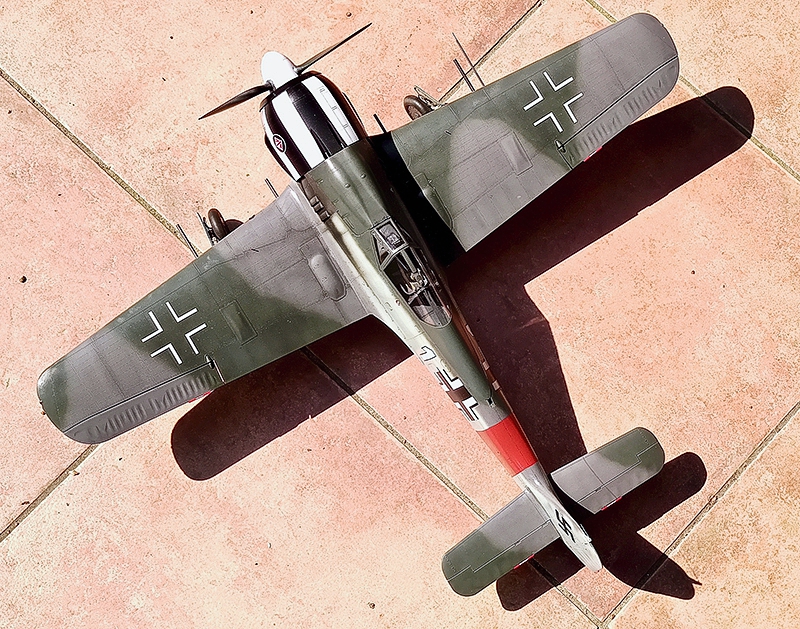
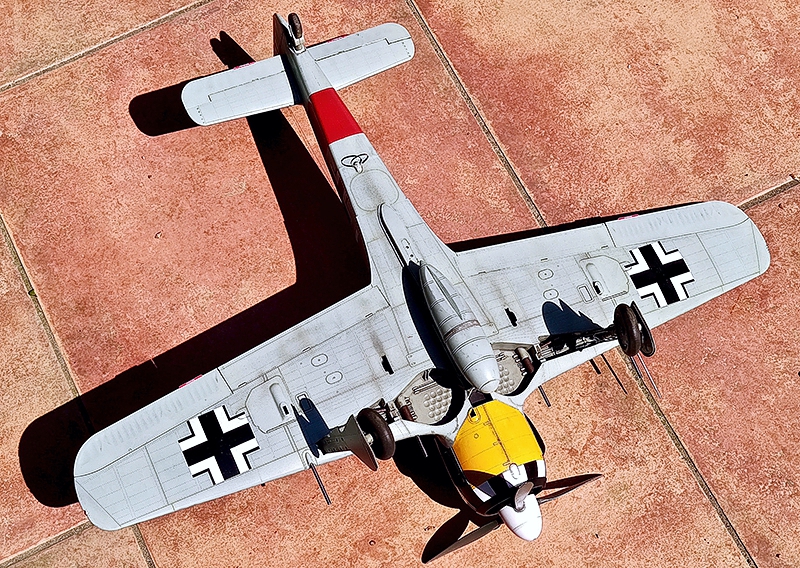
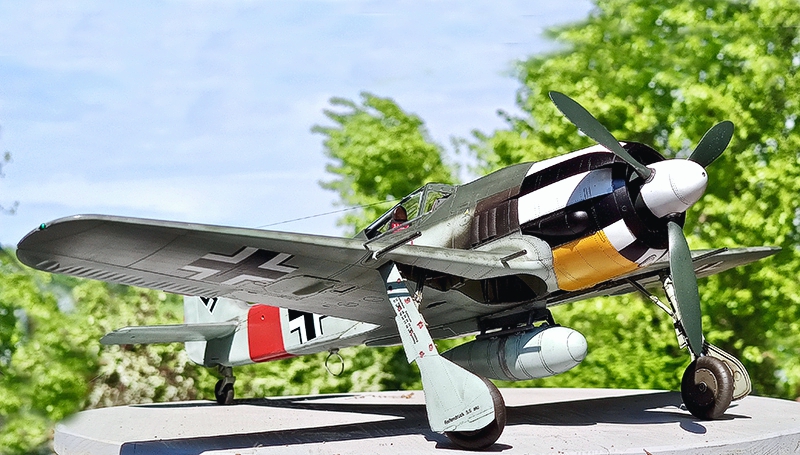
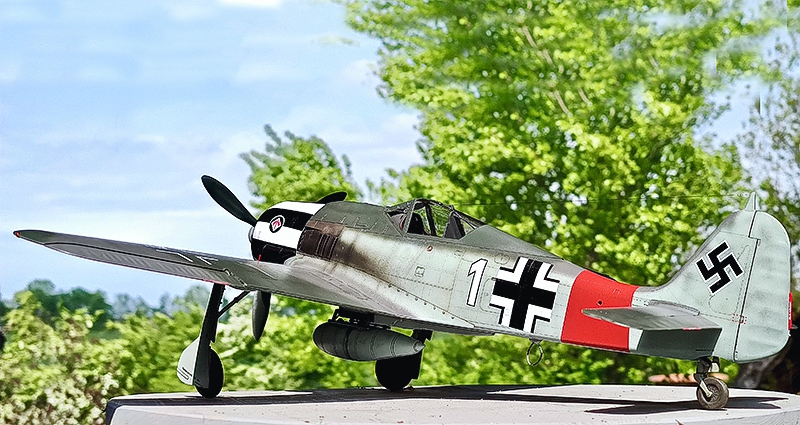
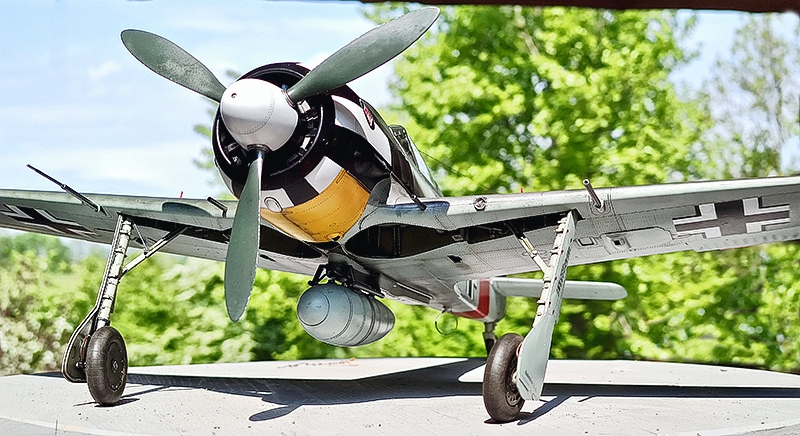
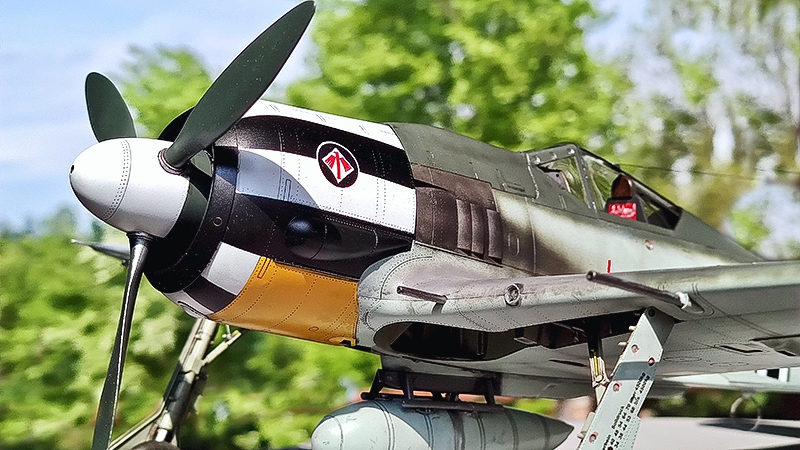
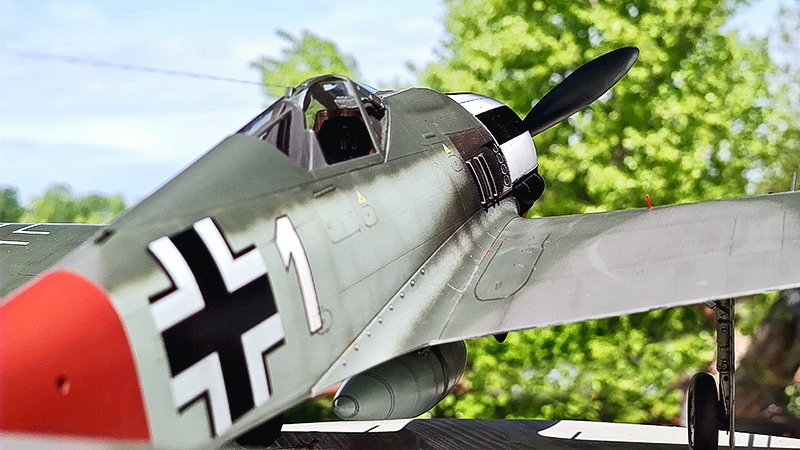
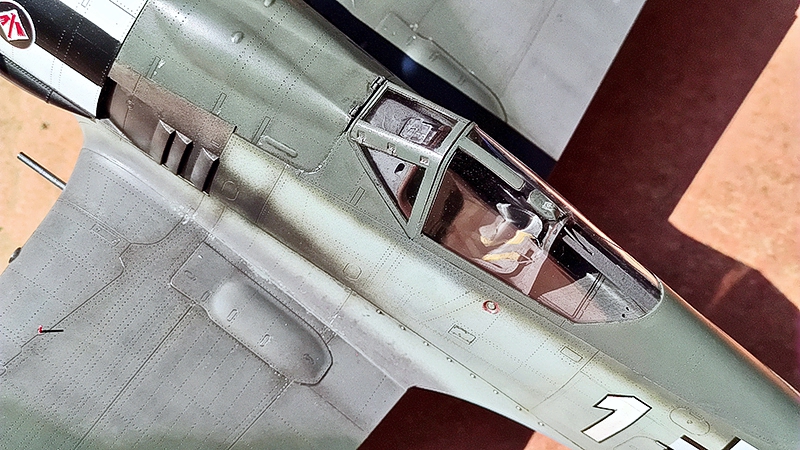
Here is my Hobby Boss 1/18 Fw 190A-8, backdated to a striped-nose A-7 as it was briefly flown by JG1 during early 1944.
This thing may have started as a toy-like, pre-built plastic model for armchair collectors, but when offered as a kit it can really hold its own, with just a few heavily oversimplified areas which can be easily modified and superdetailed to one’s satisfaction. Outline, shape and proportions are close to perfect, with fine, beautifully molded surface details and possibly the best fit I have ever experienced building a model kit. The number of parts is minimal, with greatly simplified sub-assemblies for the sections which will be basically invisible (such as the engine), and given its large size this easily assembled model also offers lots of fun and interesting opportunities when it comes to the painting stage.
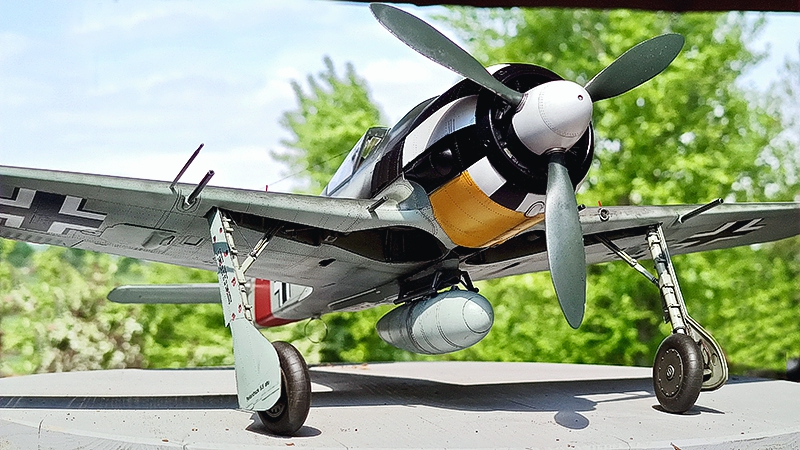
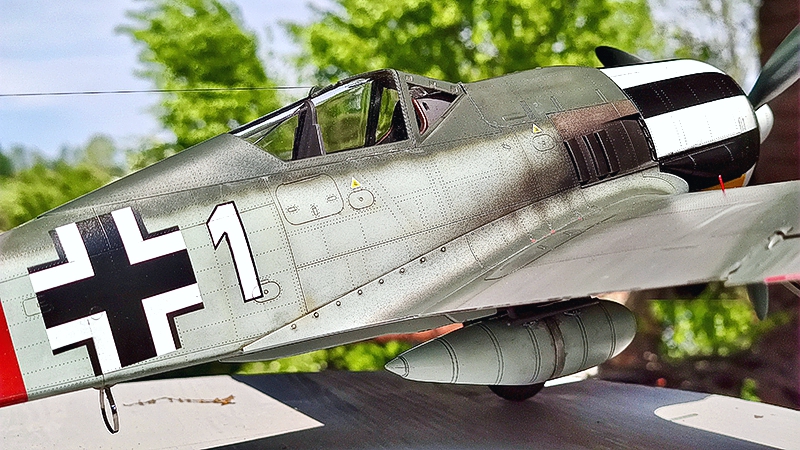
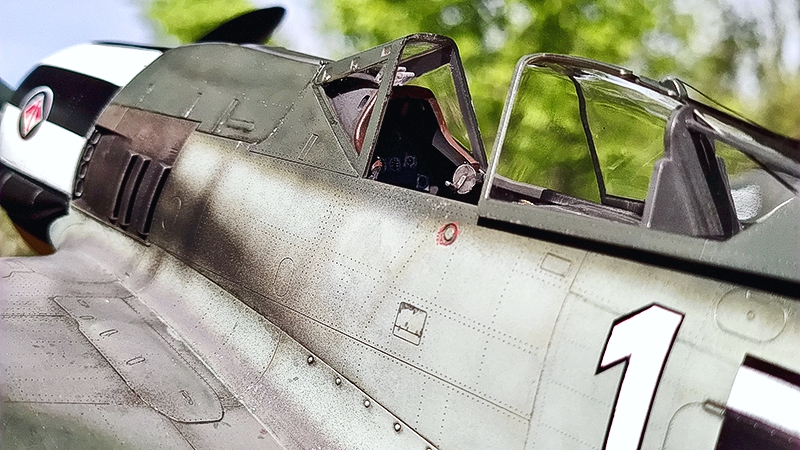
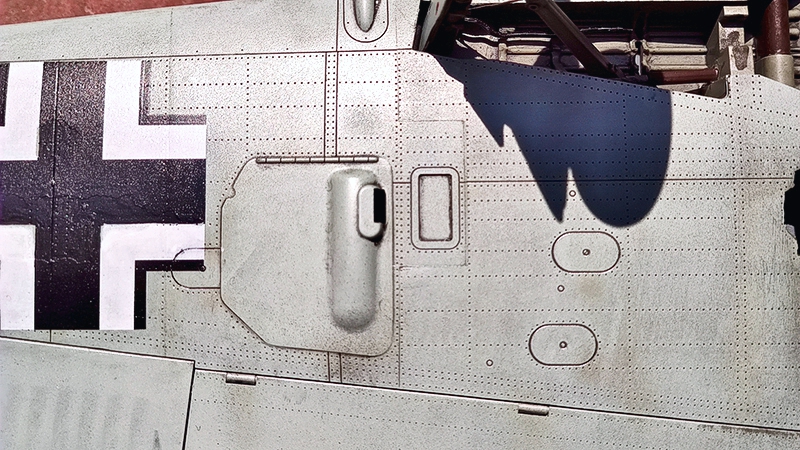
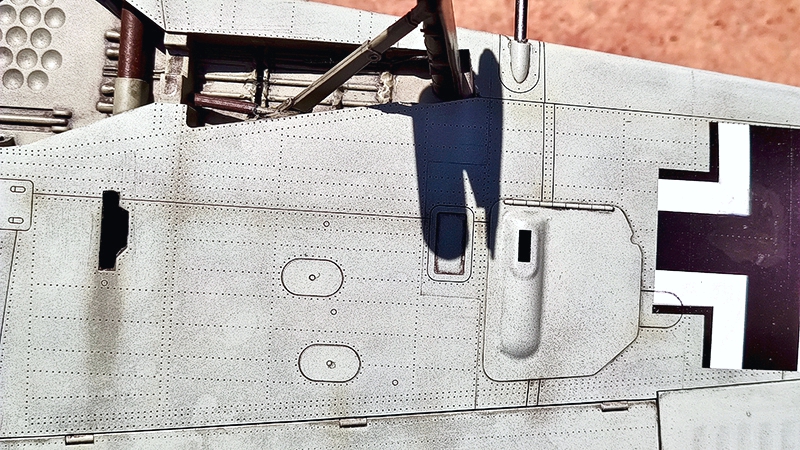
The conversion was a pretty simple one – the pitot tube was moved from the A-8 wingtip to its previous A-7 mid-wing position, the belly tank rack’s position was moved backwards as per the sub-type’s standards and – most importantly – the bulged canopy which comes in the Hobby Boss A-8 boxing (and which is wrong anyway, as it pertains to a late war, ground attack A-9) was switched with the earlier flat, commonly seen canopy found in the A-5 boxing also offered by Hobby Boss, and which I had to order from China (no big deal here – service was excellent and courteous, and I received my neatly wrapped extra canopy in a couple of weeks).
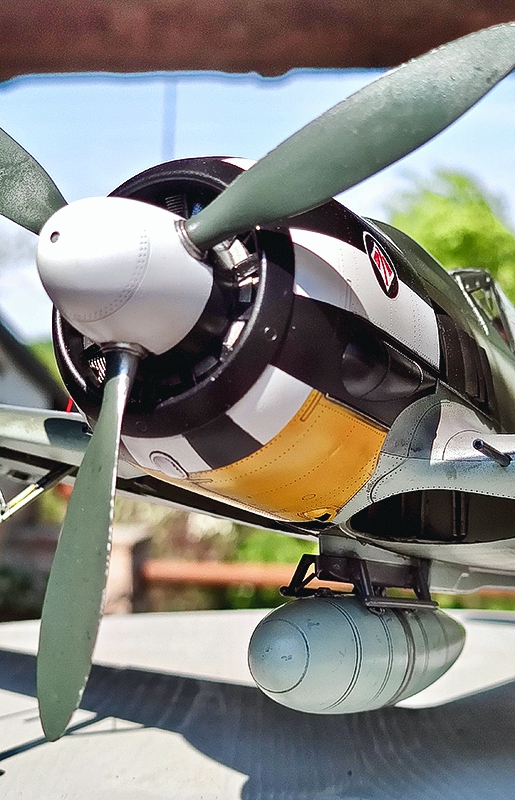
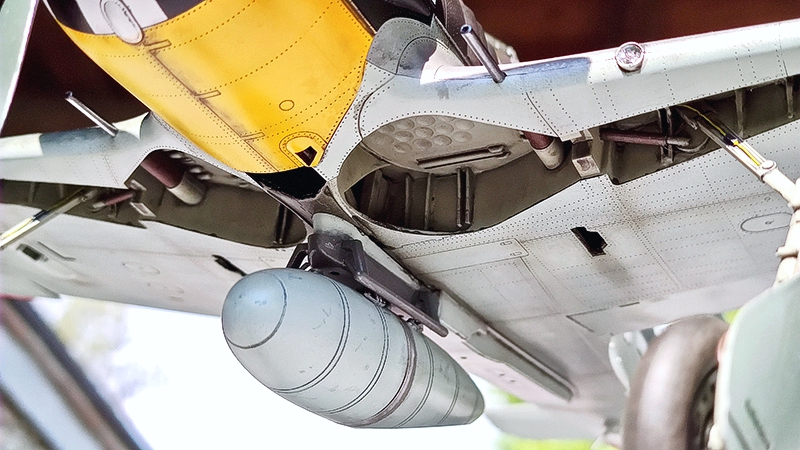
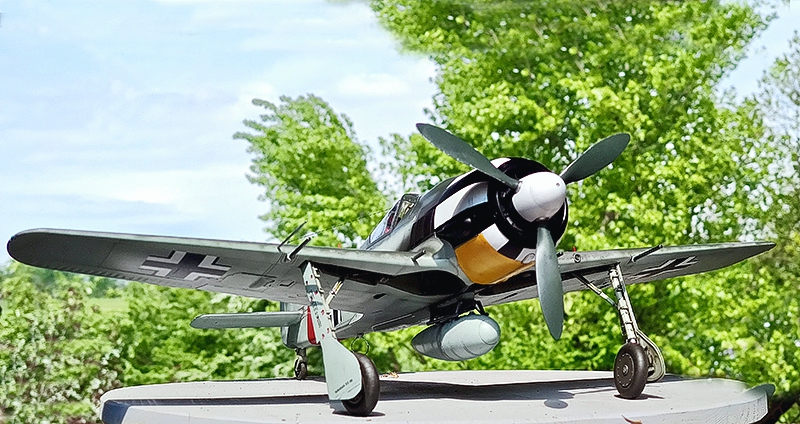
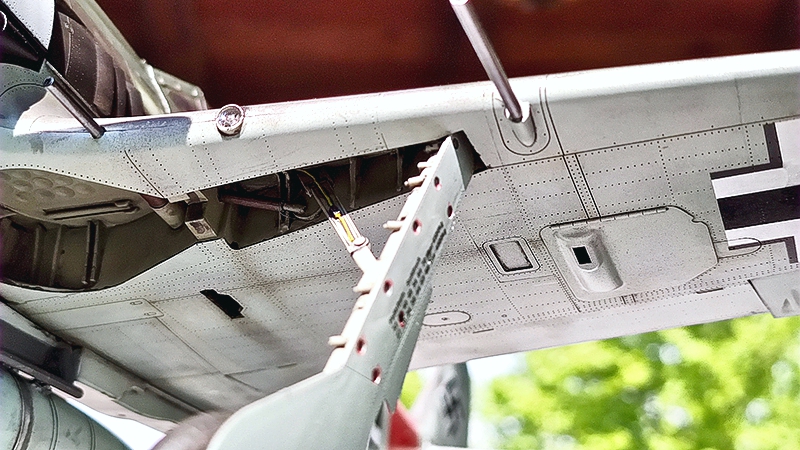
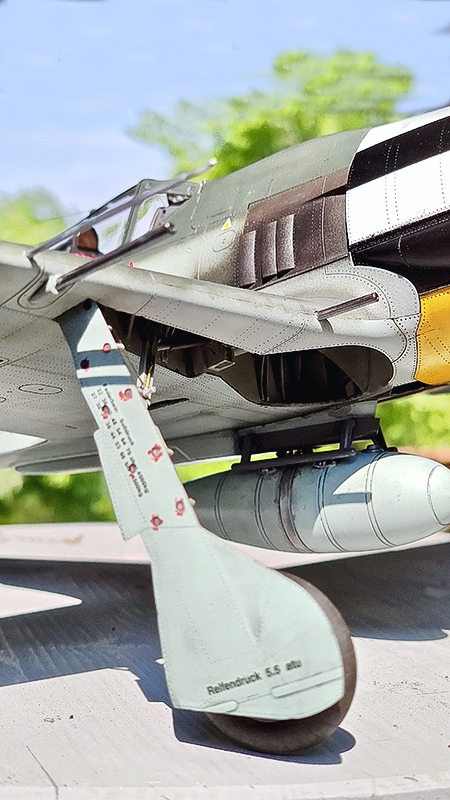
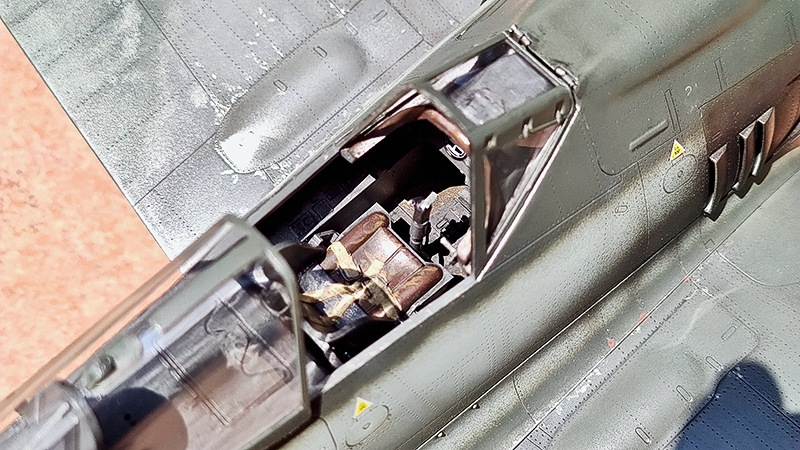
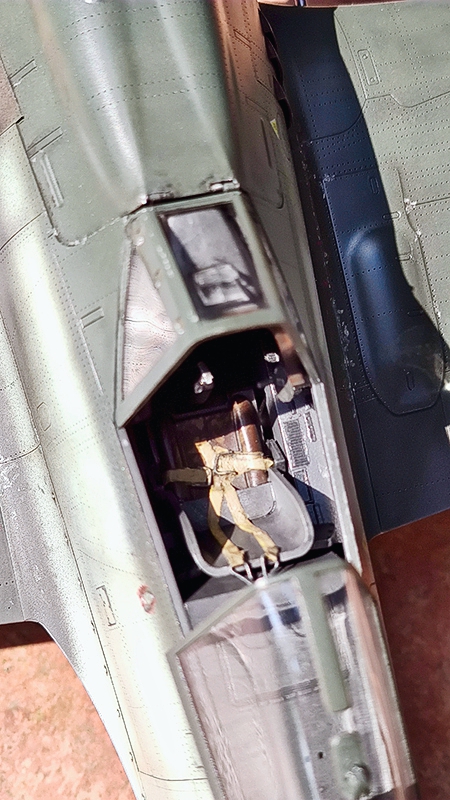
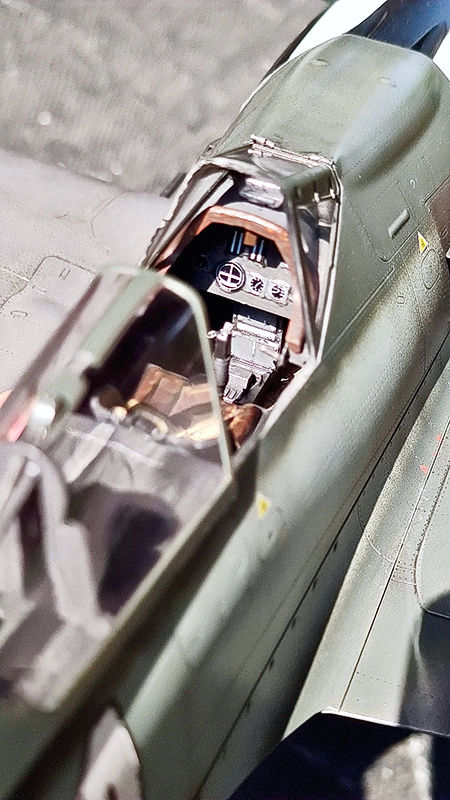
Another very important modification relates to the propeller – if the part is assembled as molded and following the instructions the blades will face the wrong way, so I cut off the projecting hub and mounted the propeller the correct way. This is an easily corrected detail which can however be just as easily overlooked. I also added a few details to the basic cockpit, which was pretty simple and uncluttered in the real plane anyway – scratchbuilt safety harness, Revi gunsight, canopy opening wheel and a few extra details on the control stick – and to the belly tank assembly (sway braces on the rack, extra detailing on the tank itself). I also hollowed out the gun barrels using a sharp scalpel blade tip and then added “down” undercarriage indicators to the wing upper surfaces, a scratchbuilt FuG 16 loop antenna below the rear fuselage - which is strangely missing from the kit - and a tiny Robot cine camera to the left wing’s leading edge, closing the hole with an epoxy drop lens.
The kit offers moveable control surfaces and flaps, but since the latter parts are totally devoid of internal detail and I have basically never seen a photo of a parked Fw190 with deployed flaps I ignored the option. I can always drop and superdetail them in the future if some aftermarket photo-etched details show up (I seriously doubt it).
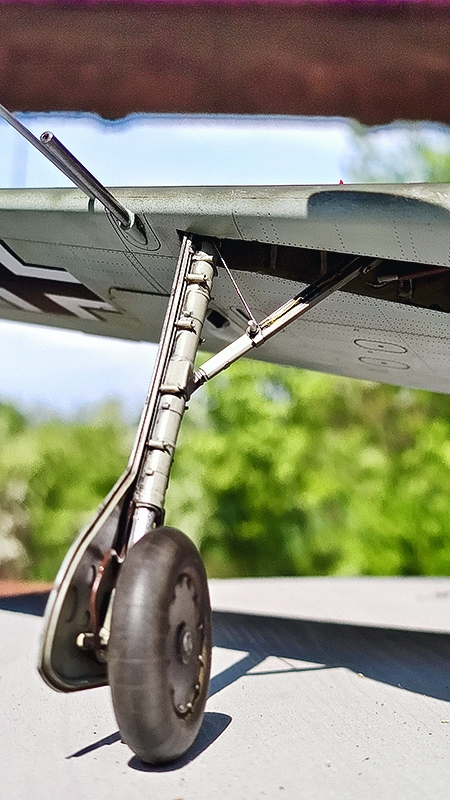
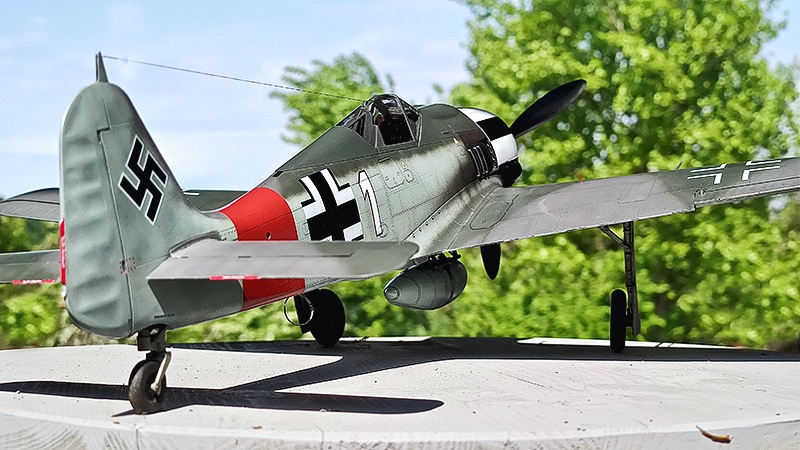
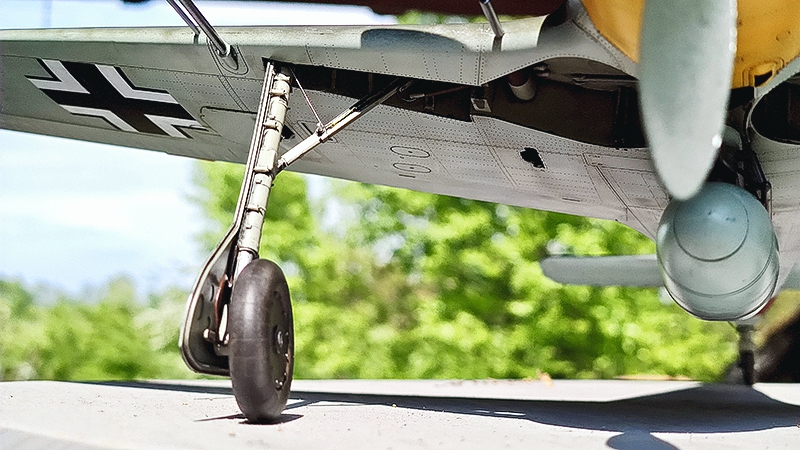
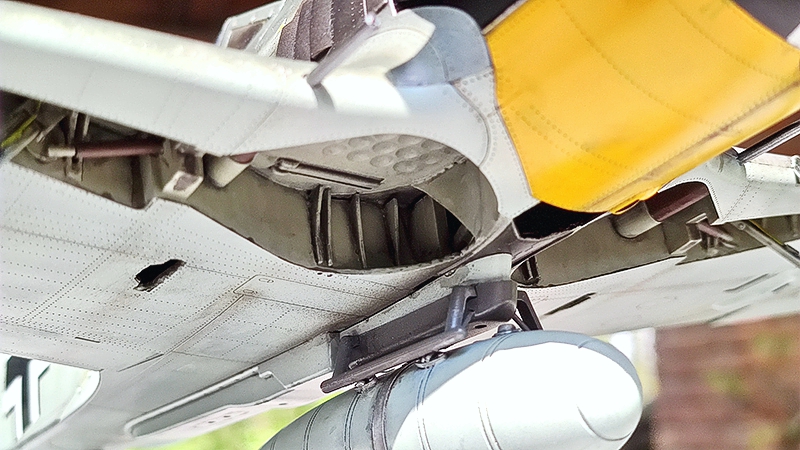
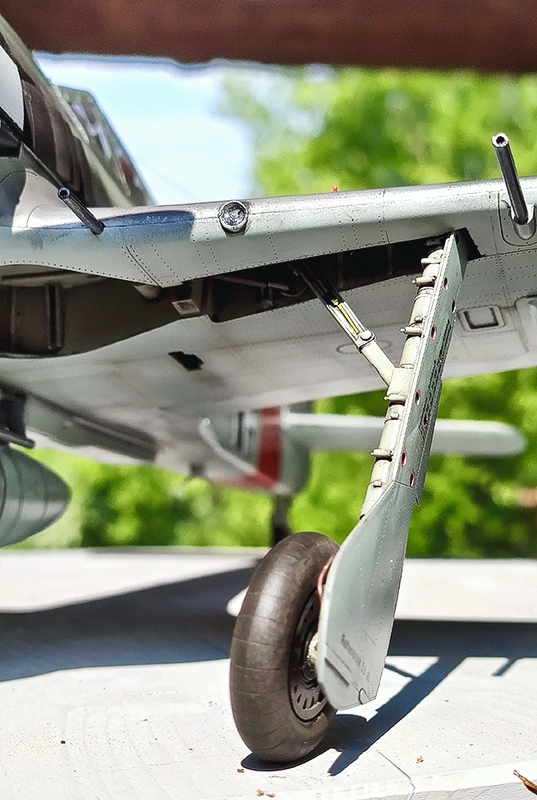
Given the large size of the model, scratchbuilders and superdetailers will have a world of fun with the kit – the only area where I really did some serious work is the landing gear and the landing gear well, two areas which in the Fw190 are very exposed. The undercarriage legs were superdetailed adding screws, electrical wiring and brake lines in two thicknesses, while the wheel well – the only really weak and severely underdetailed area of the kit – was basically rebuilt and ribbed after having dremeled away the overly thick molded detail. Better modelers than I will no doubt be able to recreate a perfect copy of the original parts here, but I’m pretty happy with my basic modification.
The model was finished with MRP lacquer acrylics, which thanks to their delicate covering allow fine surface modulations and tonal variations without having to resort to pre- or post-shading (a light Flory Models black and grime wash was applied before sealing everything, however). Weathering was kept to the bare minimum as Jg1 planes were kept very well during that period and nose-striped machines were in service for a comparatively short time anyway.
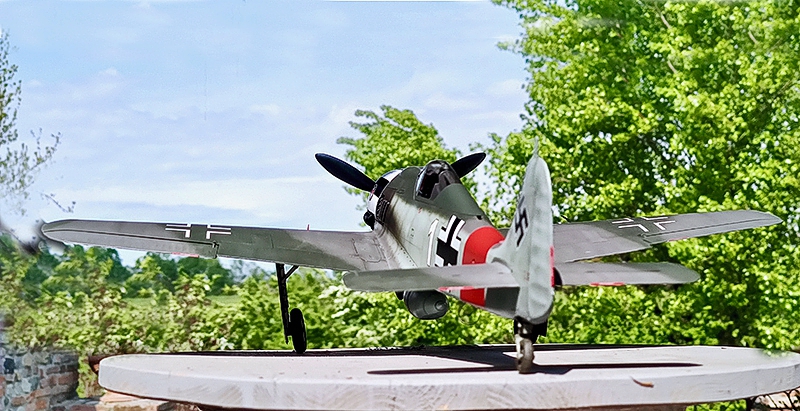
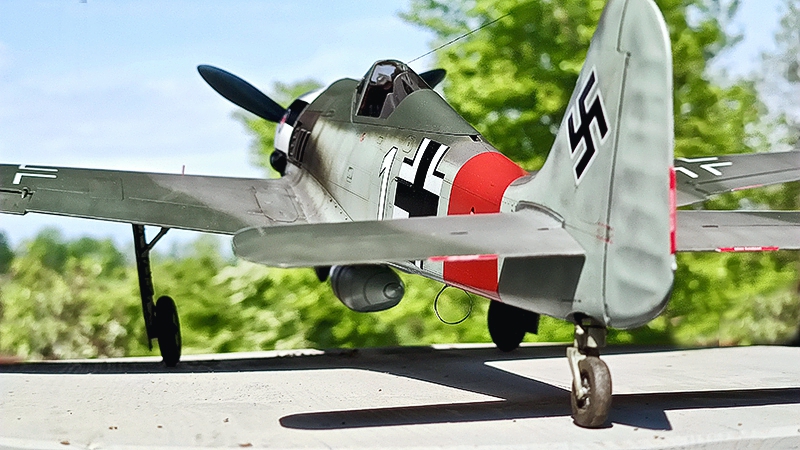
Most of the decals provided in the kit – as it usually sadly happens with Hobby Boss and Trumpeter - proved to be wrong in proportions and size, so all of them had to be modified in a way or another with a few markings masked and airbrushed, hopefully with decent results. Despite this a few stencils are still missing, and the JG1 badge I have applied to the left side of the cowling appears to be marginally too small compared to the real one, as I could not find a decent substitute for the decal provided in the box.
This is an absolutely wonderful kit if you need a break – as I did – from long, daunting, overly complex and occasionally tedious or frustrating builds.

© Andrea Ferrari 2021
This article was published on Thursday, April 29 2021; Last modified on Saturday, May 01 2021