Hasegawa 1/32 P-47D
By Suresh Nathan
Introduction
The Republic P-47 Thunderbolt, also known as the Jug, was the largest single-engined fighter of its day, and a vast improvement over the Curtiss P-40 Warhawk, its predecessor. It was one of the main United States Army Air Force (USAAF) fighters of World War II and served with other Allied air forces. The P-47 was effective in air combat but proved especially adept at ground attack. It had eight 0.50-caliber machine guns, four per wing. When fully loaded the P-47 could weigh up to eight tons. A modern-day counterpart in that role, the A-10 Thunderbolt II, takes its name from the P-47.
In response to a USAAC requirement for a new fighter aircraft, Republic Aviation engineer Alexander Kartveli proposed the AP-10 lightweight high-altitude interceptor on August 1, 1939. The USAAC ordered a single prototype under the designation XP-47, in November 1939. In early 1940, combat reports from war in Europe indicated that this design was inferior to Luftwaffe fighters. In response, the USAAC issued new requirements for a fighter including an airspeed of 400 mph at 25,000 ft, an armament of six or (preferably) eight 0.50 in machine guns, cockpit armour plating, self-sealing fuel tanks, and a minimum fuel load of 315 gallons. The new aircraft was much larger than the original, and the inline engine was swapped for a turbo-supercharged Pratt & Whitney R-2800 Double Wasp 18-cylinder radial engine. Armament was increased to eight M2 Brownings, four mounted in each wing, making it one of the heaviest-armed fighters considered by the USAAC at the time.
A common complaint from P-47 pilots was that the razorback cockpit limited rearward visibility. In response to these complaints, Republic fitted a bubble canopy from a Hawker Typhoon onto a P-47D-5-RE in July 1943. Designated XP-47K, the aircraft's new canopy improved visibility greatly. For reasons unknown, the first production bubbletop Thunderbolts were not given a new variant letter, instead they were a continuation of the P-47D line (explaining the two 1/32 scale P-47D’s from Trumpeter and Hasegawa respectively). Bubbletop P-47D production totalled 3,028 aircraft, built in eight production blocks, for a grand total of 12,558 P-47Ds.
Gabby Gabreski
Francis Stanley "Gabby" Gabreski (born Franciszek Gabryszewski; January 28, 1919 – January 31, 2002) was a career officer and pilot in the United States Air Force, retiring as a colonel with 26 years of military service. He was the top American and U.S. Army Air Forces fighter ace over Europe in World War II and a jet fighter ace with the Air Force in the Korean War. Although best known for his credited destruction of 34½ aircraft in aerial combat and being one of only seven U.S. combat pilots to become an ace in two wars, Gabreski was also one of the Air Force's most accomplished leaders. In addition to commanding two fighter squadrons, he had six command tours at group or wing level, including one in combat in Korea, totalling over 11 years of command and 15 overall in operational fighter assignments. After his Air Force career, Gabreski headed the Long Island Rail Road, a commuter railroad owned by the State of New York, and struggled in his attempts to improve its service and financial condition. After two and a half years, he resigned under pressure and went into full retirement.
A Super-Detailed Model
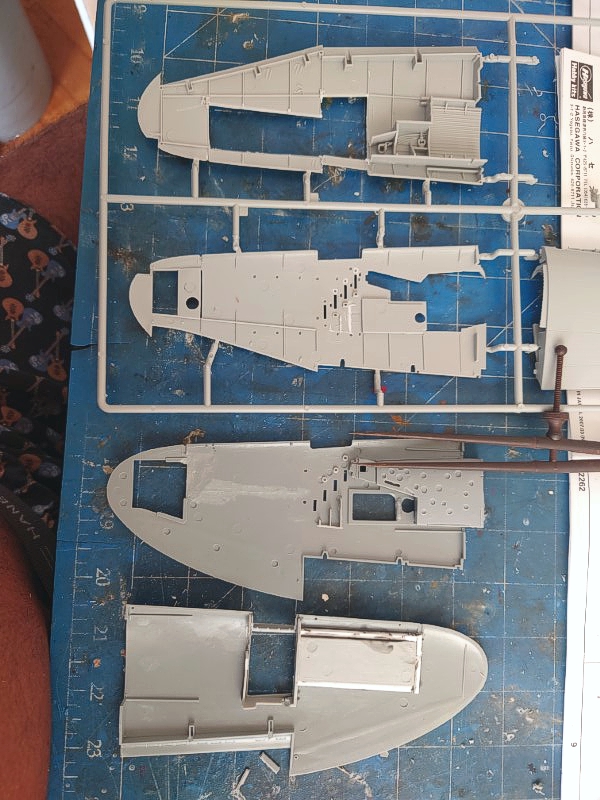
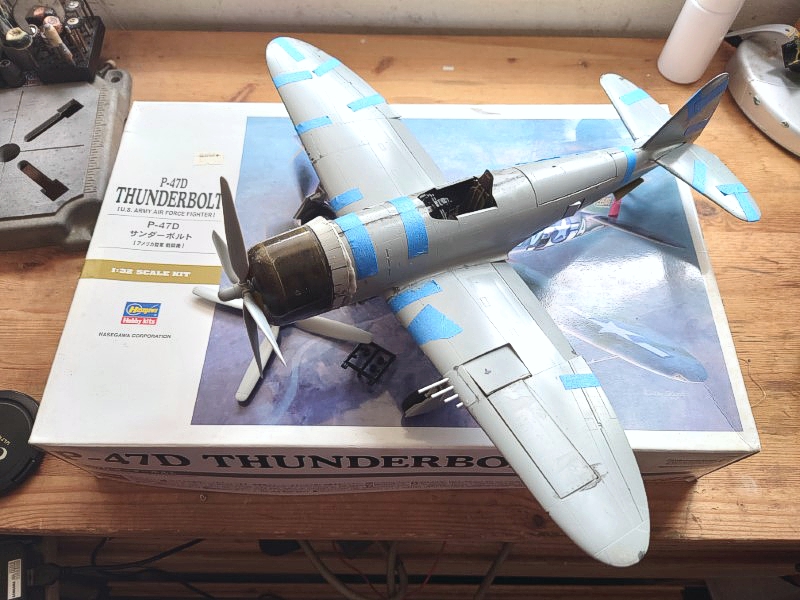
When it comes to the P-47D Bubbletop in 1/32 there is no real choice other than the Hasegawa which was new and still the best since 2007. The Trumpeter as a Razorback is nice but for many including myself the rivet detail is annoying and actually mostly unrealistic. For my money, the Hasegawa tends to do the variable thickness panelling much better too which is shown as panel lines on the Trumpeter. Therefore, to do a super-detailed bubbletop, the choice would be to use the Hasegawa with aftermarket parts, or the Trumpeter with the back ridge cut off and remodelled with a new canopy or what I did: use the Hasegawa exterior and kitbash it to the Trumpeter interior.
Cockpit and Main Supercharger Assembly
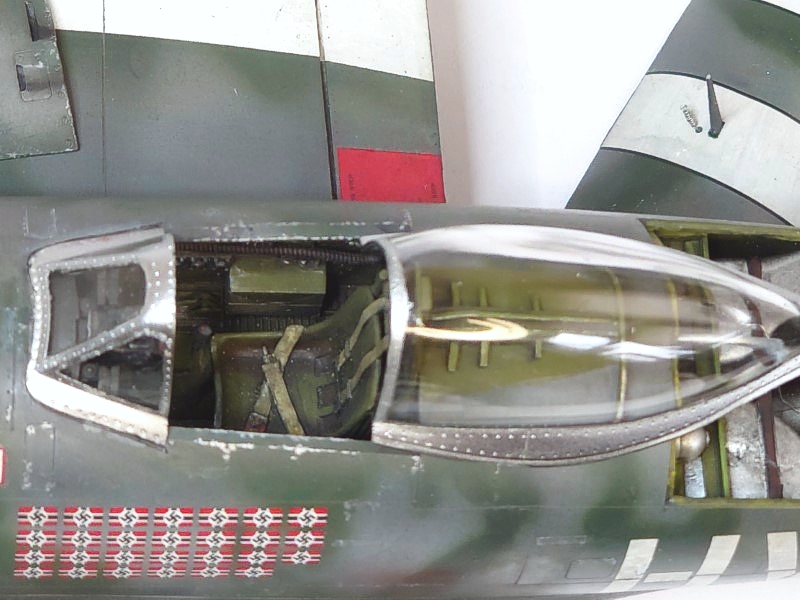
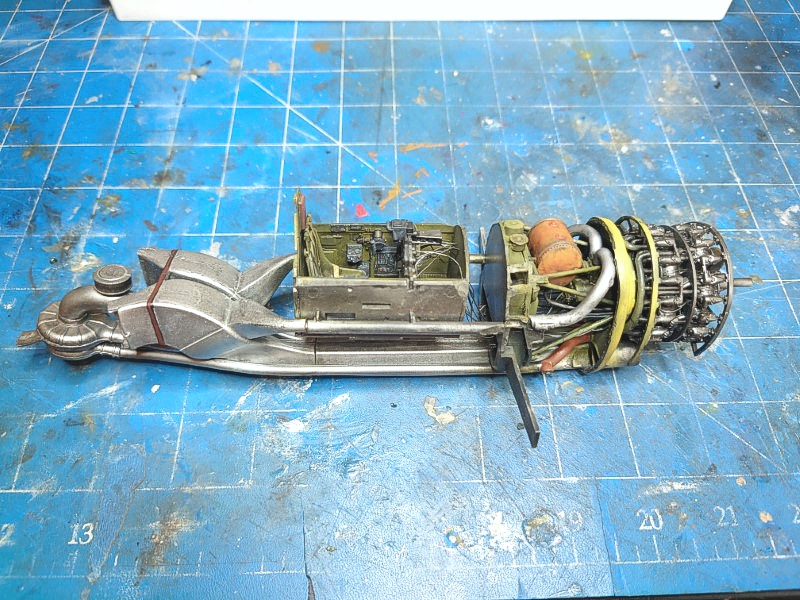
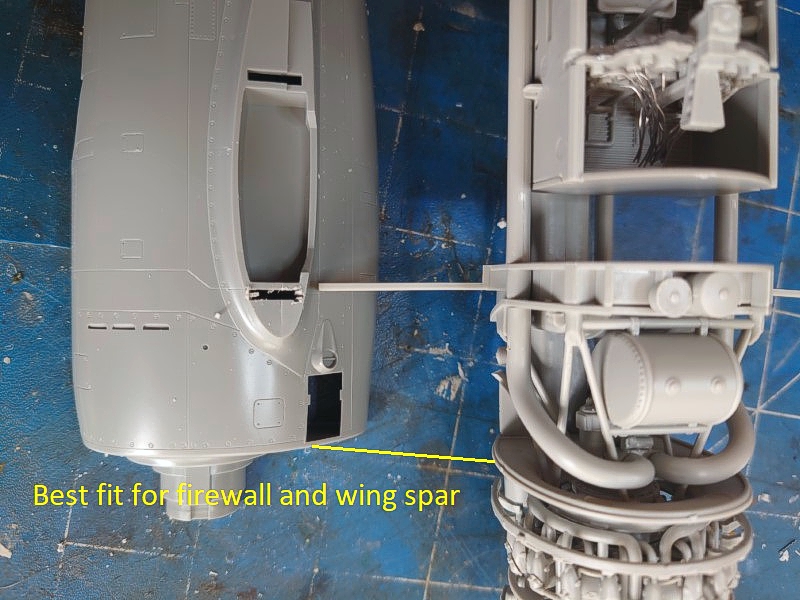
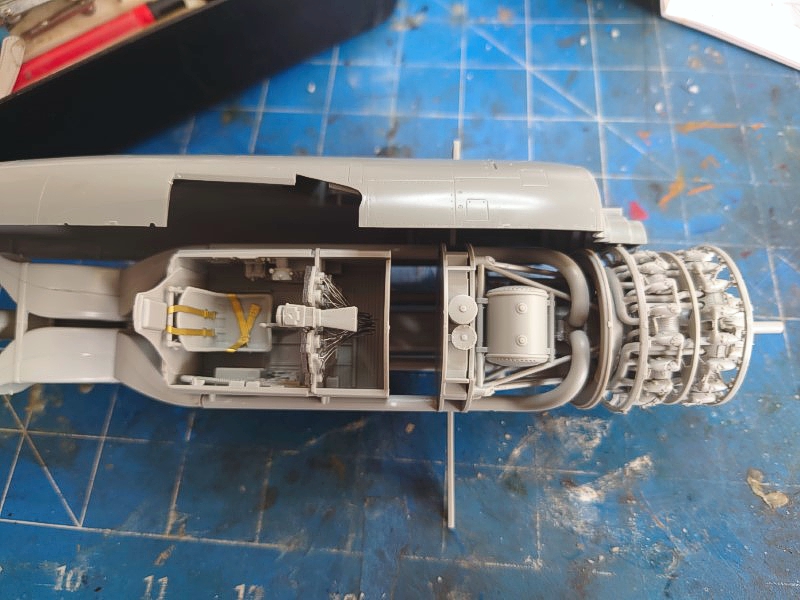
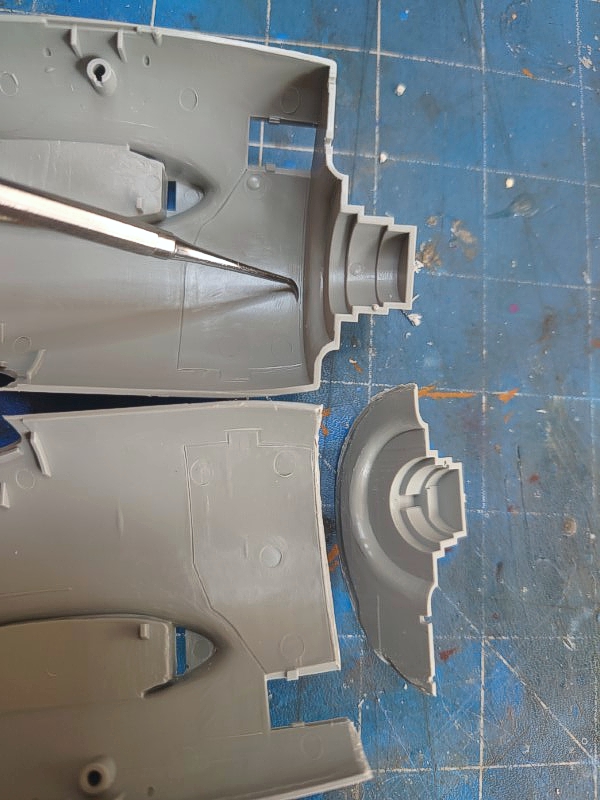
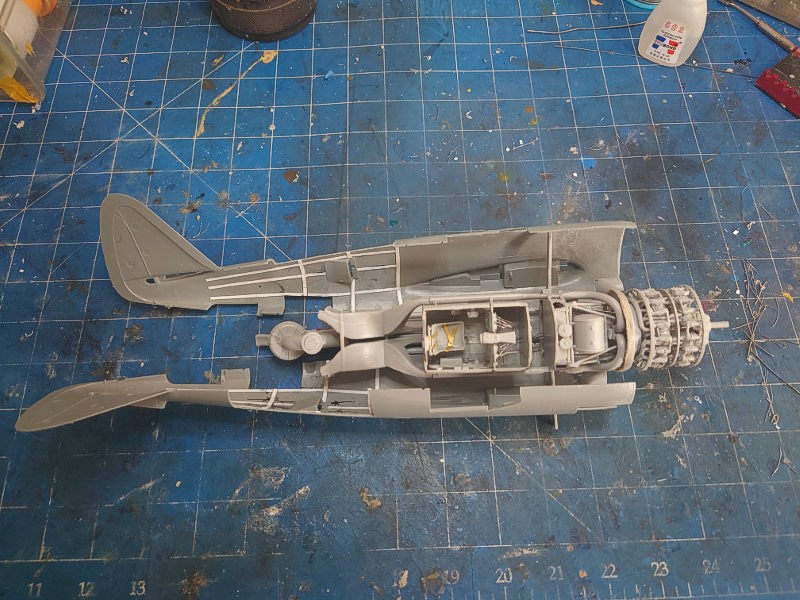
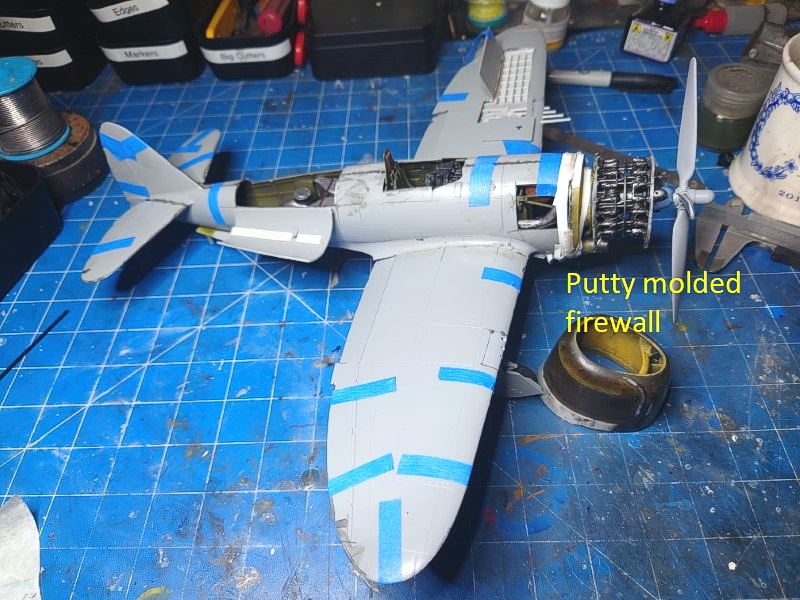
The cockpit is built out of the box with the addition of solder wire to the back of the instrument panel. This is barely visible in the final model. There were two ejection pin marks on the floor which I did not see at this stage and had to be cleaned at the end after everything went together and was painted. This fits onto the supercharger structure and firewall. At this stage I aligned the Trumpeter to the Hasegawa taking the Trumpeter firewall as the line of reference. In this way the Trumpeter forward wing spar was too far forward, and a new opening had to be opened in the Hasegawa. Next, I sharply scribed off the Hasegawa engine firewall keeping it usable for a future Trumpeter project. With this a trial fit was remarkably good and the supercharger exhausts aligned with 1-2mm gaps. The fuselage halves came together with about 2-3mm gaps and I dealt with this by grinding away protrusions in the fuselage and supercharger assembly. I detailed the inner fuselage with strips and did a trial closure with tapes. I then used epoxy putty on the firewall edge protecting the fuselage free edge with masking tape. Upon setting, I split this open and cleaned up the putty. This is a full display model and so getting the edge thickness accurate was important and I could not just stuff it with putty. After some base painting mainly of the parts that would be inaccessible (the engine was not completely painted for example), I glued the two halves together.
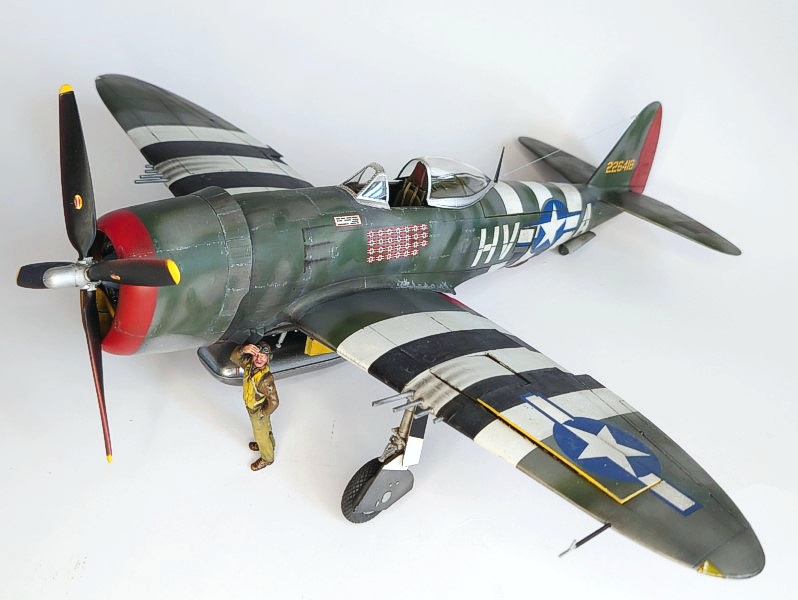
Undercarriage
I went with the Hasegawa undercarriage. It was sturdier and, in my mind, more accurate than the Trumpeter ones. I did use the Trumpeter rubber tyres and wheels. I drilled out the torque links. As tough as the undercarriage was, they broke, and I re-enforced them with paper clips. Hydraulic lines were replicated with solder wire.
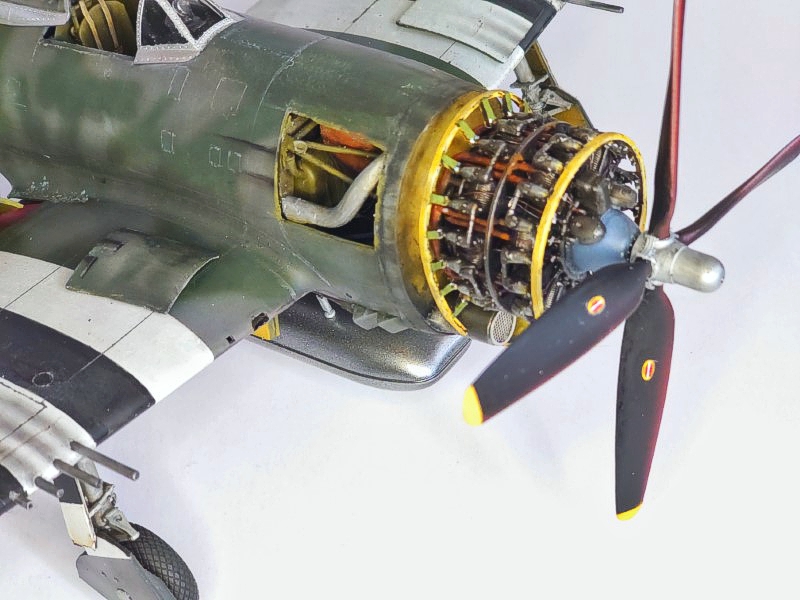
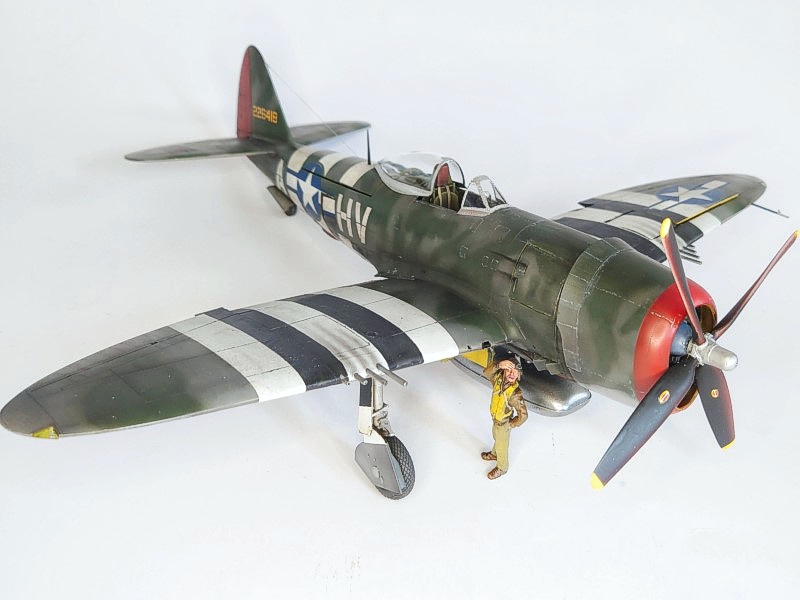
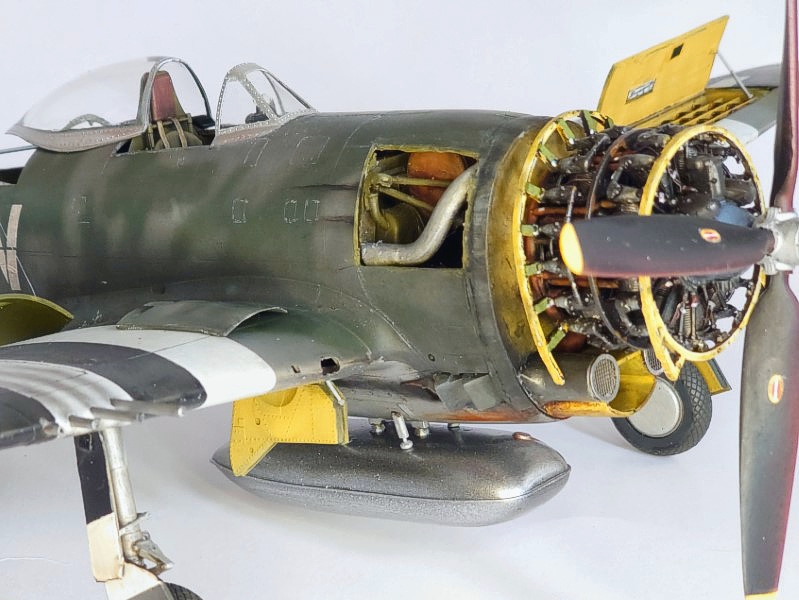
Engine Compartment
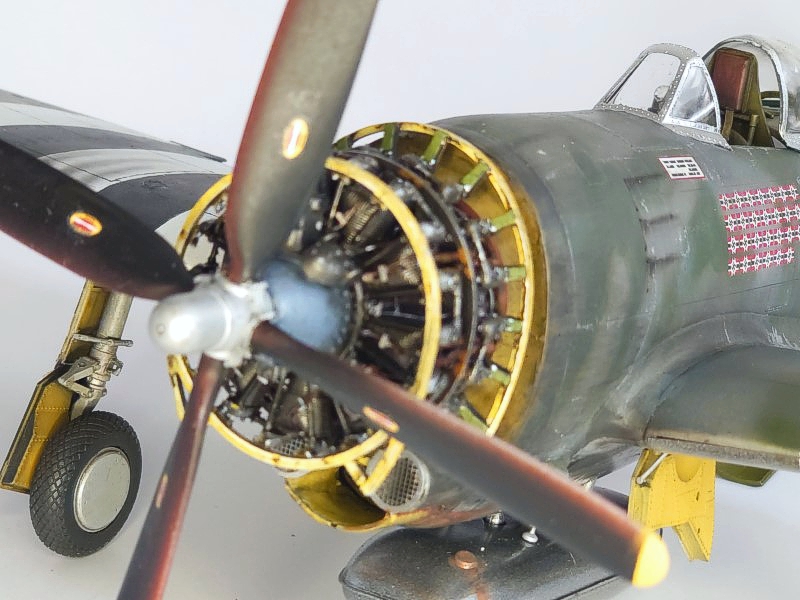
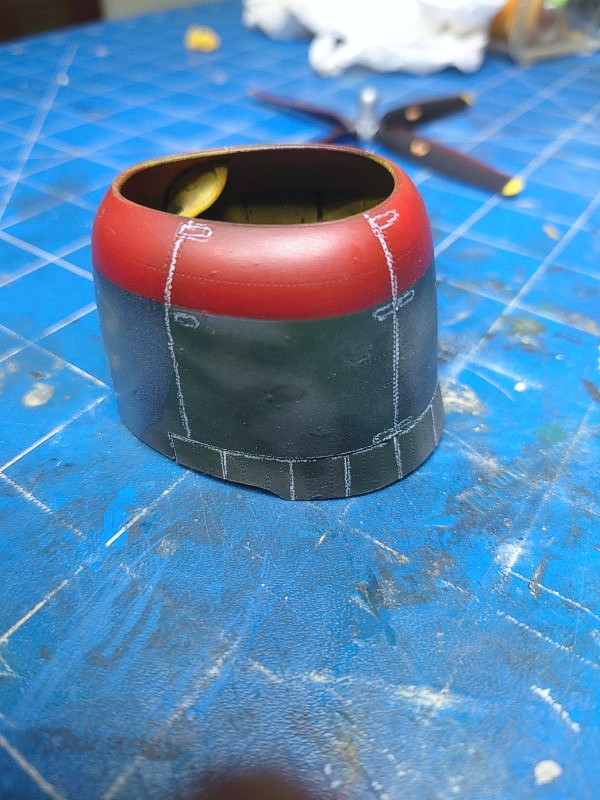
The PW R2800 engine on the Trumpeter is very good. I used it with the framing. The Hasegawa engine is good too but really only designed to be seen from the front. Ignition harness wiring was the only needed addition and I made this out of solder wire. The engine fits the Trumpeter cowling best and thankfully this fit over the Hasegawa fuselage snugly. It is transparent and brittle but was painted easily.
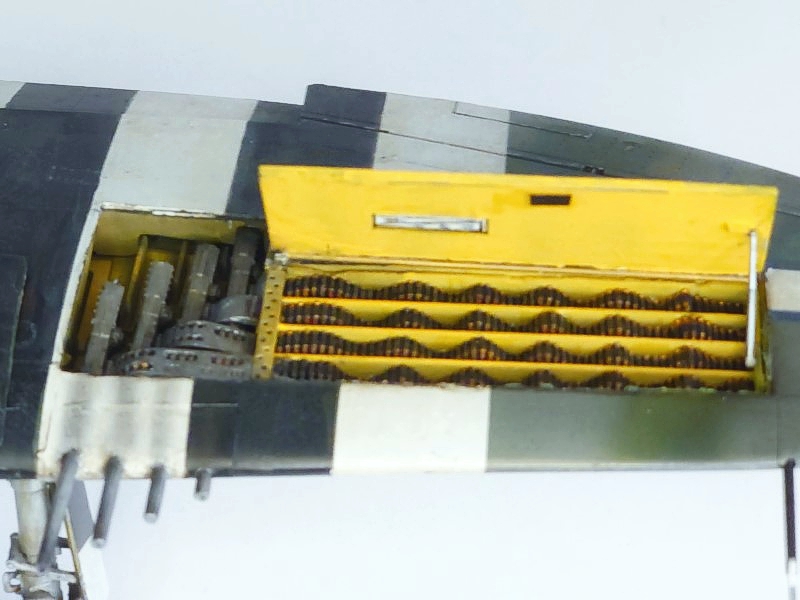
Machine-gun Bay
I scribed out the Hasegawa doors and thinned them out. In retrospect I should have vacu-formed new ones as they are thick and sit proud. The ammunition bays all line up well and I used the spacers on the Trumpeter kit carefully positioned using calipers to replicate the spacing and height of the guns. There was a little bit of filling and grinding to get everything to fit. The ammunition door has a hinge on it which is moulded in the Hasegawa. This was destroyed in the scribing process, and I made a new hinge out of nylon in a brass tube. This works well but is unnecessary because just the nylon thread alone glued directly to the plastic would have worked.
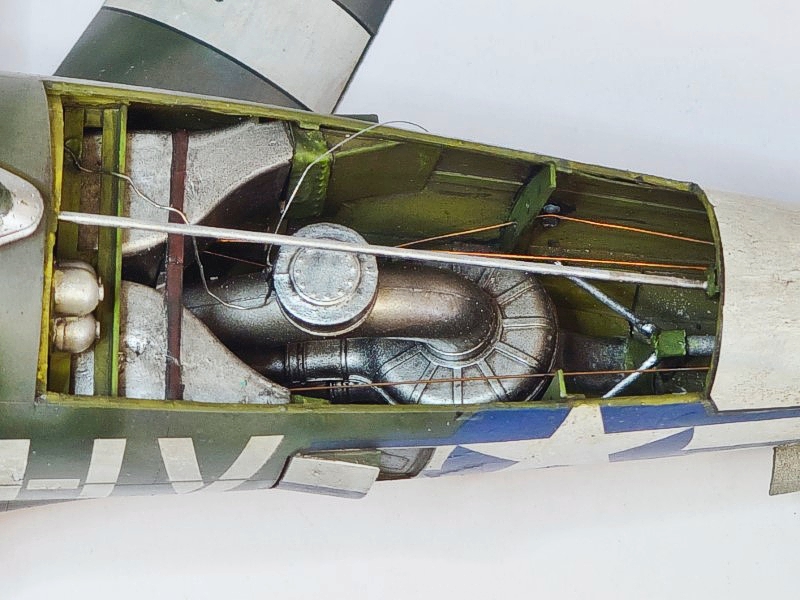
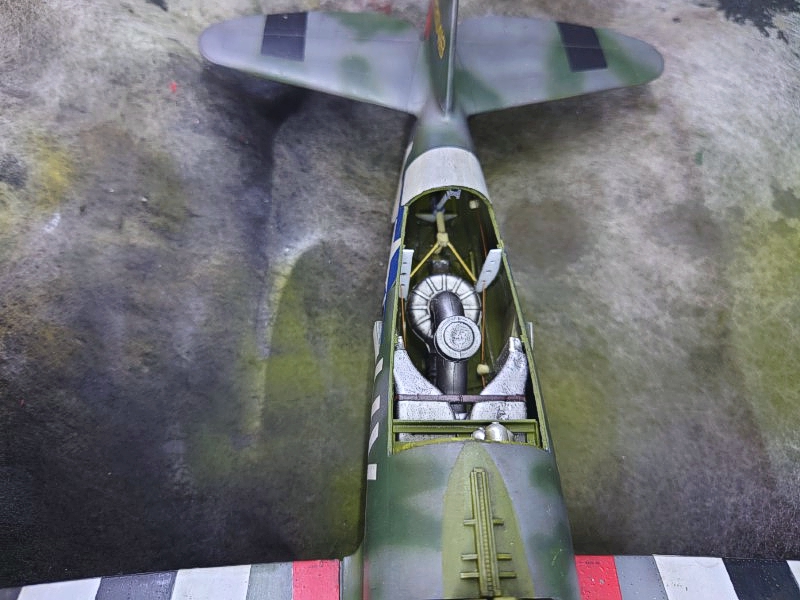
Supercharger Exhaust and Rear Fuselage
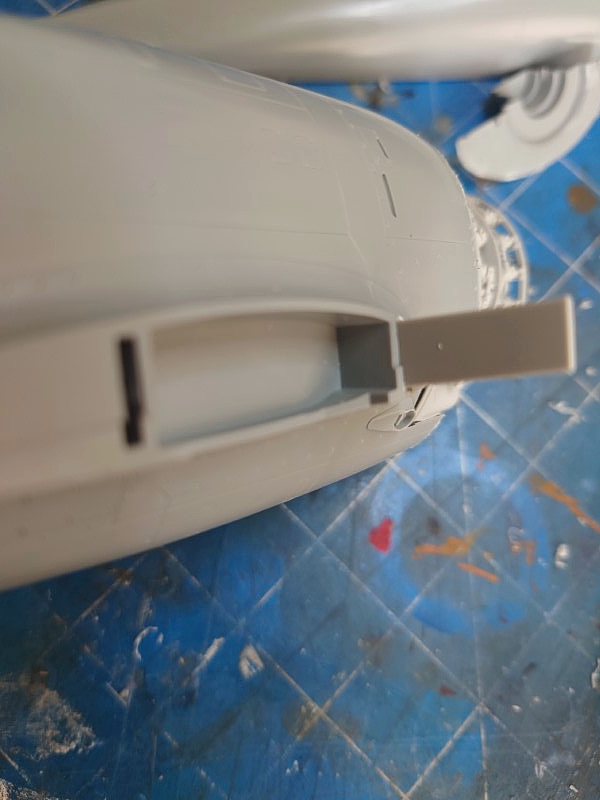
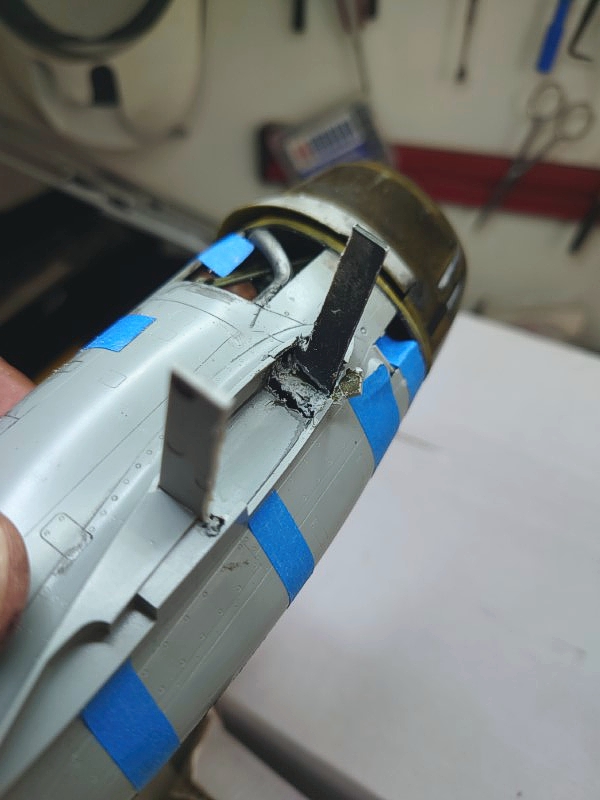
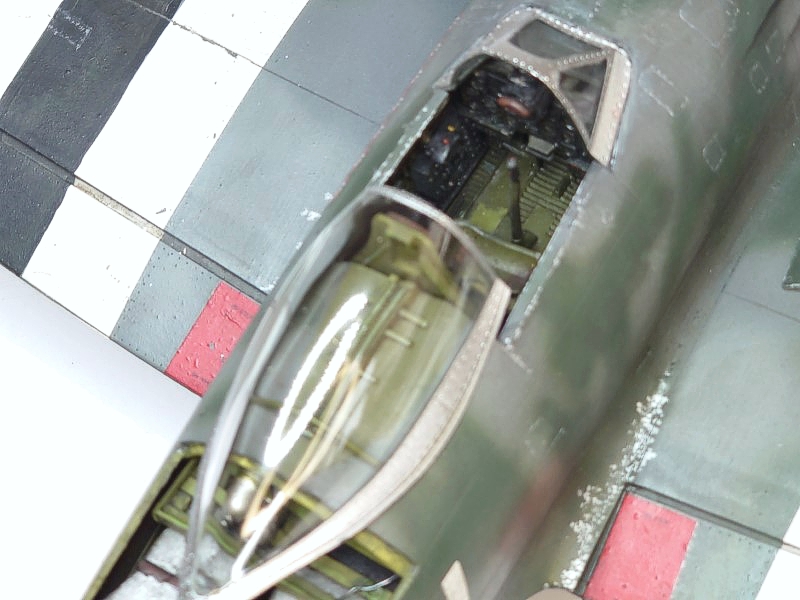
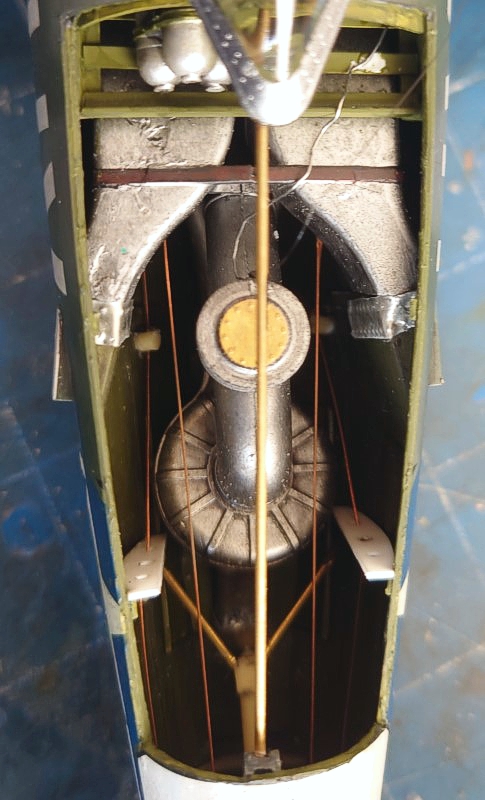
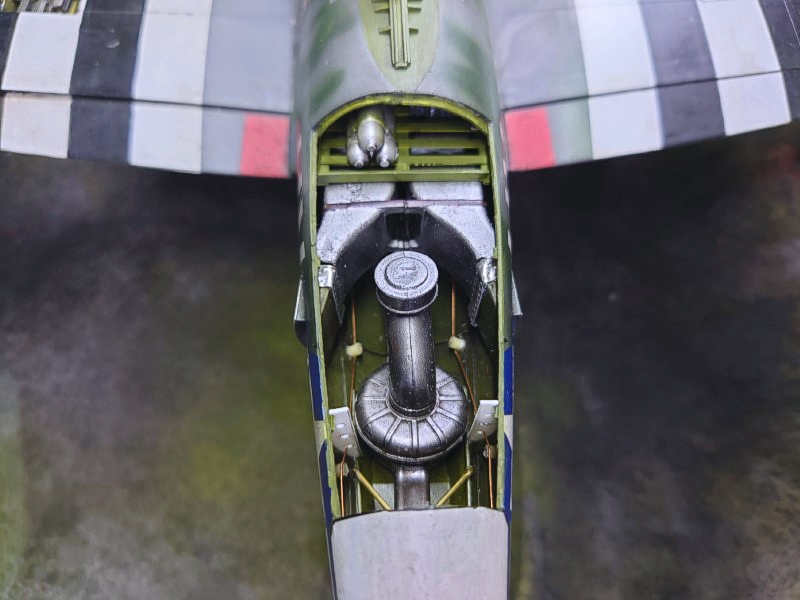
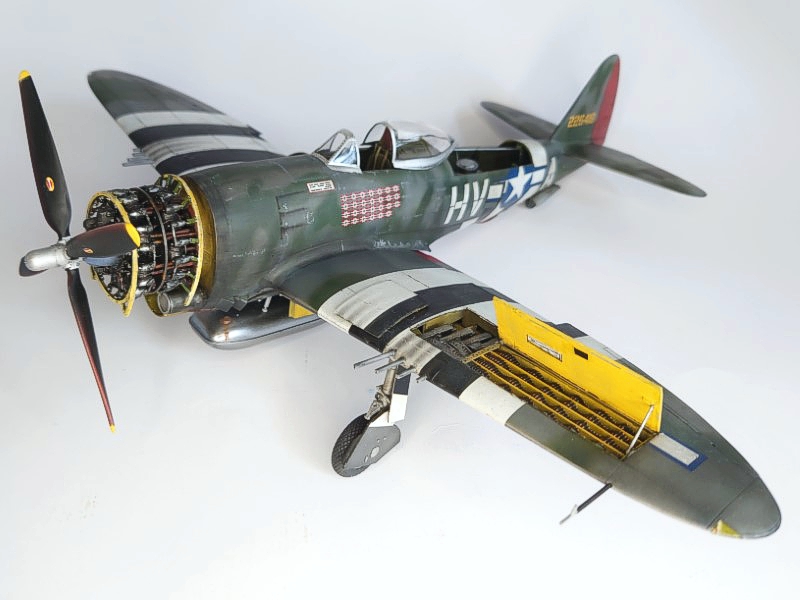
The supercharger is really what makes a Thunderbolt a Thunderbolt. Technically, I’ve been told by restorers that it’s a turbocharger although I’ve seen it called a turbosupercharger in period technical manuals. The whole plane is built around it which accounts for its large size. Nevertheless, I’ve never really seen anyone display it before and for good reason. Even the Trumpeter kit does not provide transparent parts to showcase it. There aren’t really any convenient access panels to fully appreciate it either. With all this in mind I decided to model the rear fuselage fully and provide a fake viewing panel. This was tricky as the antenna wire comes through this panel and would lose tension if the panel flipped up. The solution was to create a system of tensioning the panel down by having it exit at an angle to the panel. This then ends in a hook and loop system that can be removed for viewing.
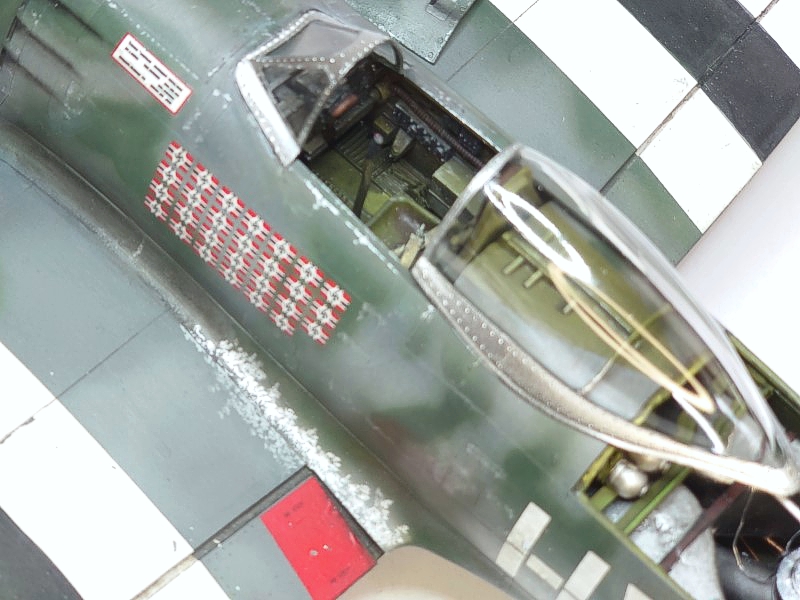
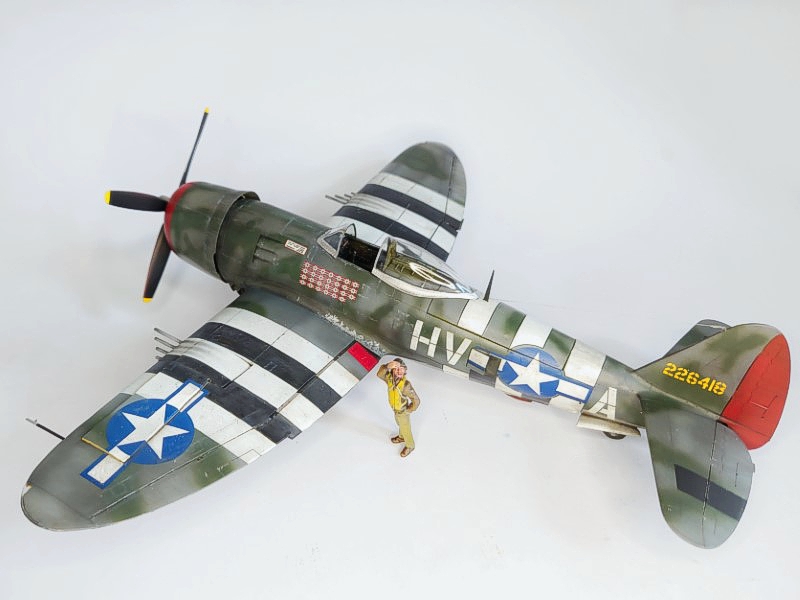
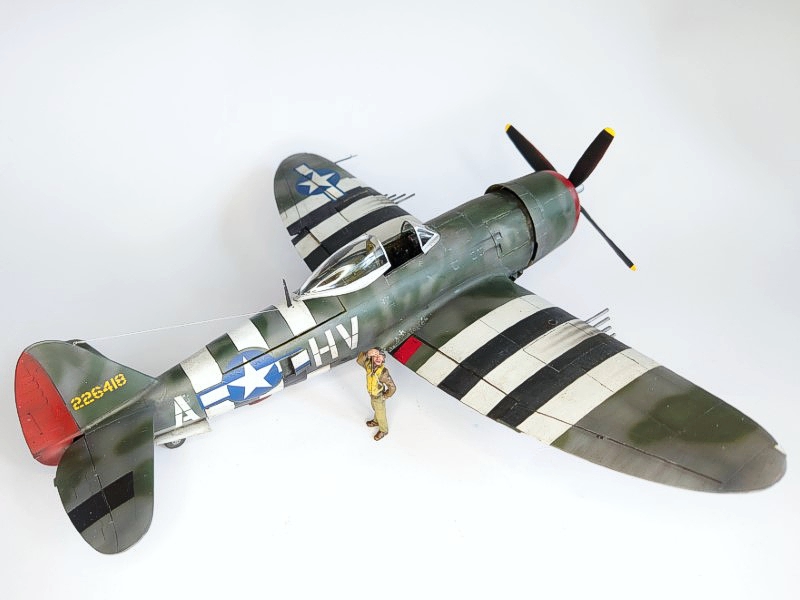
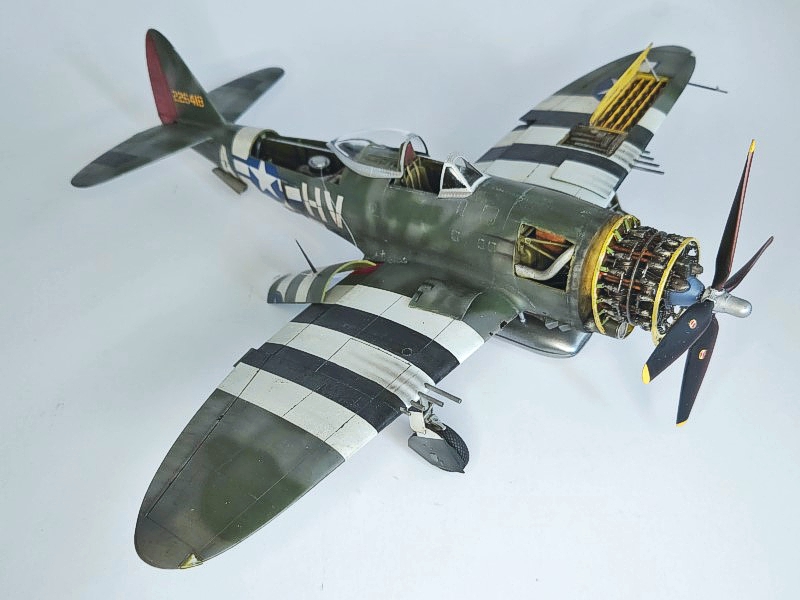
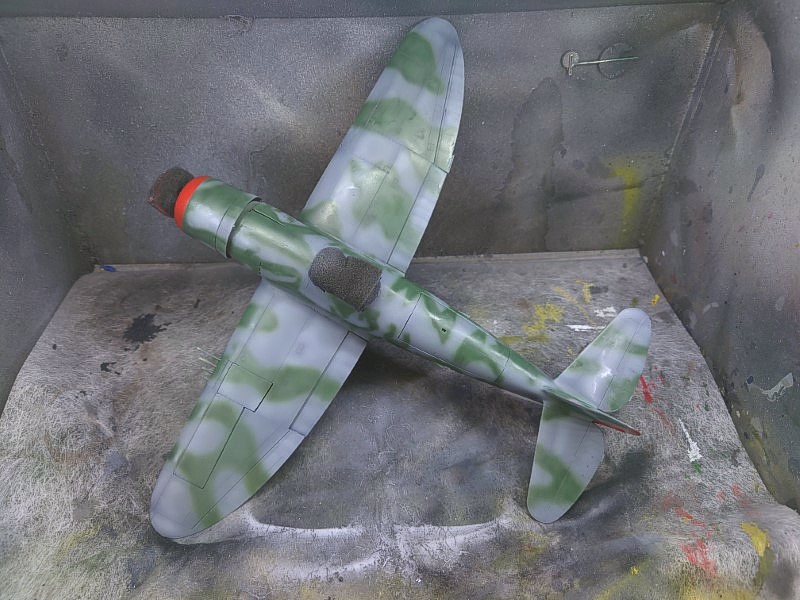
The oxygen cylinders were from the Trumpeter kit and the radios were cut styrene blocks detailed with decal panels from Reheat (they aren’t very good) and Gundam (nice but can’t be seen). The model was base-painted in Humbrol Enamels, varnished with Future-Tamiya Flat acrylic, weathered with turpenoids and chipped sparingly. I used oil washes for weathering and drop filters for colour variation. Black was used as panel wash. The worn silver was a combination of sponge dabbing, silver pencil and undercoat and masking of silver with black overspray. The camouflage is a blue grey base with dark green splinter. Characteristically it is unlike other allied patterns; it is free-hand and sketchy more like Luftwaffe regimes. I used the box art as a reference and I think it comes pretty close. I achieved the fine chipping over panelling by light chipping with a Prisma pencil then rubbing off with an eraser. Pastels and artists oils completed the streak weathering.
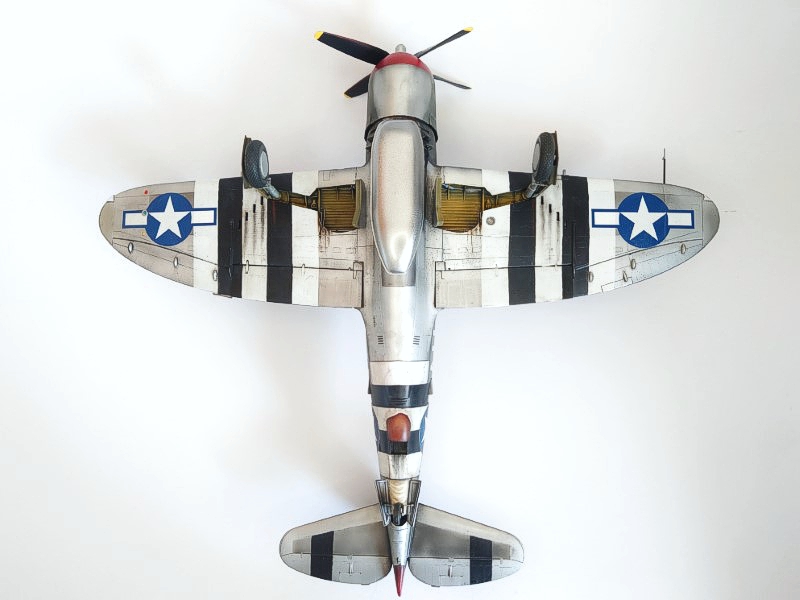
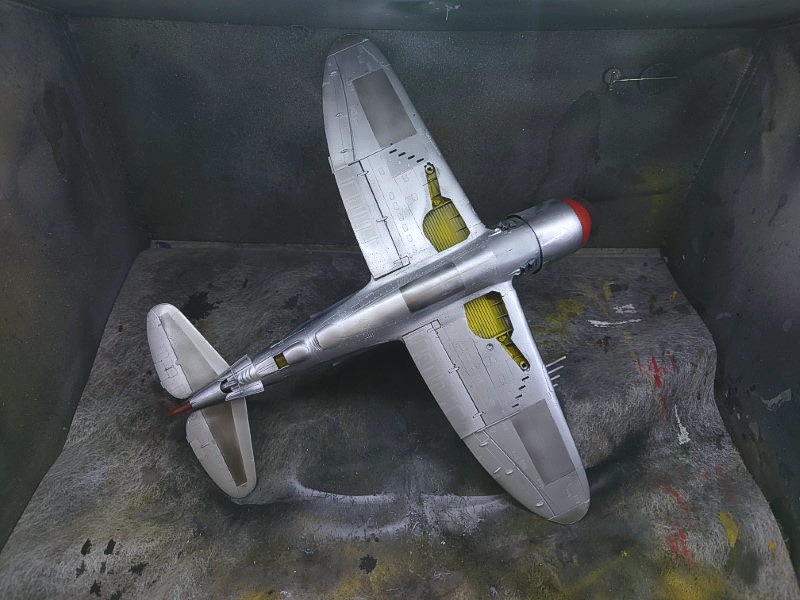
The markings in the box were of the two famous Gabreski markings – immediately after D-Day and a few months later when some of the invasion stripes were painted over. I chose the earlier. The decals were disappointing, and I would get replacements. They do not sit well with setting fluid, and I resorted to cutting out wrinkles and touching up with paint. A reasonable finish but no competition winner. The invasion stripes were especially disappointing. Hasegawa provides white stripes, and you paint the black stripes in yourself. This they did for the Gabreski planes but on the third plane they provided black stripes. Of course, no one is stopping you from using the black decals but honestly it is better to just mask and paint. Lesson learned. The Gabreski plane is one of the most photographed planes in World War 2. Yet there is some controversy about the under-surface colour as to whether it’s light grey or natural metal. I obviously chose NMF because, well, I like NMF. This was Alclad over black Alclad primer. I used multiple shades for panel weathering. I guess one of the reasons in favour of decals over masking is to avoid masking over metal finishes that run the risk of peeling. Full disclosure, I’ve never really liked the Thunderbolt. It always looked like an embarrassing piece of hardware. But when you read the accounts of fighter pilots about it especially its durability and protection I am now significantly swayed in its favour. This made this build quite enjoyable and the Gabreski version just the best way to finish it. The donor Trumpeter kit is by no means ruined for a future project, so I’d call this a win-win. Bits and pieces from spares box. © Suresh Nathan 2022 This article was published on Sunday, May 15 2022; Last modified on Sunday, May 15 2022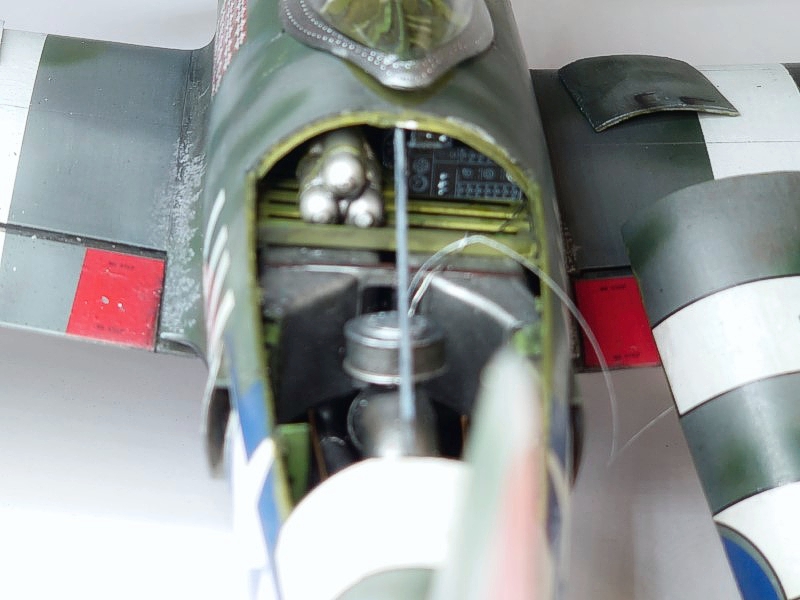
Painting and Markings
Conclusion
References
Aftermarket Parts