
Revell 1/32 Me 262B-1 Nightfighter
By Bernd Willmer
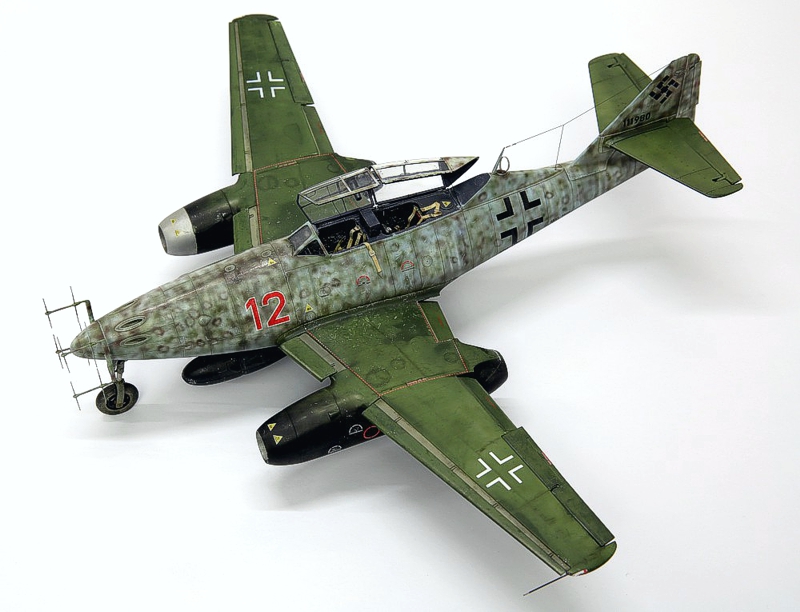
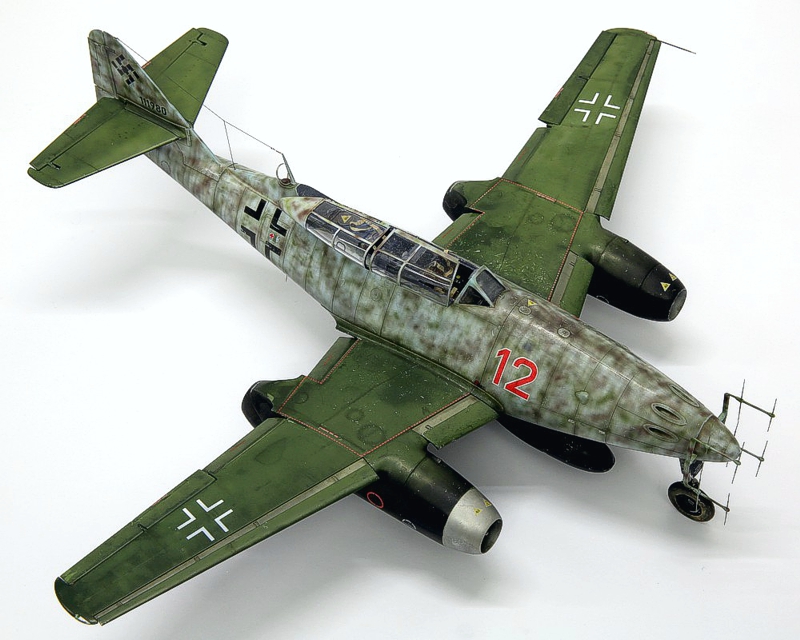
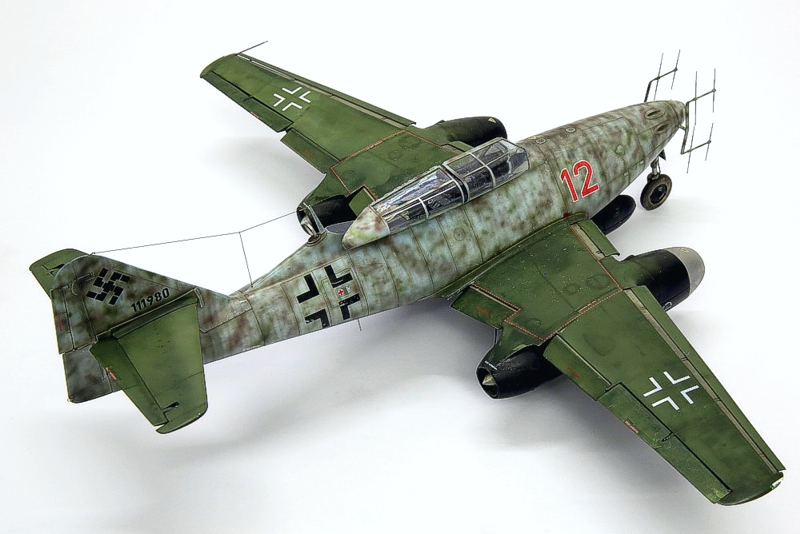
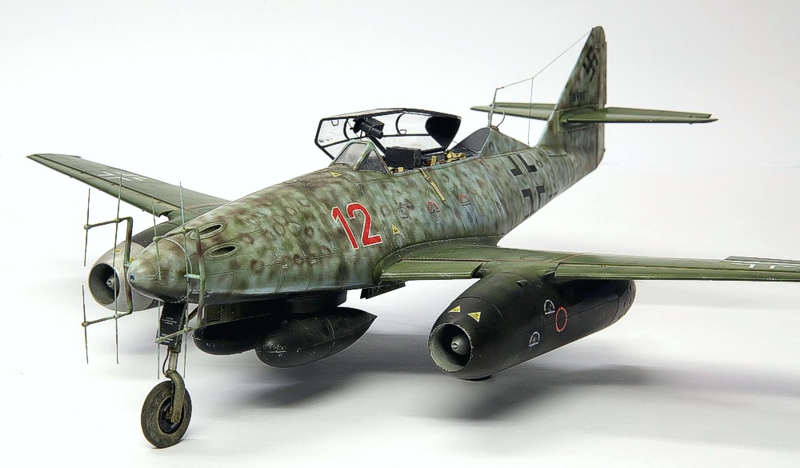

Here is my vacation project: Revell´s new tool Me 262B-1.
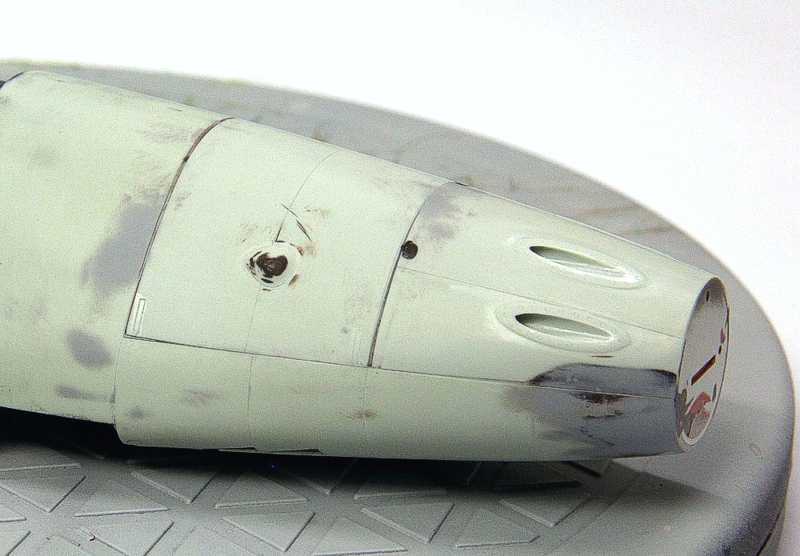
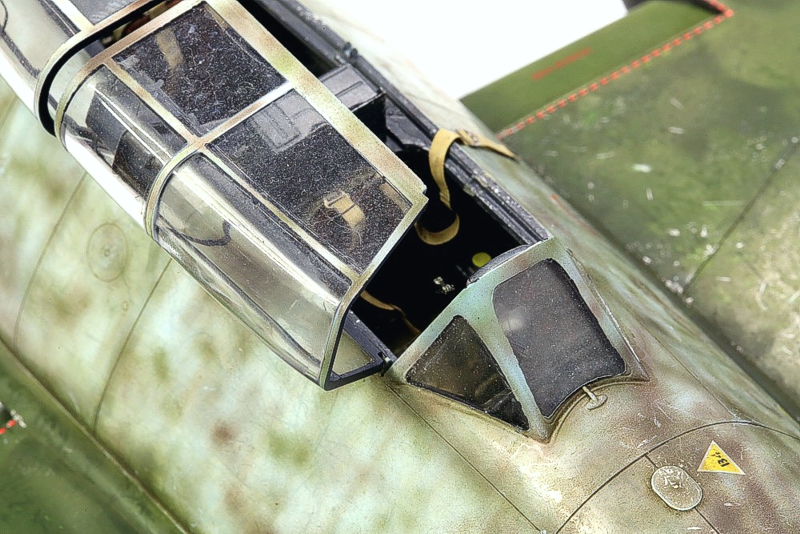
The kit quality is a bit ambivalent, but with careful cleaning fit can be good. That said, the nose panels fit horribly requiring shims and putty.
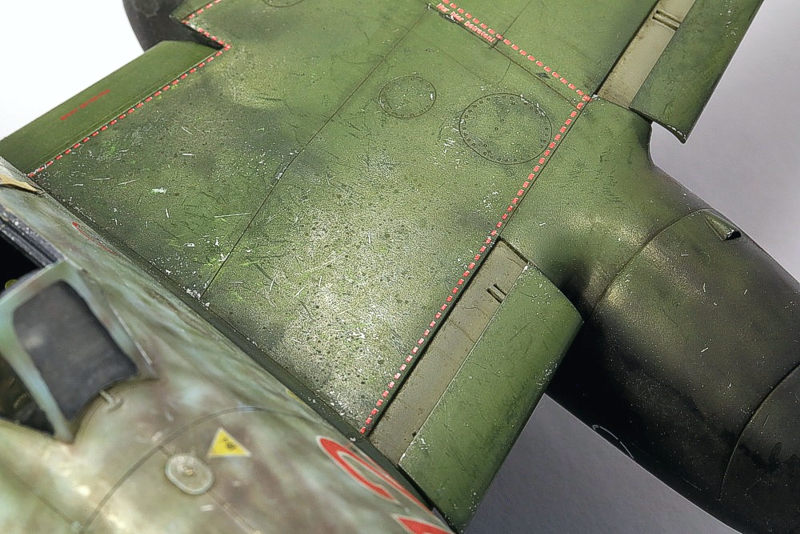
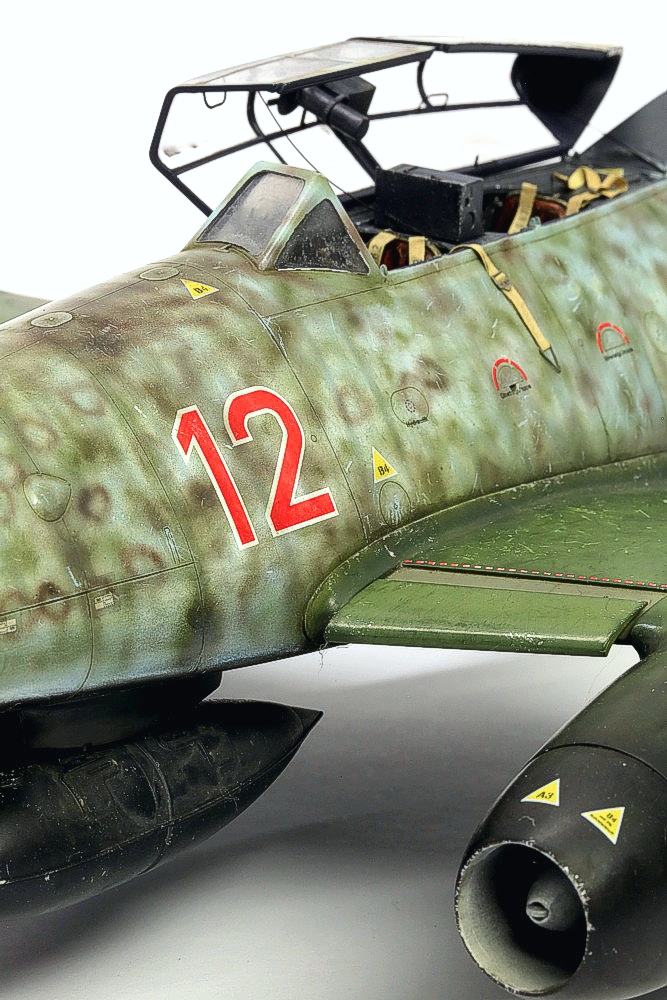
The surface details are finely engraved, and the airframe shape looks good to me.
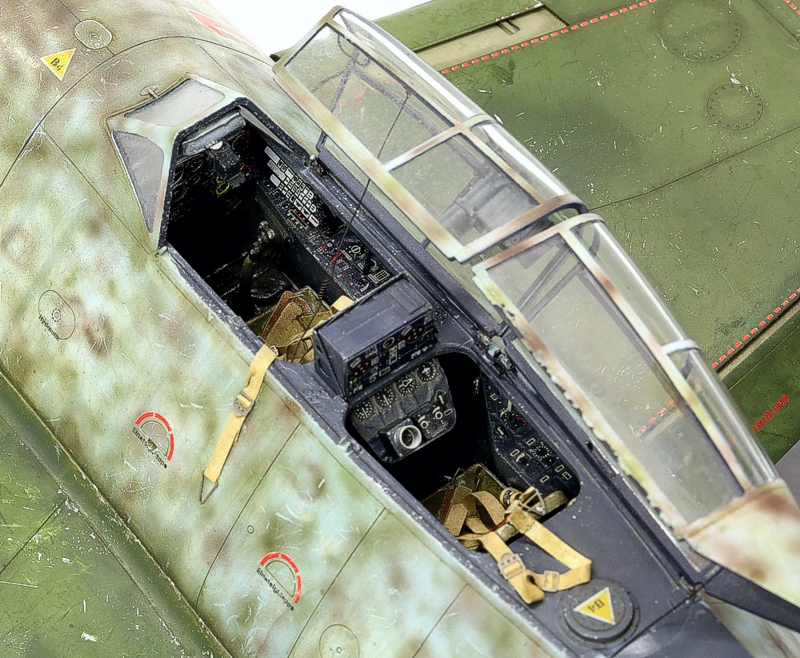
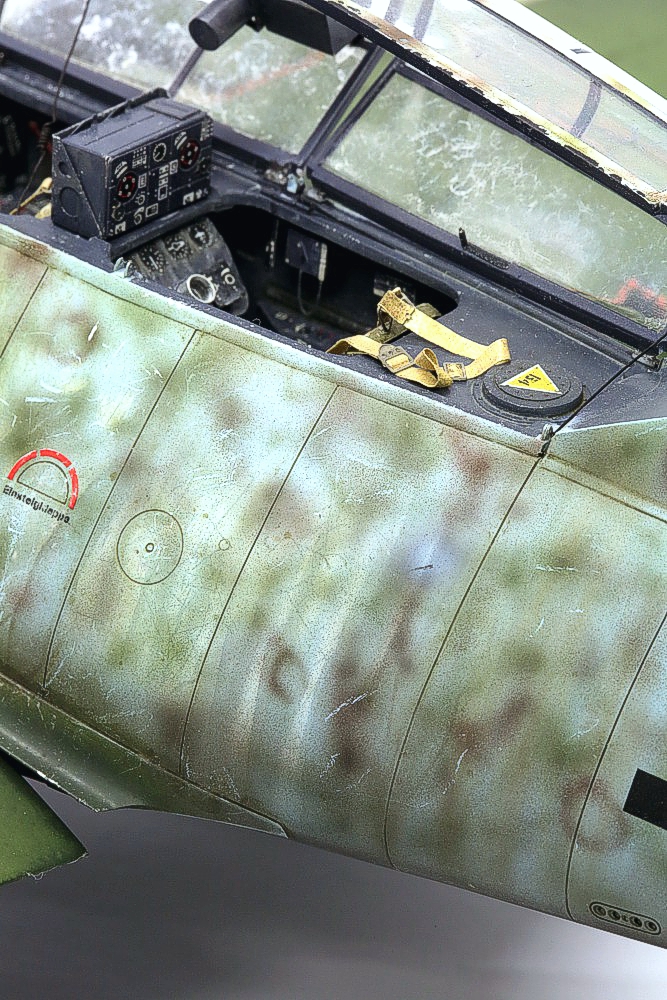
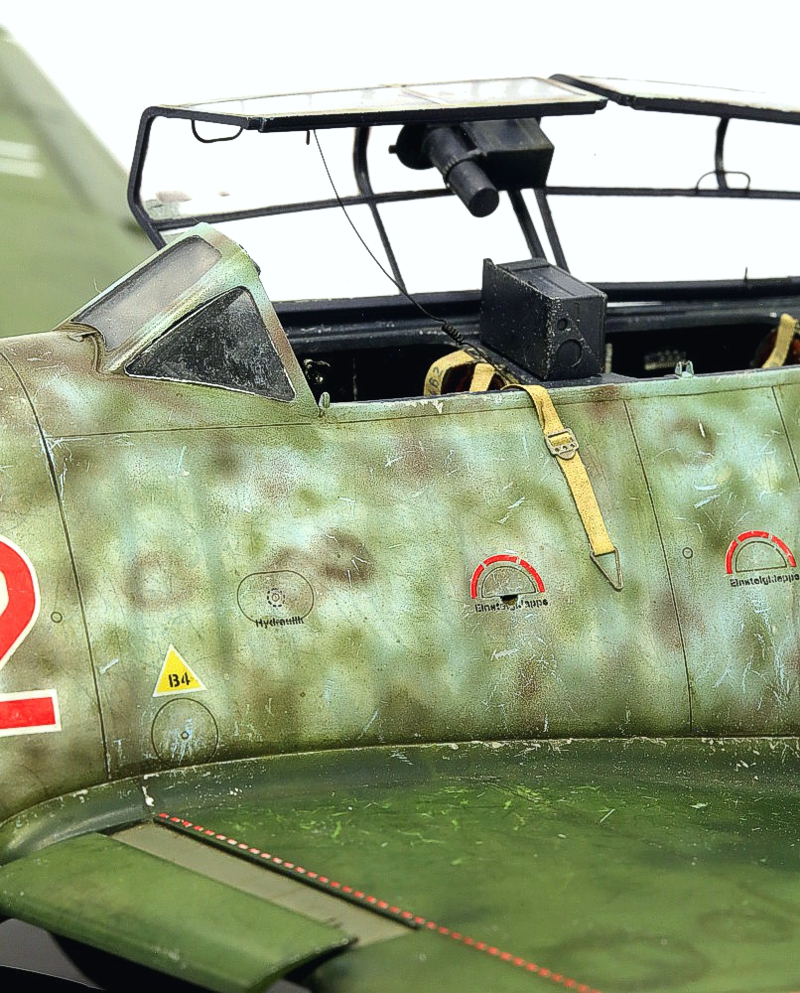
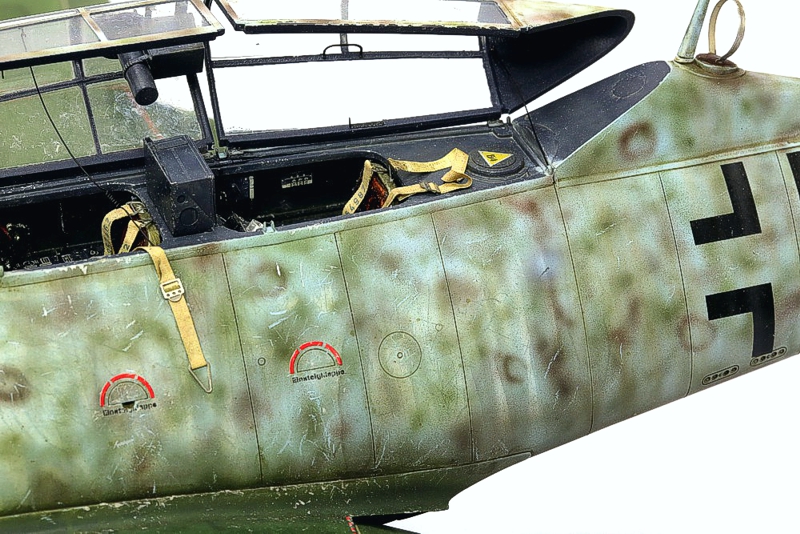
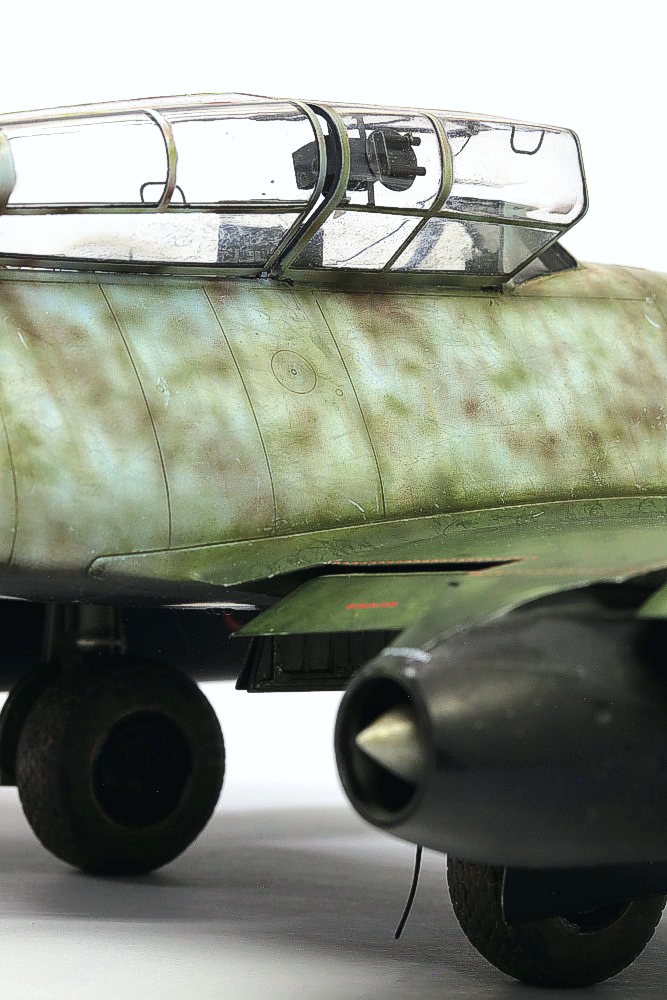
The interior was upgraded with the Eduard PE set #32893. The cockpit detail is soft and restricted, so PE is a good way to upgrade the front and back office!
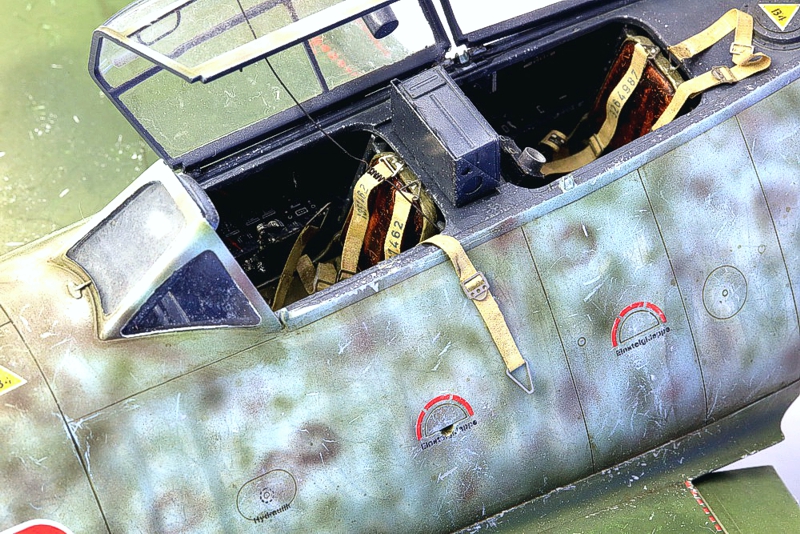
The leather seat backrest was done with fast-drying Griffin Alkyd oils from Winsor & Newton over a flat tan colored undercoating. I used van Dyke brown and umber.
Here is my procedure in detail:
- Apply a flat tan colored base coat, e.g., good old Tamiya buff (see below).
- Apply a coat of oils and let it dry. Alkyds dry fast, some 20 mins and they start to dry. Do a test in advance!
- Remove excessive oils while they are starting to dry with a flat brush to reveal the base coat.
- Apply scratches and scuffs with a toothpick.
- Apply a dark wash around the cushions.
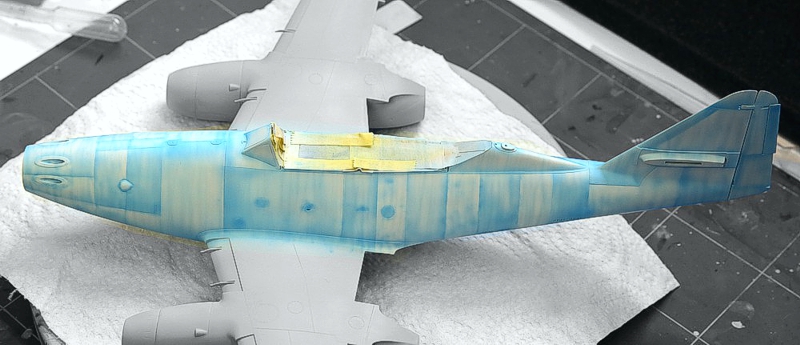
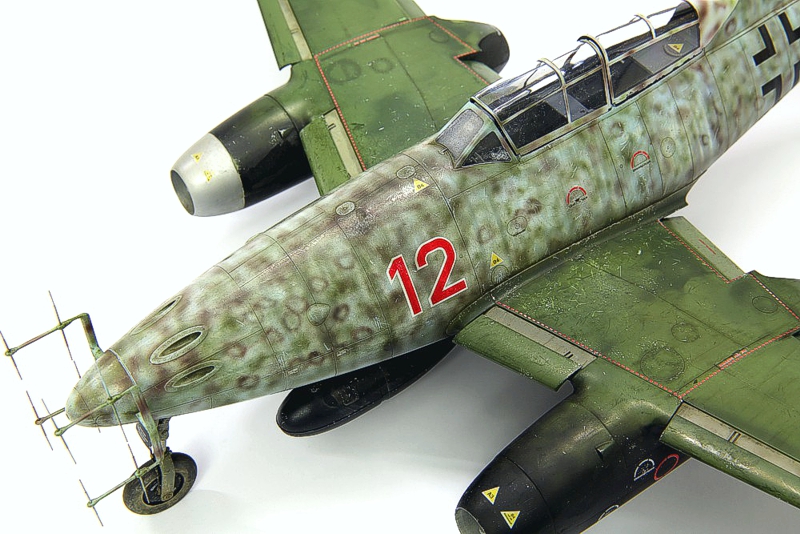
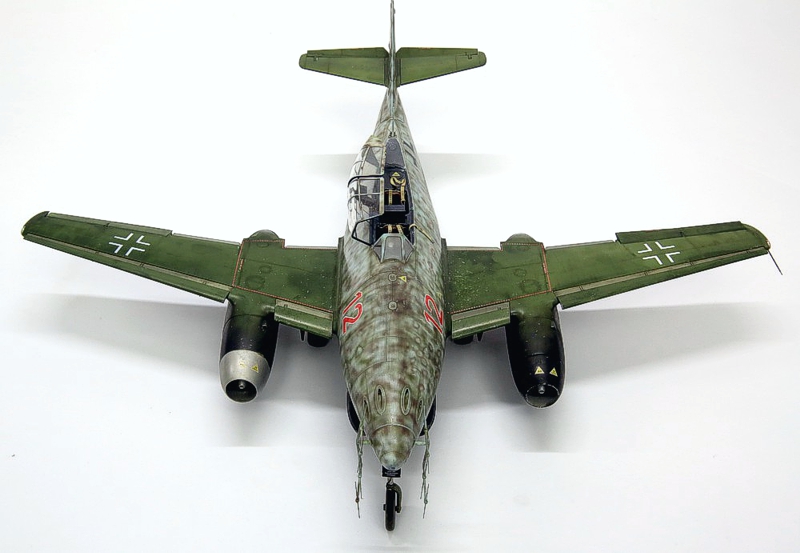
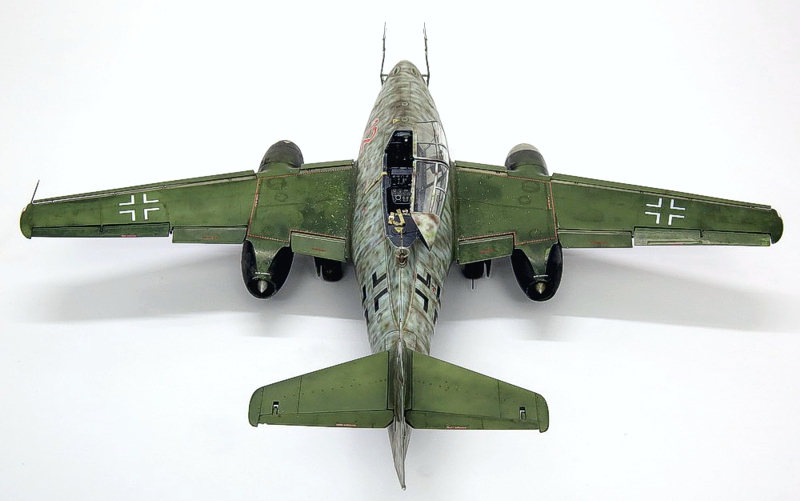
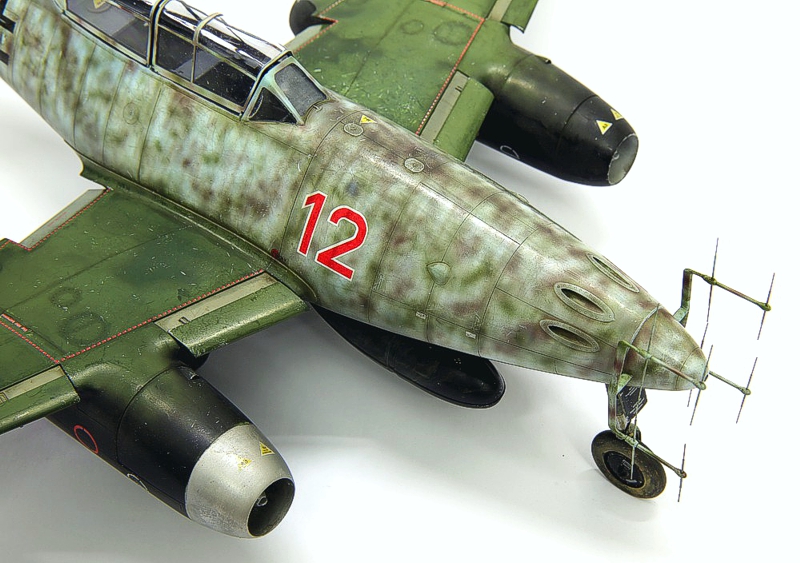
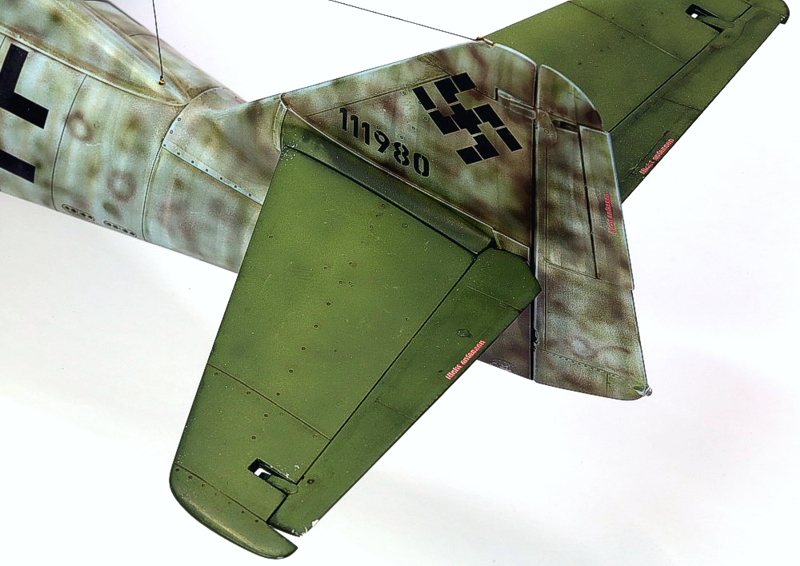
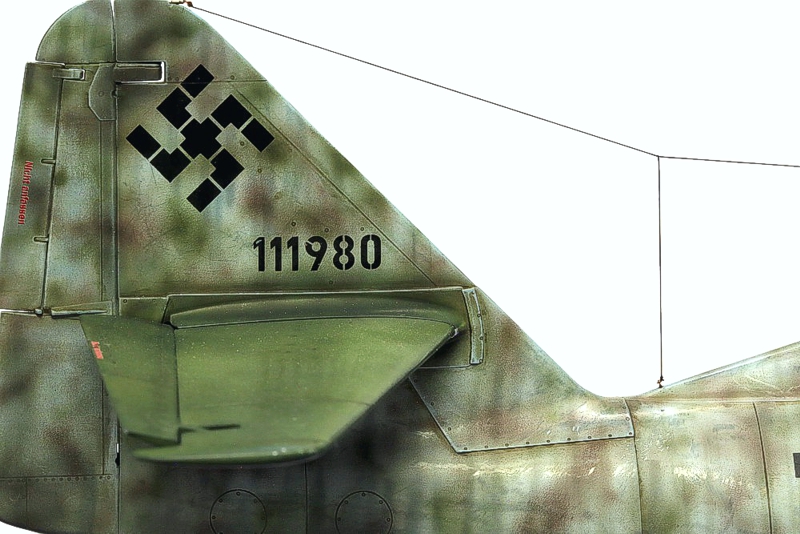
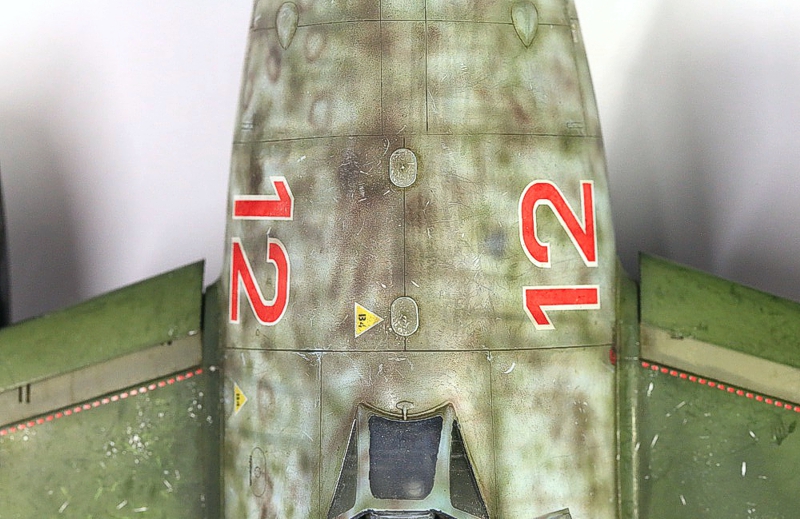
After a base coat of Gunze Mr. Surfacer 1200 I applied a thin white coat to the upper fuselage. This will be finished in RLM 76 with a brown and green mottling. I applied a blue underpainting or pre-shading of the RLM 76.
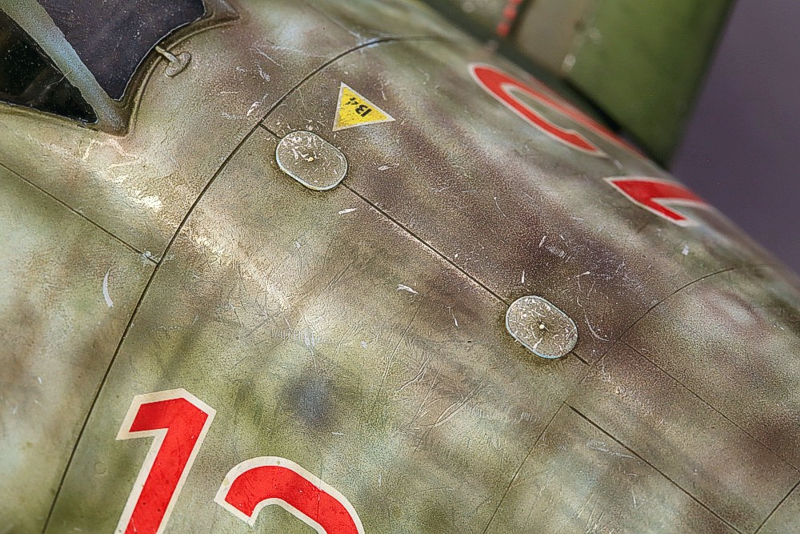
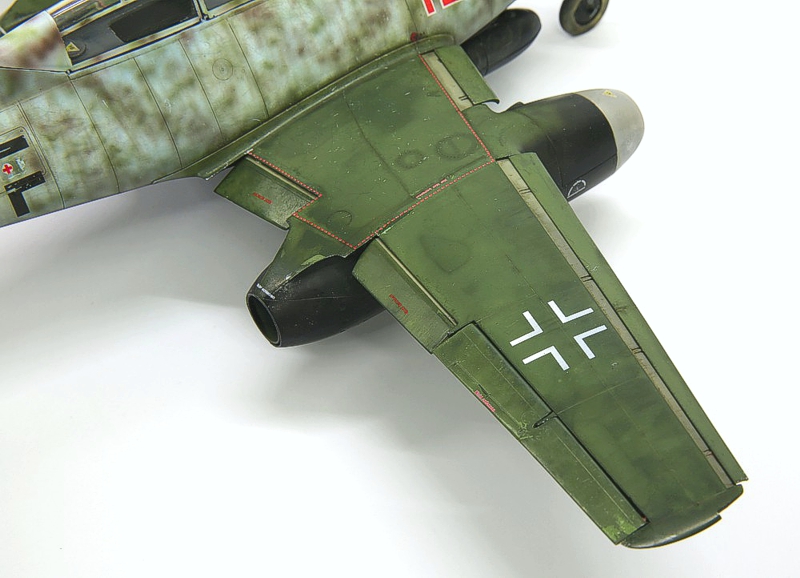
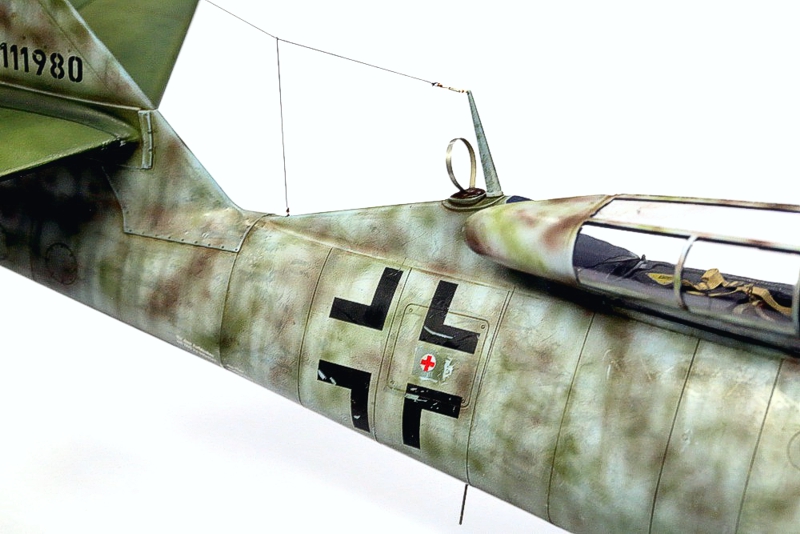
I airbrushed the black lower surfaces with satin black including some Tamiya neutral grey and a drop of red brown mixed in.
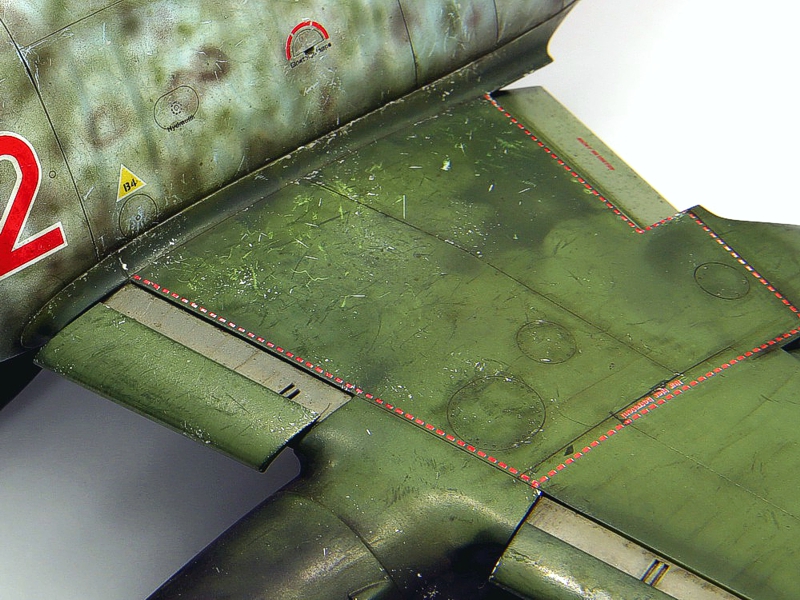
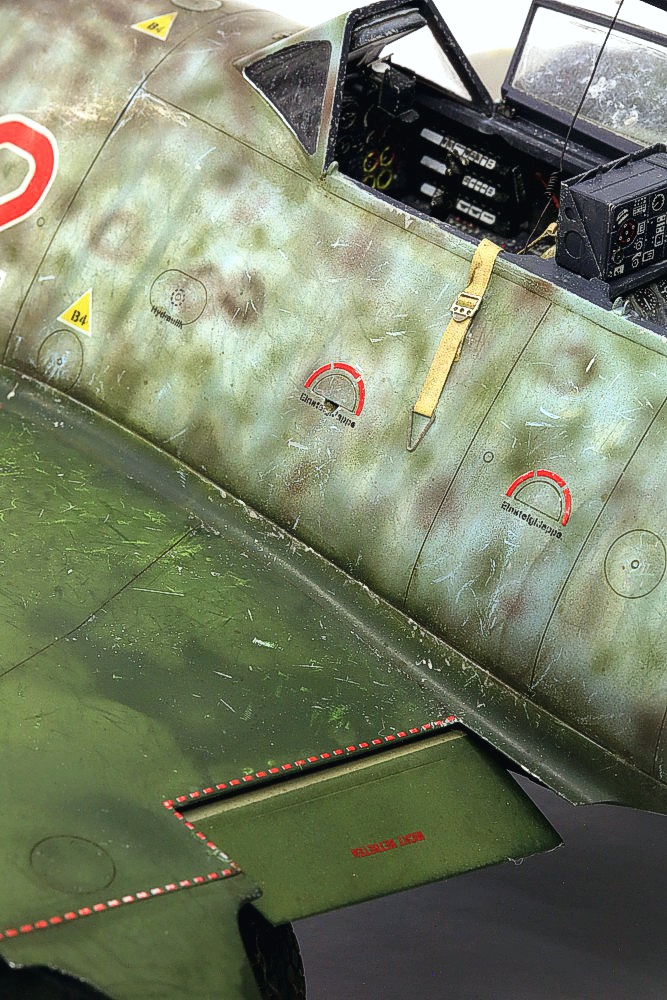
Scratches were done with a wooden chisel after painting as a part of the weathering. Scuffs can be done with a scalpel, wooden sticks, curled aluminum foil, etc. I airbrushed different green shades of solvent based acrylic resin paints and after drying sprayed a coat of hairspray and let that stay for 30 secs. Then rinsed with clear water. The alcohols and solvents in the hairspray attack the paint. The paints I used included Tamiya acrylics, ZERO Paints and Weinert from Germany. I would have to test GUNZE solvent-based paints. You must do tests to predict the outcome as it can be from both extremes (paint work is destroyed and can be rubbed-off or not affected at all). You want something in between. Tamiya olive drab XF-62 is a great test: apply it to some sheet styrene, let dry an hour and then coat it with hair spray, rinse after a half minute. See the magic. You can´t use standard decals with this technique because of the clear film protecting the underlying paintwork.
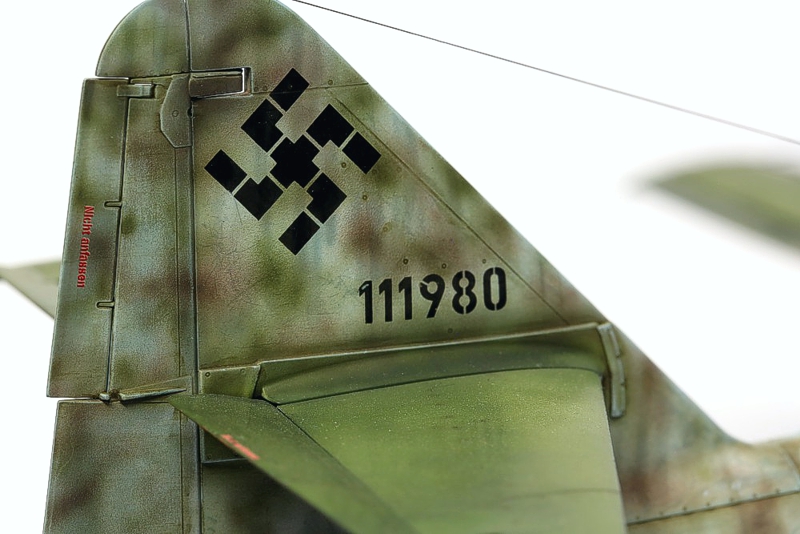
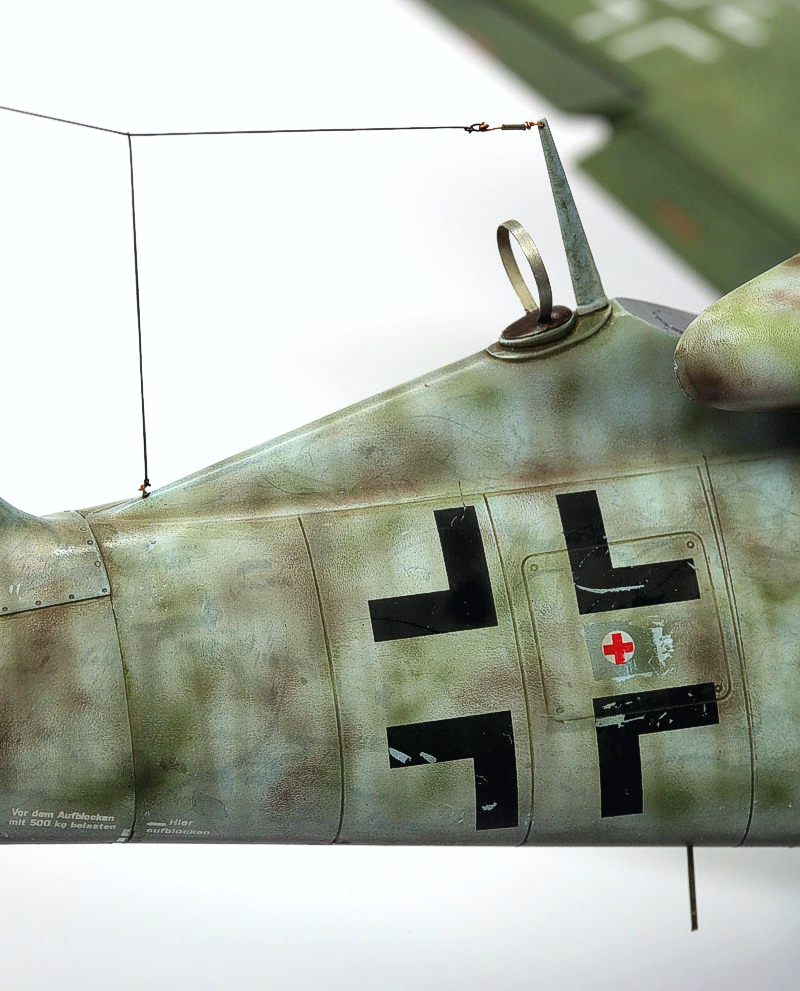
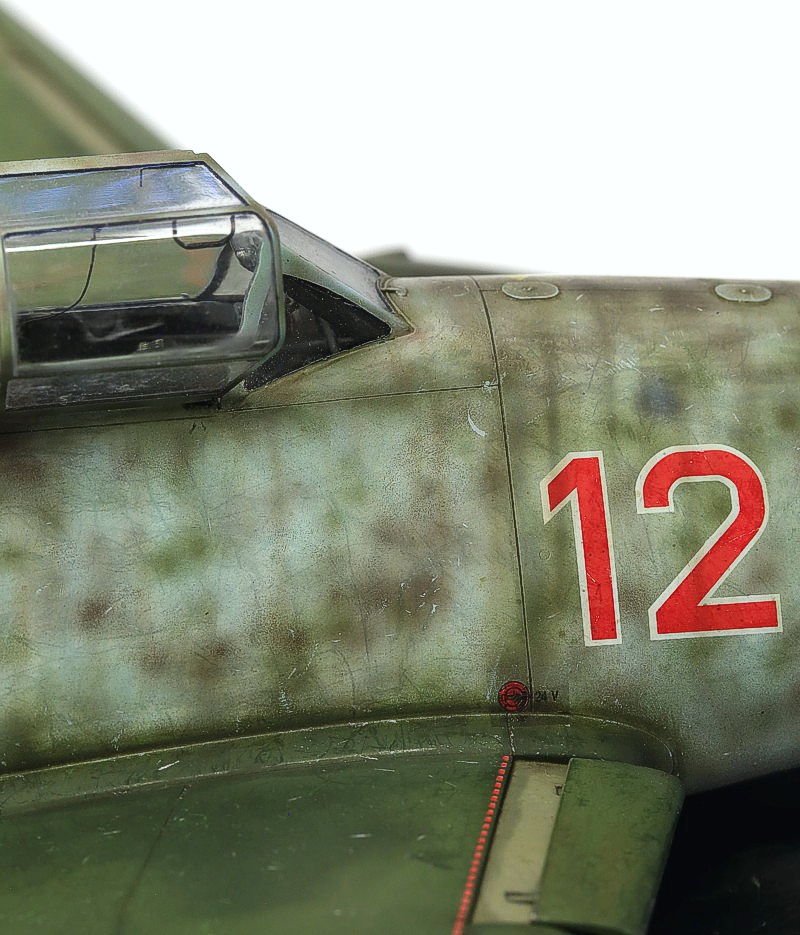
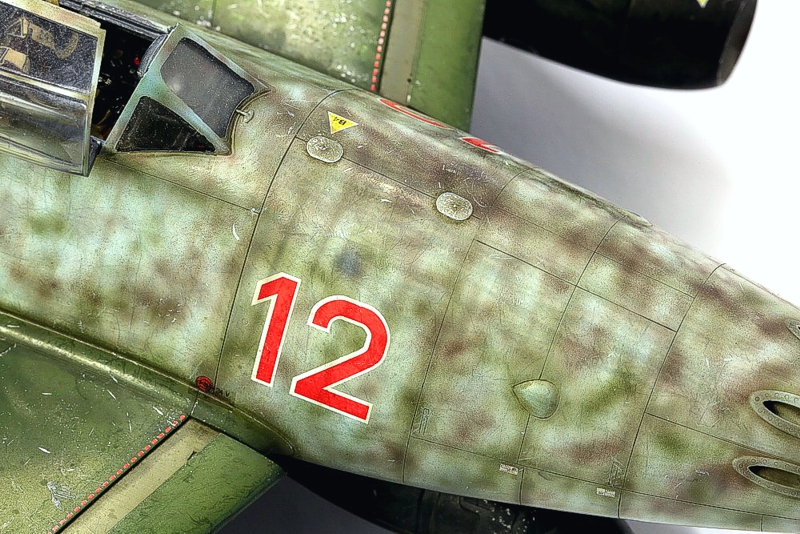
For markings I used wet transfers from HGW and a few dry transfers.
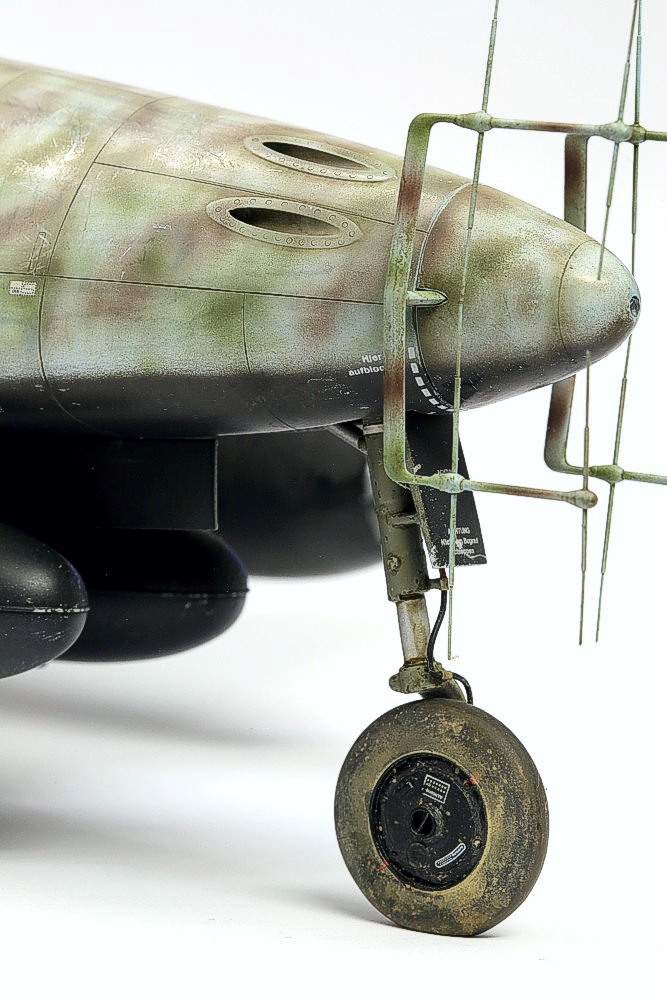
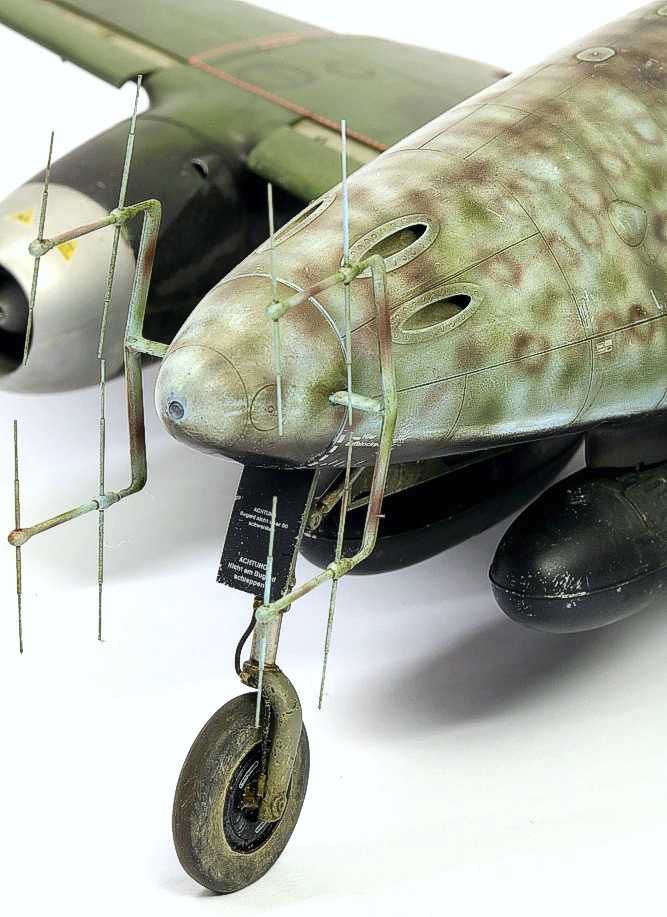
I somewhere read that in the late war the quality of tires were really bad which made them to last for about 10 landings and take-offs. Well, the same could be said about the pilots and a/c, too. So, they look a bit beaten up in my example of a tire set.
For more on the build, see my thread in the Work in Progress Forum. Page 7 of the thread goes into more detail on the weathering.
I also wrote an article for AIR Modeller. It appears in Issue 100. They also offer a downloadable version of my article.
Enjoy!
© Bernd Willmer 2022
This article was published on Tuesday, May 24 2022; Last modified on Saturday, May 28 2022