
Tamiya 1/32 de Havilland Mosquito FB Mk VI
By Martin Kurz
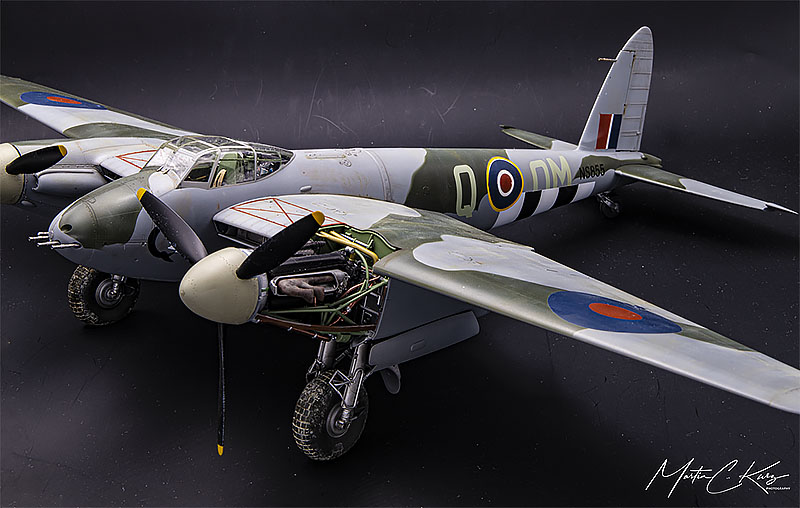
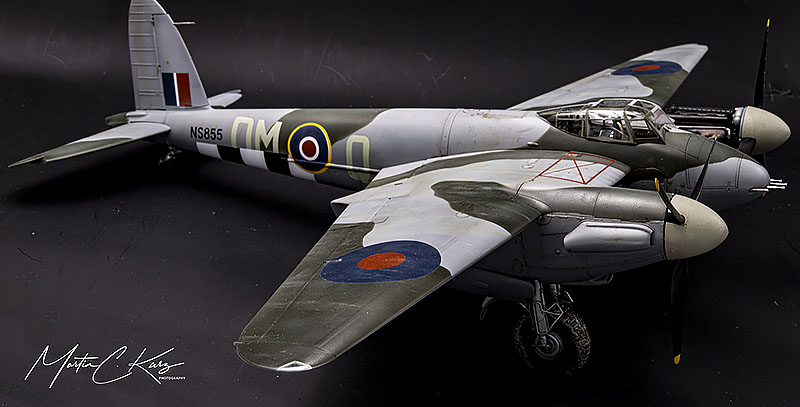
I will not write anything about the original Mosquito since there is literature about it in abundance. The airplane (OM-Q) was flown from Cambray-Epinoy, France in 1944 by 107 Sqn RAF. The kit itself comes from Tamiya and is of an unbelievable quality, although the build can be a little tricky because of the sheer amount of details available already OOB. But if you follow the instructions closely there will be no problem. Since I sometimes feel to be more of a model painter than a model builder, I just added laser-cut fabric seatbelts from HGW Models.
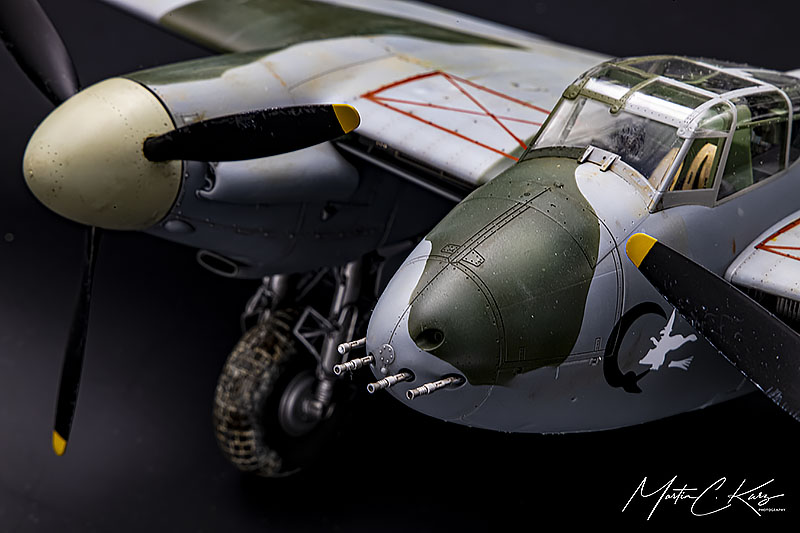
As I normally do not prime my models the colors were airbrushed directly on the plastic. The colors came from Mister Paint (MRP) and adhere very well to the bare plastic surface. After the canopy was masked the Medium Sea Grey was applied and the center area of the panels accentuated with the same tone, just lightened with a little white (ratio 1:1). Don’t be shy, any over-emphasising will be subdued by the following weathering steps. The grey was masked with MR. Hyde Masking Putty and Tamiya kabuki tape and subsequently the dark green sprayed. The center of each panel was also emphasized with lightened dark green. Next came the markings, which were exclusively done with masks from a Montex set (K32322). Everything was sealed with gloss laquer from MRP.
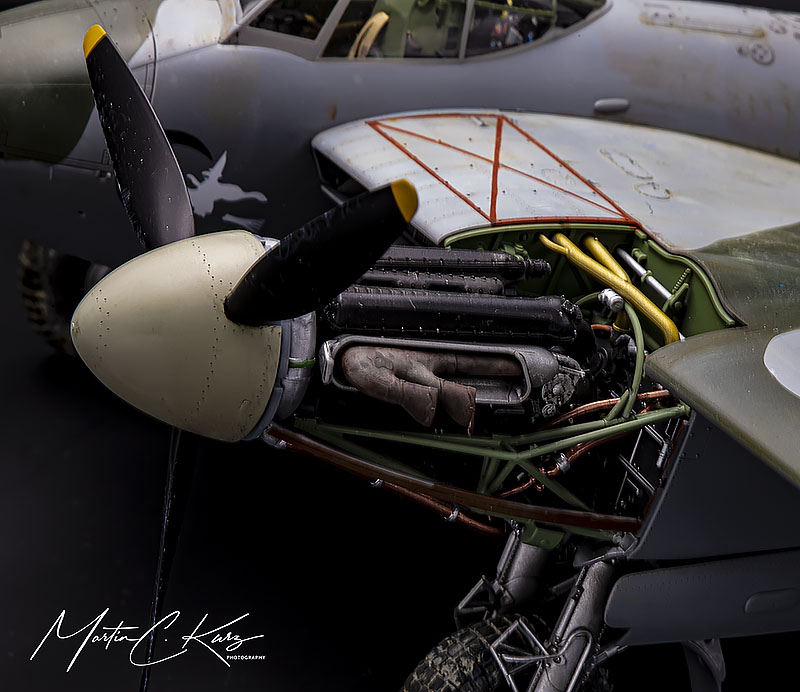
Then out with the oils. I am a fan of the dot technique, were a random pattern of small dots of rather fancy, colorful oil colors (Winsor & Newton) is applied. Red, blue, green, brown, black, white, whatever you like. Just keep in mind that every dot changes the hue of the underlying color a little bit. You wait a little, say five minutes, and remove most of it with a moist (odorless thinner) broad brush. Not wet, just damp. The complete procedure is repeated (possibly with different colors) until you are satisfied with the results. You now have a surface were the monotony of the large color patches is broken by a myriad of different hues of green and grey with the original color still present.
I wanted some panels to be emphasised and so gave them a filter with oil colors. Then everything was coated with semi-gloss clear to provide some more “bite” for the next phase of the weathering process.
Ammo track wash was brushed on the panel lines and left to dry for a few minutes. Afterwards most of the muck was wiped away with a soft cloth in the direction of the airflow, so that only the panel lines were left accentuated. The track wash also darkens the area around the panel lines a tiny bit, so they are further emphasized a little bit.
Then I applied some sort of a very constrained wash with brown-grey oils around some panels which were handled the most. Afterwards they should look as if the mechanics had held them with their dirty and greasy hands. Next came the dusting with various pastels on the wing were the mechanics stepped on them, mostly around the engines and inspection holes. Here I also used some dark and light grey pencils to simulate chippings. Some oil or fuel leaks were painted with a 5/0 paintbrush and dark brown-reddish oil color.
On the underside where dirt was kicked up from the wheels I flicked Ammo track wash and thinned light brown oils. Again I airbrushed this time semi-matte clear from MRP to seal everything. The last step was to brush odorless thinner or petroleum in an irregular motion and remove a lot of it with a soft cloth. This should give an irregular sheen mostly on the cleanest areas of the plane. The wheels were painted with rubber (MRP) and dirtied with Ammo acrylic mud.
© Martin Kurz 2022
This article was published on Sunday, October 23 2022; Last modified on Sunday, October 23 2022