
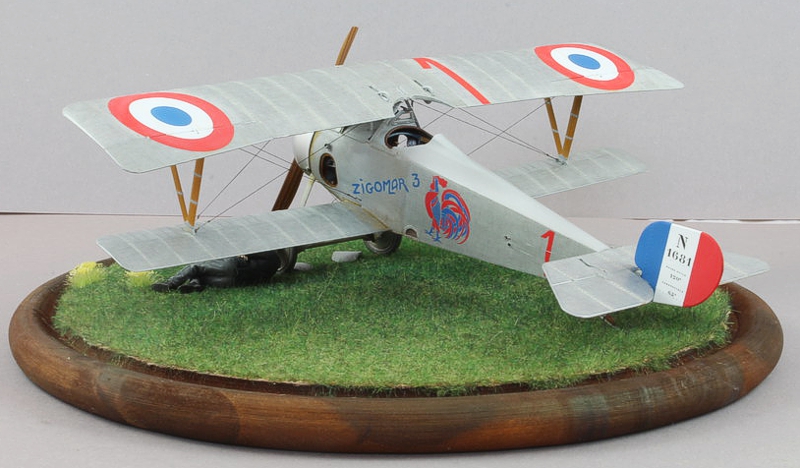
Copper State Models 1/32 Nieuport XVII (Late)
By Ernest Roth
I recently completed building Copper State Model’s (CSM) excellent Nieuport XVII (Late).

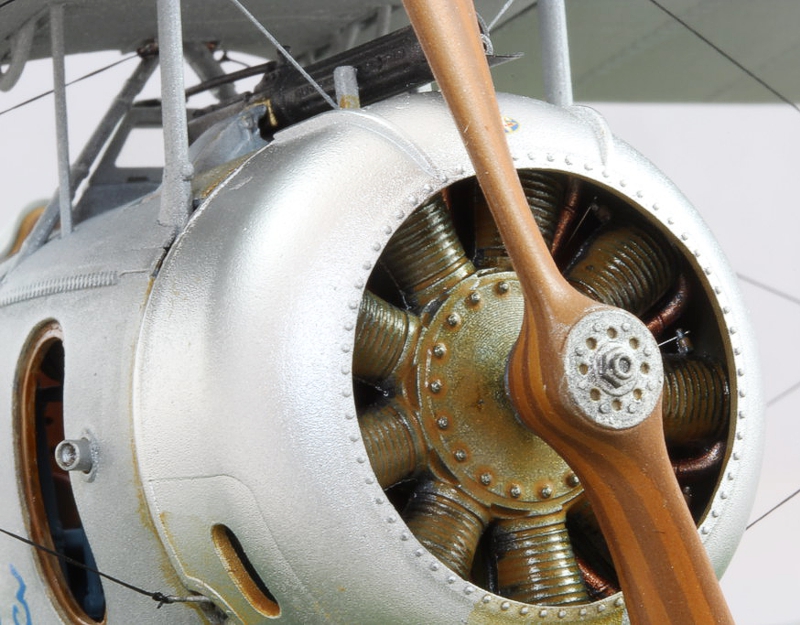
The kit had no construction pitfalls, but I made sure to pay close attention to the fit of cockpit assembly to the rear fuselage as the CSM construction sequence is a bit different for installing the built-up cockpit than other kits I have built in the past. I thought the parts fit together well, and once assembled provided a strong and stable whole. CSM captured the look of the Nieuport XVII quite well and the kit makes for a very handsome scout when finished.
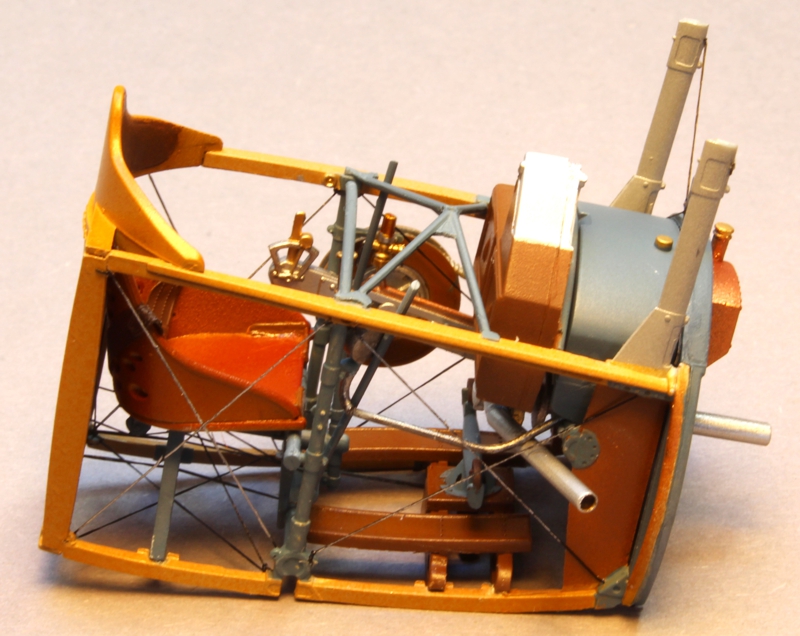

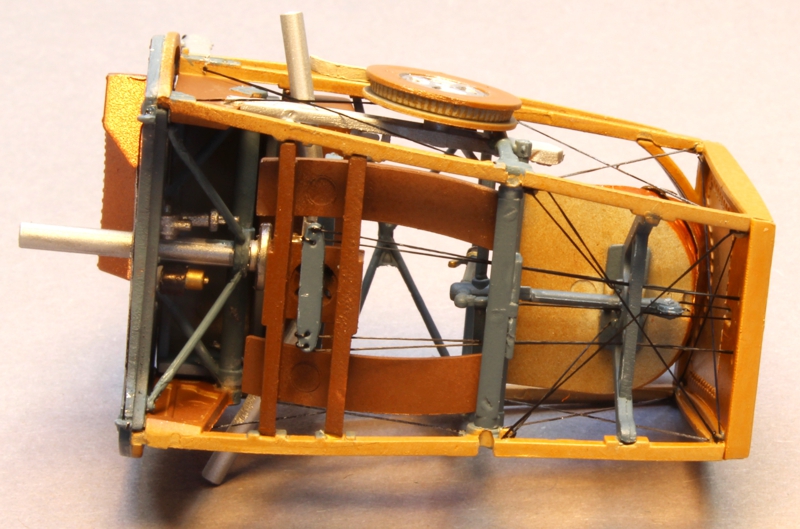
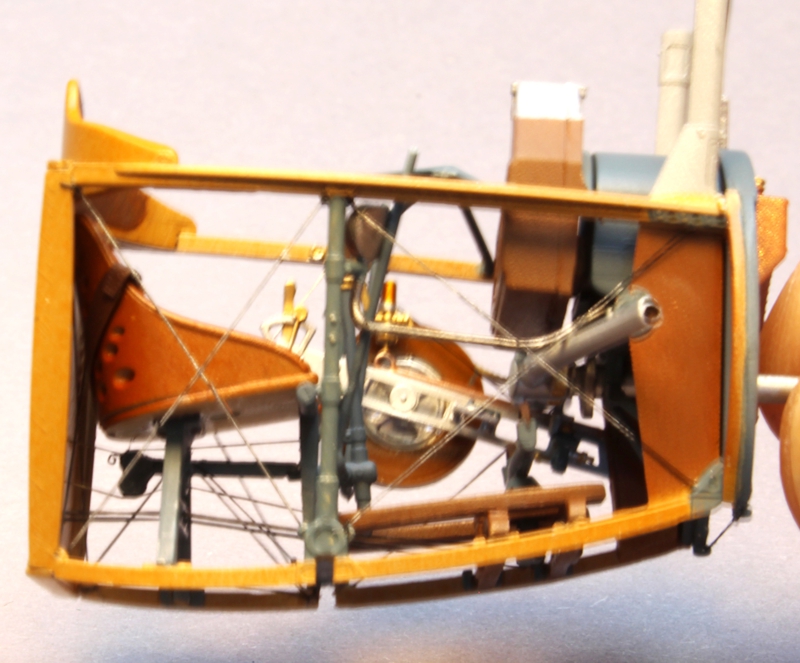
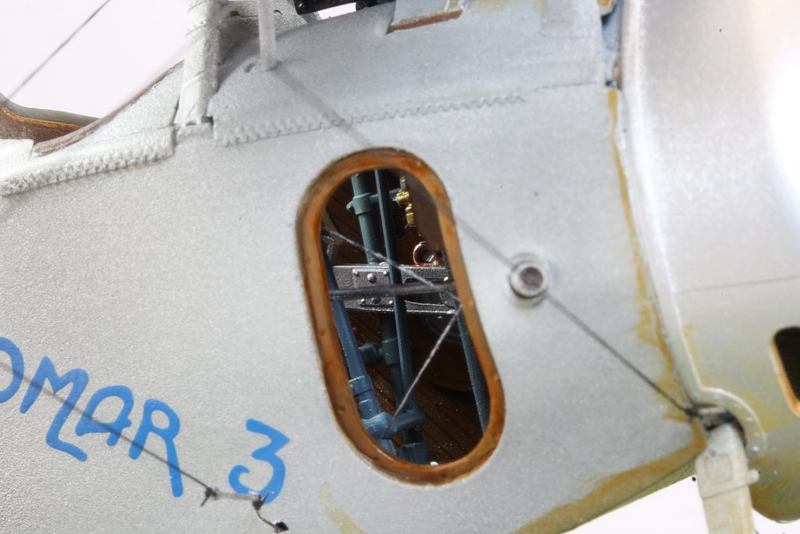
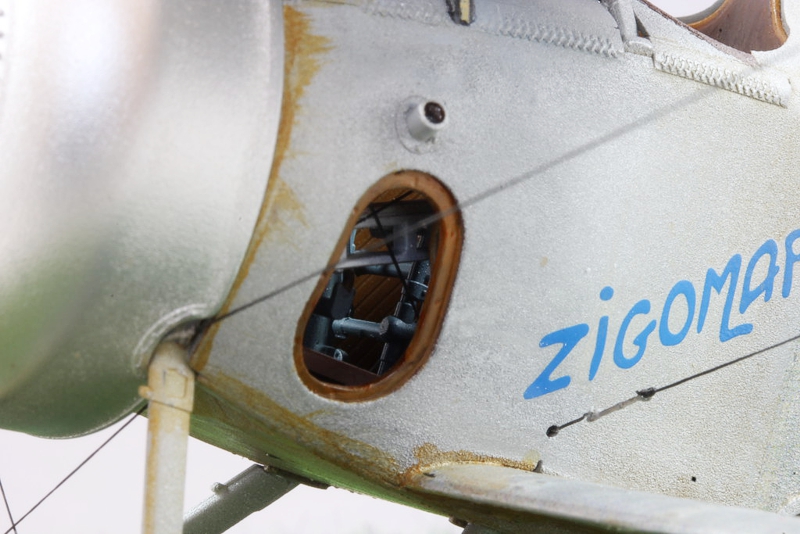
Like nearly all of the aircraft models I have built in the past, I started construction with the cockpit. CSM’s offering is pretty busy for a WWI aircraft cockpit, with a fair number of parts that look quite nice when complete. I added bracing wires and control lines, but very little of that work can be seen on the finished model. I also simulated two different types of wood, Spruce and Walnut, but again not much of that can be seen.
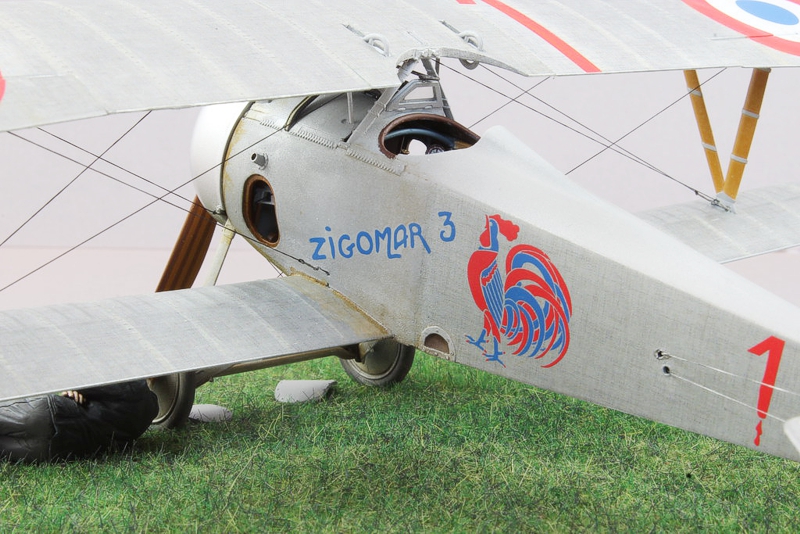
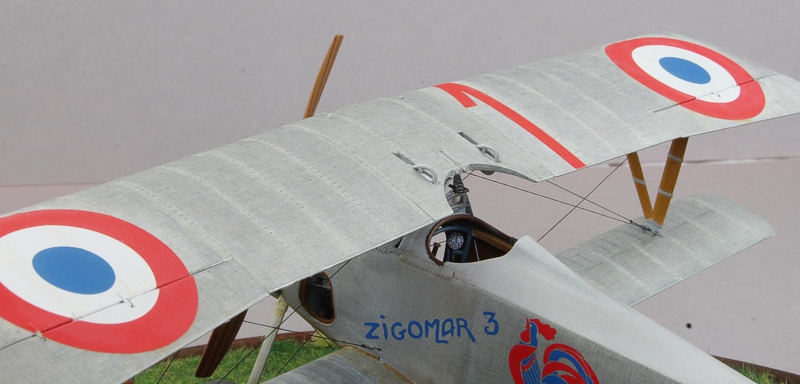
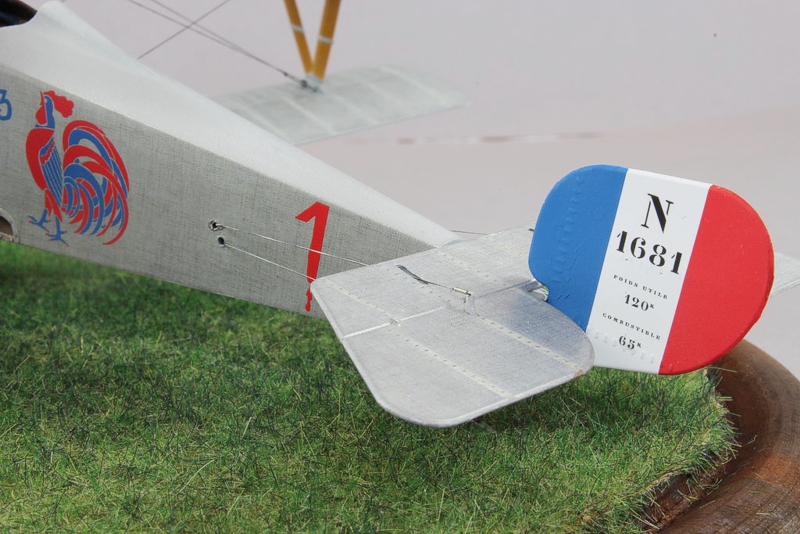
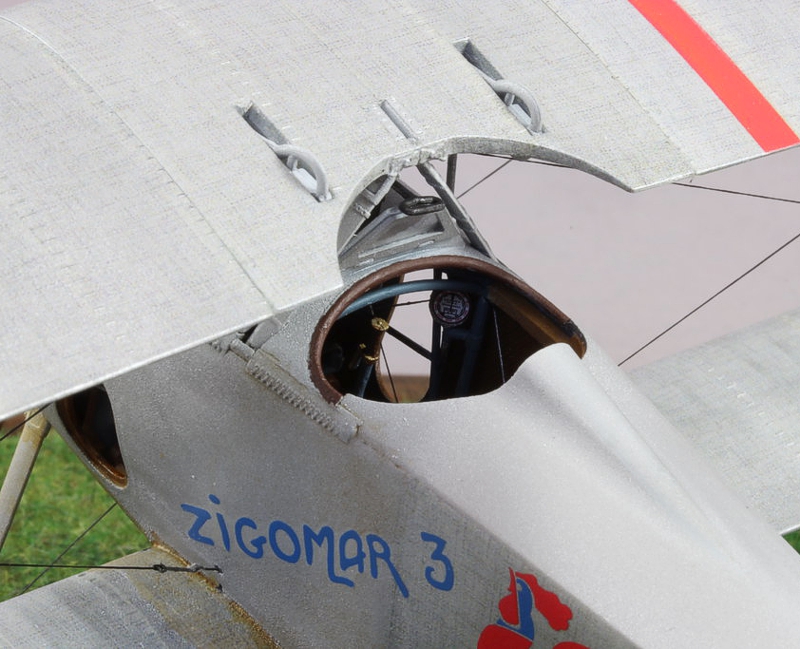
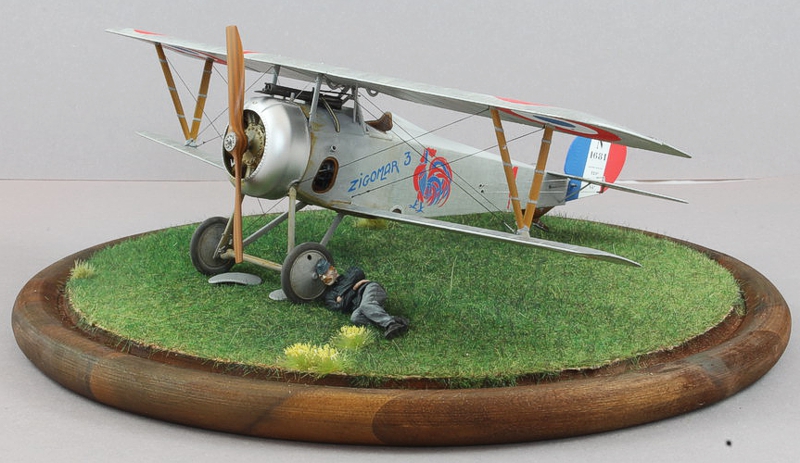
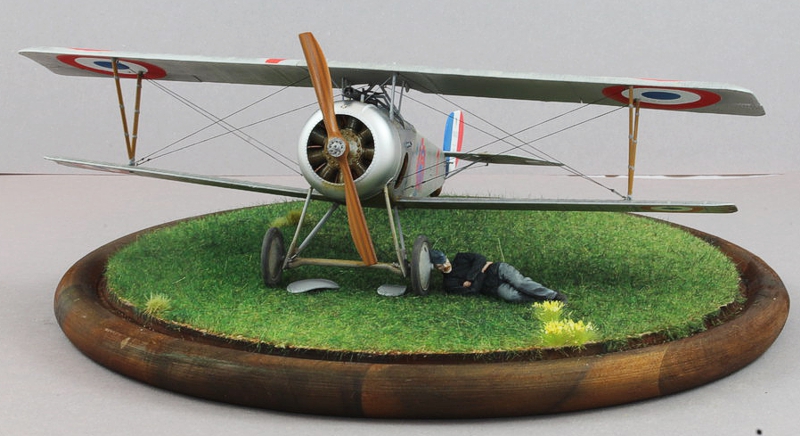
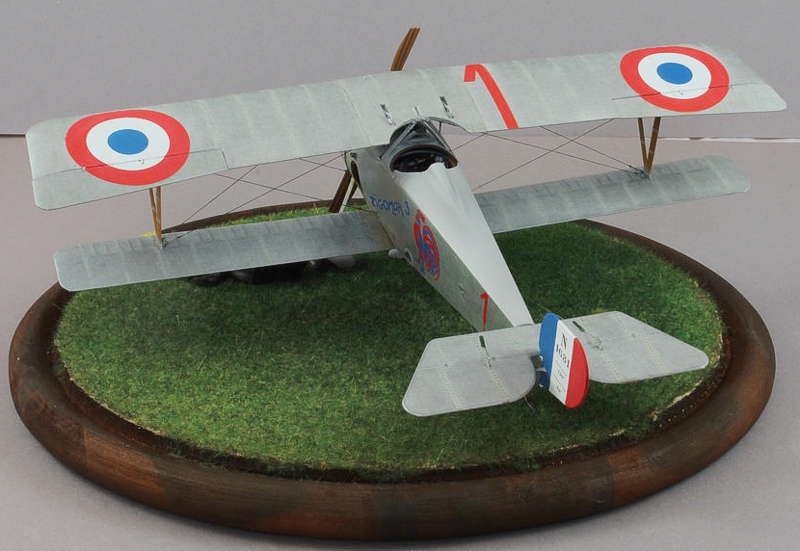
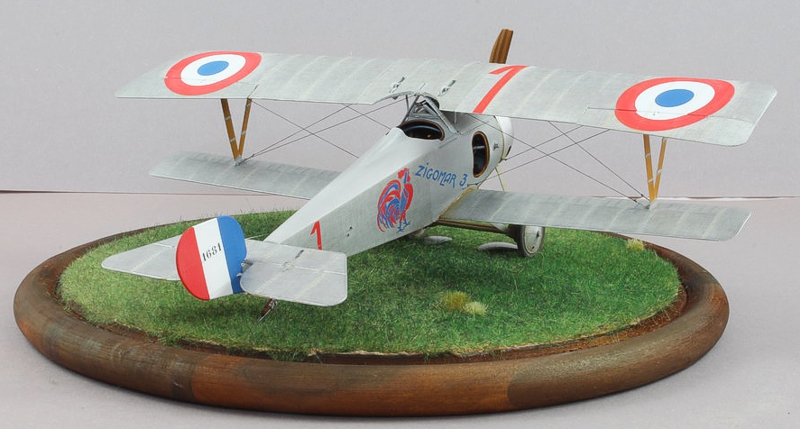
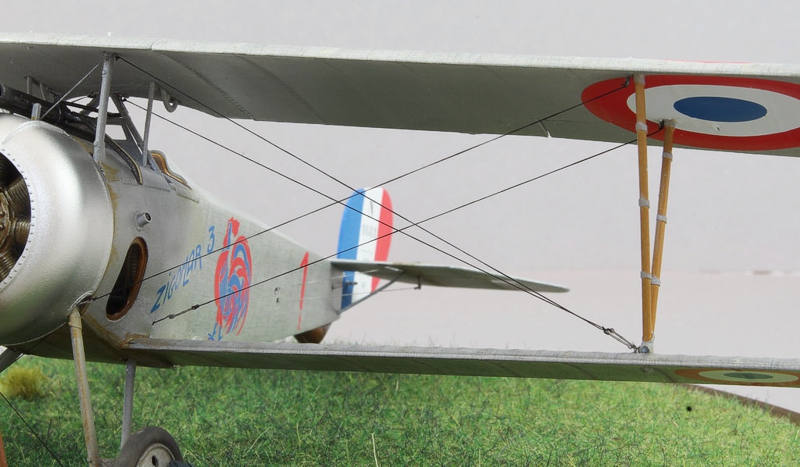
The primary aftermarket item I used was Aviattic’s Linen Effect decal on the areas of the aircraft that were covered with canvas. After priming, I sprayed an aluminum dope color that I mixed on the areas that were covered with that finish on the actual aircraft; that turned out to be about 90-95% of the surface. I had previously cut the Aviattic decal into pieces matching the surface of the model they would be covering leaving a tiny amount of overlap on each piece. The procedure for placing the linen effect decal is the same as that used for Aviattic’s lozenge decals, use plenty of water to position the decal and then gently press down on it to remove the water and get it to adhere. The linen effect decals took a bit of work to get right, but the end result looks very convincing.
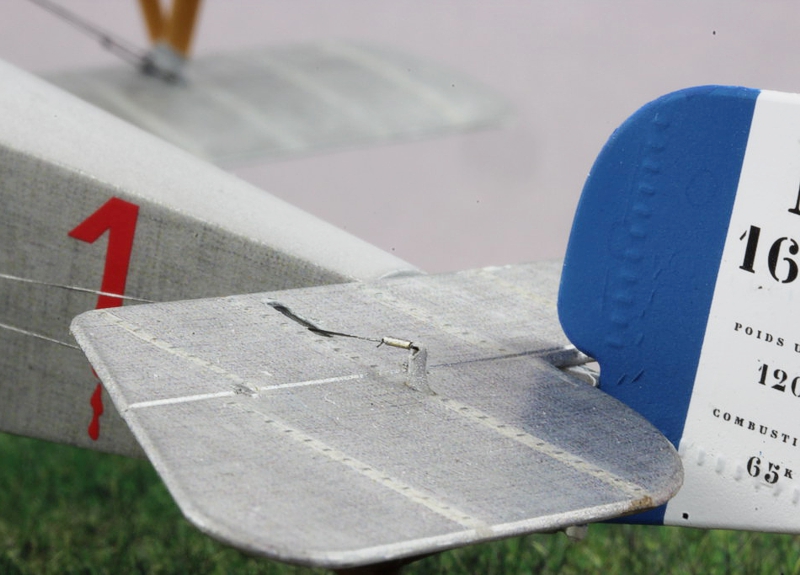
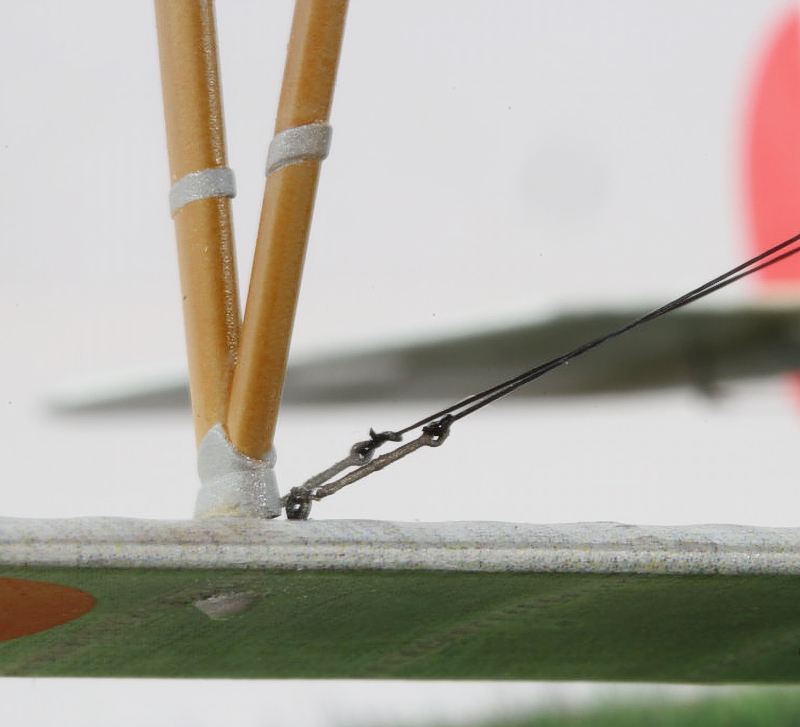
I used Gas Patch 1/48 scale turnbuckles and most of the anchoring points are that company’s 1/32 scale eyelets, though I ended up making a few using steel wire after I ran out of the Gas Patch ones. The rigging and control lines are two different gauges of Uschi elastic line. In several areas where the control lines or rigging does not attach to a turnbuckle I used .5mm copper tubing cut to length to simulate tensioning parts. I kept the weathering fairly light simulating castor oil and dirt staining in spots I thought would have that sort of discoloration. I also did some very light oil rendering on the tops of the wings and upper rear fuselage to light simulate ultraviolet fading and accentuate the ribs somewhat.
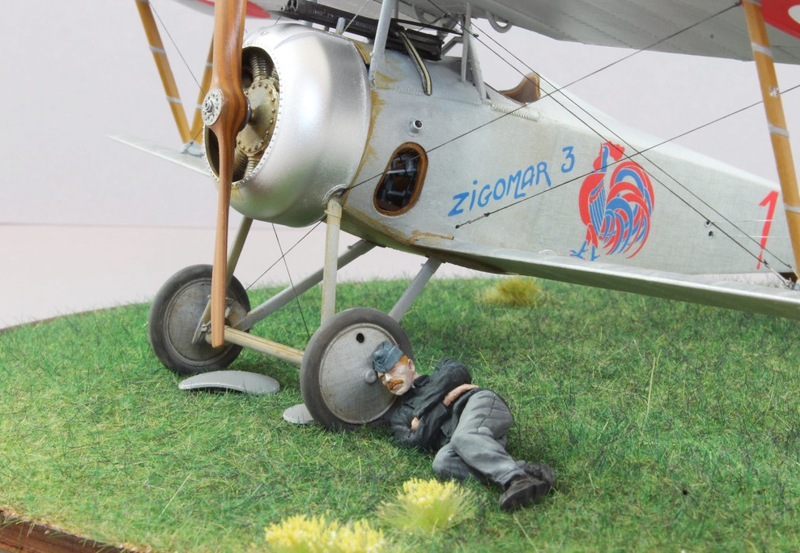
The figure is also a CSM offering that I painted using a combination of acrylic and oil paints. I scratchbuilt the base using static grass colored to suggest a late spring - early summer timeframe, adding a few “flowers” to give the grass airfield a small splash of color.
Overall, this was a great kit and figure to build and I had a lot of fun doing so. For more on the project, please check out my build thread in the Work in Progress forum.
© Ernest Roth 2025
This article was published on Friday, June 20 2025; Last modified on Sunday, June 22 2025