
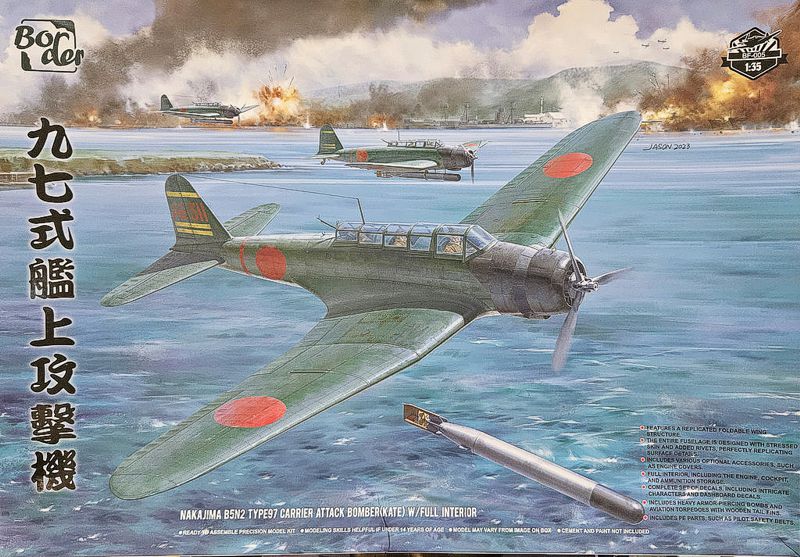
Border Models 1/35 Nakajima B5N2 Type 97 Carrier Attack Bomber (Kate)
By Malcolm Reid
This is a first for me – a 35th scale (yes, AFV scale) model which is not a tank. There’s been much shock and horror and head scratching as to why Border Models believes that 35th scale is a viable option to 32nd scale for fixed wing aircraft. The number of Border’s 35th aircraft releases is growing and they seem to be happy with their marketing decision.
The only reason why I bought this kit is that there is no injection molded B5N2 in 32nd (as far as I know). The Kate is one of those iconic Japanese WW2 aircraft, along with the D3A Val and the A6M2 Zero (for obvious reasons). Having built this kit, I’m firmly hoping that Border will release at least the Val in 35th. I don’t feel like putting a 32nd Infiniti Val near the 35th Kate.
So, what to say about this kit? I note the following:
- Magnificent fit and detail. The breakdown of the main airframe and wing parts is very clever for the modeller not to have to sand down any joints and thus lose the fine raised riveting.
- The oil-canning effect / stressed skin effect on the wings I found to be particularly pleasing.
- Some may find that the pulled fabric on the ailerons, flaps and elevators is overdone, but I was happy with the effect.
- The decals are amazing and go down over the raised rivets like paint – I only used the instrument panel, tail codes and data plate decals but they all behaved well. All other markings were masked and airbrushed.
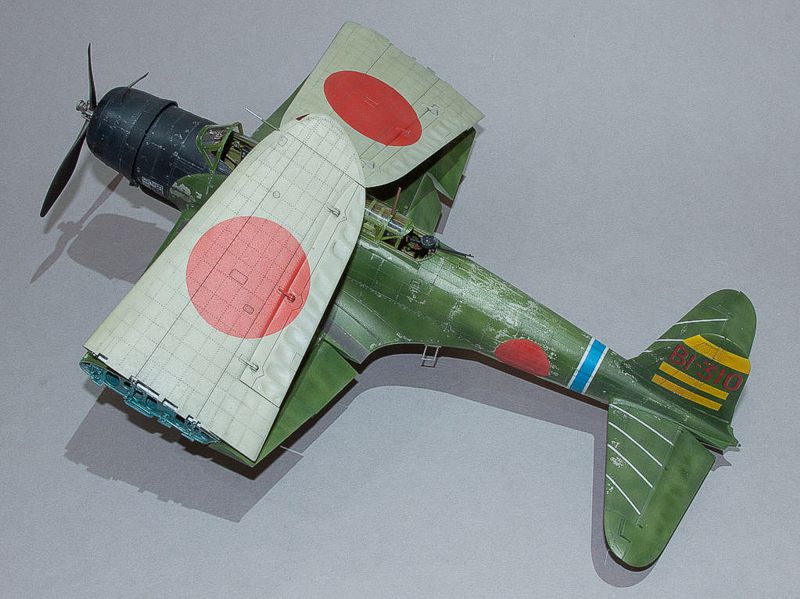
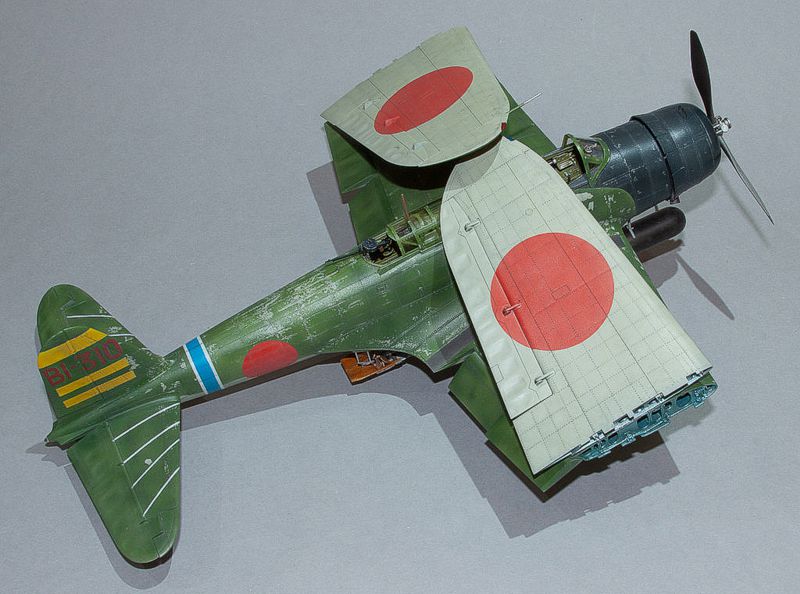
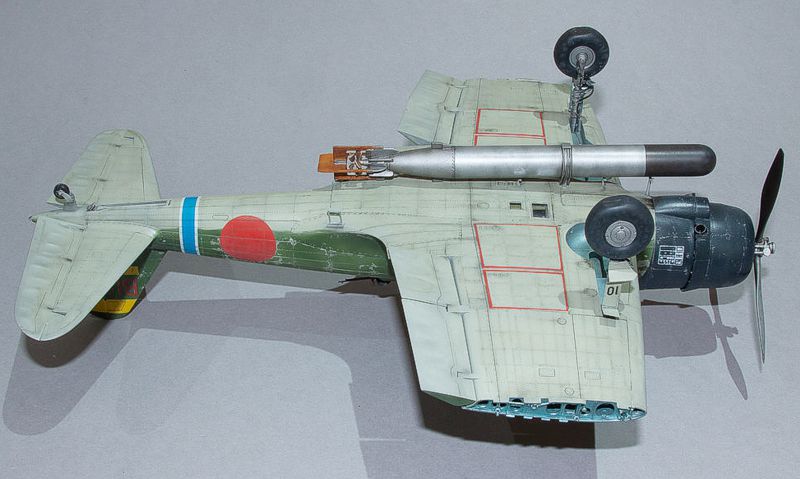
- I was worried about the fragile nature of the wing fold but with a bit of Tamiya super thin cement run into the wing fold joints and, with the aid of the two wing braces, all seems quite sturdy.
- Border provides adequate photoetch seat belts to supplement the perfectly acceptable level of detail provided for the cockpit interior.
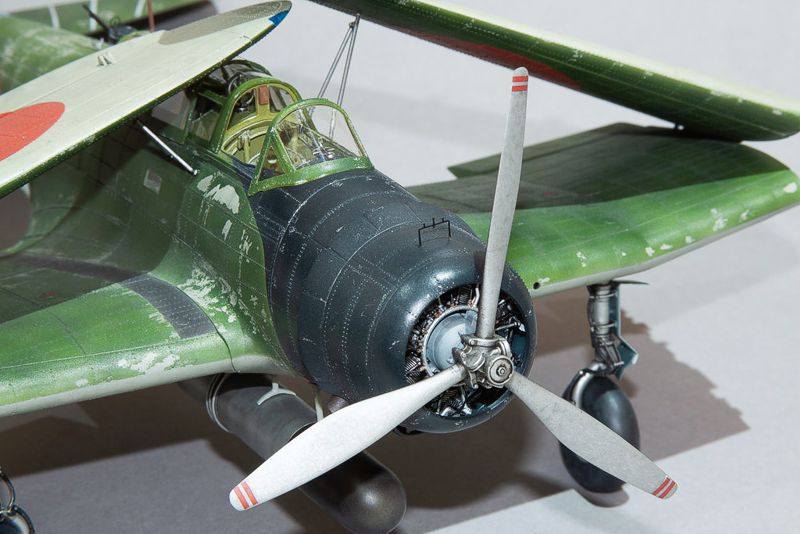
- The canopy sections are really thin and crystal clear so handle with care when masking. The sliding sections fit into one another very nicely.
- Border kindly provides finely molded main landing gear brake lines which is a nice touch.
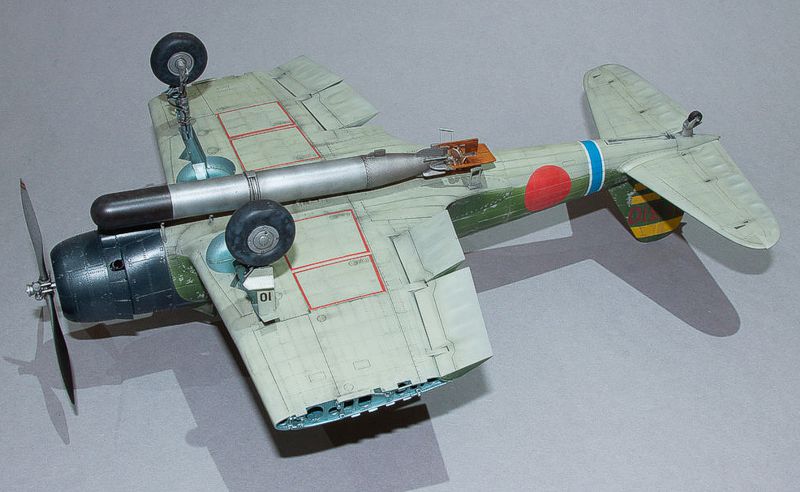
- Apparently the bomb option is too small, but I went with the wooden finned torpedo anyway.
- On the downside, the instructions are rubbish with no proper location details in many areas and no colour call outs except on the final “painting” pages. I think I messed up the orientation of the engine in relation to the engine panel support rings – this depends on correctly fitting the cylinder rocker covers which the support rings attach. I followed the instructions but still had a mismatch. I’m not sure where I went wrong. Some of the wing internal frames are numbered incorrectly as well so test fit before gluing.
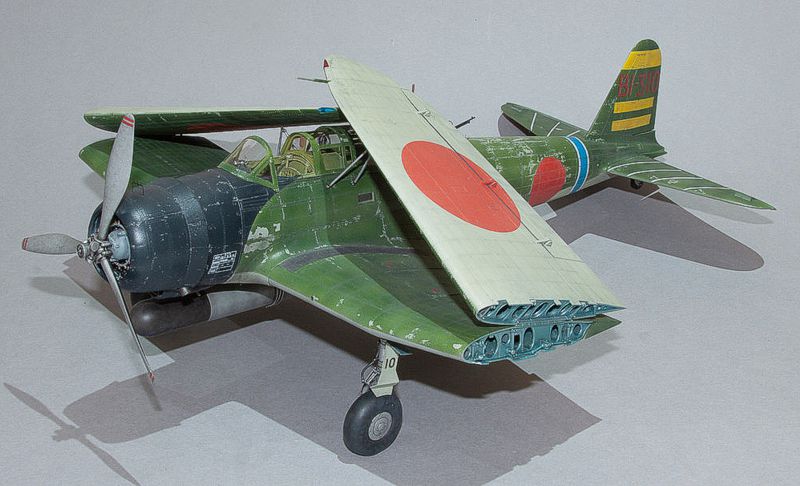
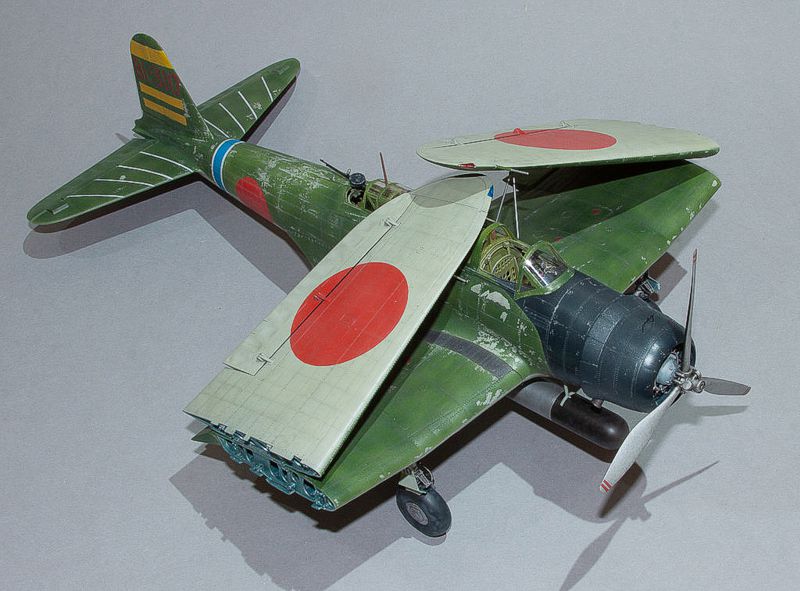
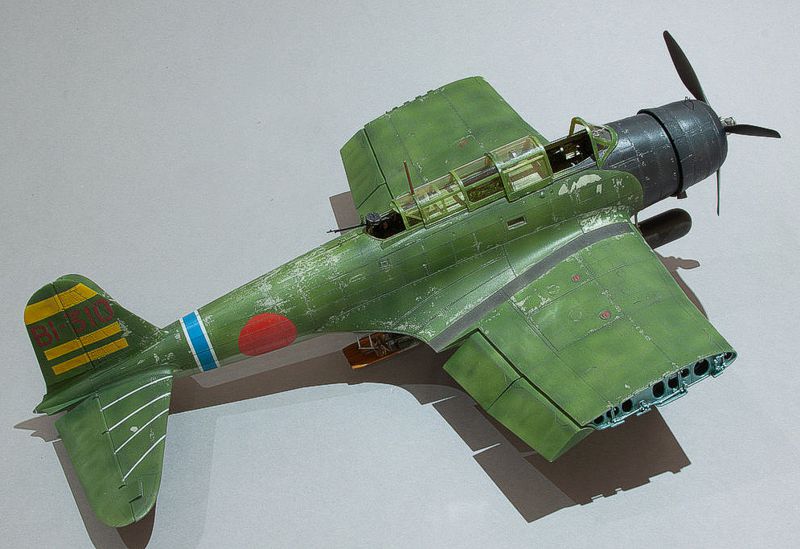
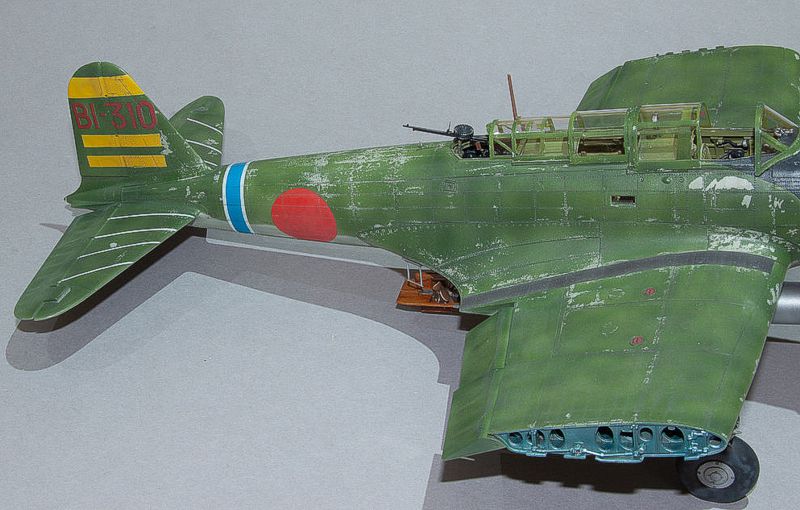
I used the Osprey Combat Aircraft book “Nakajima B5N Kate and B6N Jill Units” as a reference to help select which particular aircraft to model. I decided not to go for a Pearl Harbour aircraft but rather one used later in the war. So it was B5N2 “BI-310” flown by Lt. Joichi Tomonaga aboard the carrier Hiryu whilst in action in the Central Pacific during June 1942, at the Battle of Midway.
According to the Osprey book:
“Lt Joichi Tomonaga led two strikes on 4 June 1942 during the Battle of Midway – the first against the Atoll’s two islands in the morning and then an ill-fated attack on the carrier Yorktown in the afternoon. BI-310 had its right main wing tank punctured by Marine Corps F2A-3s from VMF-221 during the morning attack. Upon his return to Hiryu, he refused to switch aircraft for the attack on Yorktown despite knowing that he would have insufficient fuel to make it back to Hiryu after he had dropped his torpedo. The aircraft was subsequently shot down by ace Lt. Cdr. Thach, commanding officer of F4F-equipped VF-3 as Tomonaga made his run in on Yorktown. He got his torpedo away before crashing to his death and the torpedo missed Yorktown.”
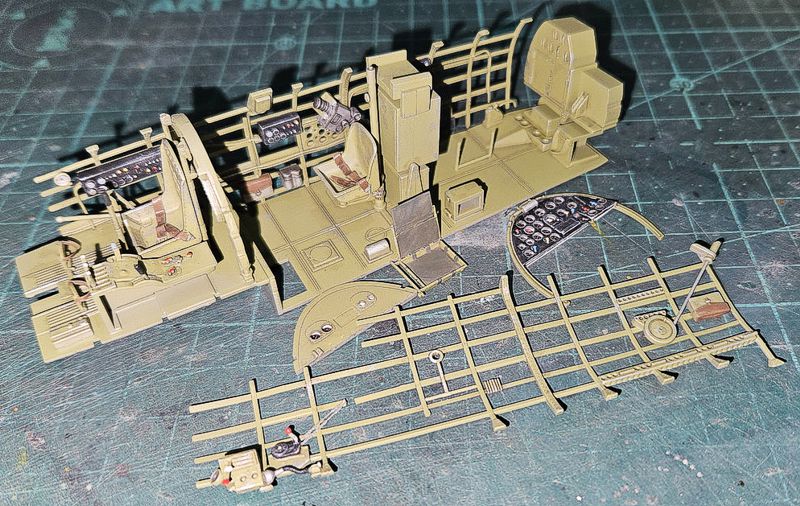
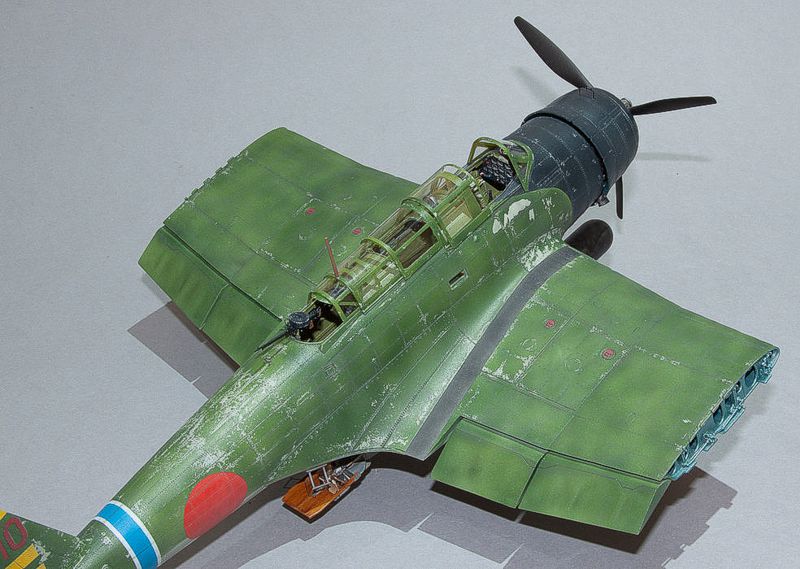
Here is the OOB cockpit.
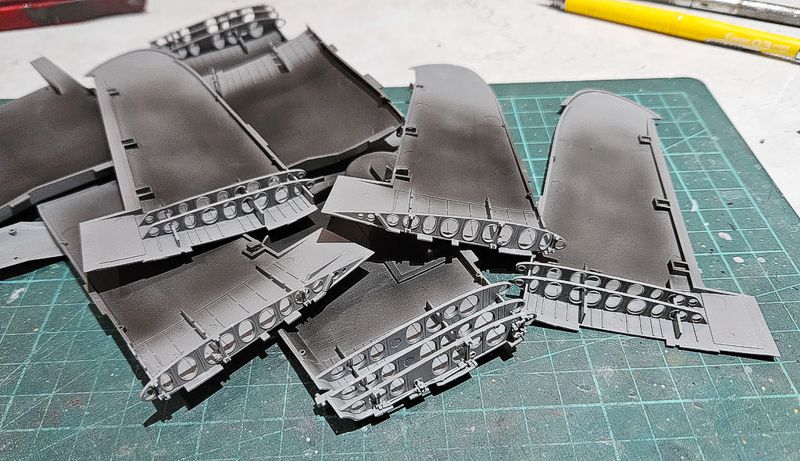
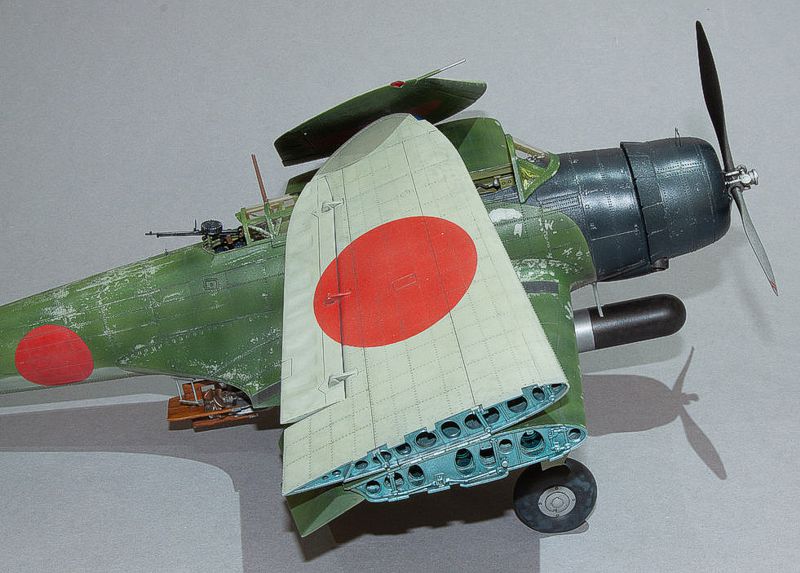
Here are the unpainted wing interior frames - 3 rows which provide really nice depth.
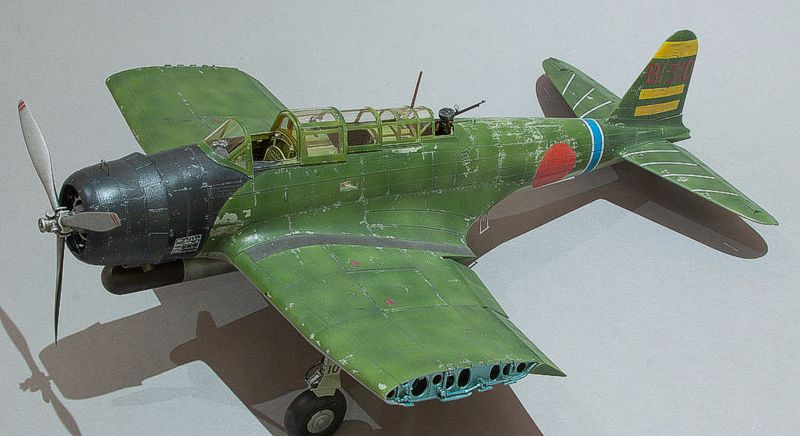
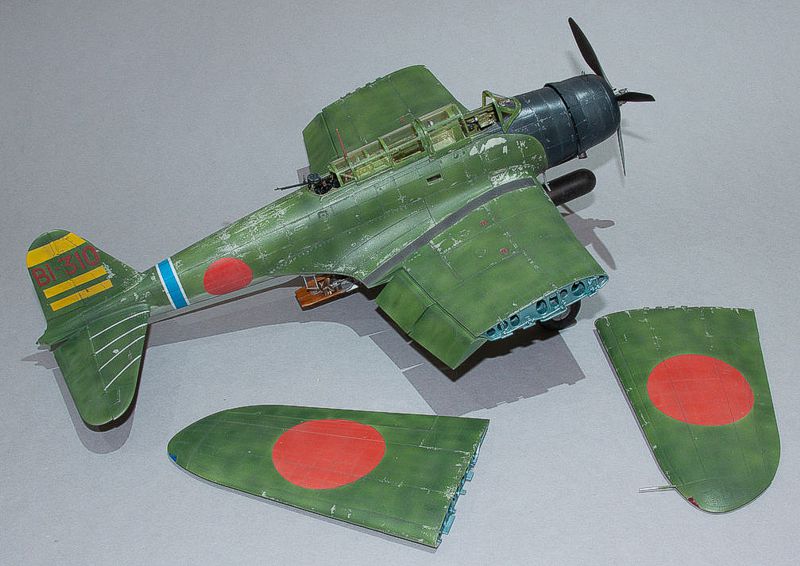
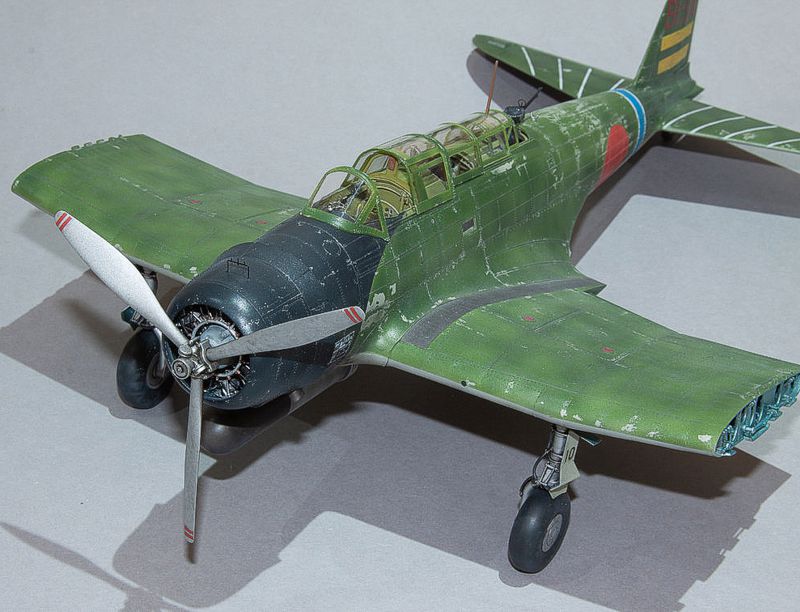
Pictures of the model before adding the folded wings.
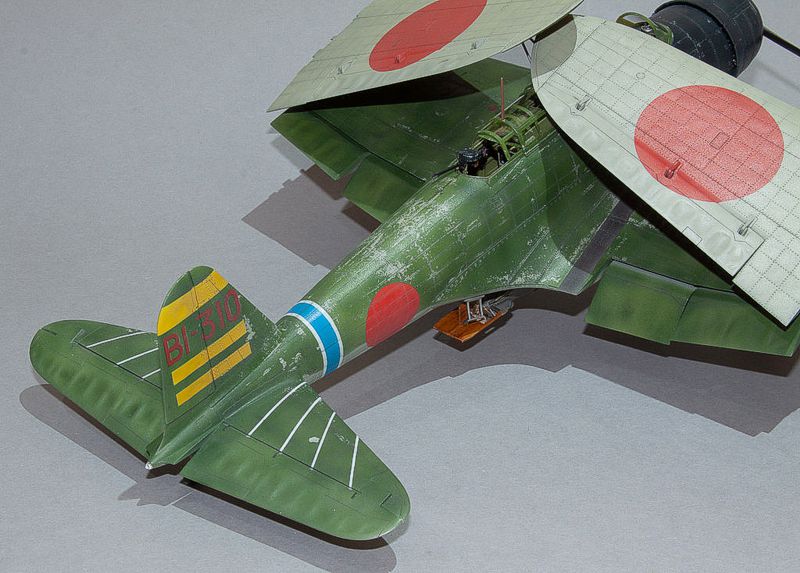
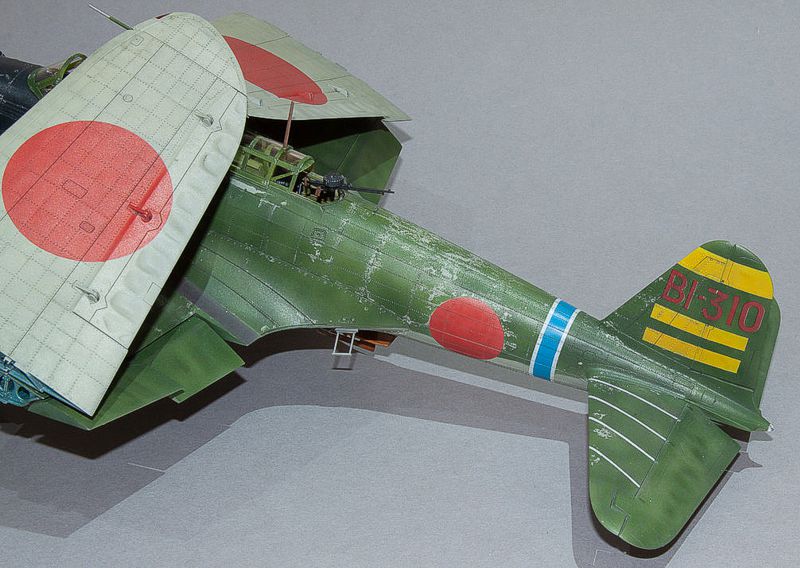
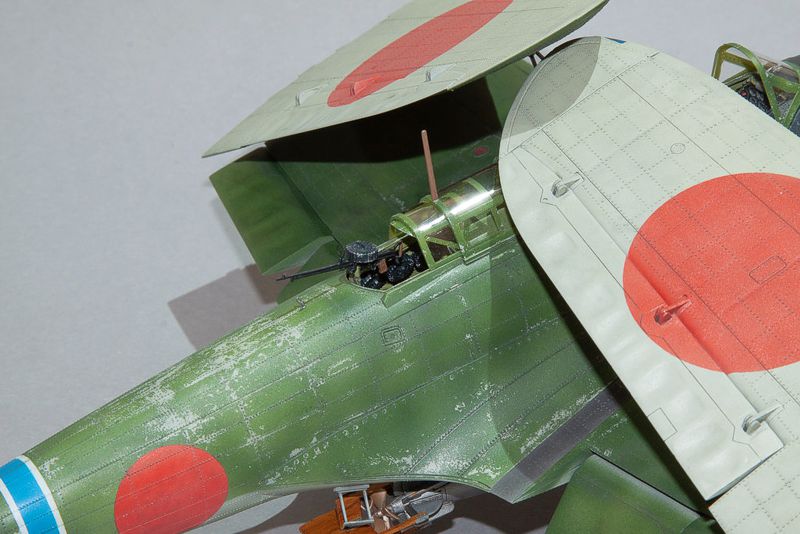
The folded wings actually don't cover up too much of the cockpit - the three openings for crew entry into the cockpit for the Kate are quite small anyway but you can still see into the gunner's station and the front cockpit. It's just the radio operator's station that's not too visible. I actually preferred to have the wing fold detail on display. Again, the three rows of ribbing on each wing section gives a really lovely sense of depth.
Colours used:
For the cockpit interior I went with Mr. Colour 384 “Kawanishi cockpit colour”. It’s light enough to allow one to still see the details in the cockpit once the fuselage has been closed up.
For the landing gear bays and wing internal frames I used a mix of Tamiya X-11 silver over-sprayed lightly with Mr. Colour 76 Metallic blue.
The cowling blue-black was painted using Mr. Colour 125 “Cowling colour.”
There has been much discussion regarding two aspects of Japanese Navy aircraft camouflage including, ‘What exactly was the grey used?’ and ‘How and when was the green applied over the grey?’
After reading various opinions on numerous websites, I went with the “standard” Japanese sickly grey-green colour and used Mr. Colour 128 “Japanese grey-green.” Some would have it a little beiger, but I left it as it was out of the bottle.
I’ve read that the grey-green paint and Hinomarus would have been properly applied onto a primer base and thus did not show the characteristic flaking seen on most green camouflaged Japanese aircraft. So, my assumption is that the green was applied over the primed grey base coat at a later stage and most probably in less than optimal conditions thus resulting in a significant flaking of the green. I masked the Hinomarus and other markings before applying a coat of Ammo/MiG-2011 “heavy chipping effects” to the base grey-green and then airbrushed Mr. Colour 129 “Nakajima dark green” to give a patchy look. Random areas were then darkened with Tamiya XF-112 JN Green. Water was then applied with a stiff brush and areas of green removed care of the chipping effects fluid. This was then all sealed in with Tamiya X-22 gloss varnish after which a wash of MiG-1209 “Starship Streaking” was applied followed by some random areas of oils and pastels. A final coat of Tamiya flat varnish finished it off.
© Malcolm Reid 2025
This article was published on Saturday, December 06 2025; Last modified on Sunday, December 07 2025