
Matchbox 1/32 SBD-5
By Angelo Picardo

This is the Matchbox issue of the kit and came in three colours of plastic. Revell have reissued it recently. Like a lot of Matchbox kits it is a mixture of good and bad. The shape is basically right. The interior however is a figment of someone’s imagination. They must of once seen an old picture of the interior and based the kit parts on what they remember! Panel lines are raised and engraved. Transparencies are thick and do not fit well.
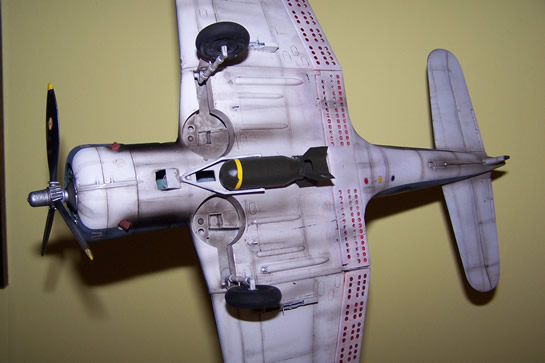
I got this kit from a second hand dealer for a very reasonable price and then I bought the two Eduard sets for it. One is for the interior and replaces nearly all the kit parts. The second set is for the exterior and features bomb racks; undercarriage doors; aerials; bomb fins, etc. The soft plastic made engraving the panel lines a quick job. The Eduard interior set took a lot of time to put together. The instructions are a bit vague on the location of some of the parts. A lot of dry runs were required to ensure the fit was correct.
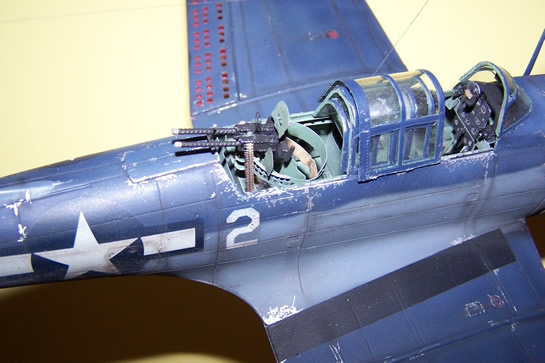
The rear gunner’s seat is quite a complicated part that requires parts to be folded and curved with great care to produce an excellent reproduction of the real thing. The twin rear guns were taken from Academy’s U.S. Machine gun Set as were the ammunition belts. I know they are 1/35th scale but it’s not noticeable and the detail on them is exquisite.
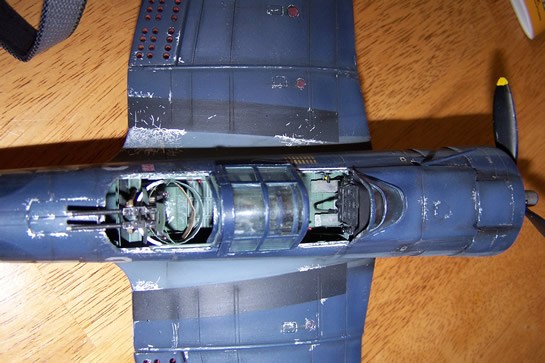
No reflector sight for the front cockpit is provided so one was scratch built from sprue. After this the model was finished to the painting stage in no time.I painted the model with Humbrol Enamels. Weathering involved airbrushing lighter shades of the colours between the panel lines. A wash of raw umber oil paint was then applied. The panel lines were shaded with Tamiya Smoke, then a bit of dry brushing to finish off.
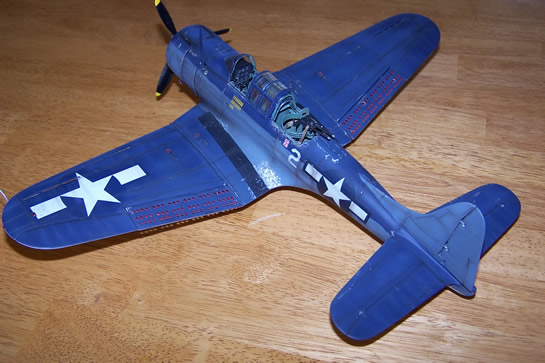
The paint scratches and chipping was achieved by using a metallic gel pen purchased from a local stationers. I wanted a faded worn look to the finish and I think I got it.
The kits decals were unusable. The protective sheet had become adhered to the decal sheet and no amount of soaking shifted it. All I managed to salvage were the squadron’s Ace of Spades badge. All the other decals came from the spares box and I used artistic license in applying two victory markings by the rear cockpit. The decals went down over a cote of Johnson’s Klear floor polish.
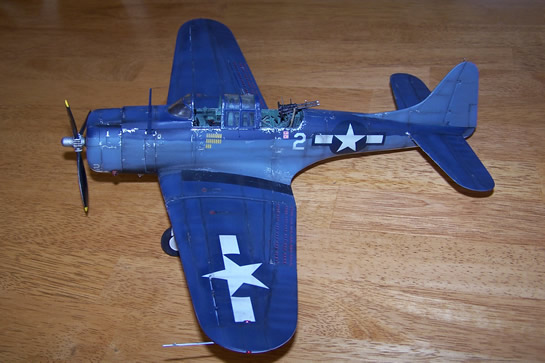
I used Vallejo’s Model Colour matt varnish to finish it all off. The model can be made into a nice representation of the Dauntless and I have seen a number of them at shows that inspired me to build one for my self.
© 2005 Angelo Picardo
This article was published on Wednesday, July 20 2011; Last modified on Saturday, May 14 2016