
NF-104A: The Rocket Powered Starfighter
By Dr Menelaos Skourtopoulos
History
The Lockheed F-104 Starfighter is one of the hottest and most enigmatic airplanes ever built. With its performance and flying characteristics it wrote many stories of glamour and...death.
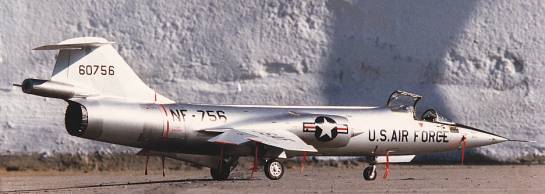
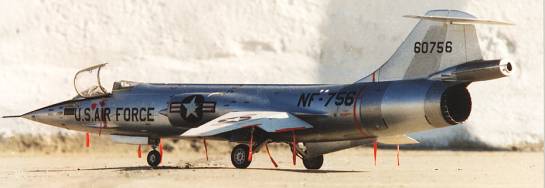
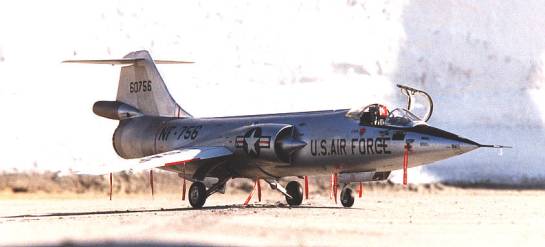
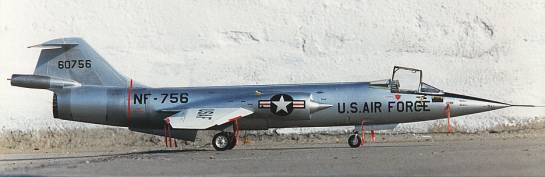
C.L. "Kelly" Johnson's product was also used by the USAF Test Pilot School for high altitude work. Under the designation NF-104A and fitted with a 6,000lb LR-121/AR-2 rocket motor, the NF-104A was given the means to zoom climb to 1200,000 ft - literally to the edge of space. Three F-104As (56-756, 56-760 and 56-762) were converted to the NF version.
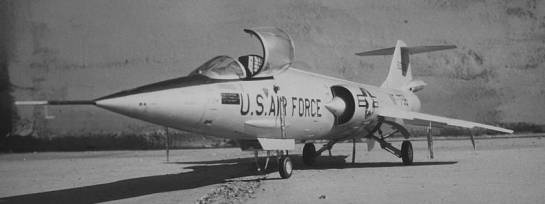
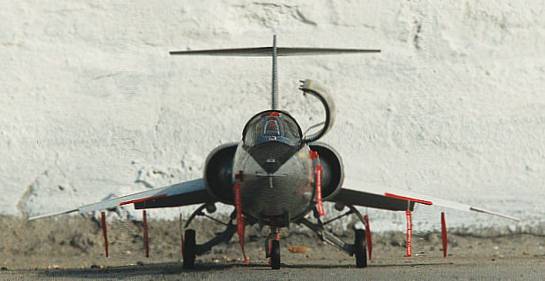
The differences between the standard F-104A and the NF-104A were the tail mounted rocket engine, the increased chord fin and rudder assembly (as on the F-104B and the later G), longer span, revised intake shock cones for higher mach numbers, and small reactive rockets around the nose and on the wings.
Typical flight procedure was starting the rocket at 35,000 ft for two minutes, reaching mach 1.9 and burning out at 100,000 ft. The jet engine was shut down at 80,000 feet and restarted on the way down below 60,000 ft. Famous test pilot Chuck Yeager almost killed after the 56-762 went out of control (he couldn't push the nose down) and bailed out at 8,000 ft. Unfortunately the C2 seat rocket, still burning, hit him on the face and burned him badly, but he survived (he has the right stuff!!).
The Model Situation
There are two big Starfighters in the 32nd scale: the Hasegawa J/G, G/S, C models and the Revell G/C model.
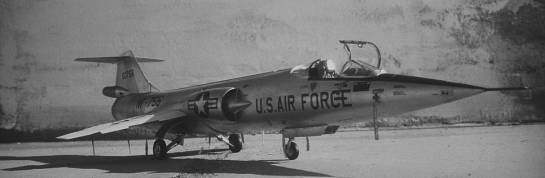
While the Revell kit is not bad at all (see my article about the TF-104G conversion) I chose the Hasegawa kit for that conversion, because it has more details in the cockpit and canopy, speed brakes, nice surface details and a whole J-79 engine. The bigger G tail is in both kits and this is a must if you want to make a NF-104A.
But both kits have their problems with Hasegawa (Revell too) having the G type wheels and Hasegawa having the G instrument panel (Revell gives the C type panel).
The Conversion
There's a lot of work to do if you want to make a proper NF-104A. I started with the cockpit.
The main instrument panel and side consoles are something different compared to the G type.
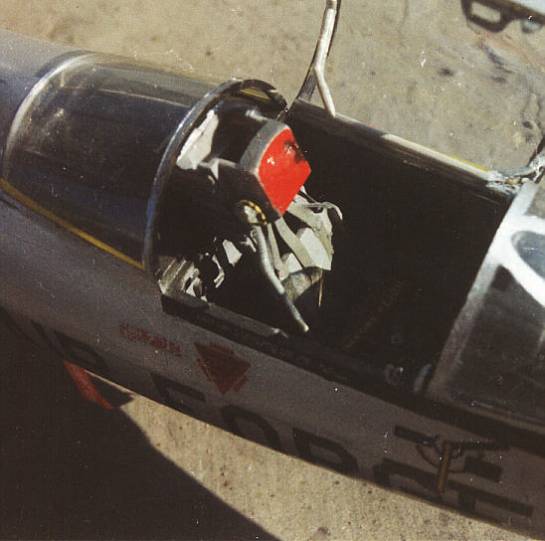
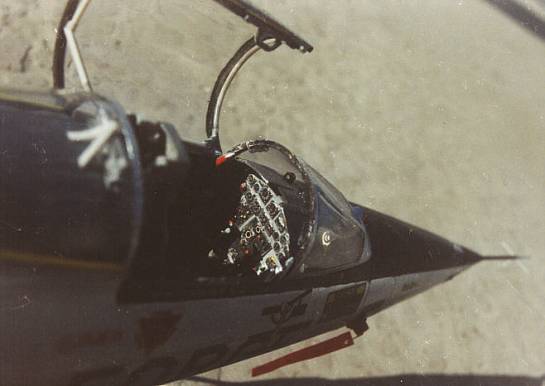
I used the drawings of the Detail & Scale issue of the F-104. I covered the radarscope with putty and after it was dried I made some "instruments" on that region to simulate the knobs and switches. I just took them from the spare box or made them from plastic styrene. The upper half of the instrument panel is also different with a huge art. Horizon in the middle. I couldn't find such a part, so I didn't change it and left the G type configuration on that region. I also left the side panels of the G type unchanged. The NF had a little different ones but this is not absolutely necessary fro change. There was no optical sight in the NF. I just closed the hole of the projector with putty. Hasegawa gives no detail for the sidewalls so I put some plastics strips from evergreen to simulate the wall structure.
Some details are necessary for the canopy rails but are easy to made (e.g. the handle that the pilot uses to close the canopy). The C2 seat is included in the kit and this is the right seat for the NF-104, but with poor details. I had to add some details from scratch. I made the seat belts from toothpaste tube using drawings from the real seat. I didn't used any extra kit but if you want to do so, there some detail sets in the market.
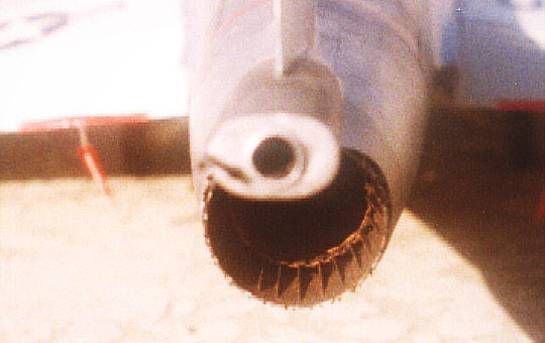
To make the rocket engine it seems some kind difficult at the beginning, but in the 32nd scale it's easy enough. I build it from an old drop tank from the old A-7A/B kit in 1:48 scale. I just cut it in the middle and between the nose to fit it between the vertical tail. Some filling was needed to close the gap. The rocket was flat and not round at its end, so with some hot water I gave it its appropriate shape. I close the hole with some epoxy putty and after it was dried, I drilled a big hole inside it to simulate the nozzle of the rocket engine. A piece of plastic with a String at its end simulated the fuel pump.
A complete J-79 engine is in the kit but only with the standard details, however the primary exhaust nozzle flaps are nice made and this will be very helpful to make an accurate exhaust nozzle. The divergent flaps are really not thick enough, so I made them from scratch. I cut pieces (triangles) of plastic styrene and glued them inside the outer nozzle. If you have the Revell kit just look at my TF-104G conversion article for some solutions.
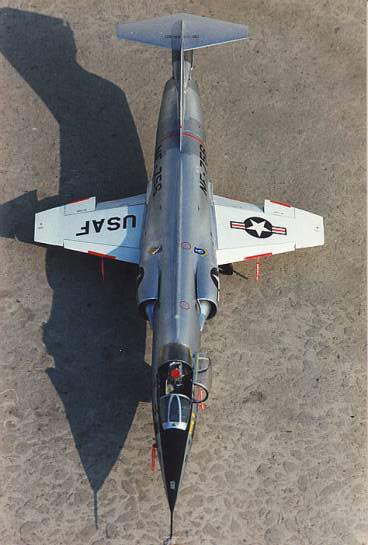
The NF-104 had a longer wing span with 24-inch wing extensions. I took them from an old Esci F-104 in 1:48 scale! Just cut out the outer wings and you'll have a perfect NF-104 wing extension for the 32nd scale!. With some filling and sanding there will be no gap between the two parts.
The landing gear is one of the most detailed parts of the kit, however the wheels are of the spoked type that was used on the European G-variant. The holed wheels made from scratch by feeling the original wheel with putty and drilled the holes in the right positions.
There's a 20 mm Vulcan cannon in the kit, but the NF had no armament, so you can use the Vulcan for other kits (F-4E?!). The gun port was covered aerodynamically with a fairing. I made it from putty and finished it smoothly as you can see on the pics. The air intakes had longer shock cones in front of them. I made them from plastic sheet.
There is a YAPS boon in front of the nose that has some antennas on it. The boom was originally thicker than the pitot boom, but I left the pitot tube unchanged and put only the antennas on it. (you can hardly see the difference…)
Last but not least the NF had small RCS controls on the metal radome (in four positions; left, right, up and down) and on the outer wings (on both sides). These are made easily by drilling small 1,5 mm holes on those positions.
If you want a F-104 boarding ladder, you can find it in the Hasegawa F-16 kit.
Painting
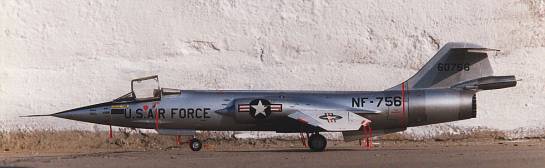
I used the metal cote polished aluminum (27002) from Humbrol for spraying the whole aircraft except the wings, they are white in the NF-104A (or light gray as I found out many years after I finished that model). The paint looks very like the real unpainted metal surface. The NF had a metal radome so you must paint everything. The upper portion of the nose had a black antiglare surface.
The region around the afterburner and the vertical tail had a darker metal tone as the rest of the airplane. I mixed the metal cote aluminum with some gloss black to match the right tone.
Decals
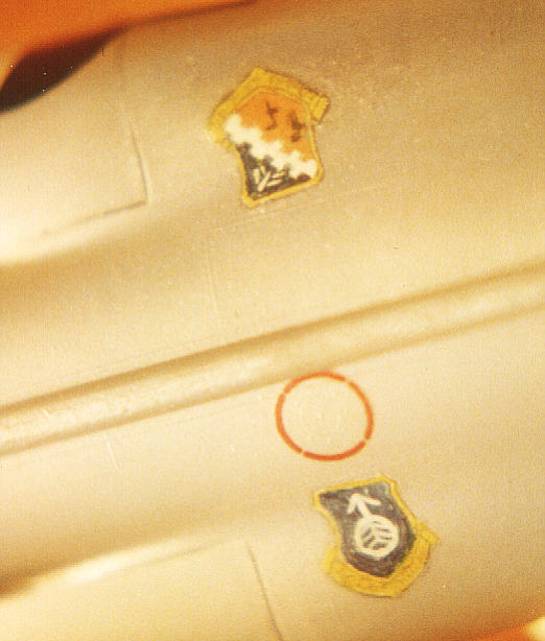
The decals came from a variety of different sources. The big USAF on the wings, the US AIR FORCE on the fuselage sides and the stars are from Monograms F-102 in 1:48. The buzz numbers (NF-756) and the serial number on the fin are from Verlinden Productions USAF letters in 1:48. The badges of USAF test center and Air Force Systems Command are handmade. I first drew the badge with a pencil directly on the surface, then I painted it white and after it was dried I put the other colors on it with a thin brush. The rest of the warning stencils came from the kit. I put some REMOVE BEFORE FLIGHT on several locations to add some more realism.
Summary
When the whole job is done, you will feel a little bit like a test pilot, but unfortunately the model is too small to climb inside and start the engine!!. With the conversion like this I had the opportunity (back in 1990...) to have something different beside the other "usual" models. Its not difficult to made and the satisfaction is guaranteed.
References
- F-104 Starfighter in Detail & Scale (Vol. 38)
- F-104 in action (Squandron S. Publ. 27 & 135)
- Century series (Squadron S. Publ.)
This article was published on Wednesday, July 20 2011; Last modified on Saturday, May 14 2016