
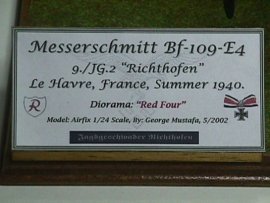
Airfix 1/24 Messerschmitt Bf 109E
By George Mustafa
HISTORY
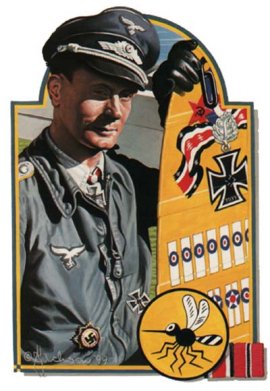
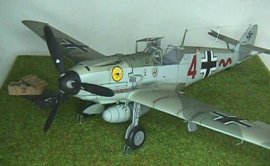
Designed by professor Willy Messerschmitt a director of the manufacturers Bayerishe Flugzeugwerke AG, the prototype Bf 109 first flew in 1935. Progressive developments quickly led to the Bf 109B and C, which saw active service with the Condor Legion during the Spanish Civil War. Later model variants were more powerful and saw action during WW II. The E model was introduced into the Luftwaffe service in December 1938. This model was more powerful, better armed and armored. By the fateful summer of 1940 over 500 of these were in service for the offensive against England, that became known as The Battle of Britain. This model represents a fighter from 9./JG.2 stationed in Le Havre, France during the summer of 1940, prior to the Battle of Britain. In my research I found that this particular aircraft was flown by Haupmann Josef Wurmheller, which was, at the time depicted in this diorama, not painted with the yellow nose and rudder typical of the epoch concerning the Battle of Britain.
Hauptmann Wurmheller's Bf 109E-4's nose was later painted white for recognition purposes. Hauptmann Wurmheller eventually became Group Commander of 9./JG.2 "Richthofen". In 1941 he was given command of 6./JG.2 flying Focke-Wulf FW-190's in Norway. He was killed in an aircraft fire in late 1941. The following is dedicated to the memory of Hauptmann Wurmheller and this outstanding aircraft.
THE KIT
This Airfix product may be an old mold, but is still a good model. In my research I found and have just recently read the only article around about this model in this scale posted in the Internet by Mark Mallison, and decided to go ahead and super detail this model with scratch built items and the available Waldron instruments, belt buckles and rudder pedals. The model just simply cried out loud to be super detailed!!
It happens that this model has been sitting in my shelves for 10 years, since I bought it in a Michigan hobby shop which name I don't remember, back in 1992 when I was stationed at Selfridge AFB. The model was molded in light blue-gray and was essentially flash free. Ejector marks were minimum and most of the parts fitted pretty well, however, being sitting in the shelves, having endured all the stress of moving (twice) and the travel to Puerto Rico, some parts were warped and required some extra work. The plane featured a detailed engine, gun and gun bays, cockpit and real rubber tires. Perhaps Airfix at one time intended to motorize these models since there are extra parts to place an electric can type motor.
This is my fifth 1/24 scale model from the Airfix collection, and I still have the Hurricane and the Harrier in the shelves (recently acquired). Deciding what to do took some research to figure out. The model cries out loud for details, and in this big scale I decided to go on an all out effort to enhance it. Hence, the first step was conducting a research. I got information, images and good reference pictures from books and the Internet. (Sorry I don't mention all the good web sites I visited, they were too many. But, thanks to all you folks who have extraordinary sites dedicated to this venerable (and rather infamous) fighter.
CONSTRUCTION
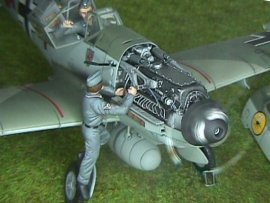
THE ENGINE
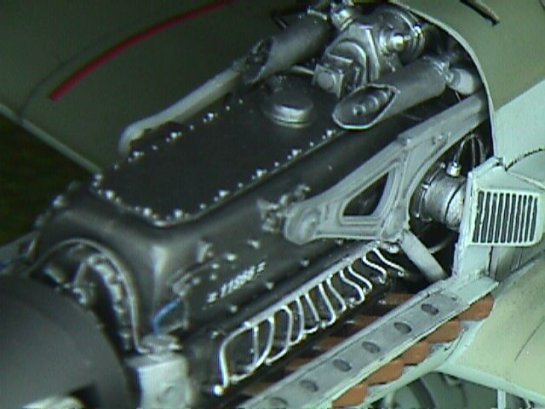
The first step was to make a thorough research of the Daimler-Benz DB-601 engine this version of the 109 used. For that matter I surfed the net and found good reference. Starting from there I proceeded with detailing the engine.
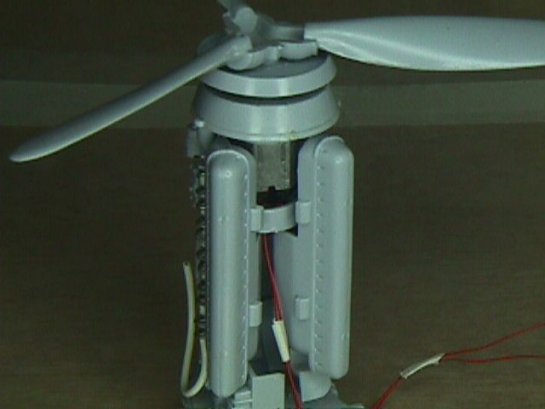
The model engine, although with some detail, lacked much of the good stuff that would make it worth the project. Hence I removed all the molded in detail and added them back from my bag of tricks. In the process I added a Mabuchi micro motor inside the model's DB-601. I do believe Airfix at one time intended to have these models motorized since extra parts for the engine included a motor mount, precisely for a Mabuchi type can electric motor.
This model included molded-in exhaust pipes, which of course would have reduced the overall quality of the finished product. I decided to replace them with my scratch built ones. First, I removed the molded-in pipes with a Dremel Motor-Tool and an X-Acto blade. Next I placed the engine inside the fuselage halves and took measurements. My first attempt was done by cutting, bending and shaping brass stock square tubing, but I decided they were not what I wanted. Then I decided to use stock styrene. Using Evergreen rectangular strip styrene .100 x .125, I cut and heat-bent each exhaust pipe to shape, then super glued them to a sized strip of Evergreen .15 x .188 styrene. After test fitting them, the new exhaust pipes were bored out with a Dremel Motor-Tool. The new pipes are a far cry from the molded-in counterparts. They measure well and were connected to the engine, once it was installed in the fuselage. Along with the engine, I modified the propeller to fit the Mabuchi motor. By using stock brass tubing and styrene tubing I succeeded in reaching the correct size to fit the modified prop shaft.
The next step was to test fit the engine inside the fuselage halves and run the electric motor there, (and yes, I did thoroughly checked and ran the motor prior to closing the kit's model engine!!).
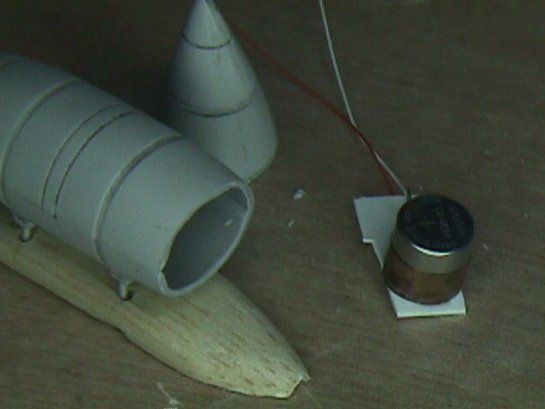
The motor runs on a three volt battery located inside the external fuel tank, on a scratch built mount with styrene base and brass contacts. (I borrowed the fuel tank from the Airfix 1/24 scale Fw 190 in my collection and in its place installed the Fw 190 kit bomb.) The under-fuselage hard point was carved to scale specs from balsa wood and later covered with Tamiya epoxy putty.
 Part of the engine modification included the cowling. I added internal structures as per my references. The 109E featured a one piece upper cowling that was removed by loosening four latches at the igniter or spark-plug access cover, and four latches at each corner of the cowling. I made four working latches at the corners and cut out the molded plug access covers and made them new from stock styrene with working hinges and pin latches.
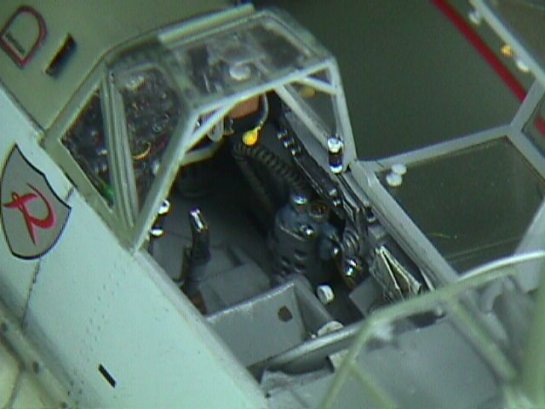
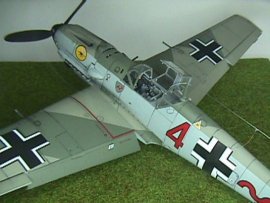
THE COCKPIT
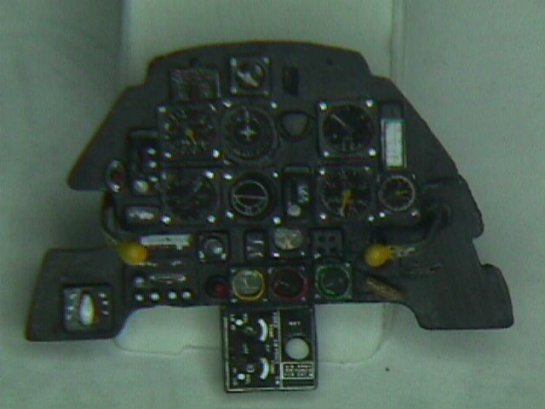
The Airfix model comes with a decently detailed cockpit, however, it cried out for super detailing. Adding the Waldron German instruments, seat belt buckles and rudder pedals was for me not enough. For that matter I decided to further detail the cockpit a bit more. I started out with the instrument panel. Using the kit's instrument panel, I modified it to accept the Waldron instruments, and added levers, switches and placards according to my references. Later E models incorporated the under fuselage hard point and a center or pedestal panel in the cockpit. I made the placards in my computer, printed to scale, cut and pasted in place.
Next, I reconstructed the cockpit walls. The throttle and mixture levers were scratch built using flat brass and the kit's handles and throttle quadrant base. Interior structural details were added with stock styrene. The elevator trim and horizontal angle of attack trim wheels operated with a sprocket and chain system. I reproduced such with styrene blocks shaped to size and round styrene stock. The same with the right side wall. I removed some of the built in details and replaced them with scratch built items.

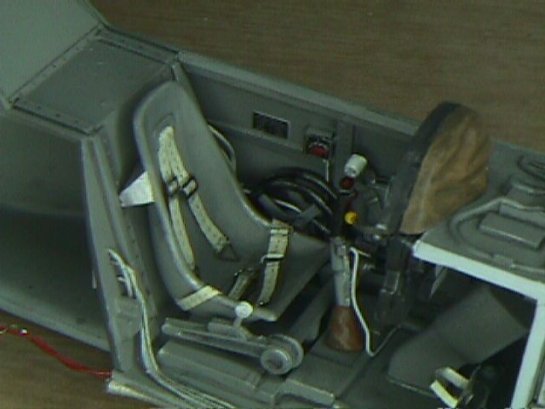
The oxygen hose was replaced with a new one made out of wire-wound-around-a-solder core, painted and weathered. Other goods included, hollowing out the map case (at the rear of the right wall) and adding cut out small picture of a real aeronautical VFR terminal chart photo from a general aviation pilot paraphernalia catalog, folded and cemented in place with white glue. The canopy crank handle was made from solder. I added small gauge wires to simulate the 109's internal wiring, including the stick wiring, as per reference photos. Note info placards in the radio/circuit breaker panel and other places. I also added a small two gauge panel under the radio/circuit breaker panel in the right cockpit wall, and a gauge atop the oxygen cylinder regulator from the Waldron instrument plate. This panel housed the oxygen gauges in later E models. The seat belts were fashioned from white gift-wrapping nylon band (the kind used to fashion those adornments in Christmas), and used the Waldron buckle set. I added the Waldron German rudder pedals and the securing strap, later E models used this kind of pedals. After getting the cockpit components together, the results were very pleasing.
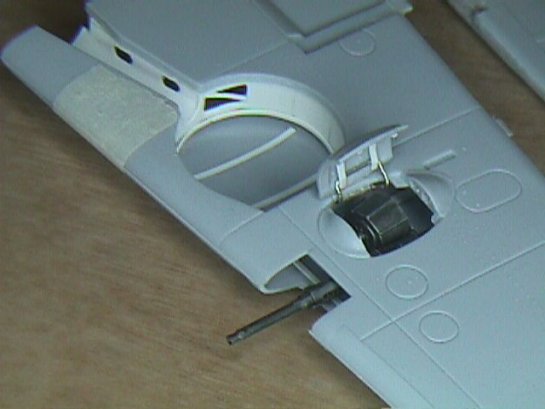
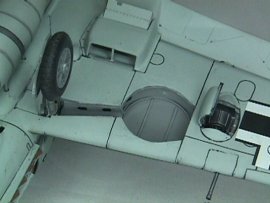
THE WINGS
It is a shame that a model of this size and detail was developed not taking into consideration such details as the landing gear wheel wells. Following Mark Mallinson's article and recommendations, I scratch built the wells as per my references. I added well details with stock styrene, and developed a hinge for the under wing armament access covers.
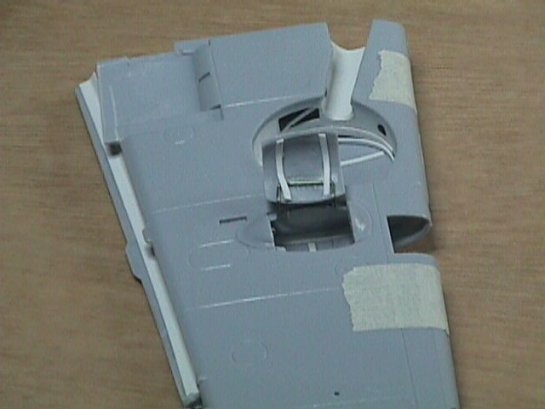
I cut out the flaps and reworked the trailing edge of the wings and the leading edge of the flaps ( a real treat!). They were positioned down as per references. (109's were usually parked with the flaps down). The kit's undercarriage was slightly modified and used for this project. Since the same is very close to specs, I didn't want to go into constructing aluminum/brass replacements. Since the E models incorporated the leading edge wing slats, and the Airfix model had the molded-in, I decided to leave them as they were, and not mess with them. Perhaps it could retract from the authenticity of the model, but I find it irrelevant and can live with it.
OTHER INTERNAL AND EXTERNAL DETAILING
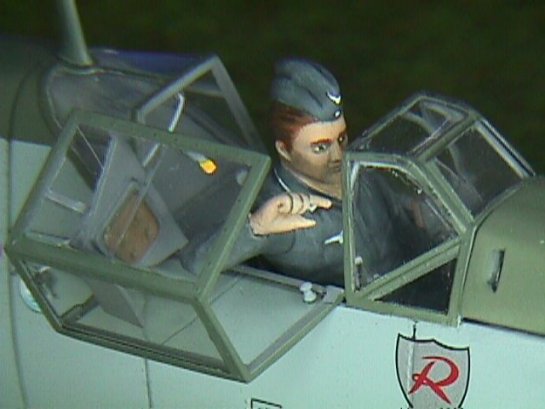
Canopy and windshield modifications were done by adding the internal struts in the windshield, the top hand holds, and the mechanism to open the left vent Plexiglas. The rest was done by masking and painting the internal frames interior colors, and the external frames the camouflage color. The canopy opens and closes, and has the safety strap to prevent damage if it traveled further than the normal travel when open. Also, the cockpit night lamps and the locking mechanism were added to both sides of the windshield frame and the left side of the canopy frame.
MODEL ASSEMBLY, PAINTING AND WEATHERING
Assembly went on pretty much straight forward. However, the model was slightly warped (as can be expected of an old model). The fuselage and the wings had to be worked out of the unwanted warping that prevented a clean assembly. Some filling was needed in the fuselage and the wings, but after that the model was pretty much fitted, and ready for paint.
I primed the whole model with the Tamiya Primer to create a smooth, uniform surface and check for unwanted scratches, unfilled unions, etc. In fact, I found few areas that required a bit more work. After that, I used Model Master RLM colors as recommended in the Eagle Strike decal instruction. After confirming the color scheme in the Web, I proceeded to paint the model according to the standard Luftwaffe patterns of the time, RLM 02, RLM71 on top, and RLM 76 underneath. In fact, I wanted to stay away from the "Mottling" scheme that most 109's portrayed and decided to stick to the original three color scheme, to preserve the beauty of the lines of this aircraft.
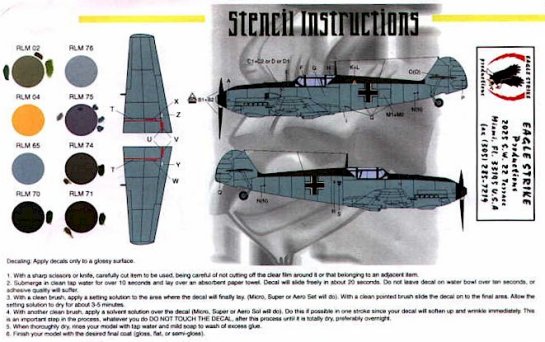
DECALS
Since this particular model had been sitting in my shop shelves for ten years, and providing that here in the tropics, humidity and the heat is so high, the decals that came with the model were ruined. In its place I obtained Eagle Strike's excellent 1/24 scale decals for this model. These were applied over the gloss finish of the model, and went on smoothly and conformed to the surface easily. I must commend the fine job Eagle Strike's people did with these decals. After applying them, and weathering the model, I over coated the plane with Model Masters Flat clear coat obtaining an excellent flat appearance and sealing the decals over the model.
Weathering was done pretty much using the standard methods. First an overcoat of Model Master's gloss clear, and a wash of thinned water color (Kid's finger paint type worked fine) with few drops of dish washing liquid. This technique helped achieve the effect on panel lines, crevices, etc. I decided to keep the paint pretty much intact, since this particular aircraft was, at the time of this scene, fairly new, just few months since delivered from the factory. The trailing exhaust marks in the side fuselage were achieved using grinded down pastels. Finally, the underside of the plane was then dirtied a bit to show some use, leaking oil, etc.
PILOT AND GROUND CREW FIGURES
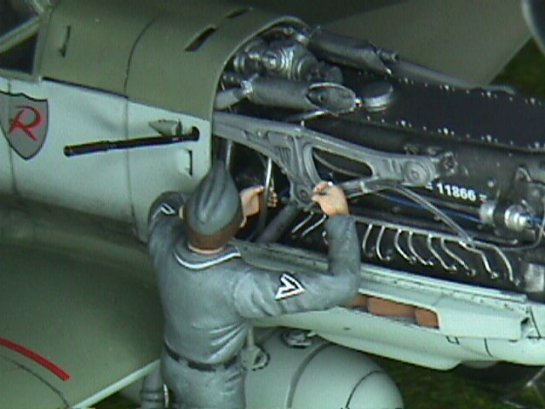
Models of this size demands attention to detail, which includes figures. It is a shame that manufactures have stayed away from creating figures in 1/24 scale. The only available figures are the auto mechanic set from Fujimi. I reworked these figures, repositioning them to suit the need. Using the excellent Tamiya epoxy putty, I filled gaps, and added the flight caps to these two figures. Paint and patience converted them into Luftwaffe mechanics. (Ironically, they became from modern auto mechanics, to Luftwaffe mechanics, they remained anyway, mechanics...)
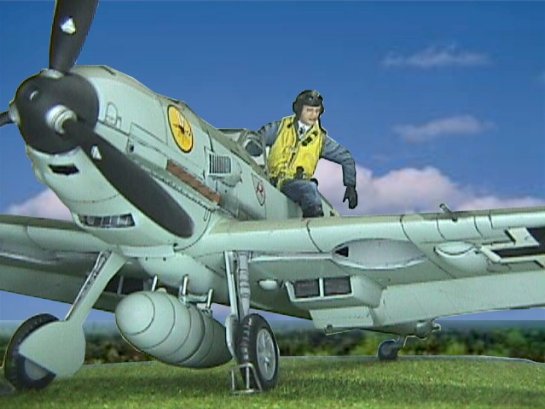
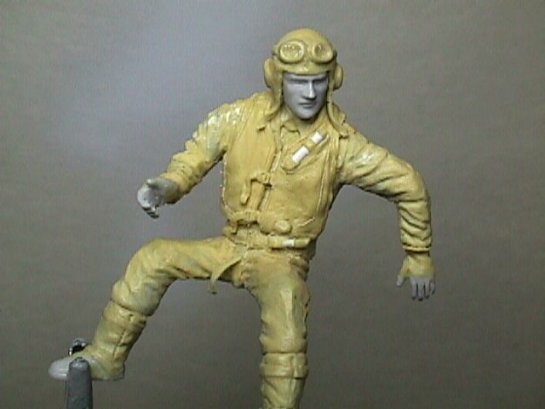
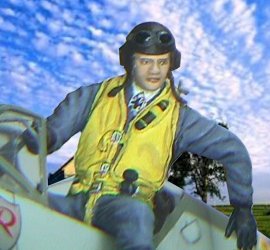
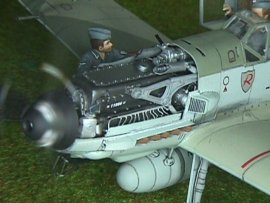
Since I decided to make this a "posable" diorama, I also reworked another Fujimi figure and posed him as a pilot climbing out of the cockpit after a mission. For this I cut out the figure in all its joints, drilled small holes and affixed the parts back with wire pins. This technique gave me the opportunity to pose the figure, as I wanted. After that, I filled the gaps of every joint and made the flight jacket (Luftwaffe standard of the day), the trouser, the boots, gloves, life jacket and flight helmet with the Tamiya putty. Painting was accomplished with artists oil's (such as the other two figures).

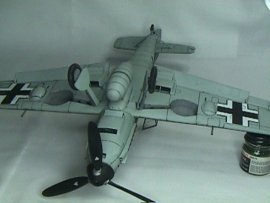
THE FINISHED MODEL
All the effort, the countless hours of work, the four months of building time, hopes and dreams do pay off when you get the final product. The following pictures depict the finished model. Note that this model has an electric motor inside the Daimler-Benz D601 to spin the propeller.
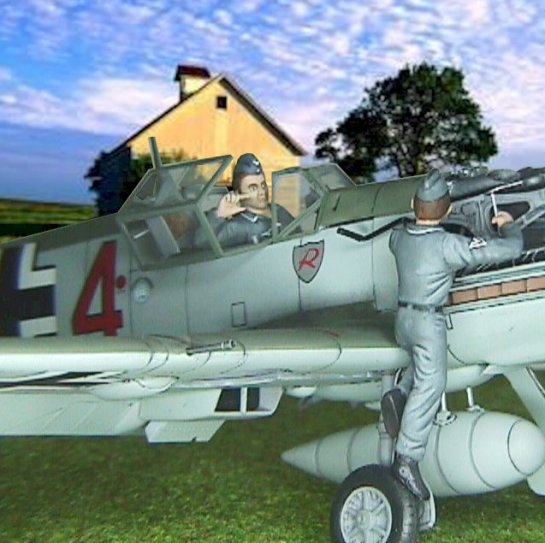
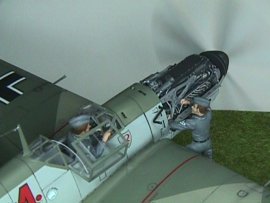
Furthermore, I made this aircraft and the diorama "posable". One scene depicts the pilot, Hauptmann Josef Wurmheller climbing out of the cockpit after arriving from a mission. The other scene depicts the engine cowling removed, and a mechanic working with the engine (perhaps fine tuning it) with another mechanic in the cockpit and the engine running.
CONCLUSION
Making this model to the level of complexity and detail I decided to add was a very rewarding experience. I'm very pleased with the end result, and it makes a fine addition to my collection. The only drawback of this large scale is the lack of space to display it. For the better part of the project I estimate over 150 hours of work in the course of four months. As for the model itself, Airfix 1/24 scale models were the pioneers in the scale, and allowed modelers to experience the thrill of building large and super detailing big time, however, it is a shame that with all those excellent aftermarket products, no one has thought of making some for the 1/24 scale series, other than the most recent set in the market for the Fw 190. I'm looking forward to see what Trumpeter will bring us in their upcoming 1/24 scale series, and if they apply the same level of details as they did with their 1/32 scale A-10, I'm in for more 1/24 aircraft and less space to display them. My next large project will be the Airfix 1/24 scale Harrier. For this one I have already ordered the Flight Path's excellent detail kit and accessories. I plan to do a "possible" diorama portraying the Harrier in maintenance and ready for flight, (I guess I like tough projects). Until the next one...
© George Mustafa
This article was published on Wednesday, July 20 2011; Last modified on Saturday, May 14 2016