
I.D. Models 1/32 Dewotine D.520
By Rick Cotton
Much has been written already about the chaotic state of the French Air Force in World War II's early years, and I will not add to that. Suffice it to say that the Dewoitine D.520 just made it in time to fight, and gave a decent account of itself against the Bf 109E before France's fall, and then soldiered on for Vichy before the end of the war.
I acquired an ID 1/32 D.520 a few months back, and immediately started cutting and sanding. The main wing, fuselage, and elevator shapes are provided, along with a clear one-piece canopy, a spinner, some bad landing gear outlines, and a 1/32 scale drawing. That's it. Everything else, including the decals, is your baby.
I started as usual by cutting apart the parts and treating them to a few passes on my electric belt sander (thank God for that thing!), followed by sanding on flat sheets of progressively smoother paper. I first primed all the parts with Testors Panzer Gray. Following that, I scribed the panel lines with an exacto and a Squadron scriber, using the provided drawing as a guide, then sanded again, followed by brushing out the sanding dust from the panel lines with a stiff toothbrush. I then cut out the canopy areas and the rear quarter windows, using a brass pattern I cut from the drawing. This was made more difficult by the fact that the kit was old and the canopy had become both yellow and brittle.
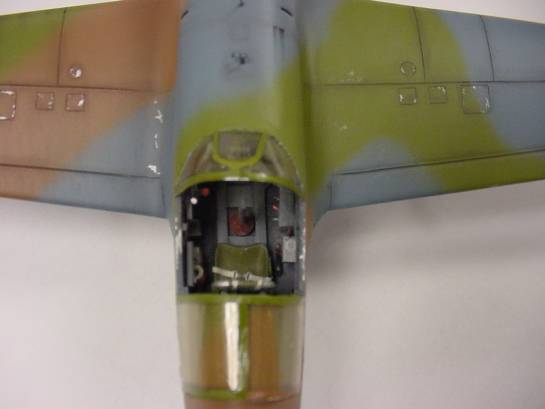
D.520 interior reference photos are rarer than Christmas parties at Osama Bin Ladin's house, so I had to rely on what I could find, some on the net, some by staring into 1/48th D.520 models at friend's houses, and some by using the instructions from the Tamiya kit. The interior base color was a very dark bluish-gray, which I simulated with a mix of 90% Testors Panzer Gray, 9% Testors Blue Angel Blue, and a few drops of White. The seat, pirated from an old Monogram P-51 and reworked, was painted a light khaki color, with light gray belts and leftover buckles from some long-past project. A fire extinguisher came from an old Tiger tank, and various levers, cranks, boxes and other bits from the parts box.
There was a set of Roberts Model parts included with the kit when I got it, so after discarding the items from it that were obviously of no use, I was left with a set of engine exhausts, a tailwheel. two main struts and wheels, and a set of prop blades. The wheels looked suspiciously like a set of early P-51 wheels, but, since I was short on references, I used them anyway along with the struts. Simple wire brakelines were added, and on they went.
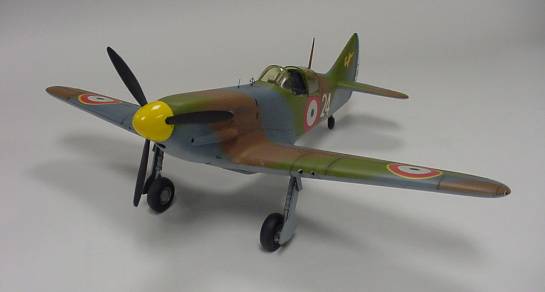
The kit spinner was a total washout - it was badly mis-molded, so I substituted one from a Revell Spitfire. The resin blades went in with a minimum of difficulty.
The small size of the kit (something slightly smaller than a Hurricane) negated the need for a wing spar so assembly went forward in the usual method for a vacuform…wait till the kids are asleep so they don't hear the swearing…lots of putty (Tamiya), lots of scrap plastic, and lots of measuring back and forth with the drawing, and lots of sanding 'til your arm falls off. Finally the little French beast was ready for masking & painting.
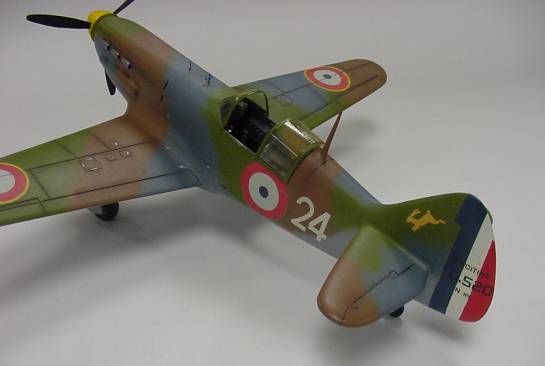
I used the Polly S French Air Force acrylic range on this kit, thinned with the Polly S airbrush thinner, which is largely an alcohol and glycol mixture. The colors used were French Light Blue-Gray on the undersides, French Dark Blue-Gray on the topsides, with camouflage consisting of French Earth Brown and French Khaki. The paint worked to perfection, resulting in a very smooth uniform color scheme portraying a relatively new aircraft from that summer of 1940.
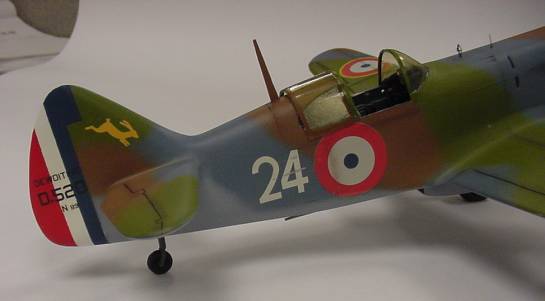
OK, YOU tell me where to get 1/32 D.520 decals, or for that matter ANY 1/32 decals for pre-November 1940 French airplanes. Couldn't find any on this planet, so I had to scrounge them all from the spares box. Old Matchbox SBD spares contributed the roundels, the others came from lots of little scrap sheets of unknown origin. Weathering is pastel chalk dust applied judiciously for exhaust and gun muzzle stains, a few oil leaks (black ink), and some very minor silver chipping (Testors silver).
It's not a perfect D.520, but then I've never built a perfect kit, and never will. I like it, it LOOKS like a D.520, and it fills an important gap in my 1/32 collection, as well as giving me a bit of practice time before I try tackling the 1/32 ID Yak-3.

This article was published on Wednesday, July 20 2011; Last modified on Saturday, May 14 2016