
Pacific Coast Models 1/32 Reggiane Re 2005 Sagittario
By Rick Cotton
They may not have been the fastest. They may not have been the most technologically advanced. They certainly weren’t the most successful. But there’s just something sexy about Italian WW2 fighters.
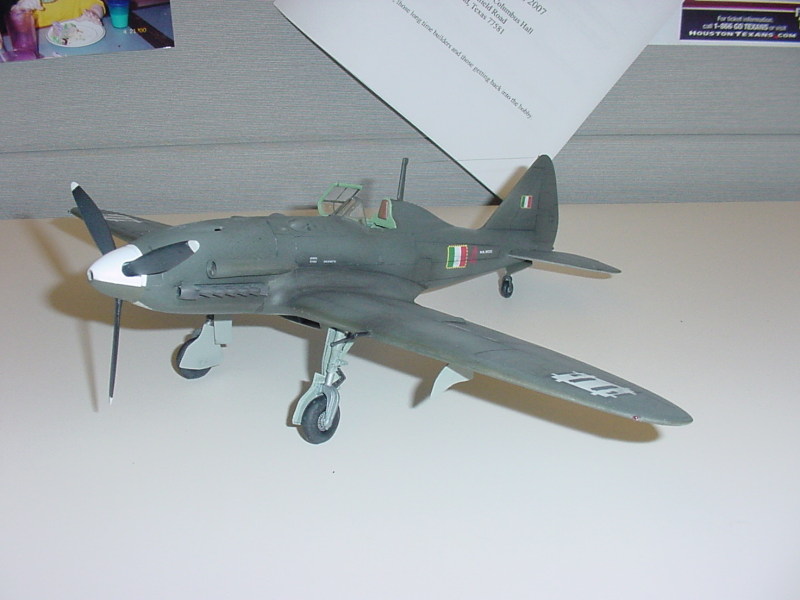
The Reggiane RE.2005 Sagittario (“Archer”) certainly fits that mold, with it’s graceful, almost art-deco curves, it’s slender nose, and it’s purposeful looks. But, like it’s Macchi and Fiat stablemates, this thoroughbred was too little, too late. A scant handful, perhaps less than 50 reached operational status, first with the dying Regia Aeronautica in the last days of Mussolini’s empire, then soldiering on in German-occupied Northern Italy with the fascist puppet government’s air force, the ANR. No complete examples survive today, only a partial fuselage remains of this once proud bird.
Those of you who have tackled the Pacific Coast Models 1/32 Macchi series know that these kits were not the easiest in the world to build. Like your author, you probably said a few colorful things while trying to sand, carve, sand, grind, sand, cut, sand, saw, and sand one of these into something resembling a fitting kit. Now Pacific Coast releases the RE.2005…
Rejoice, Italian aircraft fans. This is an entirely new animal.
Pacific Coast, in a smart decision, had the molds for the plastic in this kit made by a different maker, Sword models, resulting in a much better-fitting kit. I used a bit of putty, but nothing out of the ordinary. Plus, you get full resin in gorgeous detail, Eduard color photoetch, and PCM’s knockout decals & color marking guide, all included in a very complete kit.
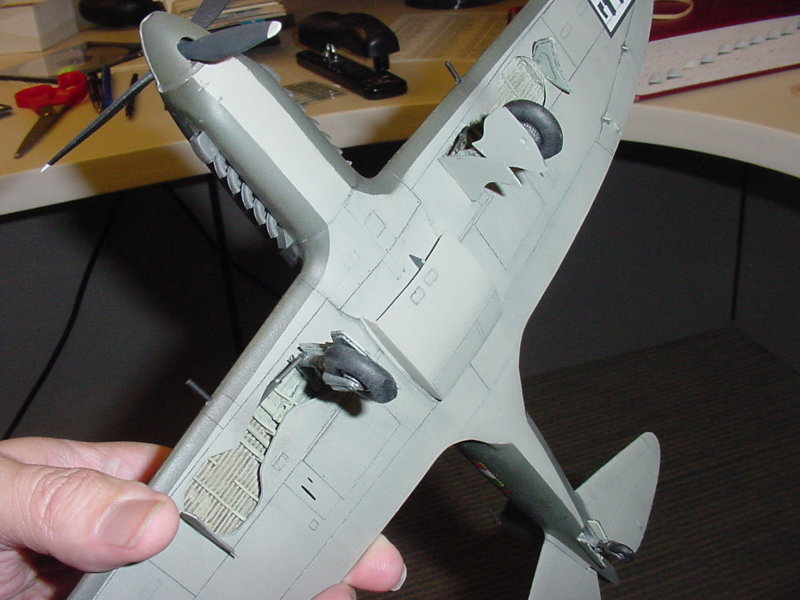
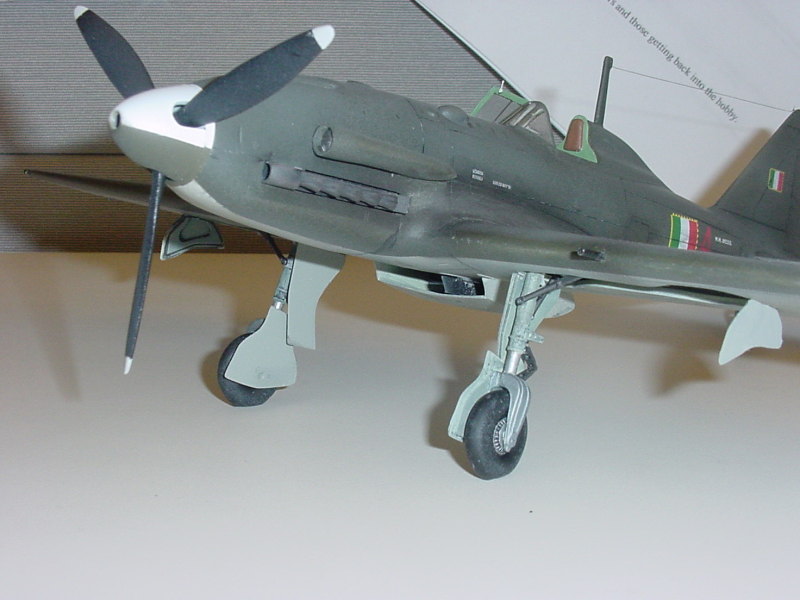
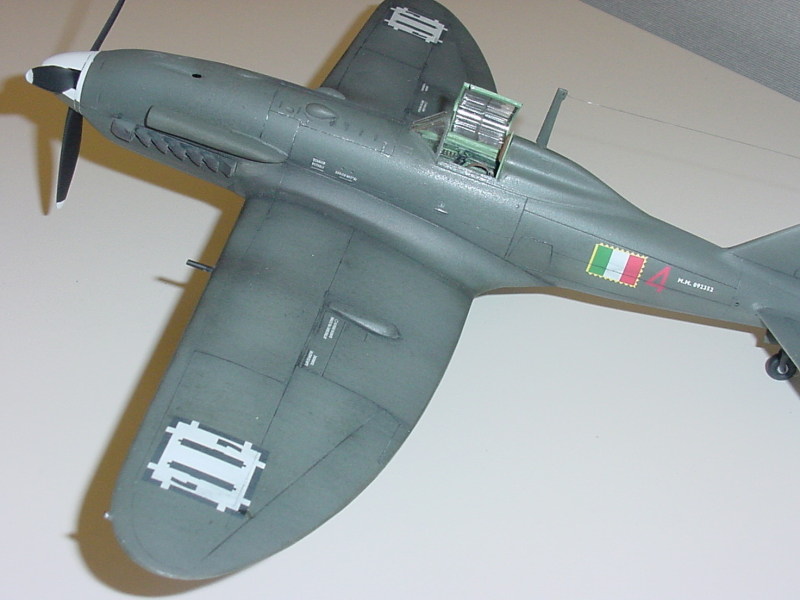
The plastic parts feature a smooth, shiny surface with reasonably petite recessed panel lines (next to no rivets), and thin, clear, distortion-free canopy and windscreen. There are relatively few plastic parts….the horizontal stabilizers are single pieces. Where one’s eyes will bug out, however, are the resin parts, a big bag of them, featuring a beautifully-detailed cockpit, wheel wells, weighted tires, exhausts, oil cooler, and more. The photoetch is extensive, and provides the elusive Italian pilot harness that no one else seems to get just right, along with other detail parts. There is an option of a photoetch control panel, or a cast resin one.
I began with construction of the cockpit, and after some test fitting, decided to attach the cockpit sidewalls to the fuselage first. This revealed the first of only two significant fit problems. The starboard resin cockpit wall is molded with two oxygen tanks, with should pass through a lightening hole in the fuselage former at the back of the cockpit when it’s assembled. Turns out this hole needed to be moved a bit up to get the tanks through,,,no big deal, just a bit of judicious reaming with a sharp #11 and a rat tail file. Problem solved. I taped the fuselage halves together, and superglued the left side of the former into place, and allowed it to dry thoroughly. Everything else lined up on these parts nicely. The second problem occurred when I discovered the photoetched instrument panel to be a bit wider than the inside of the fuselage (don’t know if the cast panel fits well or not). A few careful snips with some sharp surgical scissors, and the panel went in.
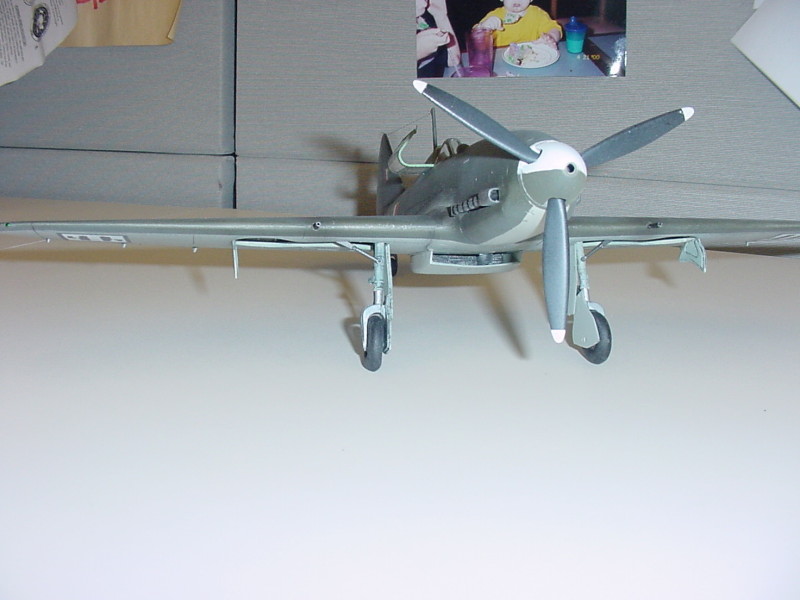
The remainder of the assembly was pretty straightforward. The resin wheel wells were sanded flush on their pour stub sides, and superglued into position on top of the lower wing half. Test fitting revealed only a bit more sanding needed to get the wing gap to close. Fit of the wings is pretty good, and they should be pretty flat in alignment. Remember, the RE.2005, much like the British Hurricane, had almost no dihedral. I replaced the kit-supplied resin wing guns with some brass tubing, although the resin parts were very good.
Take care attaching the landing gear. The receiving holes for the struts will need to be reamed out a bit, and the struts trimmed to get a good tight fit. The weighted resin wheels are beautiful, and need only a bit of reaming out in the center of the hub to get a nice, flush fit to the strut.
When it came time to install the cockpit headrest/armor plate, instead of trying to clean out the end of the fuselage coaming to receive the part, I simply sanded the back of the headrest flush, and it glued perfectly into place with no fuss. Easy solution.
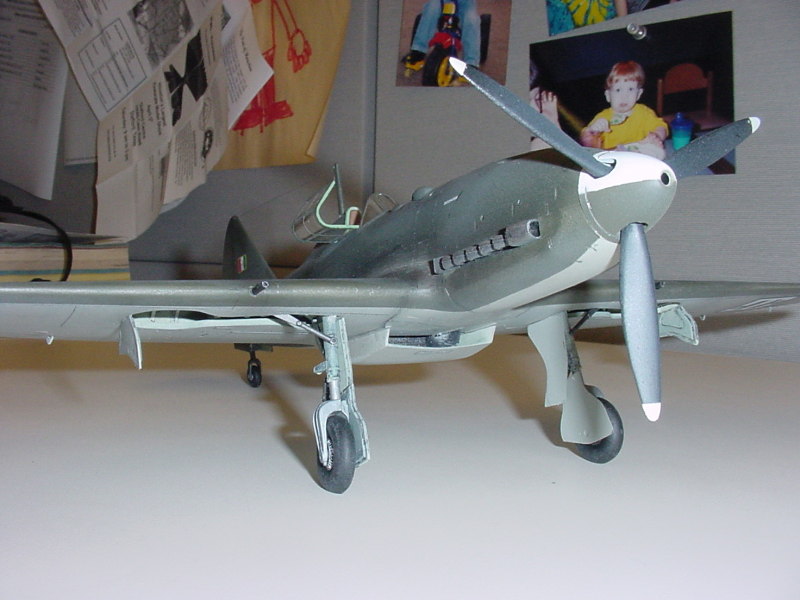
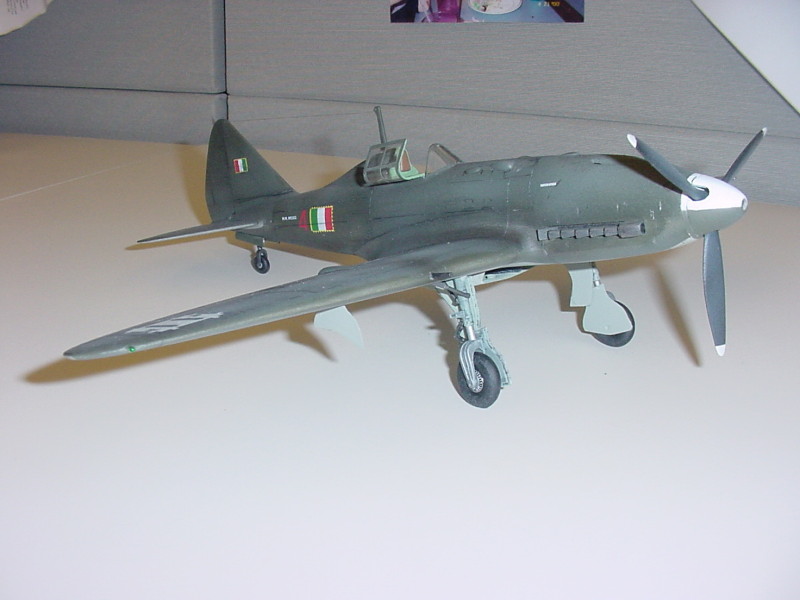
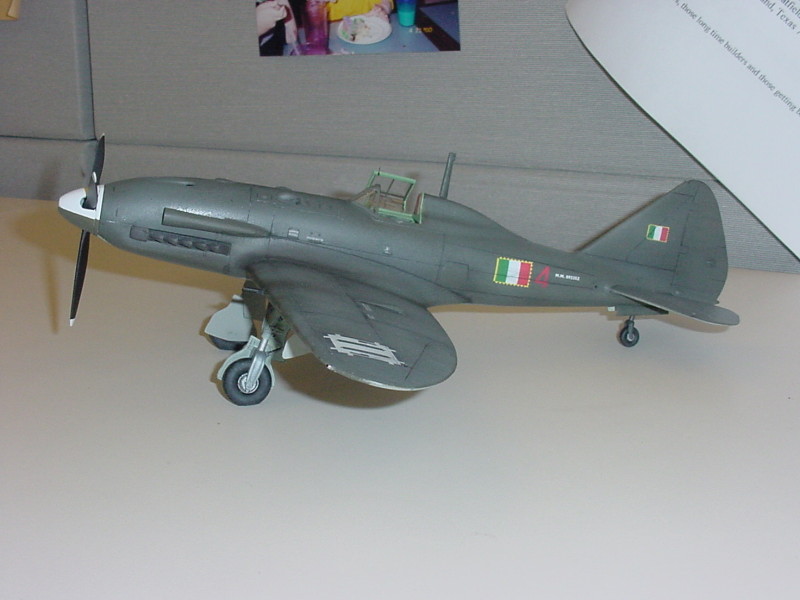
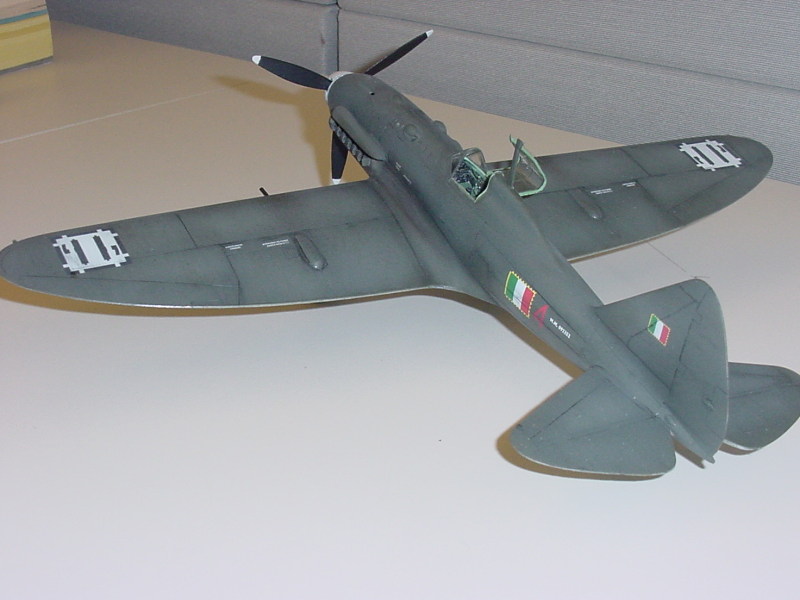
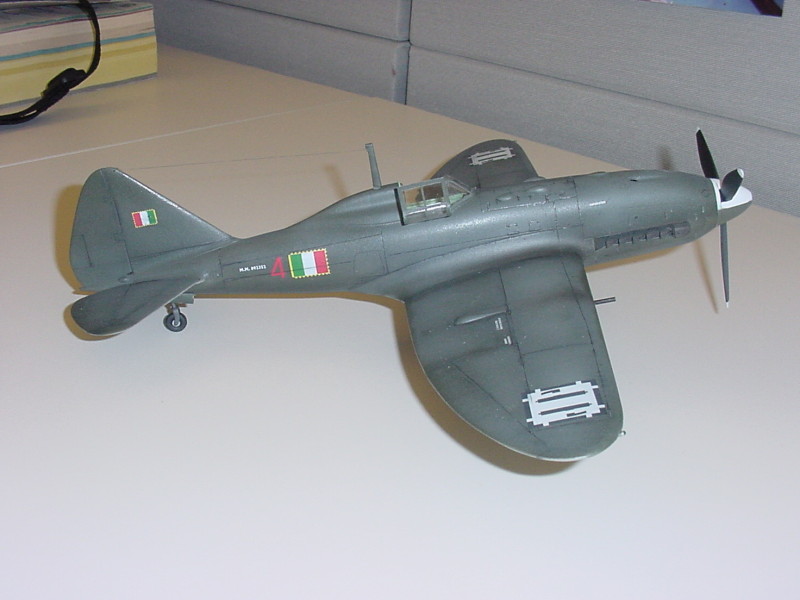
Now, I am a huge fan of all those wild sand-and-spinach, or smoke ring, or multi-color blotch camo patterns on Italian aircraft. Unfortunately, it appears that all 50 or so RE.2005’s were painted Dark Olive Green over Light Blue Gray. Fortunately, Pollyscale acrylics makes exactly those two colors, and I just happened to have some (imagine that). Since my Veltro, Folgore, and Saetta all wear RA tail crosses and fuselage bands, I elected to go with the less-often seen ANR marking option in the kit, as this would also allow me to do a more weathered operational bird, instead of the shiny prototype bird well-documented on the Web. I pre-shaded all panel lines with Tamiya Flat Black, and then applied the Pollyscale camo colors, gray underside first, then a heavily faded Olive Green topside (Mediterranean sun). The decals performed flawlessly, as usual, over a couple of coats of Future. They were sealed with Future, then Testors Acrylic Flat, followed by watercolor washes to pick out the panel lines. A Prismacolor silver pencil was used for minimal chipping, and a nasty mix of black and browns was airbrushed for exhaust staining.
There you have it. A rare and beautiful bird, in a decent-fitting kit, from a company that actually cares (gasp!) about it’s customers. And the price? Considering the huge amount of resin, the full photoetch, and the excellent decals, it’s an absolute steal at about 60 bucks USD, shipped!
Well done, Pacific Coast Models!
PS: I too chided Mr. Lawrence about the upcoming Spitfire kits, and he was forthright enough to respond directly to my concerns…a real gentleman! Hey, Ken…..since you might consider non-Italian subjects….. a 1/32 Nakajima Jill would be very cool!
© Rick Cotton 2007
This article was published on Wednesday, July 20 2011; Last modified on Saturday, May 14 2016