
Tamiya's 1/32 A6M5 Zero
By Rick Cotton
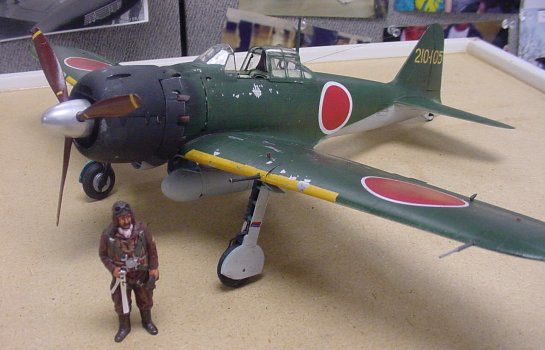
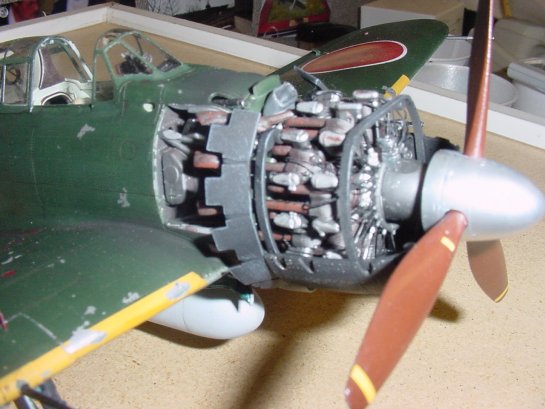
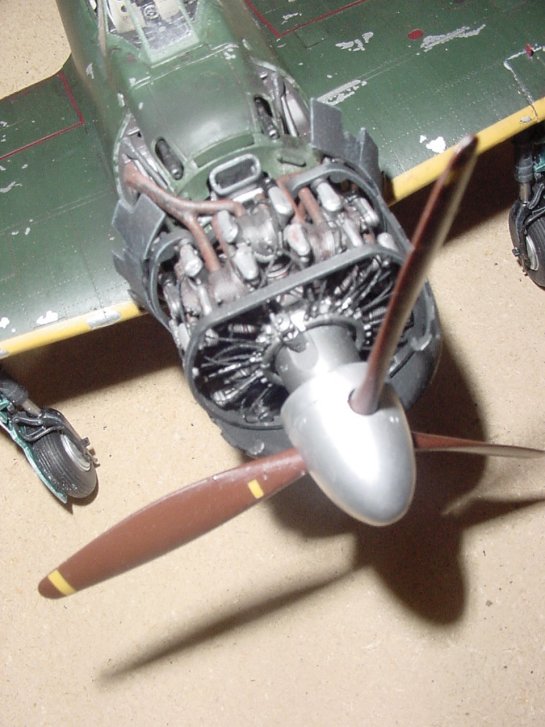
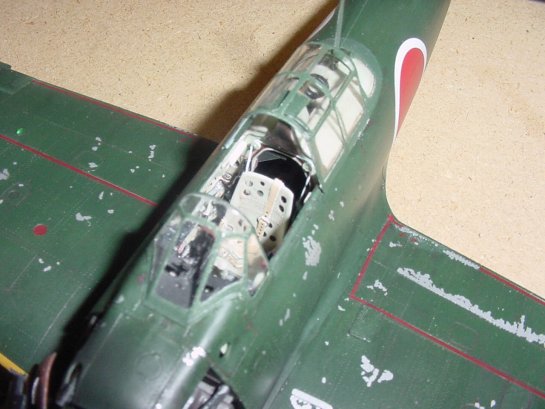
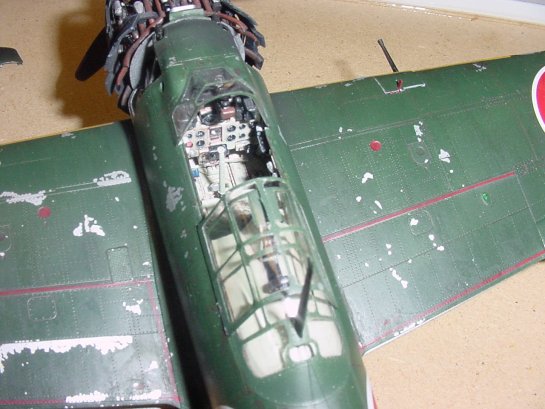
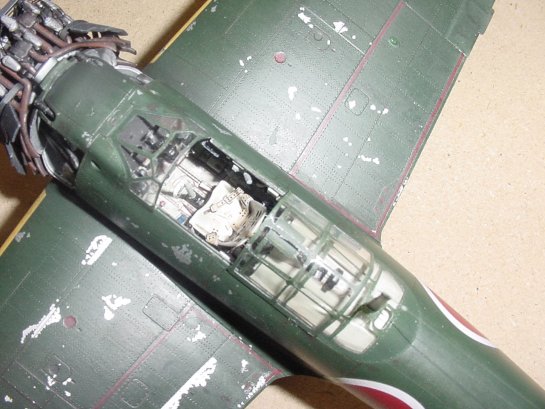
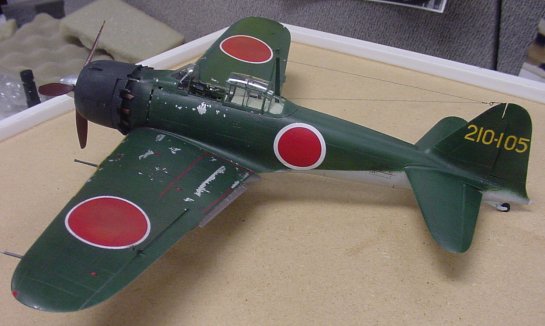
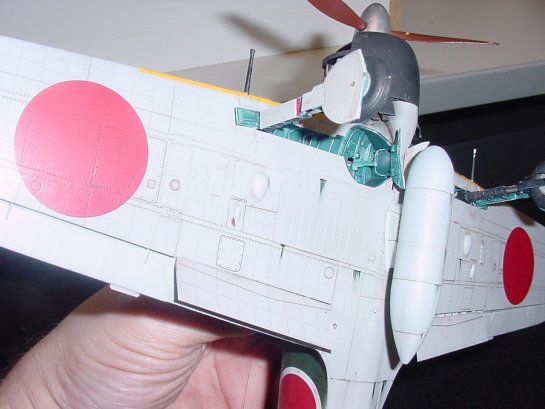
By now, several reviews exist on the Web about the new Tamiya 1/32 Zero, so I won't excessively belabor the point. This kit is, in my opinion, the finest, most comprehensive, and best engineered plastic model of any scale, type, or subject I have ever had the pleasure of building. It's inaccuracies are few, the fit is near-perfect, and the detailing is fantastic. I'm one of those nuts who loves to add bits and pieces, and I could find next to nothing to add, the kit is that complete. I added engine wiring, a bungee cord on the seat assembly, and that's about it. It didn't need much, if anything, else.
I built my Zeke as a Nakajima-built example, which means using the "bamboo color" Nakajima Interior Green (noticeably lighter than Mitsubishi Interior Green) . I used Tamiya Interior Green (produced especially for this kit) as my basic cockpit color, washed with a dirty brown watercolor wash, and then drybrushed with varying lighter shades of the cockpit green. A bit of silver drybrushed on wear spots finished it off. The kit belts and buckles were used. These could be improved in future releases, but they're OK when installed. I recommend using lead foil or tape to replace the kit belts.
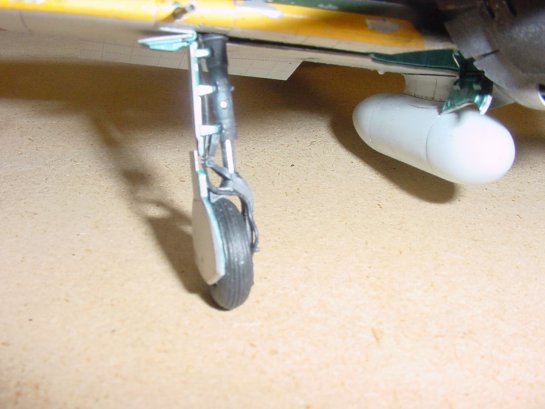
A word about the operating landing gear. Mine work, but I will only use them once. Up for the paint job, then back down again for good. Mr Tamiya, please leave the operating features to the 1/48 Monogram kits from the '60s. They aren't worth the bother, and they just complicate matters. 'Nuff said.
The canopy masks provided in the kit worked well, and came back off with no problems.
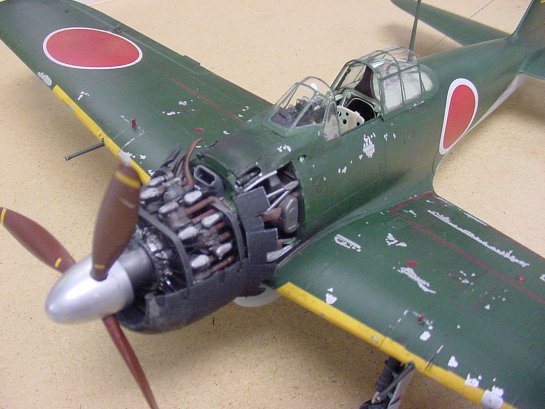
Painting time. OK, you want green over gray or gray under green? I really wish there was another option for this bird. I have seen paintings of Zeros based in Wonsan, Korea that had Trainer Orange undersides with green topsides, but I have no good documentation for them, so I went with one of the kit options. I painted with Pollyscale Acrylics, using IJN Green over IJN Gray, and then gloss coated with Future. The thick decals settled down nicely when I put Micro Sol UNDER them and allowed them to dry. Watch the placement of the Yellow ID stripes on the wing leading edge, it's easy to get them mis-located.
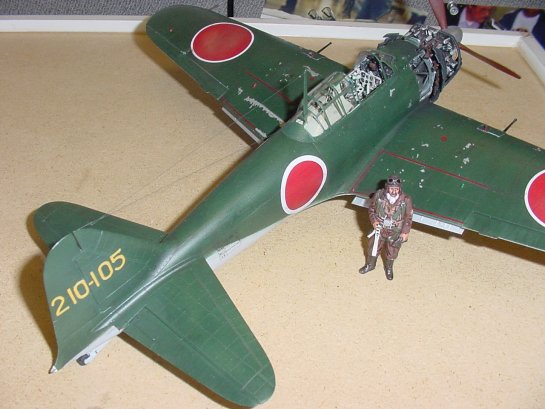
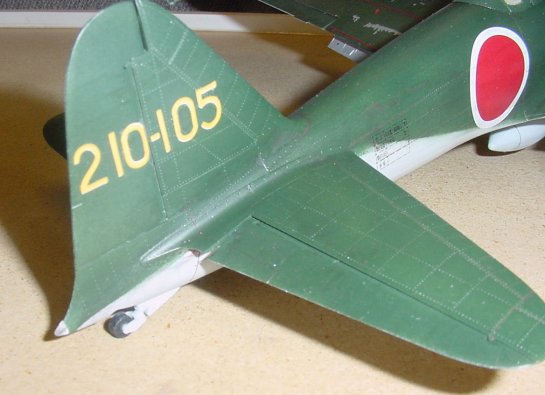
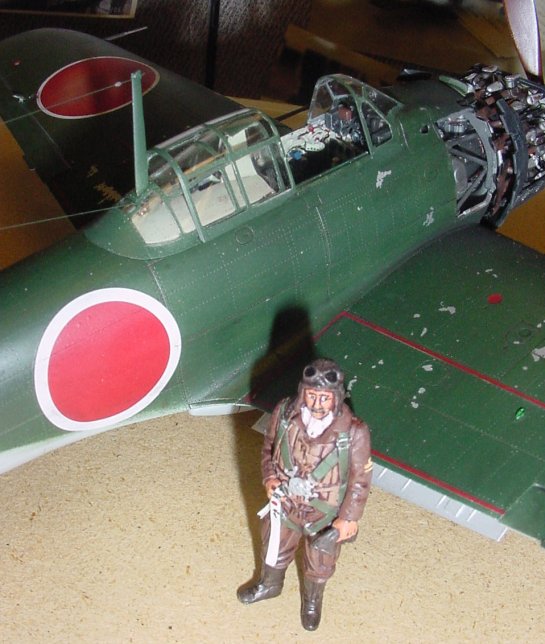
Weathering was the usual mix of water color wash, drybrushing, and pastel chalks.
This is a super kit...but it isn't perfect. The belts need replacing and there are numerous sinkholes in the flap areas and on the landing gear doors. The working gear unnecessarily complicate things, although they do ease painting by being retractable. Should these points keep you from building this kit? NO WAY!!!!! This thing's more detailed than the Federal Budget, and fits tighter than Britney Spears' pants. I just hope there are more of these super-detailed jewels coming soon. Tony...Jack...George...better yet, Jill...Grace...Dinah...I can dream can't I?
© Rick Cotton 2002
This article was published on Wednesday, July 20 2011; Last modified on Friday, February 03 2017