
Revell 1/32 P-38M Night Lightning Shady Lady
By Suresh Nathan
I’ve been working myself up to this model for the longest time. I had gotten all the pieces but was hindered by the lack of decals. At some point (it was late I remember, and a 6-pack of Bud had something to do with it but after that everything was a blur) I decided to bite the bullet and go for it.
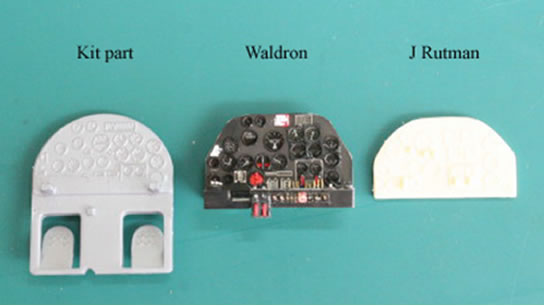
I decided to go with Revell for the base kit with the J Rutman P-38M conversion and P-38 upgrade. Also, Waldron provided the instrument panel. Yes, yes, I know, the Trumpeter kit is the de facto P-38 standard but truth is I am a little nostalgic about these things and I do like the general shape of the Revell offering. The Trumpeter kit (which I do have) is a little, well, wimpy (IMHO).
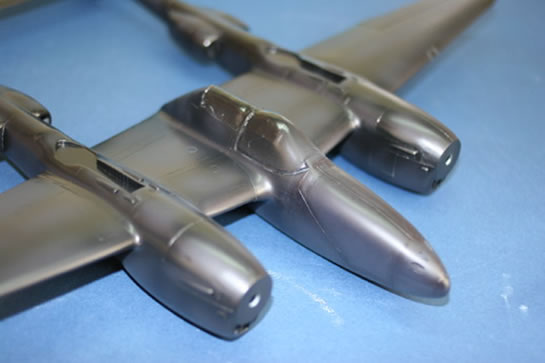
Anyway, I started by sanding down the entire kit and rescribing panel lines according to drawings in Squadron’s P-38 Lightning In Action. Riveting was kept to a minimum. Anyone attempting this should realize that the Revell panel lines are (totally) off.
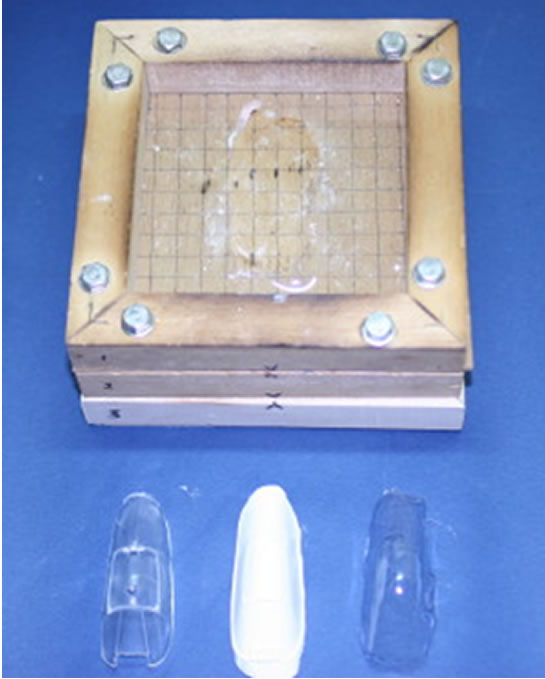
Next I made a plaster male cast of the kit canopy and vacuum-formed a couple of canopies (this served as both the cockpit mask during painting as well as the final canopy (which was dipped in Future floor wax).
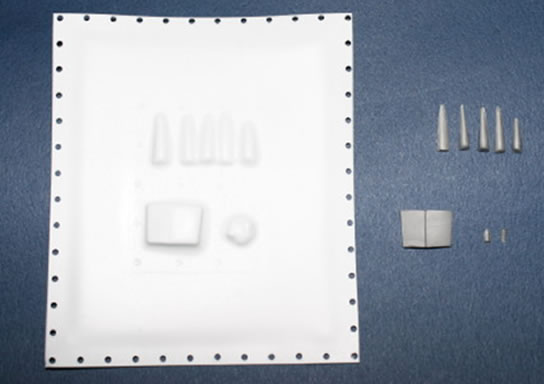
I trimmed off all air brakes and scoops and vacuum formed new ones over the cut-off bits.
All bits were dry- fitted repeatedly.

Choosing the instrument panel was a challenge. As can be seen, the Waldron set was the clear winner. I didn’t use the rest of the Waldron set because the Rutman set was available. Truth is, the Waldron set is extremely accurate but just too fiddly (you’d expect a Liluputian pilot to get in an fly the thing off when your done!)
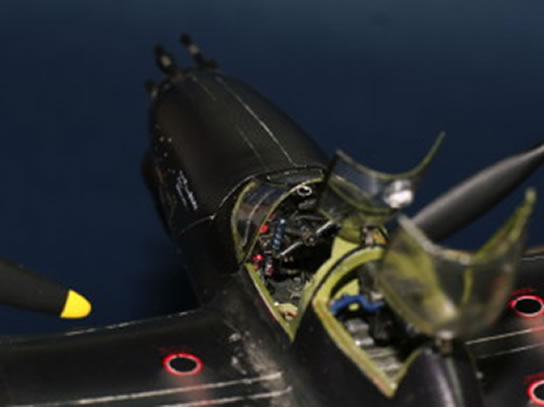
I painted the cockpit details and glued everything in place. Alas, by the time I was done, the instrument panel couldn’t be seen. (Sigh!) At least, as they say, I know it’s there.
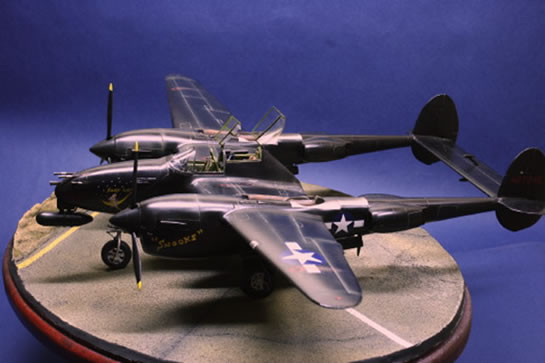
With the mock canopy in place, I sprayed the whole plane Tamiya satin black (from the can). This was then panel shaded using blue grey.
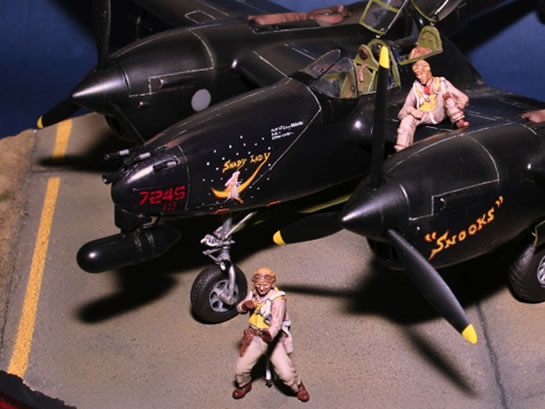
The plane was covered in gloss varnish and decaled – the roundels and fuel port rings came from an old Superscale set. Stenciling was done by hand. The nose art was hand-painted. Interestingly, in my earlier research I thought that the plane I was depicting was “Sassy Lady”.
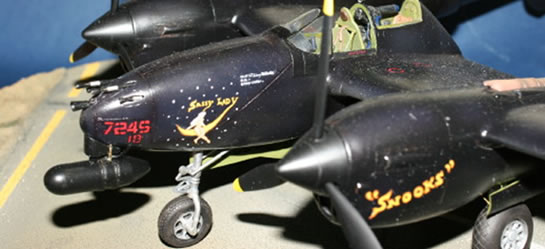
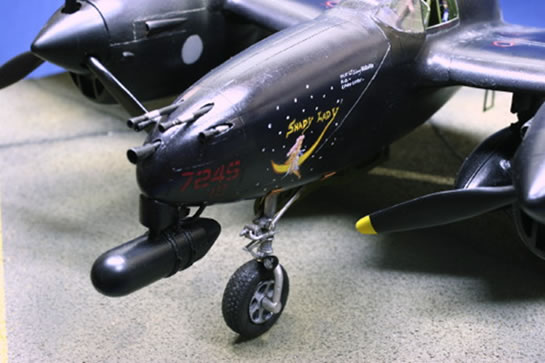
I learned only much later that it was “Shady Lady” who was far less skimpily dressed. I made the changes and the craft was none the worse for wear. Interestingly, these two shots also show the nose undercarriage which I had to change few times to get the look I wanted. The light for the nose-wheel came from the spare part box. Note the crew ladder at the back of the middle sponson.
The whole model was coated in gloss varnish. Burnt sienna oil wash was generously applied and wiped off in a front to back direction. Chipping was done lightly with a scribing tool which allowed grey primer or silver kit plastic to show through (very convenient). Next soot, gunpowder streaks, oil-streaks, etc were added with an airbrush.

The undercarriage from J Rutman needed a little work to get it to fit right (lots of epoxy and gap-filling superglue). The all-metal struts were needed, as the kit requires a lot of weight to keep the nose down. I tend to think that the kit offering is actually more accurate but in the end strength won out to style. Styrene bits and wiring finished the job.
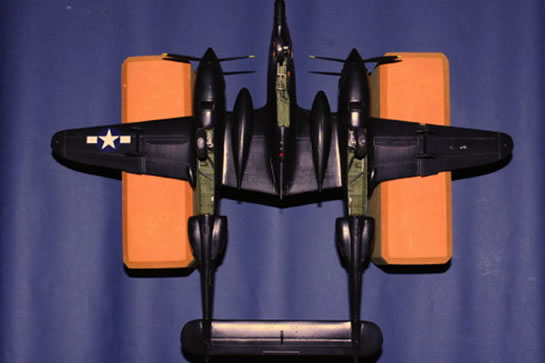
The left wing light was done by cutting a section of wing off, putting a lens into the defect and vacuum forming the glass cover over it.
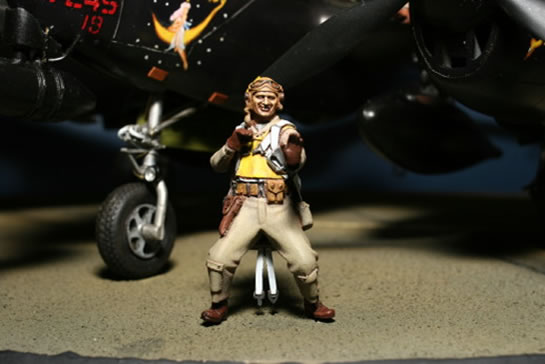
I like figures in my displays. These are hard to come by in this scale. If I can’t find them, I make them. The figures I used for this build came from PJ Productions and Andrea Miniatures.
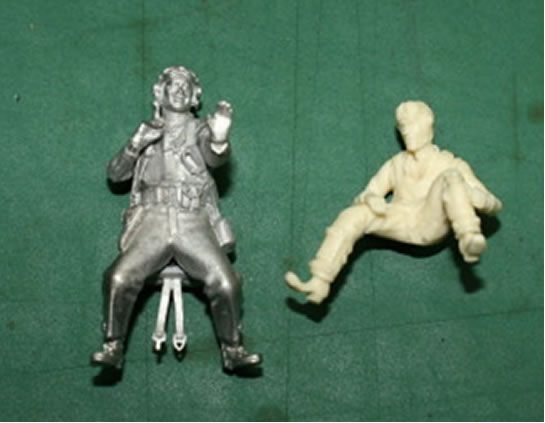
The venerable Andrea figure, IMHO, sets the standard for US fighter pilot figures. The figure has been copied at least twice and is in a word beautiful.
The PJ offering is by comparison not beautiful. With a lot of work and sculpting to add on volume to the limbs and a parachute with straps it’s pretty decent. Oh and don’t forget to hollow out the goggles.
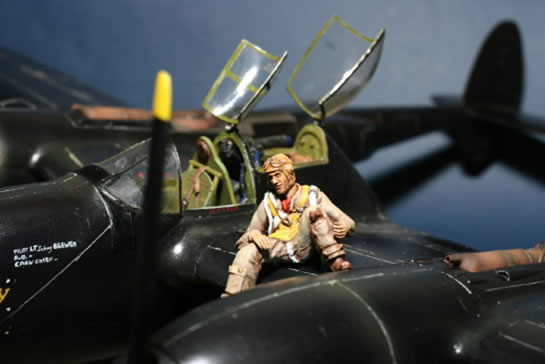
The figures in place you get a real feel for the size of this lady.
© Suresh Nathan 2005
This article was published on Wednesday, July 20 2011; Last modified on Saturday, May 14 2016