
Some Construction Notes on the 32nd Scratchbuilders Defiant
By Frank Mitchell
The Scratchbuilders Boulton-Paul Defiant will produce a very nice model even though there are a few problems to solve along the way. However, we are not likely to have another 32nd scale Defiant anytime soon, so this is the only game in town, and if it takes a little extra work, that just makes it better when the model comes out they way one would wish.
The molding, as usual with Scratchbulders kits, is beautifully done; in fact, I think that these kits have some of the nicest resin molding around. Probably related to that, however, is the fact that these kits take some planning ahead, since they tend to be broken down in ways that are not typical of most kits. Also, since they are aimed at the more experienced modeler, the instructions and drawings are not terribly extensive, but they are sufficient to let you know the broad sequence of construction. These notes are intended to supplement the instructions and to point out some areas that can use improvement.
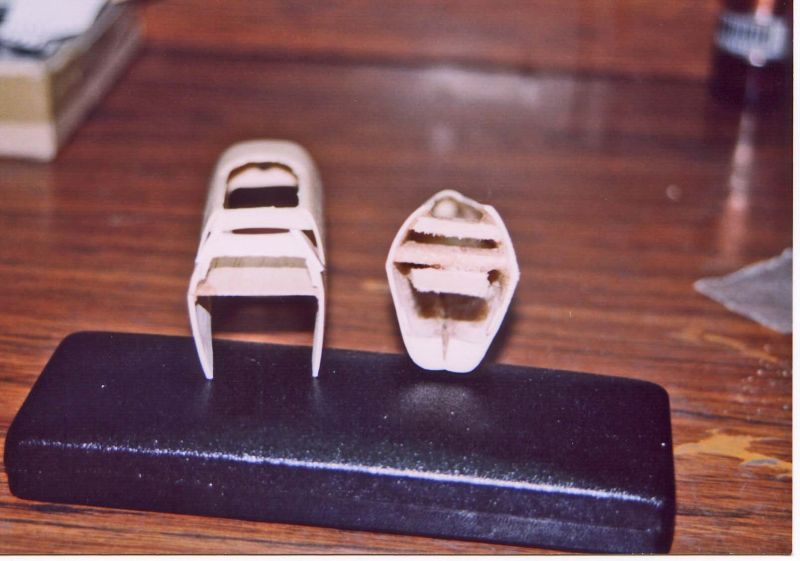
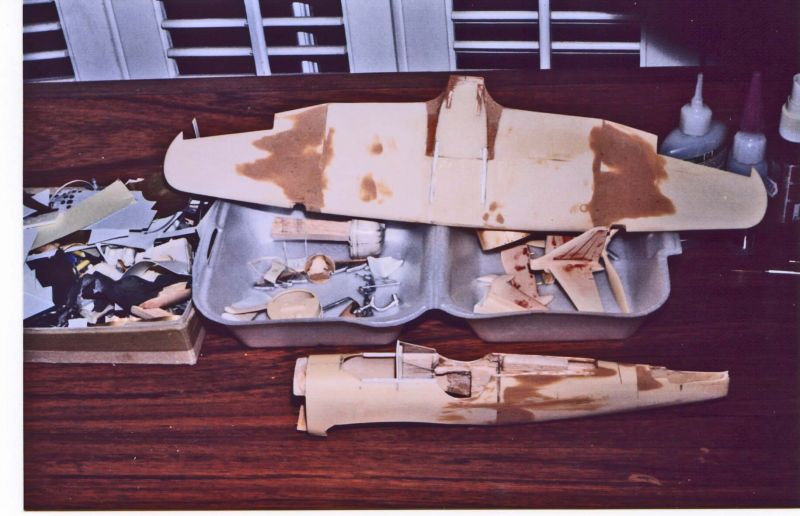
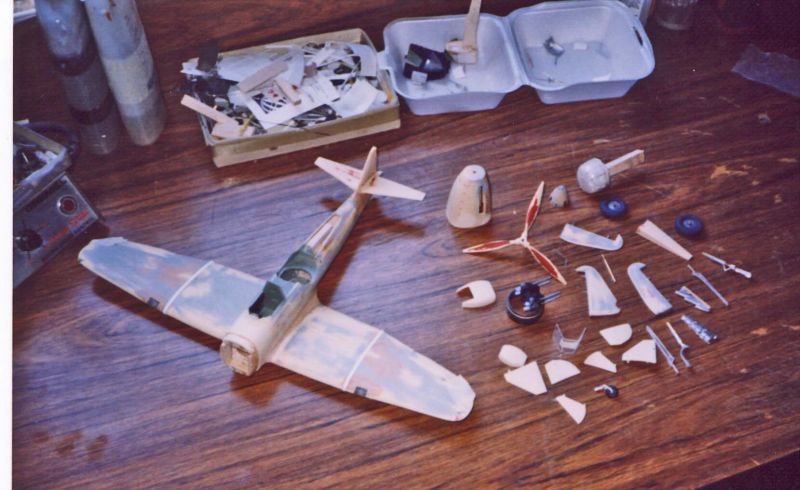
The first problem that I noticed was that the rear fuselage does not have the very characteristic triangular shape which actually begins before the turret and runs to the tail. That can be fixed by taking a wedge out of the bottom of the rear half of the fuselage and pulling it together, but I did that only after I inserted a piece of ¼” balsa at the level of the turret base (one must be careful not to put any braces through the pilot’s cockpit; it could not be detailed if you do). With that done, a wedge of resin can be cut out of the bottom of the rear fuselage. When the bottom is pulled together and superglued in place, the turret will still fit. Obviously, this rather major change will require similar changes to the front fuselage and to the wing center section.
The fairing behind the turret can be assembled up or down. I chose to have mine up, and that piece was fitted to the fuselage.
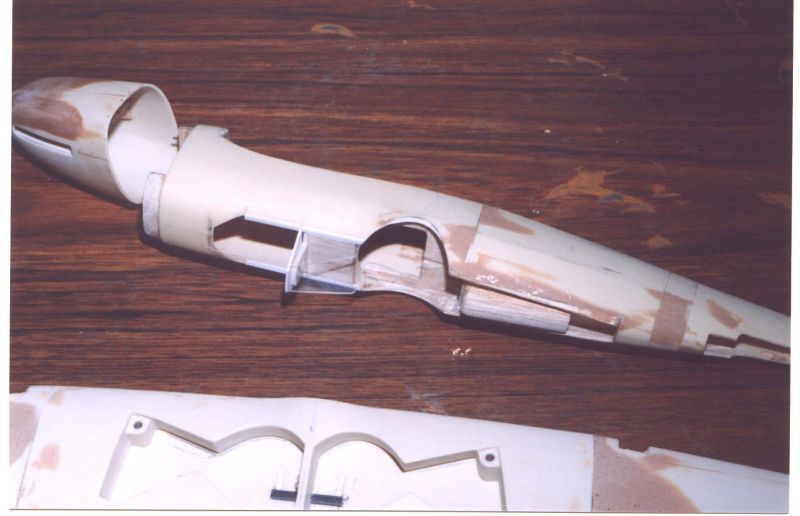
According to the references available to me, I felt that the cockpit forward of the turret was too short by about ¼”, and the “shortage” was in the area between the turret and the pilot’s canopy. I built up a new lengthened structure for this since it is straight sided with only a piece of metal for the retractable fairing. I used 32nd plexiglass for the sides and molded some styrene for the retractable fairing.
It is quite simple to move the pilot’s area forward since all that is necessary is to open the shape in the forward fuselage molding. All the interior pieces still fit fine. Once again, I made a new mold for the windscreen and canopy because of the frames and also because I felt that the top of the canopy was too curved; it should be flat on top with only tiny curved edge into the flat sides. All the kit’s interior pieces still fit, and pilot’s cockpit was now detailed.
I elected to leave out the engine, mounts, etc., and just use the cowling. I built a couple of small styrene shelves inside the cowling to mount the exhausts, and used some scrap pieces of wood to attach the cowling to the fuselage.
The top of the cowling is not round, but flat and slightly bulged on each side above the exhaust to go around the engine’s valve covers. A little subtle molding was carried out with epoxy. I also substituted a modified Revell P-51 spinner--I can’t prove that there is anything wrong with the kit one--I just thought the more pointy one matched the pictures and my drawings better. My opinion only.
Having the fixed portions of the tail molded together is a mixed blessing; nice for alignment, but since the horizontal stabilizers are too thick, the togetherness made it a bit awkward to thin. Also have to thin the control surfaces, of course, but the elevators are much worse that the rudder (which does need a bit of reshaping at the top).
From here on, the model pretty much followed normal practice. The landing gear and other details such as prop, exhausts, tail wheel, etc. were either modified or detailed as necessary.
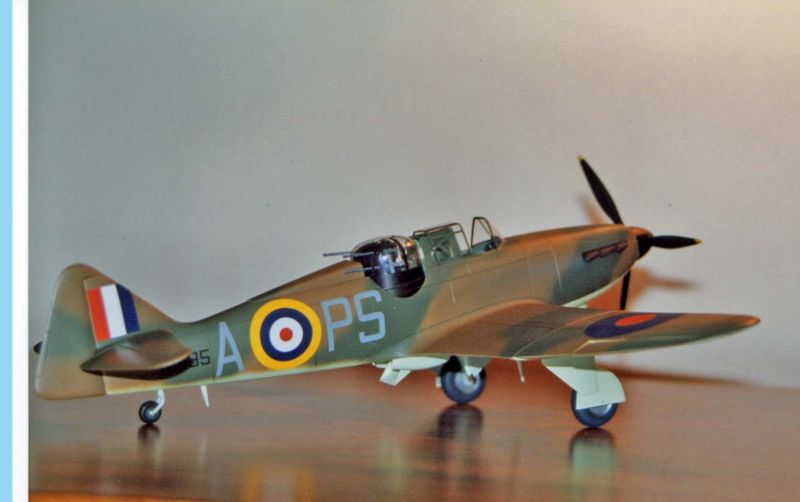
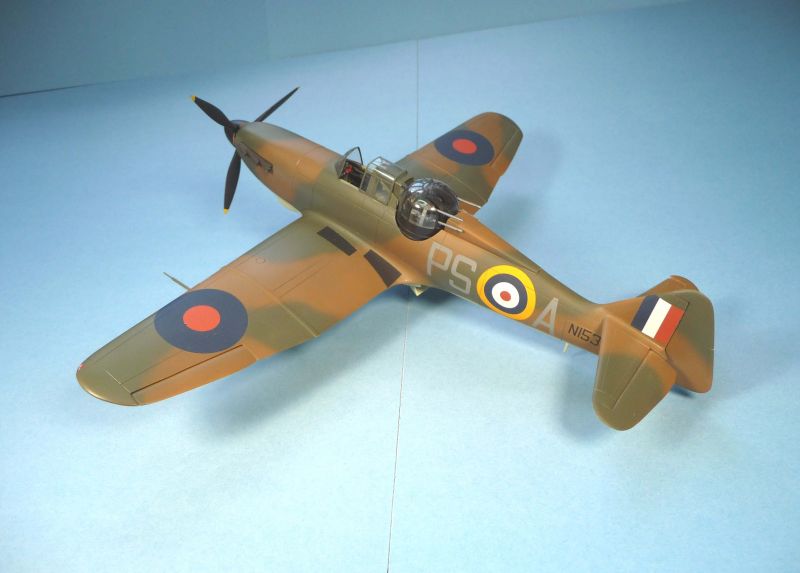
After the usual priming and sanding, the model was painted with Gunze paints and coated with Testor’s Gloss Coat. After the decals were applied, the model was overcoated with a mixture of Testor’s Gloss and Flat to get the desired sheen. I didn’t do much weathering if for no other reason than most of these aircraft (at least in day-fighter use) didn’t survive long enough to get badly faded, stained, etc.
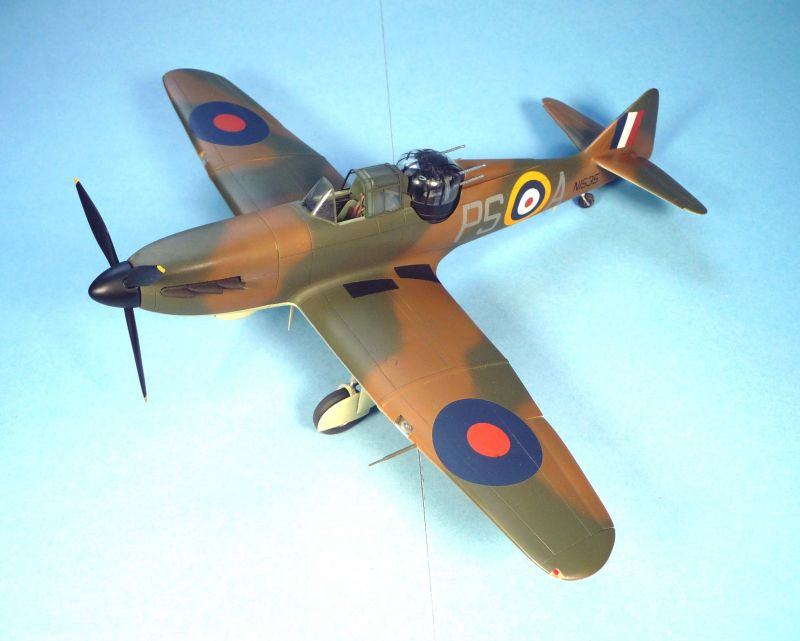
I am happy with my Defiant. It did take some effort, but that to me is what adds interest. As noted before, we are unlikely to get another, so I can recommend the Scratchbuilder’s kit to anyone that enjoys 32nd modeling.
© Frank Mitchell 2011
This article was published on Wednesday, December 14 2011; Last modified on Saturday, May 14 2016