
Trumpeter F6F-5 Hellcat in 1/32nd Scale
By Vince Pedulla
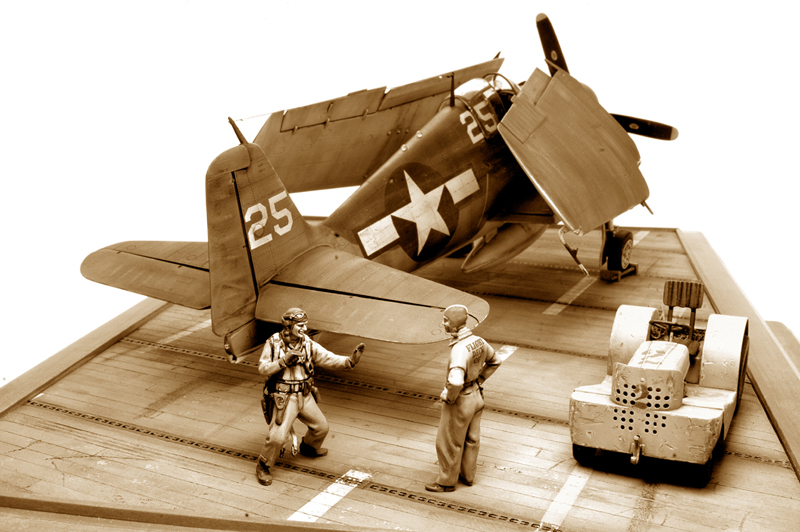
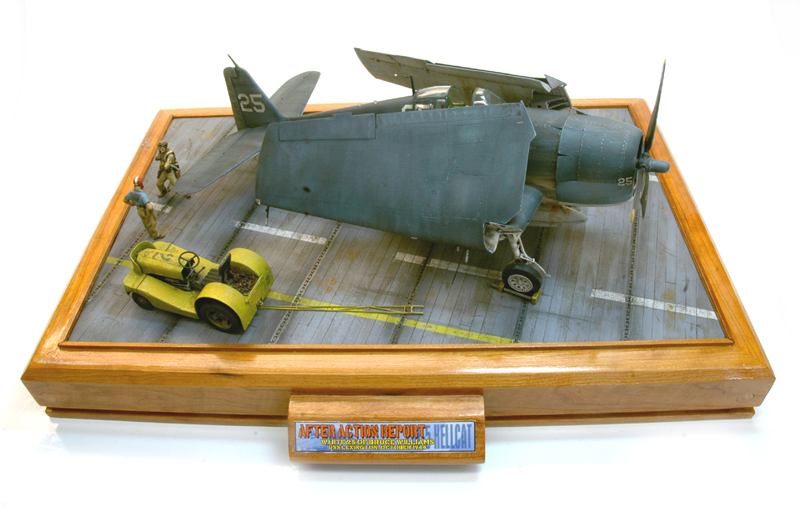
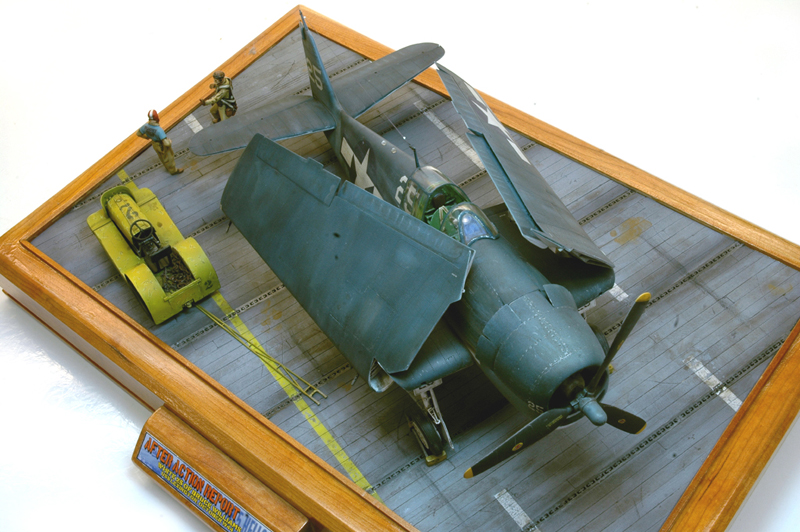
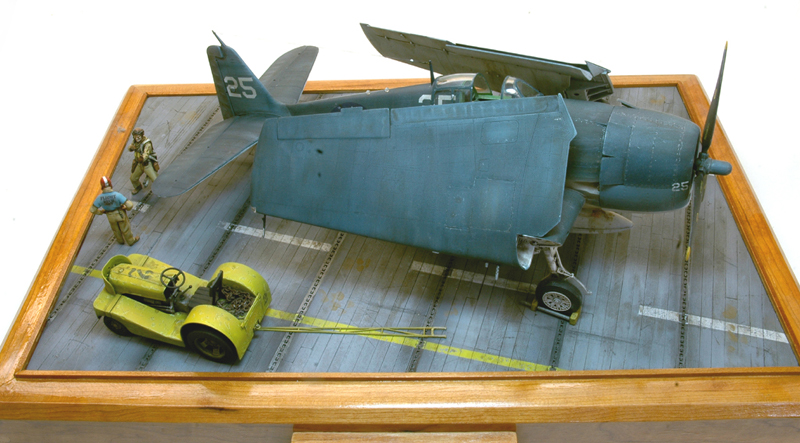
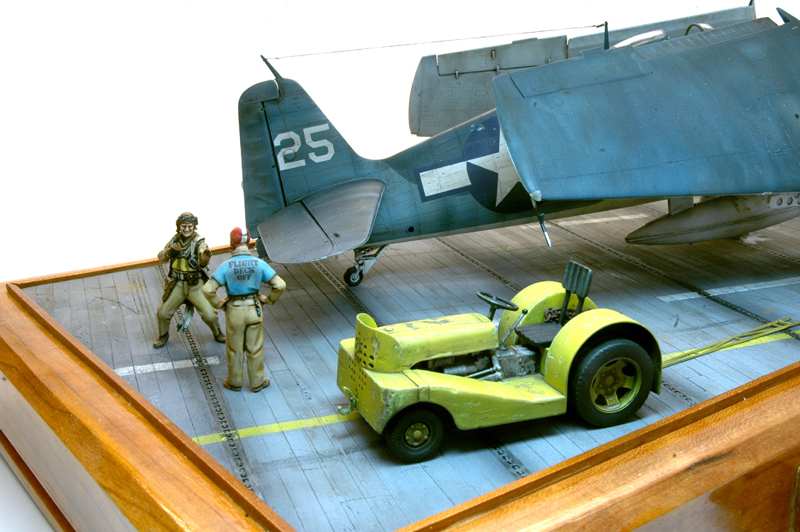
After completing a very complex diorama, with horses, mud, etc, I needed to do something simpler! I had picked up Trumpeter’s Hellcat at a local show for a good price, along with a sheet of decals from Techmod, which featured a three-tone scheme I liked. The Trump kit was actually the night fighter version, but it was very simple to convert to the standard gun fighter. The kit also came with a tow tractor, tow bar, and wheel chocks, making it a natural for a diorama scene. I intended to add a few after market parts as possible to keep costs down.
BIG CAT CONSTRUCTION
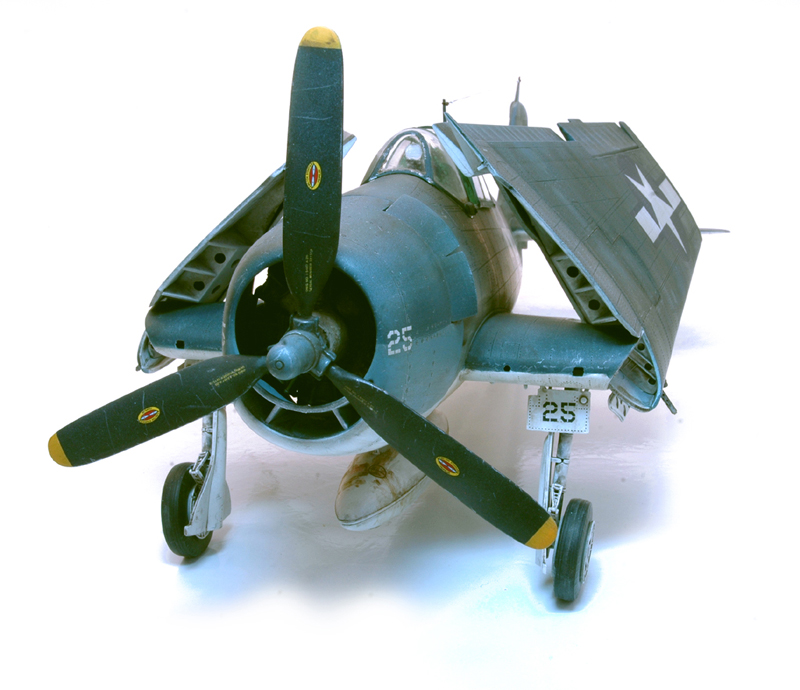
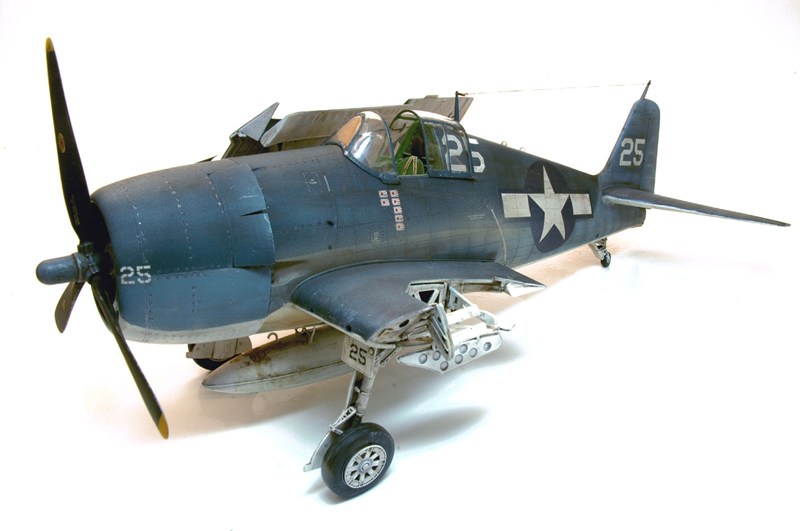
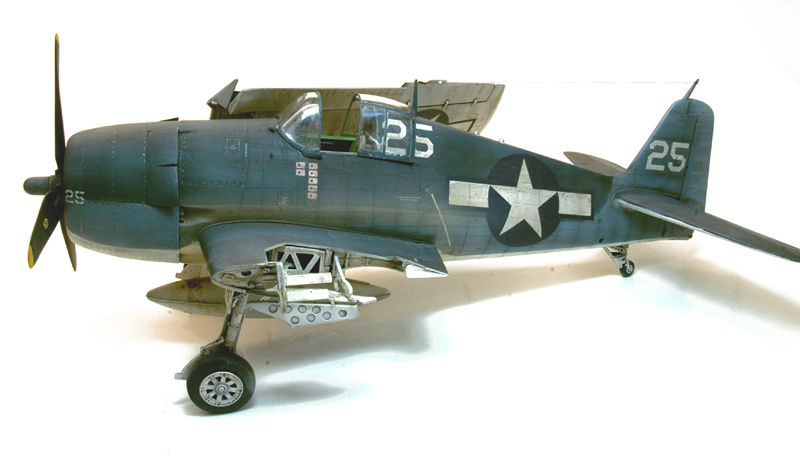
The Hellcat kit starts with the cockpit assembly, and goes together smoothly. I did not bother assembling the tanks and engine supports in step 8, as they would never be seen. The kit comes with some very basic PE seatbelts, but I replaced these with left over Eduard PE belts from my earlier P-51 project. I knew I had to paint the cockpit before sealing it up, and I used Testor’s Zinc Chromate (4852), washing with oils and picking out details. The kit comes with a nice instrument film part, but lacks any decals for the instruments on the side consoles. Based on references I located on the internet, I added instrument decals from various sources, mainly the decal sheet from the Dragon P-51. The seat has some big knock out marks that need to be filled. The gun sight is very fiddly, and I left it off until final assembly of the model. The cockpit opening is very large…it musta been a comfortable plane! This cockpit would probably have befitted from additional PE or aftermarket parts, but looks good out of the box.
Next up was the engine, and I assembled and secured to the front bulkhead, spending most of my time on the engine front face. It would be the only part seen so I did not want to pay too much attention to the power plant. I had no intentions to use the clear cowling or leave it removable. I also did not assemble or add the radio parts to the fuselage, and they are invisible on the completed kit. Step 15 includes the tail wheel assembly, which is very fiddly and fragile. I broke it off several times and had to reinforce it with brass rod. After painting the interior walls of the plane with the same green as the cockpit, I sealed up the fuselage.
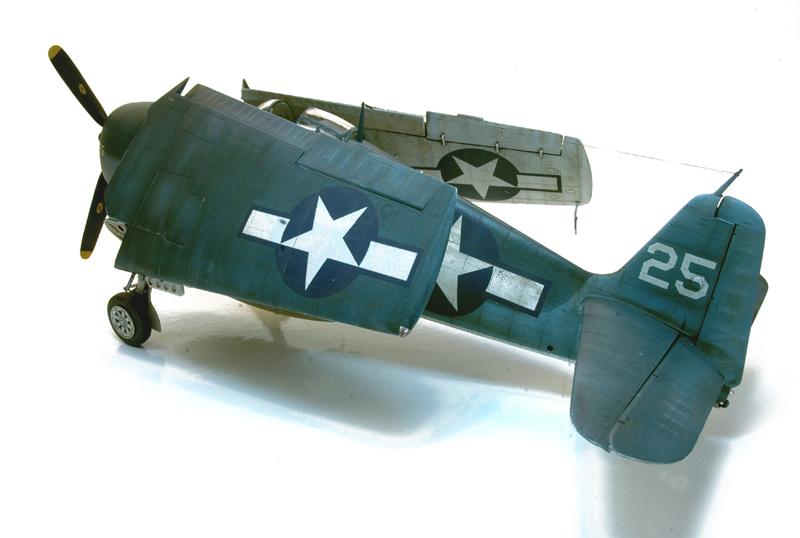
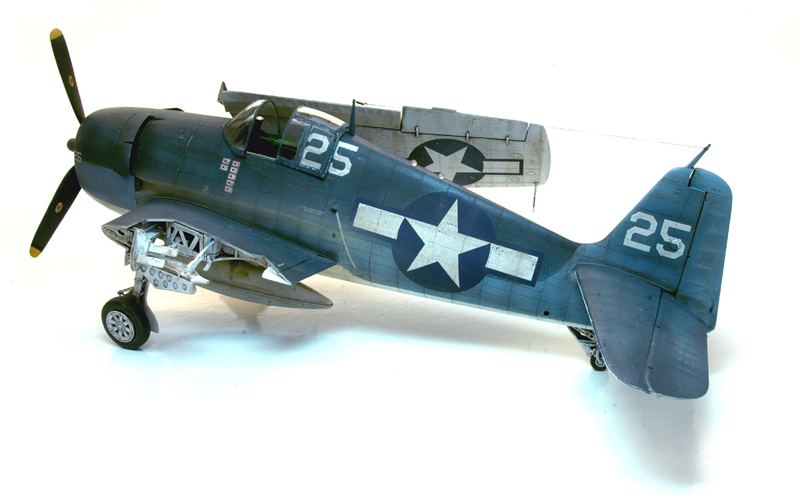
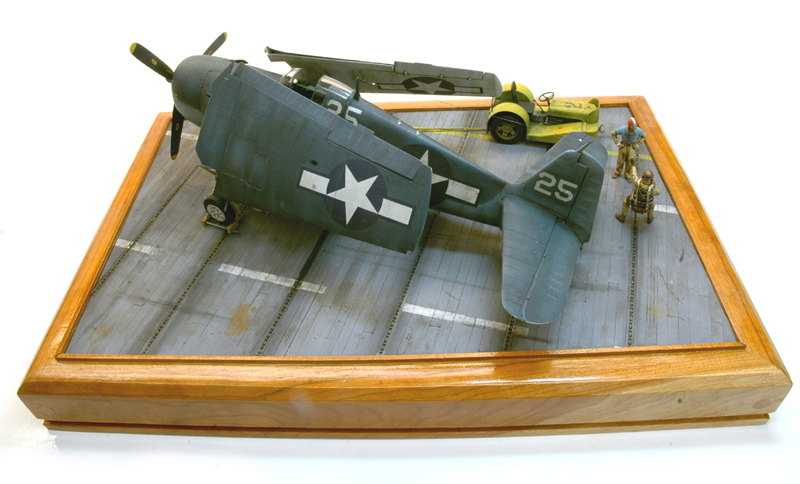
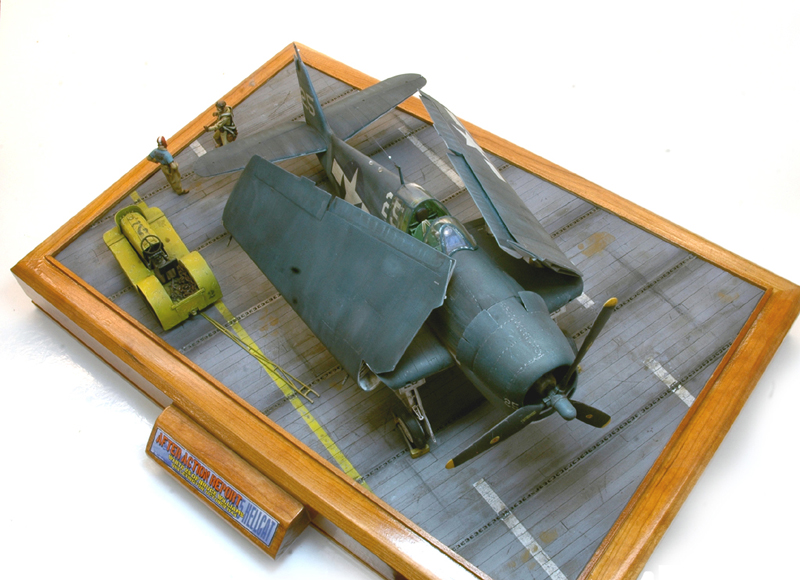
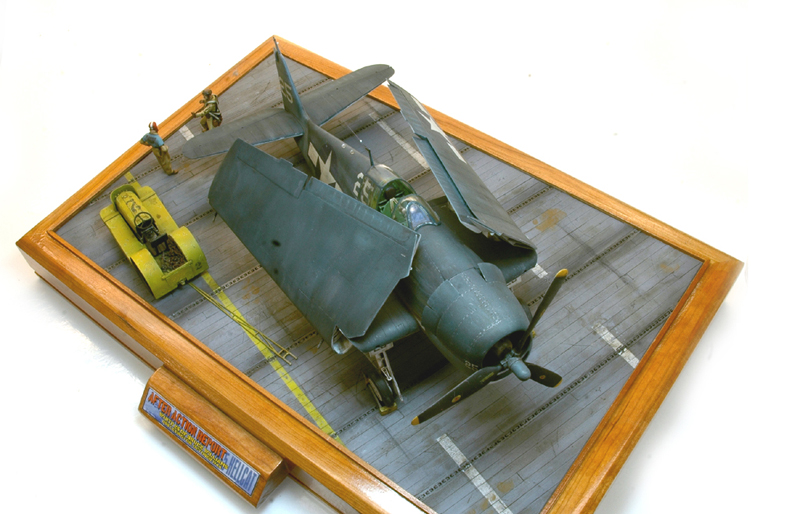
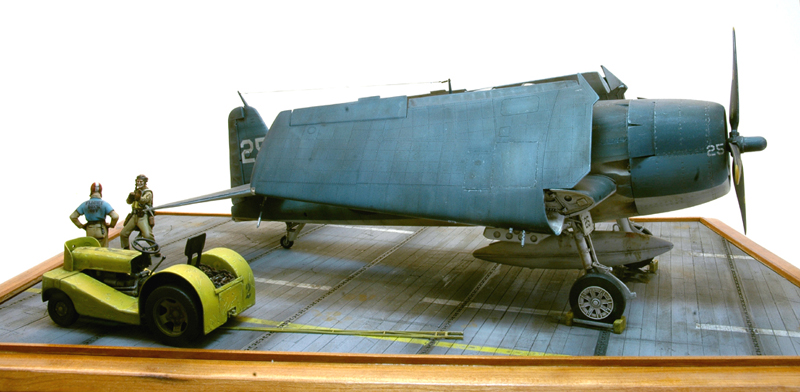
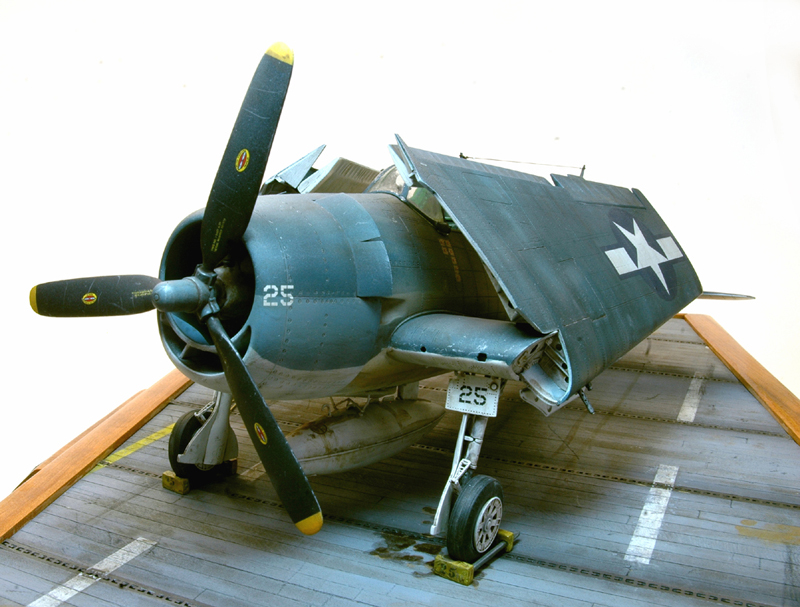
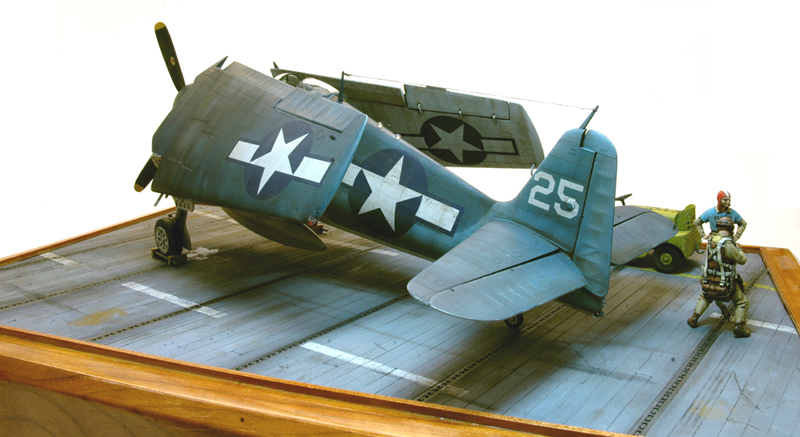
Moving on to the wings, I had initially intended to have one wing folded and one extended, But after test fitting the join between the wing root and outer wing, I observed that there would be a huge gap in the wing that would require filling and rescribing. Forget it! The kit includes what appears to me to be fairly comprehensive wheel well and wing fold detail. The join between the wing root and fuselage is outstanding, requiring no filler at all.
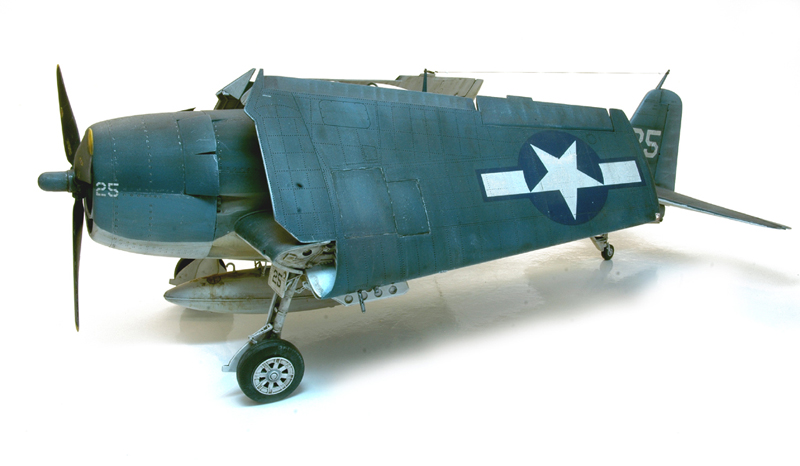
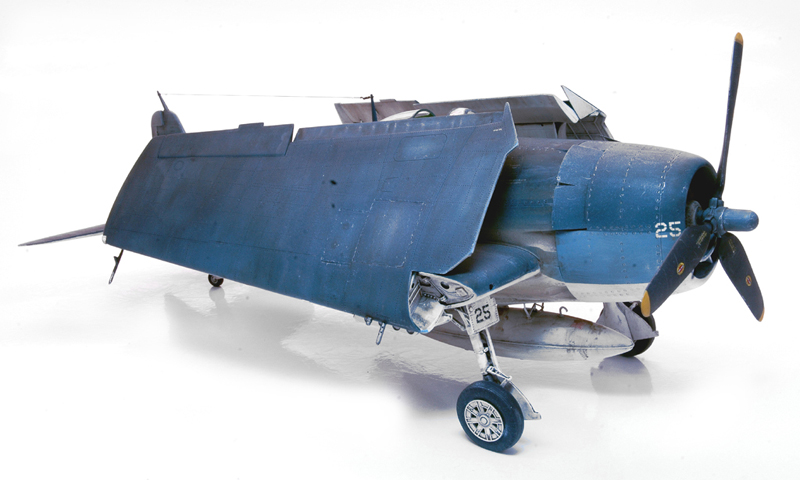
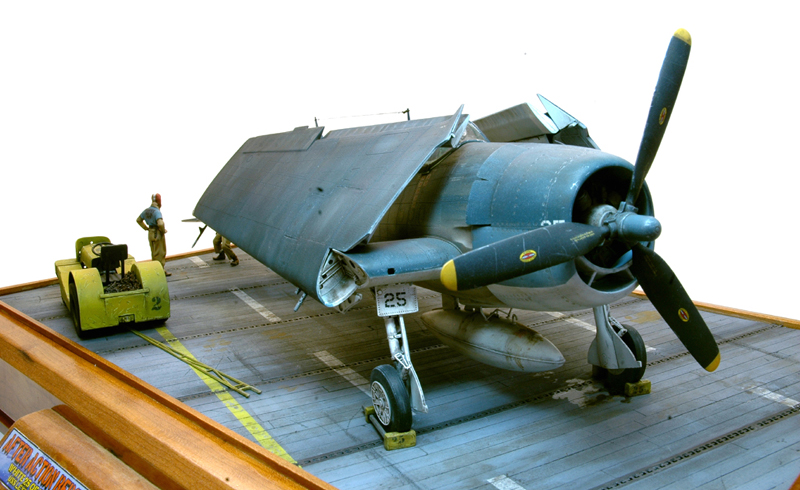
In step 20-23 adds the exhausts, lots of parts which are kinda complex but fit together nicely. I left off the flame dampeners as they were used on the night fighter version. I did assemble the basic guns and barrels but left off the ammo belts. The gun barrels feature weird oval holes in the cooling jackets. I replaced the inner pair of barrels with turned brass parts from Master Models, gorgeous! The middle barrels stick out a little and are slightly different from the brass versions, but I was not about to spend another 10 bucks just to have a 16th of an inch showing! After joining the wing halves, I glued on the gun covers, and ran into a problem. The cover parts sit just slightly below the surface of the wing, and leave an irregular surface. I wish I had tested this before gluing the wing halves together. I had to scrape down the edges, fill and rescribe the panel lines. If I had test fitted them, as I should have, I would have shimmed the interiors with thin plastic to make the hatches flush. The bottoms of the wings have holes for the rocket assemblies, which I was not adding. I glued on small circles with a rivet head to represent the attachment point covers. I also built up the nice drop tank.
The landing legs are very sturdy assemblies, although the vinyl wheels aren’t quite as wide as the plastic hubs. Also I noticed the scissor parts are both added to the lower part of the gear, where the oleo would be. I simply filled the holes and glued the upper scissor parts higher. The legs have very sturdy locating holes and can be left off until the last minute.
I am still learning how to fill and smooth out the lines between the fuselage and wing halves. This time I used very thin plastic rod, .010 in diameter, gluing it along the seam lines. After allowing it to dry for a few days, I carefully sanded and scraped down the rod, which left a smooth join. I did have to rescribe some panel lines, but this was expected. I left of the clear parts and delicates, like antennae, for later.
PAINTING
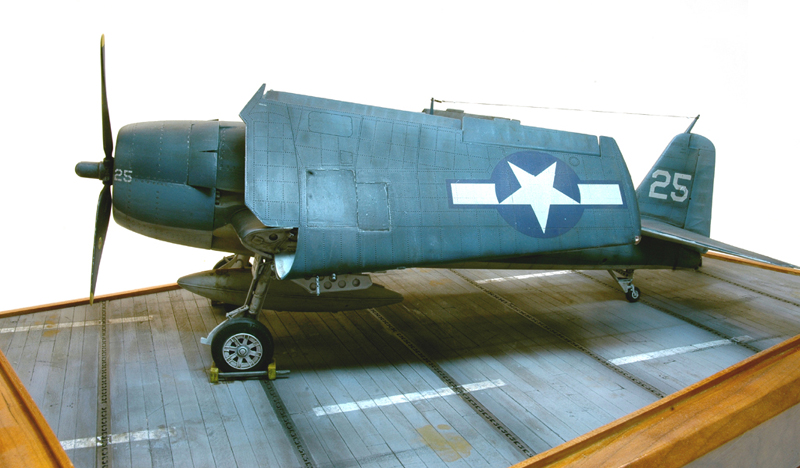
I usually use Tamiya paints, but they lacked the naval colors I needed. Instead I used Model Master Acryl paints, using Dark Sea Blue (4686) and Intermediate Blue (4744), and even bought Testor’s own Flat Black and Flat White, as I was not sure how they would interact with Tamiya paints if I needed to lighten or darken them. Using the Techmod sheet as reference, I started with a coat of flat black, then sprayed the whole model with Flat White as a primer and the lower surfaces of the plane. Masking off the lower fuselage and wings, I sprayed the Intermediate Blue, but was not happy with the tone. I added in some Tamiya Clear Blue, which mixed well with the Testor’s paint and added a bluer tint to the color. I masked off the lighter blue areas and finished with the Dark Sea Blue on the top surfaces. Hellcats are seen both with sharp separations between colors on some planes, and feathered edges on others. I went with the sharp lines. I mixed up some darker Sea Blue and sprayed fine panel line and along deeper indentations. Wanting a sun faded look, I added lighter tones of blue within panel areas and randomly about the upper surfaces of the plane. This had the effect of varying and aging the paint. The engine was masked off, painted black and drybrushed with various metal tones from Humbrol, and heavily washed with oils. It’s not very visible on the finished model. After allowing several days to dry, I finished the plane’s surfaces with several light sprays of Future to prep for the decals.
Time to add the Techmod decals, and this is where disaster struck! I cut out the larger decals and placed them on a wet paper towel, but when I tried to move them to the model, the decals literally shattered! After some colorful language, I tested more of the decals, with the exact same result. Keep in mind, I bought these from a vendor at a model show, so who knows what condition they had been stored in. I ordered another sheet from Air Connection, which seemed to take forever to get to my home. I hesitantly placed a test decal in the watery towel and it seemed OK. I then prepped one of the large “star n bars” decals, but when moving it to the model, it also cracked, but did not shatter. It was repairable though, but did not make me happy. I carefully added the remaining decals over the stretch of two days. The larger one seemed to suffer from the same cracking, the smaller ones were OK. These decals were also highly resistant to Walther’s Solvaset, and required many, many applications before they began to conform to the model’s surfaces. I had to cut panel lines and rivet holes into the decals to get them to sit properly on the model. I don’t think I’ll be using Techmod again…
After drying for several days, I sprayed the model with Testor's lacquer flat, and to Techmod’s credit, the decals did look good, with no silvering and invisible edges. I washed the whole model with varying densities of a Sepia oil paint mixed with Turpenoid. After a lot of tweaking, I was happy with the colors. I sprayed on the distinctive tannish exhaust stains seen on Hellcats, due to the type of fuel they used. I also added oil and grime streaks with oil paints and picked out a few scratches with a silver color pencil. The antenna wire is EZ Line, a great product.
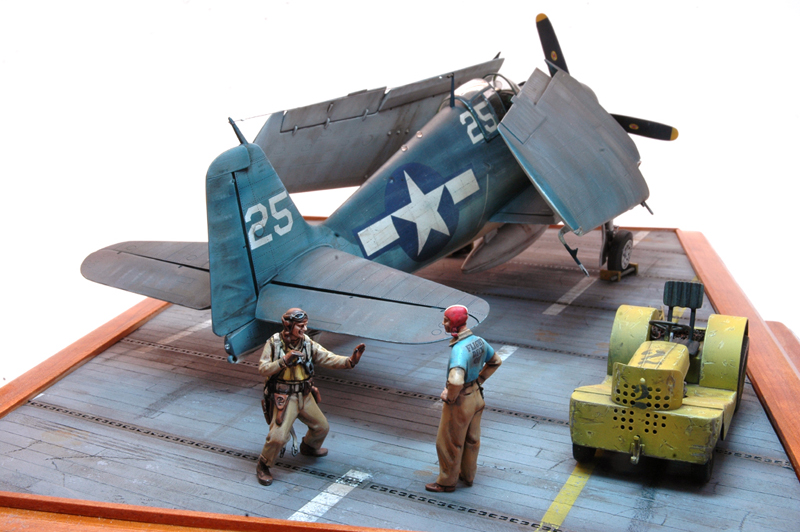
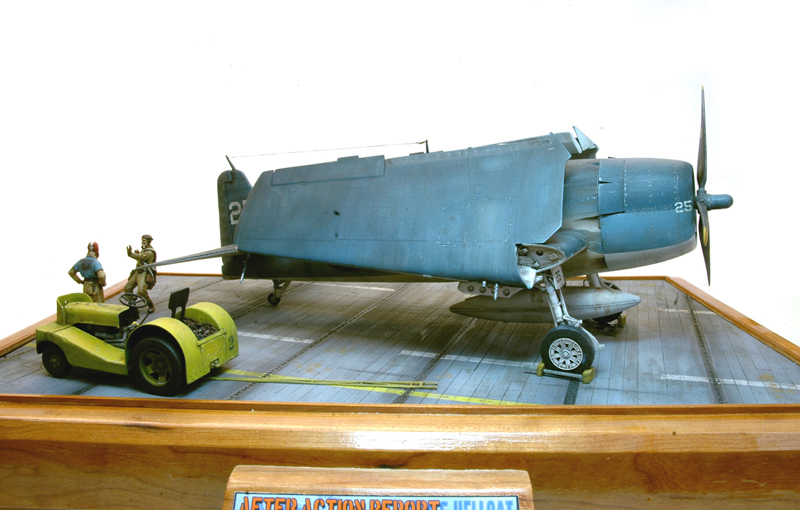
The little tractor was assembled and painted while I waiting for the decals to show up. I could find virtually no references on the tractor, but knew that many of them were yellow. I also added number markings with dry transfers, but hand painted the big one on the hood. I threw in some chains in the area behind the seat.
USS LEXINGTON’S BASE
The Hellcat is a surprisingly large aircraft! I needed big base, about 15 by 10 inches, and had considered a few commercially available products. But I wanted to build it myself, so I started by building a display box in my wood shop from a nice piece of cherry. I bought a piece of thin hobby plywood and a bunch of ¼ inch bass wood strips. WWII carriers had planks that were 6” wide, and ¼ inch was the closest I could get in this scale. I also bought a set of PE brass tie down strips from Tom’s Modelworks. After sanding and smoothing the wood strips, I cut them into varying lengths, ending up with about three varieties along with the full-length size. I glued down one guide strip to the plywood base at an angle and let it dry, then started gluing various strips top and bottom, mixing up the lengths. Honestly I didn’t try to duplicate a true carrier pattern. I just wanted it to look good. I added a tie down strip for every 10 wood strips, needing two of the brass parts for the width of my base. I ended up with exactly enough! I just left the edges of the wood and brass hanging off the plywood base, which had been cut to fit the display box. I later trimmed the edges with an X-acto knife and sanded them flat. I always thought that carriers decks were wood colored, but quickly found out that most of the WWII carriers had painted decks. After a bit of research, I decided to use Polly S acrylic Weathered Deck Blue paint, mixed with a bit of white, for the surface, masking and adding white and yellow lines later. I aged and weathered the deck with oils and pigments stains. The figures are from Andrea, and are called “Dogfight” and include the pilot and deck officer. I painted them with a combo of Humbrols and oils, adding the lettering on the Deck Officer’s uniforms with decals I printed on Testor’s decal paper. I pinned the figures with brass rod and placed them on the base. Finally I cut and glued some plexiglass sheet to make a dust cover…a big one!
CONCLUSIONS
This is only my second “wing thing” in years, and it was too much fun! The model is terrific and it was nice to make a base without dirt and mud on it. I got away without too much AMS, adding only two brass barrels and decals to the kits, and the rest of my budget spent on the base and figures. The project was a nice departure from armor and dioramas, but I was able to use a lot of familiar techniques. It will not be the last plane I build!

© Vince Pedulla
This article was published on Thursday, January 19 2012; Last modified on Saturday, May 14 2016