
Trumpeter | 1:32 F6F-3 Hellcat #02256
Reviewed by James Kelley
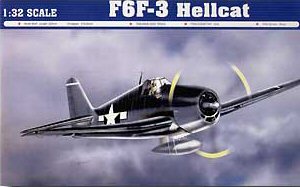
Trumpeter 1:32 F6F-3 Hellcat #02256
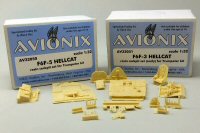
Avionix 1:32 F6F-3 Hellcat (Early) # AV32051
The Grumman F6F Hellcat was a fighter aircraft descended from the earlier F4F Wildcat, but was a completely new design sharing only a familial resemblance to the Wildcat. Some tagged it as "Wildcat's big brother". The Hellcat and the Chance-Vought F4U Corsair were the primary United States Navy carrier fighters in the second half of World War II.
The Hellcat proved to be the most successful aircraft in naval history, destroying 5,171 aircraft while in service with the U.S. Navy and U.S. Marine Corps (5,163 in the Pacific and eight more during the invasion of Southern France), plus 52 with the Royal Navy's Fleet Air Arm during World War II. Postwar, the Hellcat aircraft was rapidly phased out of front line service, finally retiring in 1954 as a night-fighter in composite squadrons.
The first production aircraft off the line, designated F6F-3s, flew on 3 October 1942 with the type reaching operational readiness with VF-9 on USS Essex in February 1943.
Two night fighter sub-variants of the F6F-3 were also developed. The F6F-3E, converted from standard -3 frames, featured the AN/APS-4 radar in a fairing in the starboard wing. The later F6F-3N, first seen in July of 1943, was fitted with the AN/APS-6 radar in a similar fairing. By November of 1943, Hellcat night fighters had seen their first action. Fitting AN/APS-6 radar fairings to F6F-5s resulted in the night fighter F6F-5N, and a small number of standard F6F-5s were also fitted with camera equipment for reconnaissance duties as the F6F-5P.
Instead of the Wildcat's narrow-track undercarriage retracting into the fuselage requiring awkward hand-cranking by the pilot, the Hellcat had hydraulically-actuated undercarriage struts set wider and retracting backward, twisting through 90° into the wings, exactly as the Chance-Vought F4U Corsair's landing gear did. The wing was low-mounted instead of mid-mounted and folded the same way as the later versions of the Wildcat, allowing the Hellcat to take on a compact, tucked-in appearance on a flight deck.
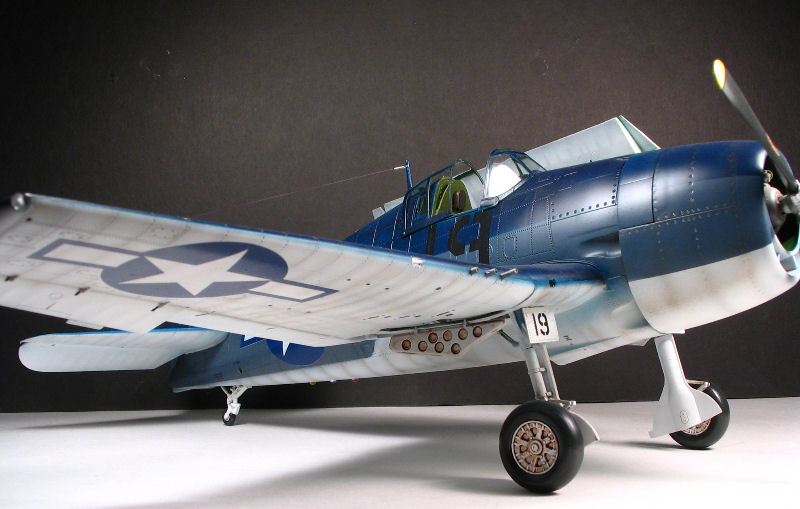
Standard armament on the F6F consisted of six .50 caliber (12.7mm) Browning M2/AN air-cooled machine guns with 400 rounds each; later aircraft gained three hard points to carry a total bomb load in excess of 2,000 lbs. (900 kg). The center hard point also had the ability to carry a single 150 U.S. gallon (568 L) disposable drop tank. Six 5 in. (127 mm) HVARs (High Velocity Aircraft Rocket) could be carried; three under each wing.
Continuing with their Hellcat series, Trumpeter follows the F6F-5N Night Fighter with an early-production F6F-3. The kit is packaged in the usual, Trumpeter-style heavy box. A separate inner box holds the clear parts, rubber tires, acetate and photo-etch parts.
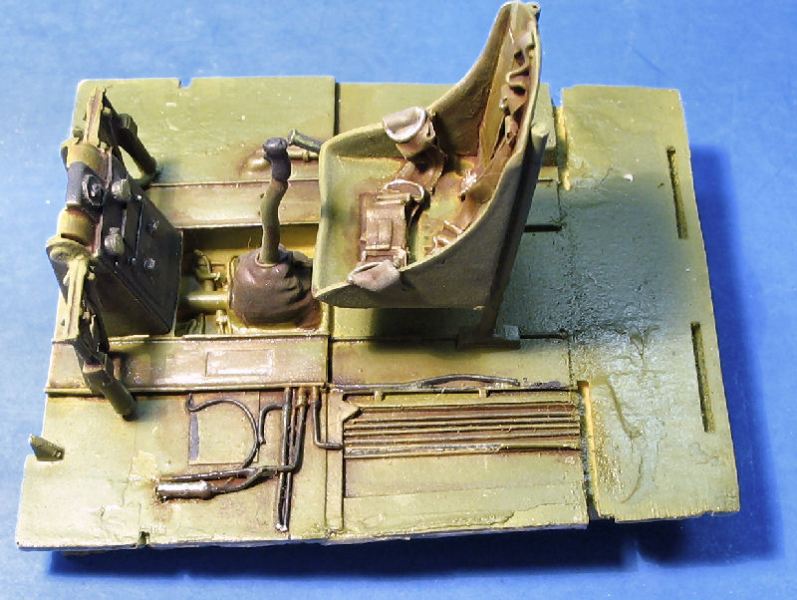
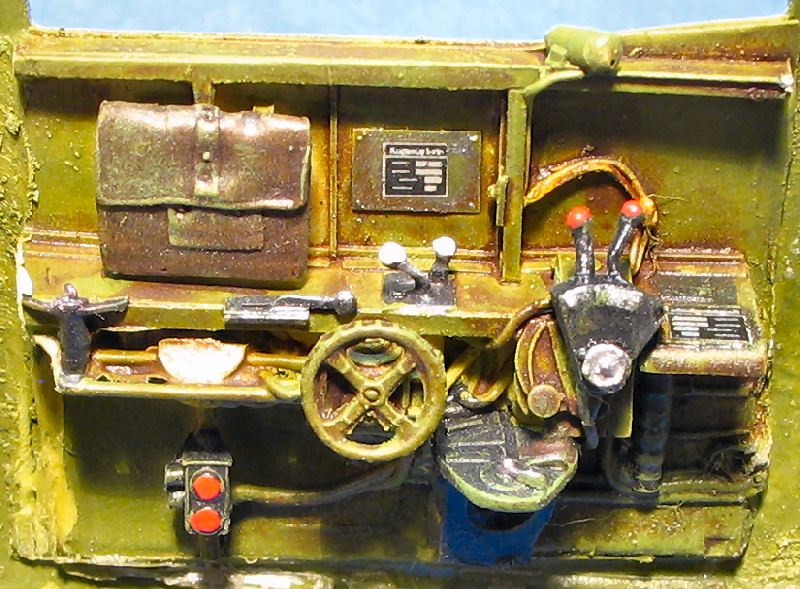
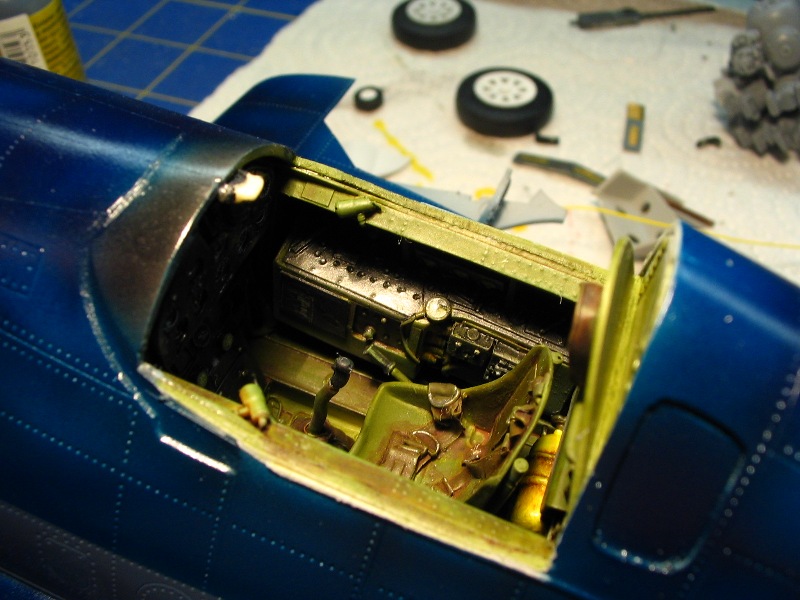
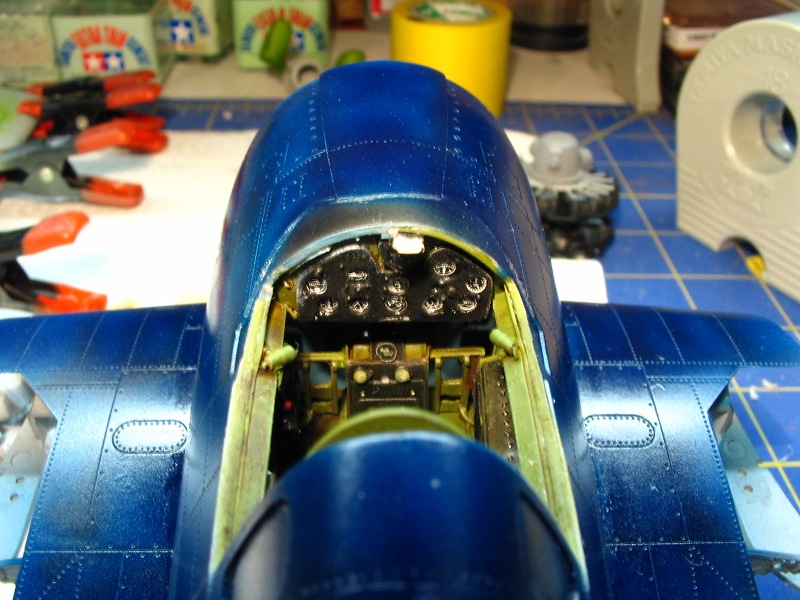
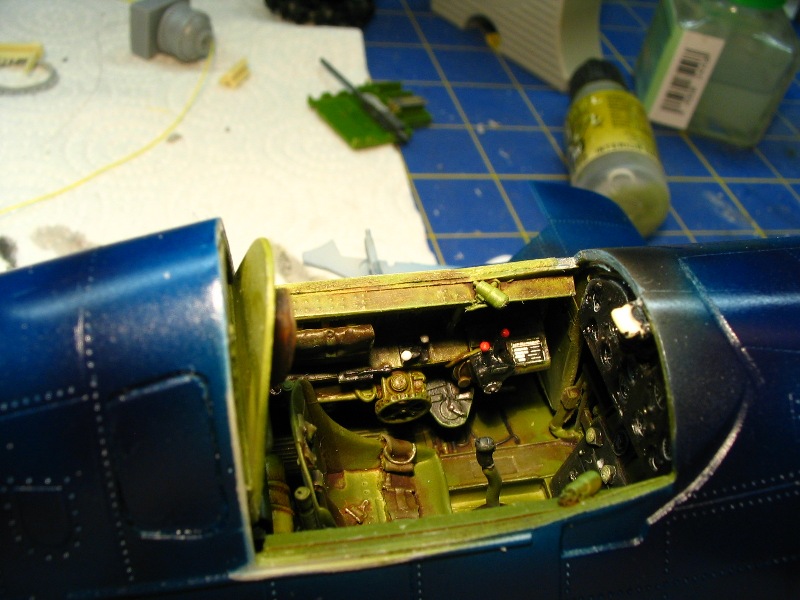
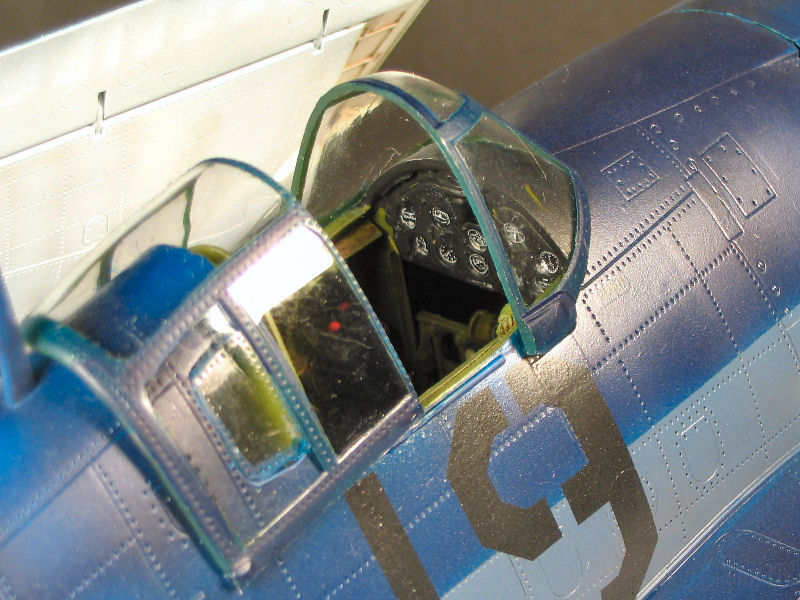
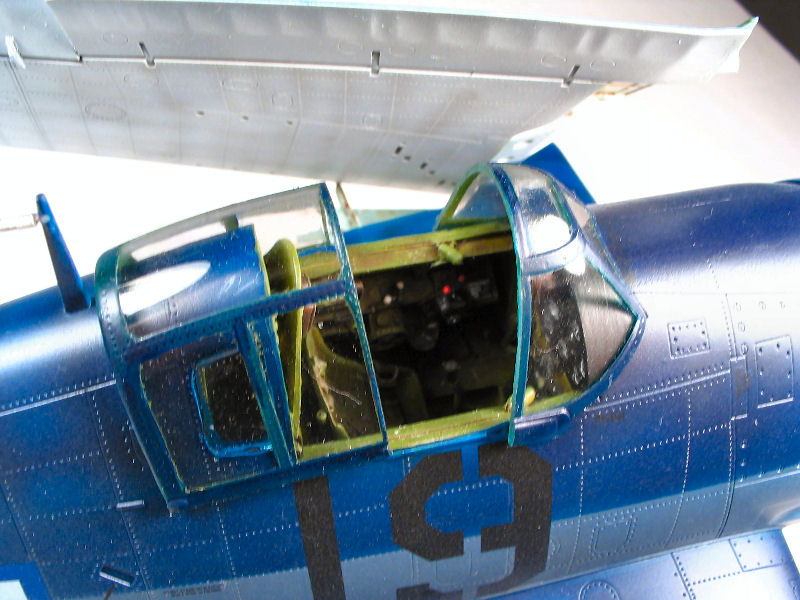
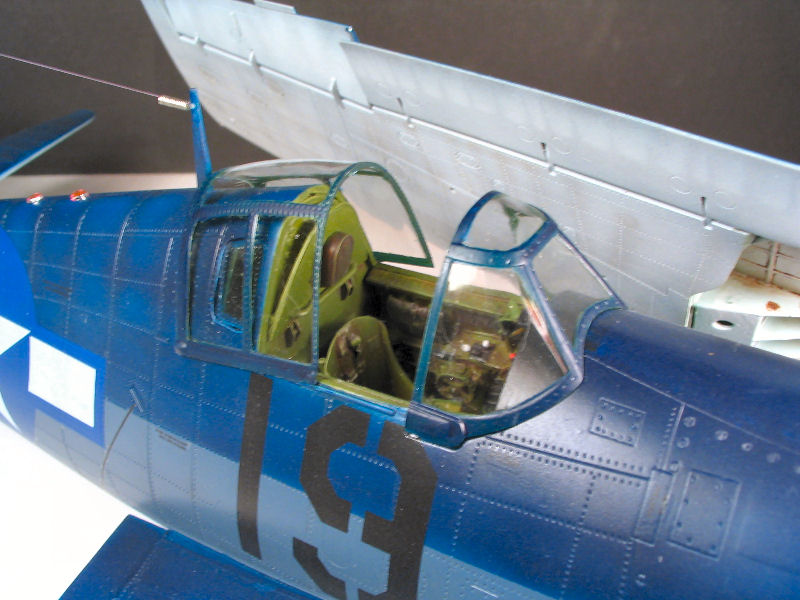
Construction has you beginning, as is customary, with the cockpit. Trumpeter provides a nicely-detailed, fairly accurate cockpit out of the box. All that is needed here is a bit of wiring and some data placards to dress things up. As I was provided with an Avionix resin upgrade set, I skipped these steps.
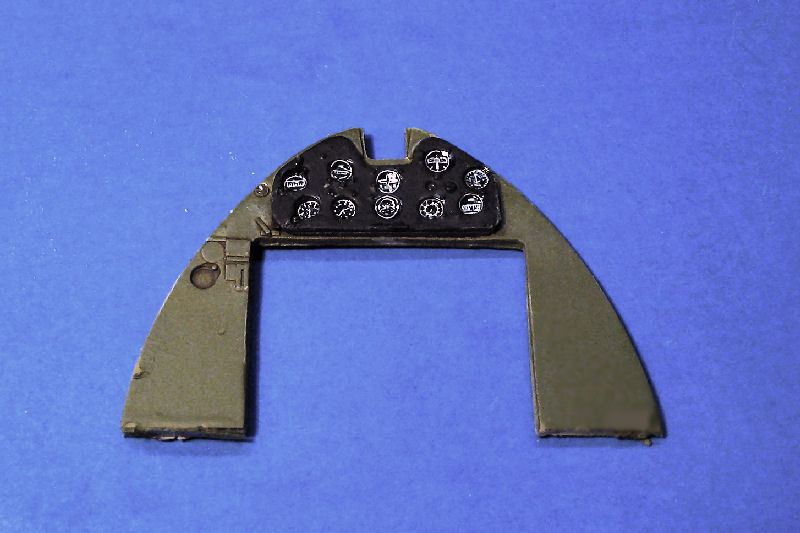
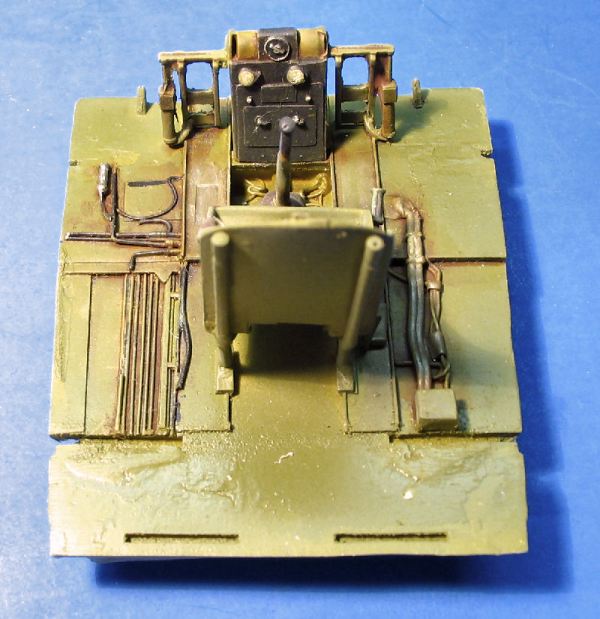
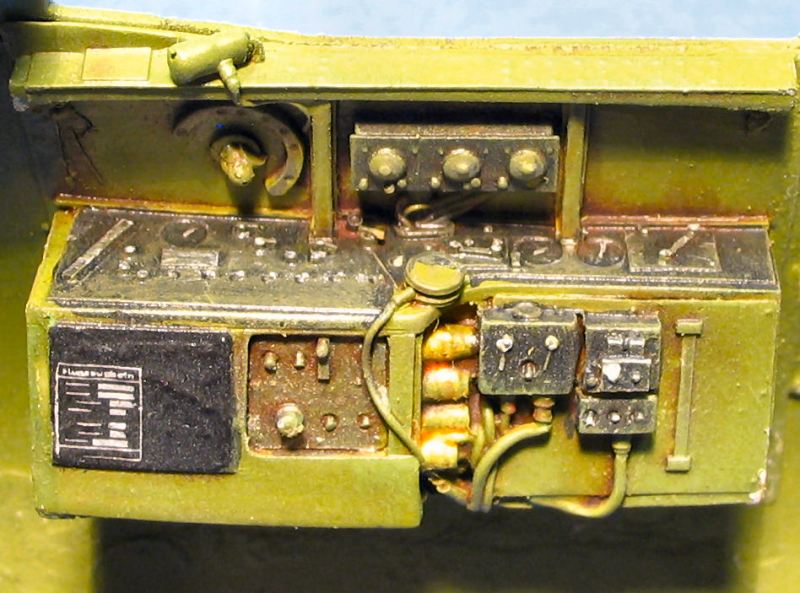
The Avionix set is what you'd come to expect from VMD studios. Painstakingly accurate, incredibly detailed, and fairly easy to use for the modeler with a bit of multi-media experience. Packaged in VMD's usual white cardboard box, and individually bagged into three groups, the cream-colored resin parts are on small, easy-to-manage pour stubs. These separate easily. The instructions are a single piece of paper with black and white photos of how it all comes together. Unfortunately, the photos are not of the best quality, and after many reproductions, some sharpness is lost. This is only an issue for the finest of parts, however, and anyone familiar with the layout of the Hellcat's business office can proceed normally. Once I had the major subassemblies cemented together with cyanoacrylate, I covered everything with Tamiya rattle-can primer, and then painted according to my references. The instrument dials have light, raised details. I chose, however, to cover the dials with Mike Grant Decals' 1:32 Instrument Dial decals. I also added a few data placards from the same sheet to the sidewalls.
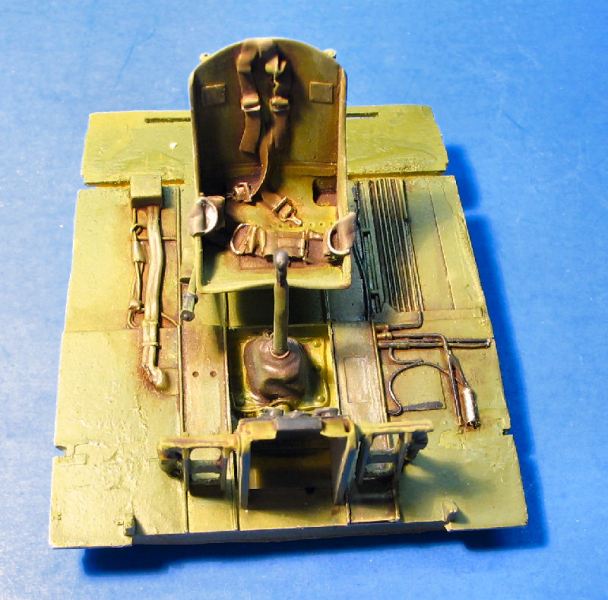
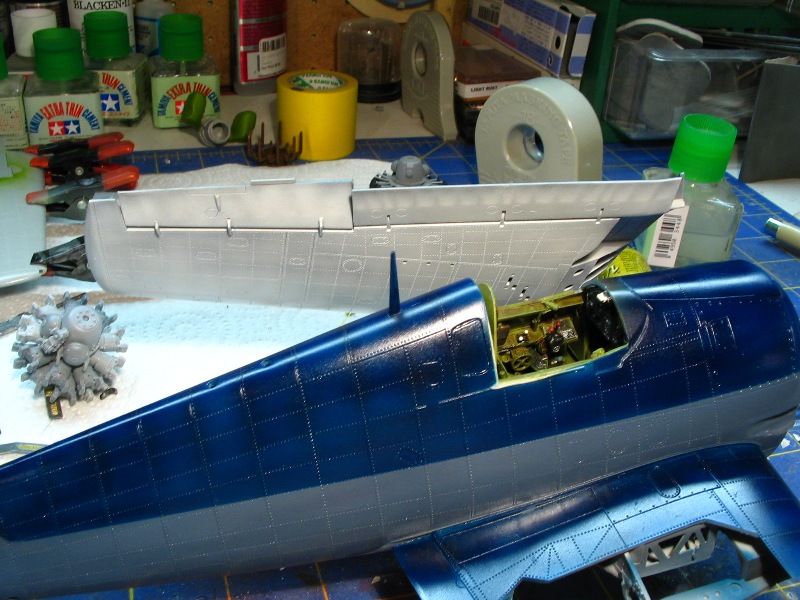
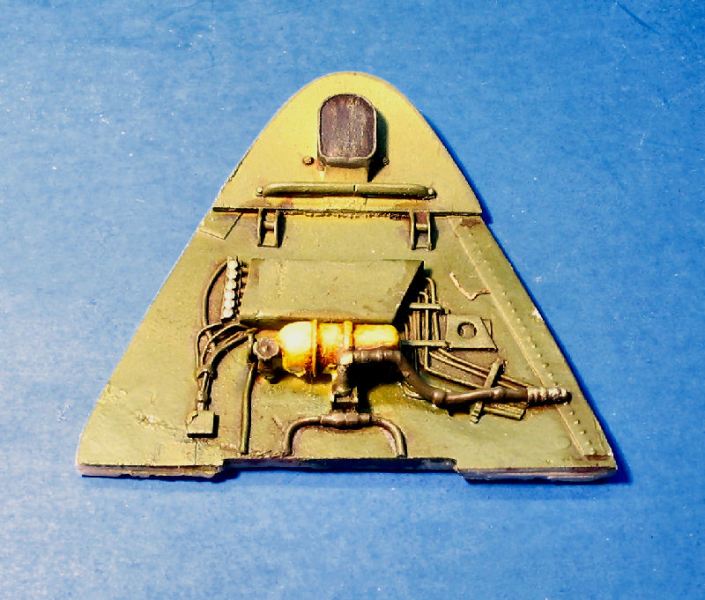
As with most Avionix products, some kit alteration is required. In this instance, it was simply removing all sidewall details from the inner fuselage parts. I used my Dremel tool to smooth out the inside of both halves, and then painted the Interior Green around the cockpit area. Trumpeter provides a full firewall with engine mount braces, water tank, and associated plumbing; in order to see these details, however, one must saw away the associated access panels. This wasn't part of my overall plan, so I skipped these steps, and left out those parts. Additionally, the Trumpeter kit has a full complement of radio gear and "Black Boxes", all located behind the cockpit. It'll never be seen, so as with the firewall components, I didn't use them. Once everything was aligned to my satisfaction, I closed up the fuselage.

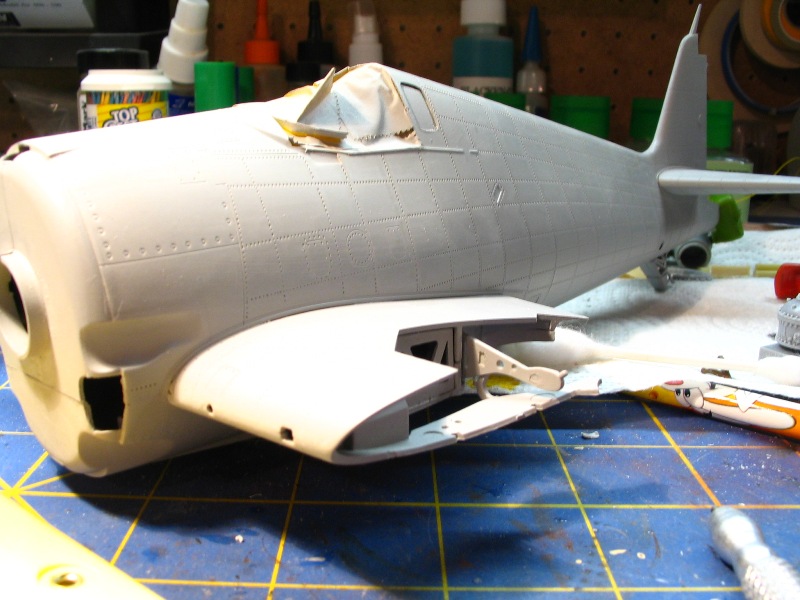
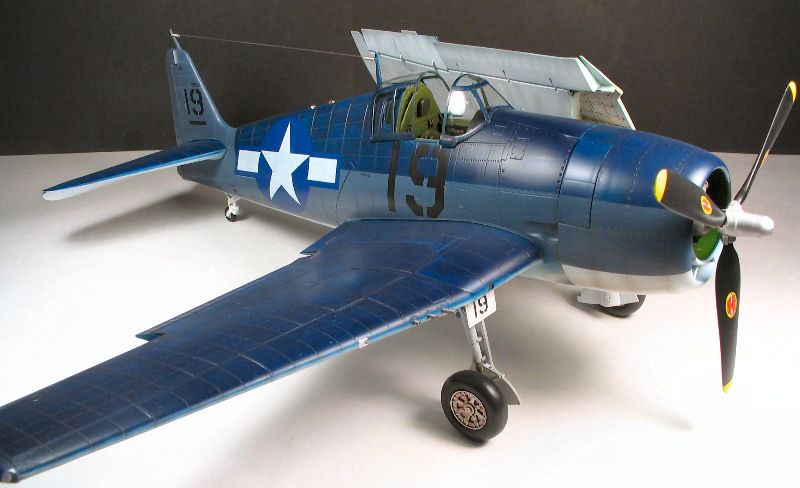
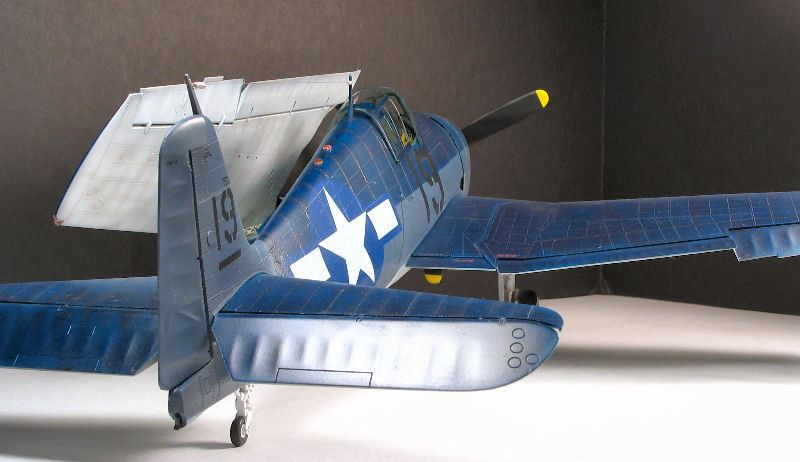
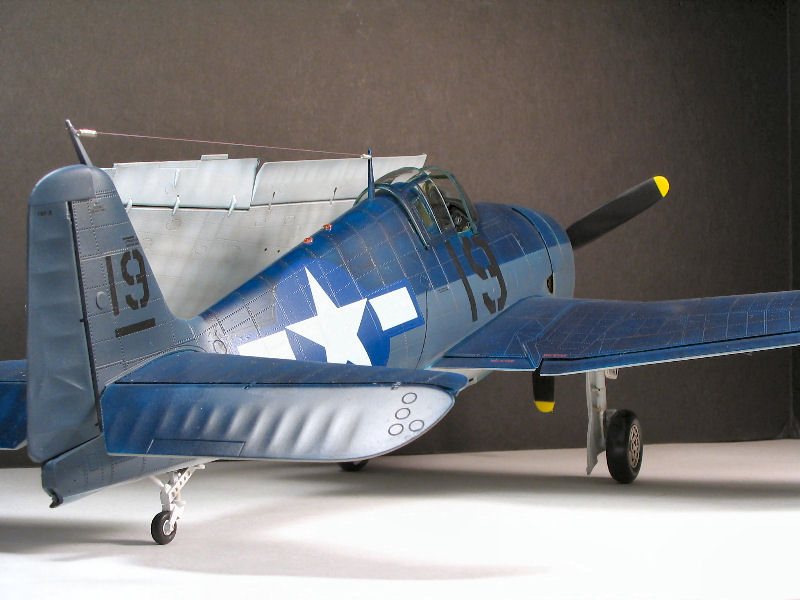
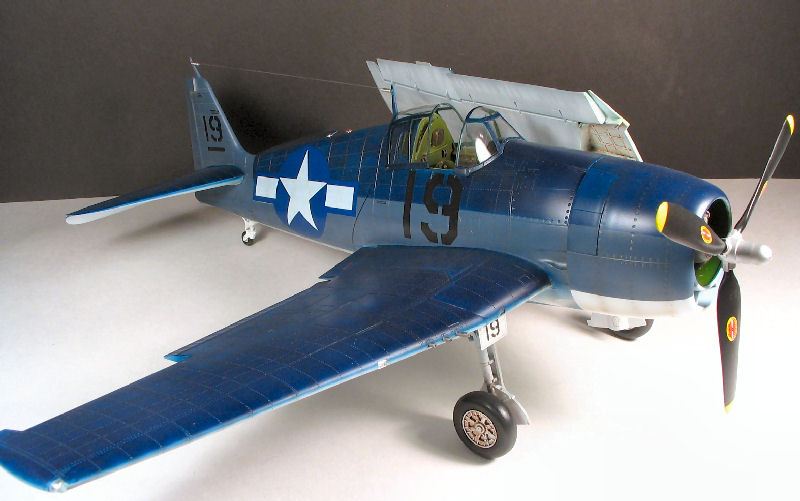
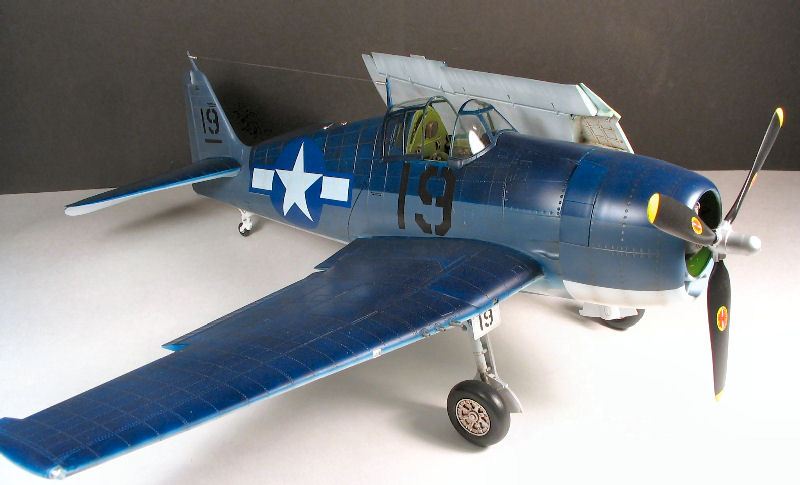
There was some degree of controversy raised upon the initial release of the F6F-5N kits regarding the area of the fuselage behind the cockpit. Instead of the typical, straight, "slab-sided" fuselage panels, Trumpeter incorrectly molded a slight bulge into the area. This anomaly is present here, as well. It's not that noticeable, really, but depending on how the light hits the model…you can see it. To me, it's not a huge issue, but to some it will undoubtedly be, therefore it bears mentioning. To correctly model a "-3", the windows behind the pilot's seat need to be cut out. Trumpeter provides recessed areas inside the fuselage halves to accomplish this.
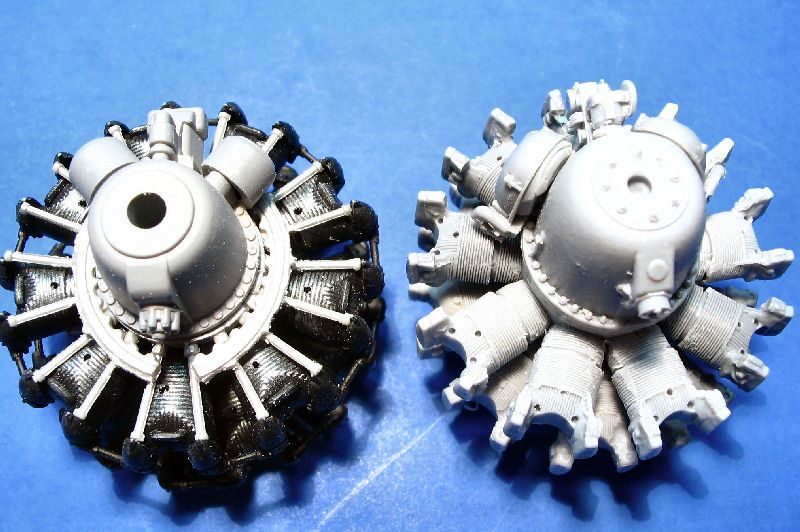
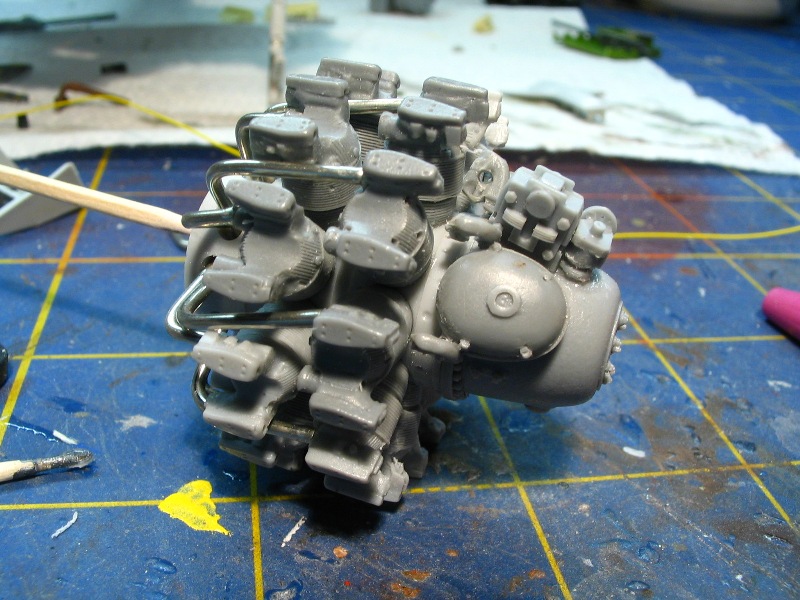
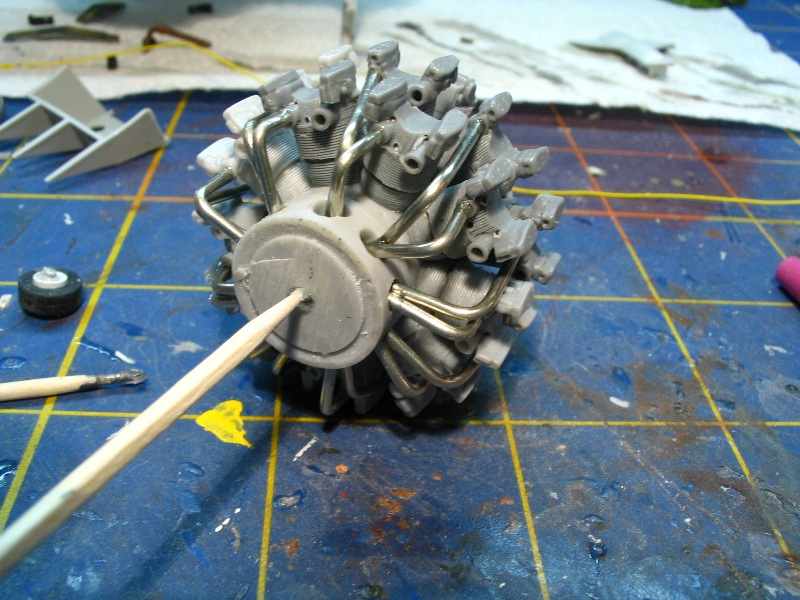
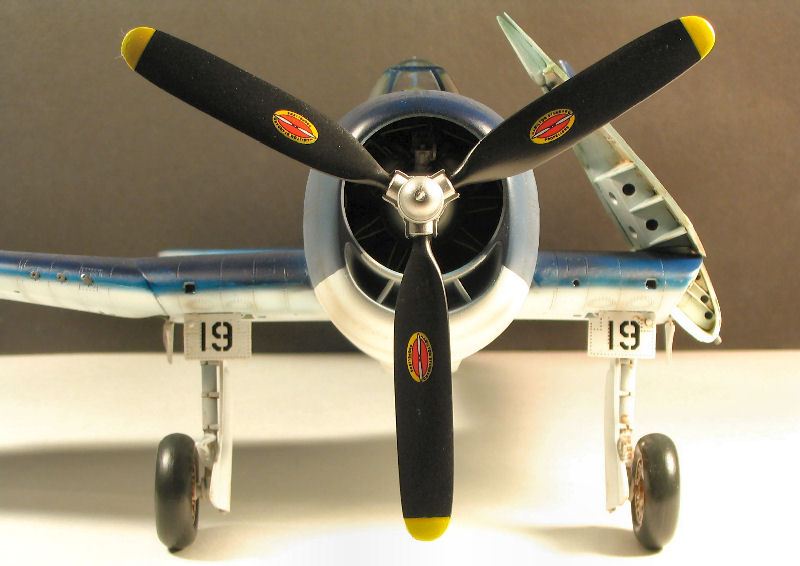
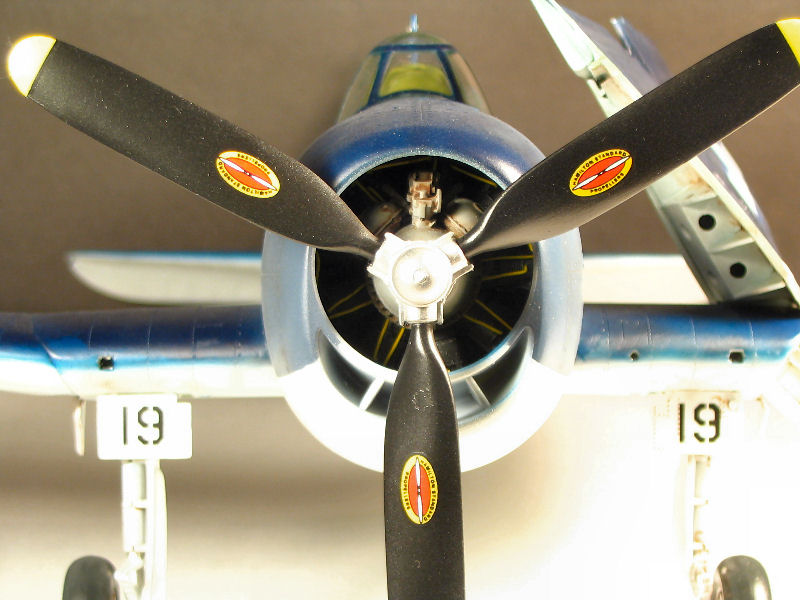
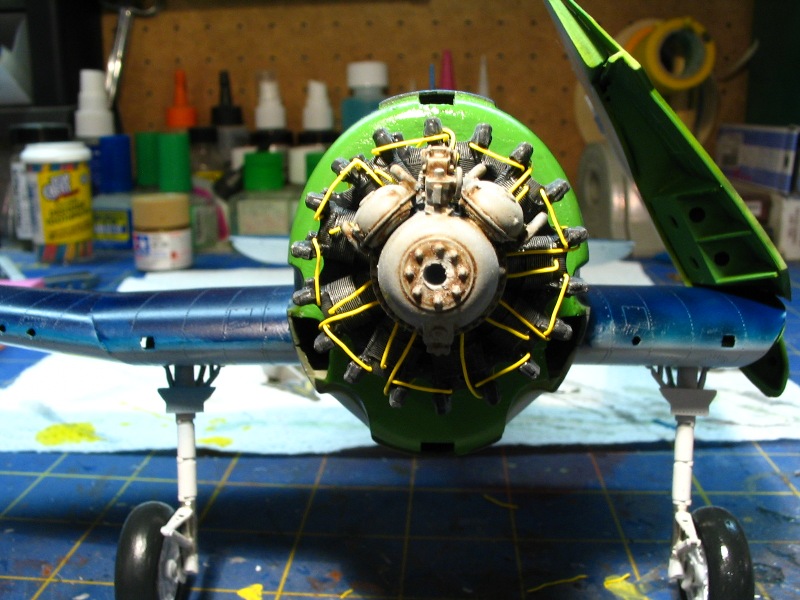
The kit's Pratt & Whitney R2800 is a kit unto itself. It builds up into a very passable replica of the real powerplant, and needs only an ignition harness to be added for completion. However, I had a Teknics resin R2800 that I'd had laying around for several years, and decided to use it. You can see the difference between the two in the photos. I'd planned originally to leave the engine cowling clear, to display the motor, but in the end…I didn't like how it turned out. I added a complete wiring harness built from Model Car ignition wiring, and a complete exhaust system from solder…but, the firewall had a step-off, and once painted, the attempted repairs were even more glaring. That's why I simply painted the cowling later, and closed it all up.
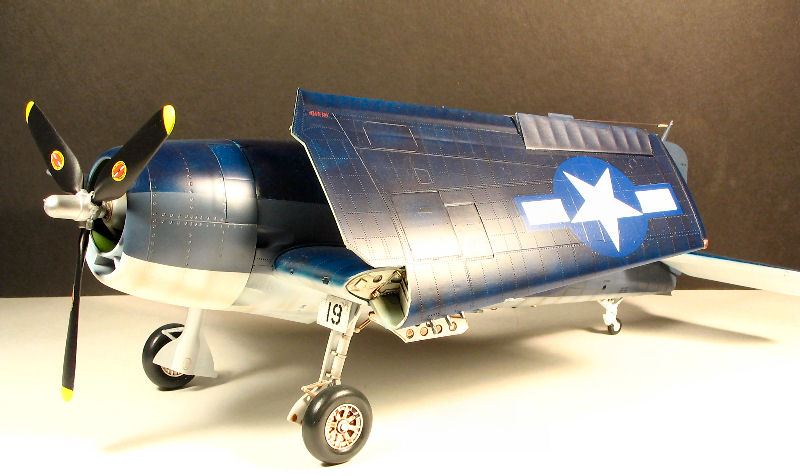
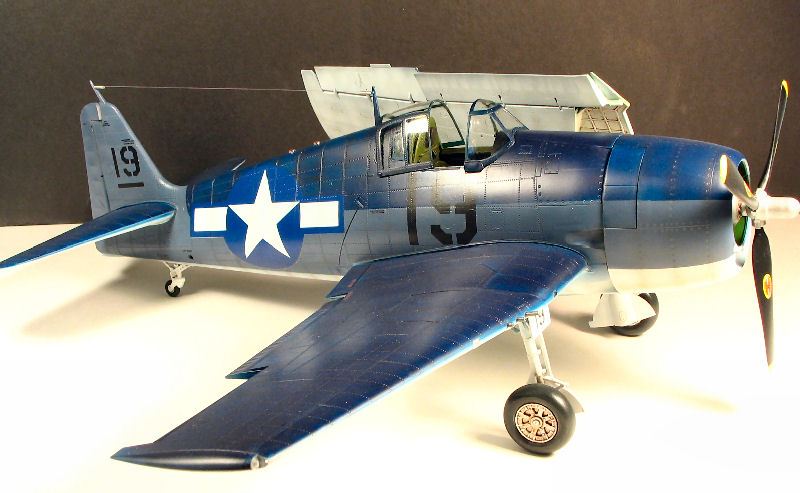
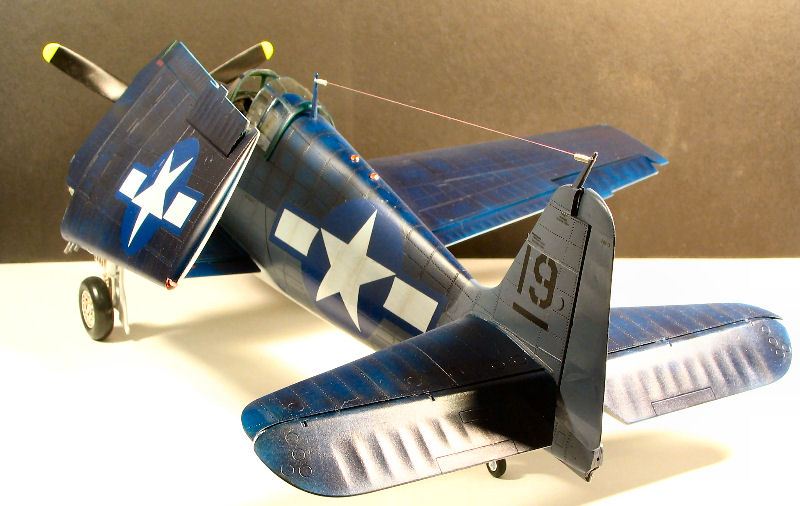
The wings attach to the fuselage next, and a tight fit was achieved without any filler. Trumpeter provides the option of folded or extended wings, and the ability to position the flaps/aerilons however you choose. There are NO photoetched hinges, either. I chose to model the Hellcat with the Port wing folded, and the Starboard wing extended. The wingfolds have very nice detail, and are fairly accurate in portraying the actual wingfolds. One thing about Trumpeter U.S. Navy Fighter kits that has always been a sore point with me is the weak wingfold mechanisms. Both Corsairs (F4U & A7E) and the Avenger kits have terribly weak wingfolds that require the use of heavy-gauge wire to stabilize. The Hellcat(s), however, have the wings engineered in such a manner that this isn't necessary. In fact, the folded wing(s) is so stable, that I didn't bother to cement it; I simply allow the friction join to hold it, so it will be easier to transport and reassemble. My thanks to Trumpeter for finally figuring this out!
Six nicely detailed .50 caliber machine guns, with associated ammo feed belts, are included. The bays may be modeled opened or closed. A full complement of six 5" "Holy Moses" HVAR (High-Velocity Aircraft Rockets) and two 500 pound bombs are provided, as well as the familiar centerline auxiliary fuel tank.
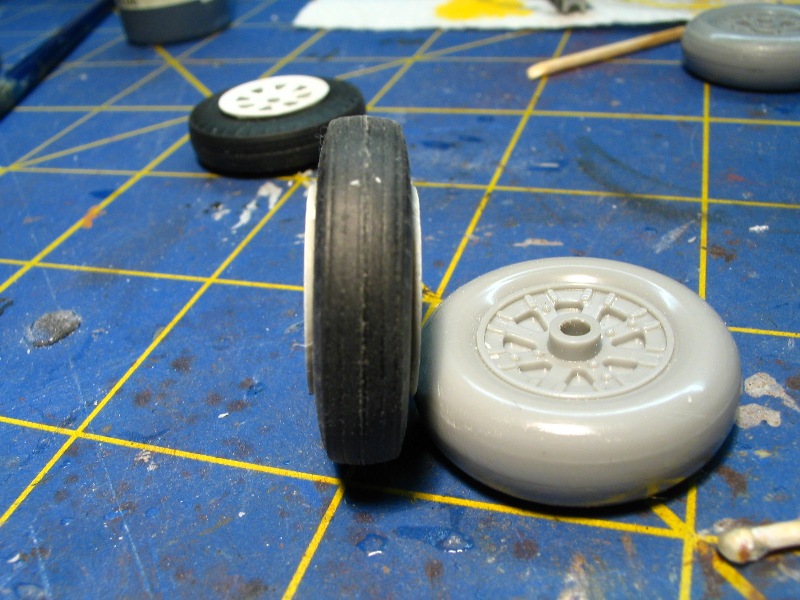
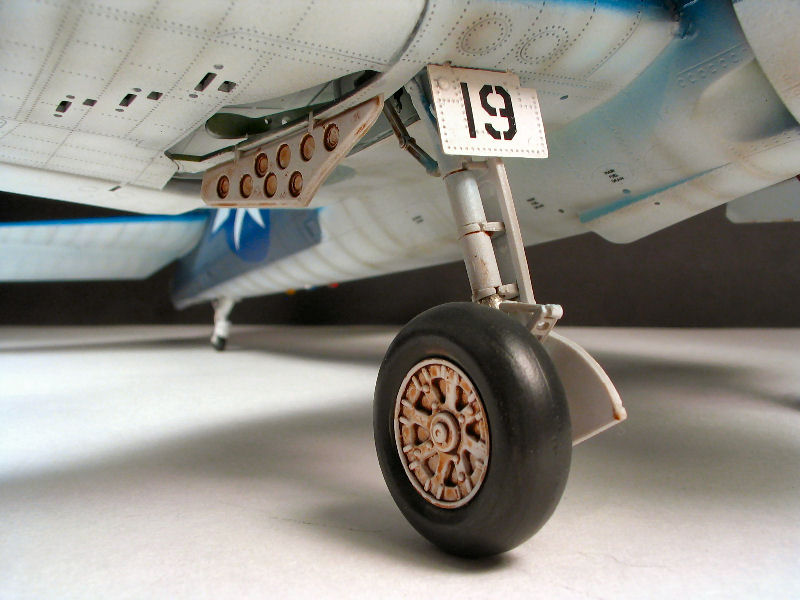
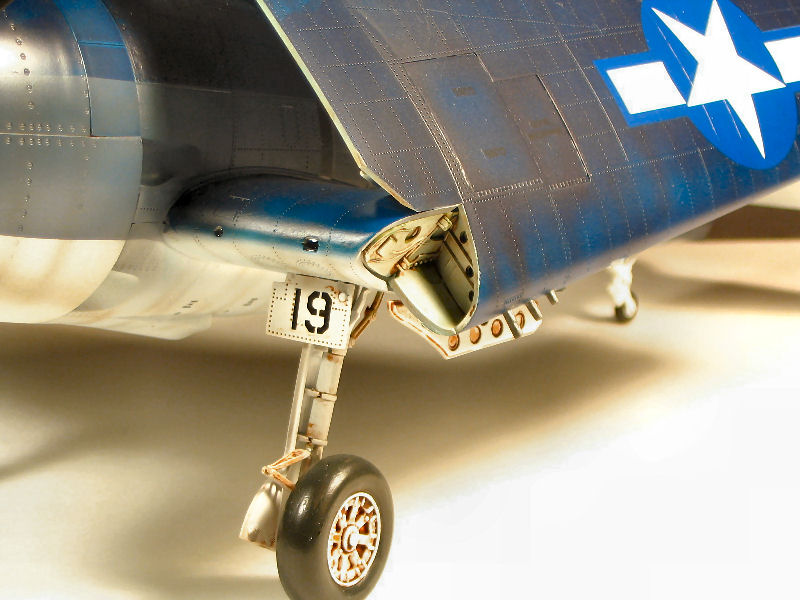
The landing gear are sturdy, and fit well into the shaped locating holes. However, the wheels are an entirely different story. You can see, from the photo, that the tires are just way too skinny for the hubs. While the early production Hellcats did have a skinny tire, the rims were of course matched to them. Not the case here, as the wheel/tire combination is essentially unusable. Another problem lies within the tail wheel assembly. In an example of "more is not always better", the over-engineered assembly doesn't support the weight of the model. I repaired my tail wheel assembly twice before pulling it out of the fuselage completely. Fortunately, I have a 1:32 Hasegawa F6F-3/5 kit in the stash, so I used the main wheels and tail wheel assembly (one piece) from this kit. The main gear's axles are toed down at a strange angle, too, which will result in a bizarre wheel stance if not corrected.
The canopy and windscreen are flawlessly molded, and responded nicely to a clear acrylic bath. They also both fit without issue.
The decal sheet provides markings for two machines:
- F6F-3, CAG CVG-15 USS Essex, 'Minsi', Oct 1944, as flown by Cdr, David McCampbell
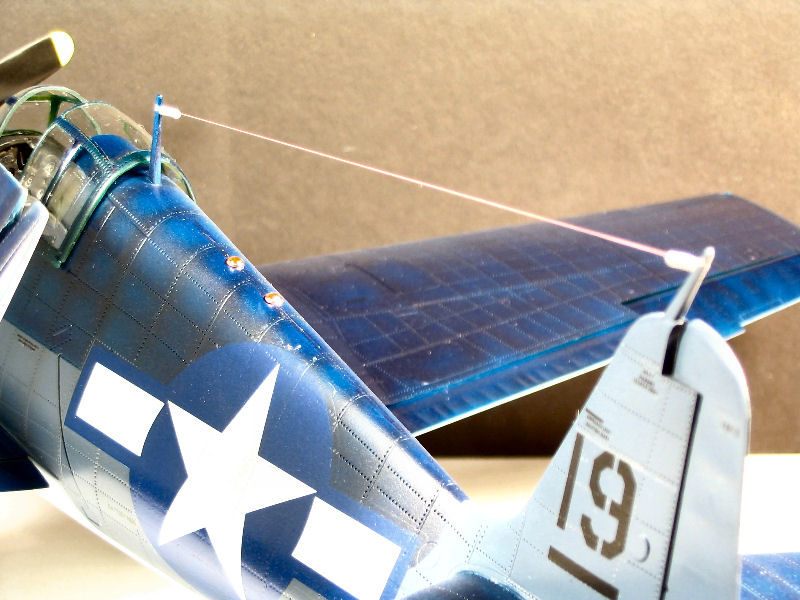
- F6F-3, 19, VF-6, USS Intrepid, Feb 1944, as flown by Lt.Cdr. Alex Vraciu
The decals went down fine, and responded well to Mr. Mark Softer. I think the Hamilton Standard prop logos are slightly too large, and despite the nice selection of data stencils, the rest are incomplete. I modeled Alex Vraciu's aircraft, and I find it interesting that despite the fact that he was one of the more widely-known U.S. Navy aces of the war, all of his markings are not included. Missing are the nine "kill" flags seen in every photo of his aircraft, as well as the "Gidget" personal emblem. I suppose the decal package represents the machine as it was issued to Vraciu, before he shot down his first enemy plane?
All in all, this is a nice kit. The panel lines and rivets are finely engraved, and there is a high amount of detail in this kit. It's relatively easy to assemble compared to some of Trumpeter's earlier offerings. The landing gear and decal issues are the biggest downfalls. They can be overcome with aftermarket accessories or parts from the spares box/stash, but for the money spent, why should they have to be? For a kit with a $90.00 MSRP, these types of gaffes are unacceptable. Recommended with the above-mentioned caveats.
The Avionix set, as with all of VMD Studios' offerings, is the highest level of upgrading you can add to the kit. Very highly recommended.
Thanks to Stevens International & VMD Studios for the review samples.
References
- Jaarski, A., & Pajdosz, W. (2006). F6F Hellcat:: Aircraft Monograph #20. Bypgoszcz, Poland: A.J. Press.
- Dean, F. H. (1997). America's Hundred Thousand: U.S. Production Fighters Of World War II. Atglen, PA: Schiffer Publishing Co.
- Sullivan, J. (1979). F6F Hellcat In Action. Carrollton, TX: Squadron/Signal Publications.
© James Kelley 2008
This product is available from the following LSP sponsors

This review was published on Saturday, September 15 2012; Last modified on Wednesday, May 18 2016