
Italeri | #2502: 1/32 F-104 G/S Starfighter
Reviewed by Dave Williams
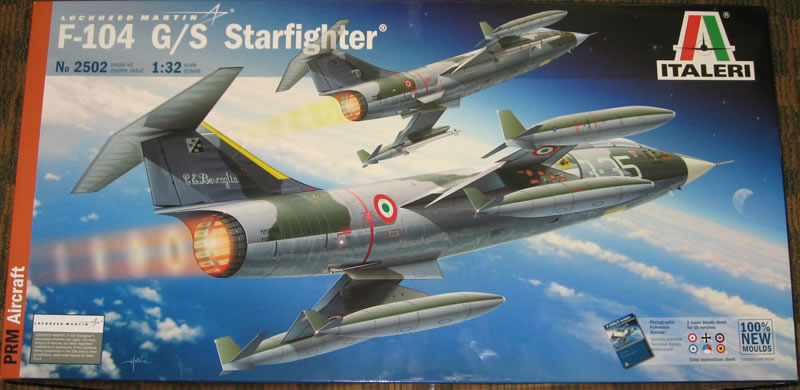
Italeri made a lot of modelers happy when they announced the release of a new tool 1/32 Starfighter. Up until now, modelers have had to make do with the Revell and Hasegawa kits. Both previous kits are something like 30+ years old, and lack a lot of detail that today's modelers expect. Also, both kits were basically F-104J/CF-104 types as they came with the flat gear doors and Lockheed C-2 seat. Both were also released as F-104Cs with the shorter tail as the only change, but the spoked G type wheels and asymmetric tip tank fins meant that they were just short tail F-104Js and not real C models. Hasegawa also released their kit as a G/S with a striking box painting of an S model in flight with all of the pylons and other external changes, but sadly inside was the same old F-104J plastic with only a set of resin wide wheels (which looked fairly nice) and bulged gear doors (which were too short and the bulge was too circular) added. Strangely, the Revell kit includes the S underwing missile pylons, as well as Sparrow missiles, although I'm not sure their kit was ever released as an S, but in any case the kit didn't have any other S features either. But enough history, let's move on to the new kit.
The Italeri kit rectifies a lot of the shortcomings of the older kits and can be built as a G or S model. The kit comes with both the Lockheed C-2 and Martin Baker seats, flat and bulged gear doors, and wide and narrow (in theory, see below) tires. Also there are a significant number of alternate parts for the S version, including new intakes with scribing representing the rectangular auxiliary air intake doors unique to the S, the extra small ventral fins, the revised center ventral fin with the swept back leading edge, the extra under-fuselage and underwing pylons, J79-GE-19 exhaust, and small details like the small teardrop shaped blisters on the sides of the rear fuselage. For stores, you get both wingtip and underwing tanks, and AIM-9B, AIM-9L, and Aspide missiles, the latter two only being applicable to the F-104S/ASA and ASA-M versions. The cannon bay, computer bay and ammo bay behind the cockpit can be displayed with the hatches open, and the rear fuselage can be detached to show the engine. Maintenance trollies are included to hold the detached rear fuselage, as well as the engine if you want to display it outside of the aircraft. Finally, a boarding ladder is included in the kit. A small PE fret is included, and you get two large decal sheets with markings for 8 aircraft, and full stenciling, including for the pylons, tanks, and missiles. All in all, a lot of potential and options in one box and would won't have to wait for Italeri to do other boxings, unless you want an A/C or a two-seater.
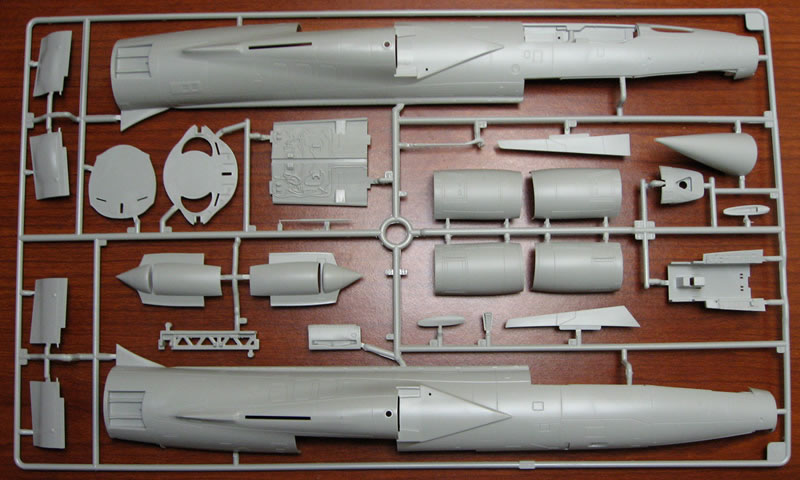
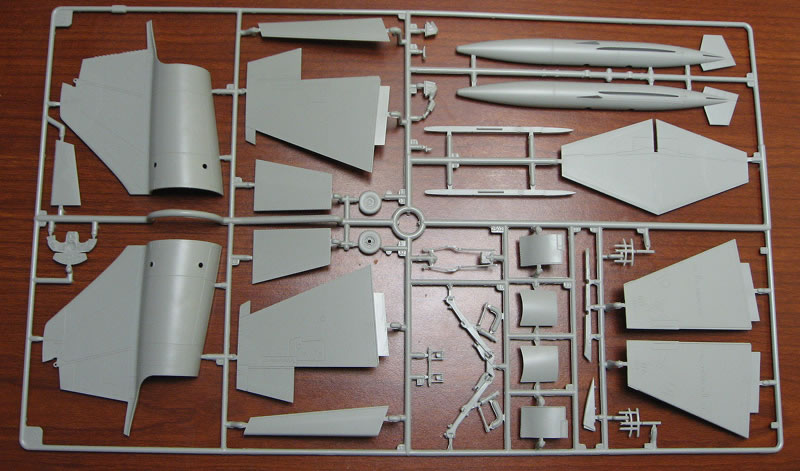
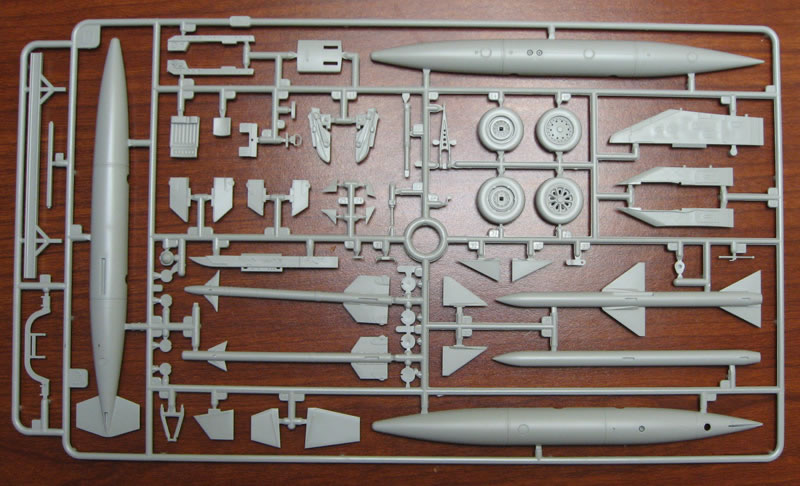
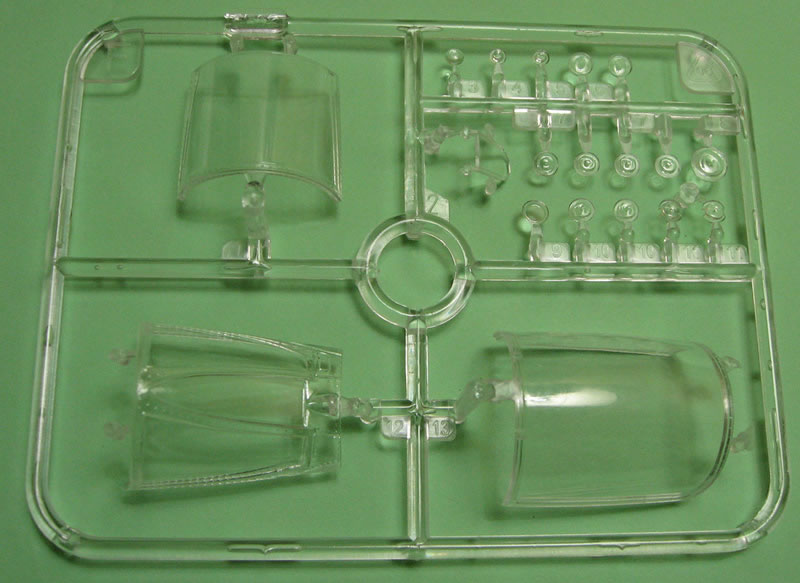
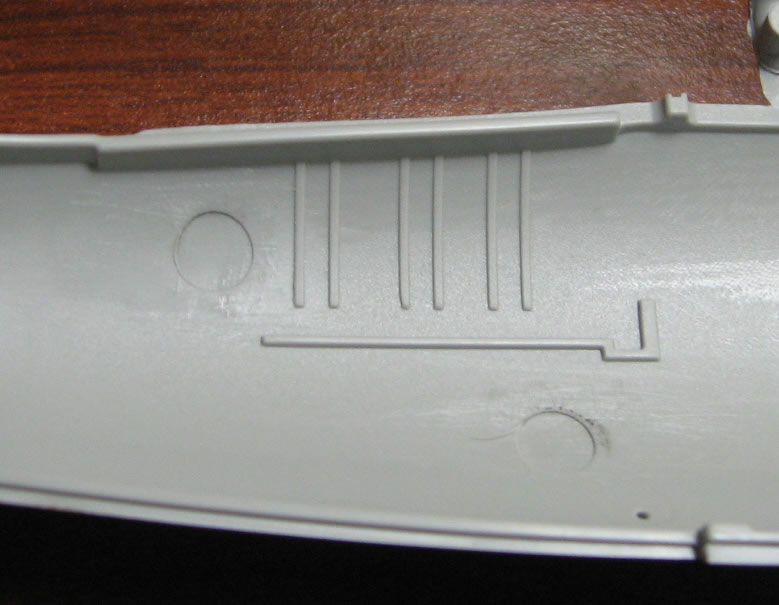
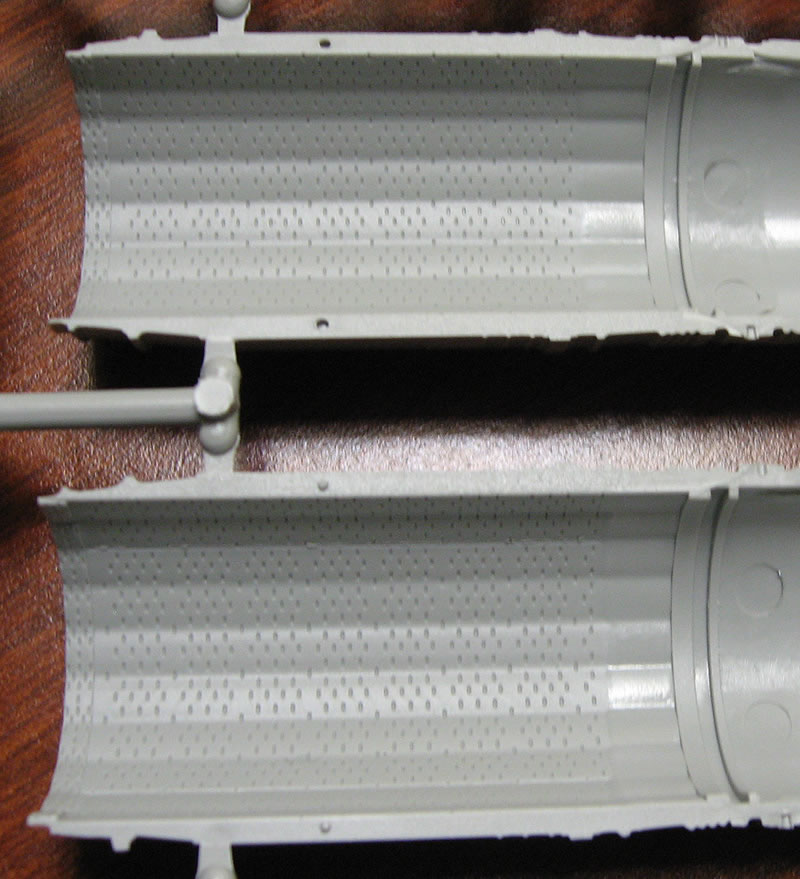
Opening the oversized box, you get 6 sprues of color plastic (one a duplicate sprue), a clear sprue, a small brass PE fret, a small color reference pamphlet with some walkaround photos and two giant decal sheets. The external detail on the aircraft is done using recessed panel lines, and the rear fuselage section is separate to allow for having the tail section removed to display the engine. The panel lines look generally accurate, but are a bit on the wide side for the scale, with some panel lines looking like they would be an 1 inch wide in real size and varying in size with no apparent rhyme or reason. They are probably OK under a coat of camouflage paint, but it might be noticeable for a NMF, as for the RCAF decal option. The wings have separate leading and trailing edge flaps, which allow them to be posed, and also allows for a sharp leading and trailing edge that won't be marred by glue. The rudder is also separate. The plastic Italeri uses is soft (you can flex the wings and T-tail with light finger pressure), and I wonder how the wings and landing gear will handle the weight in the long term if you build it with the engine and fully loaded wings. The ejector pin marks aren't too bad, but there are some prominent molding lines that need cleaning up, like on the main gear part, and there are a few sinkmarks on parts like the Red Dog missile launchers and the gun bay door. Clear parts are included for all of the navigation lights on the fuselage and on the sides of the tip tanks.
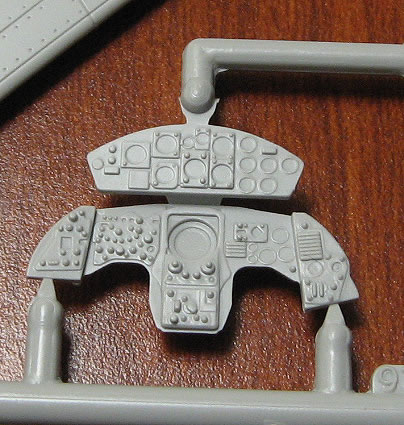
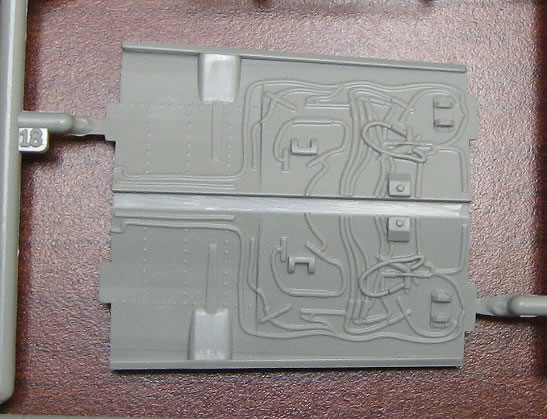
The cockpit consists of a conventional tub, which isn't quite correct as the F-104 didn't have a typical floor. Instead, there was a large belly hatch (a legacy of the downward ejection of the early F-104s) and the seat just hangs on the rails instead of sitting on a flat floor. The hatch would have raised plates to provide rests for the pilot's heels. However, with the seat and stick installed, you can't see much of the floor, so I'm not sure it's that big of a deal to most people. The side console and IP detail is raised, and the things represented appear to be generally in the proper place for a generic F-104. Italeri included the recessed circuit breaker strip that runs along the inboard edge of the left console, but it's a bit too wide, making the main console a little squished on that side. The throttle is a separate piece and a clear part is provided for the radar screen. The IP is OK, although no dial detail is represented on the plastic. Italeri intends that you use a decal with dial faces, although you will likely want to cut out the individual dials instead of using it in one piece due the the height of some of the raised detail. Skip the optional PE for the side consoles and top of the IP as it is flat and undetailed, and you'll lose the 3D detail of the plastic parts. As a note, the IP is a generic F-104G panel, which isn't correct for the CF-104, which had some relocations of the top instruments including a large artificial horizon and compass at the top center of the IP. The instrument detail is a little on the basic side, but will probably look OK when painted up. A disappointment is that there is no cockpit sidewall detail beyond some thin vertical stringers on the inside of the fuselage halves. Also, the rudder pedals seem much too narrow. The IP shroud includes a clear gunsight, clear projector lens, and the periscope for the gun camera.

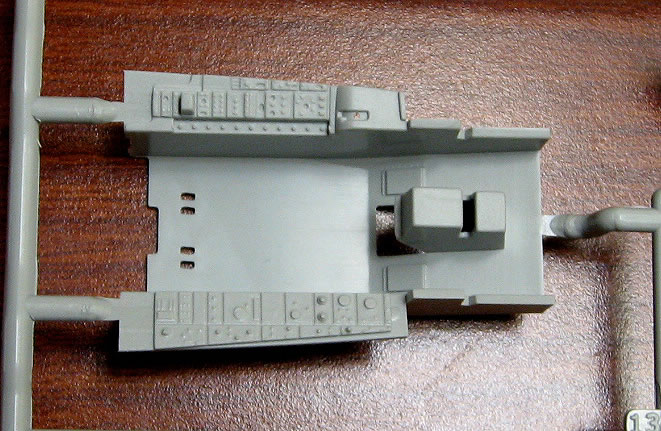
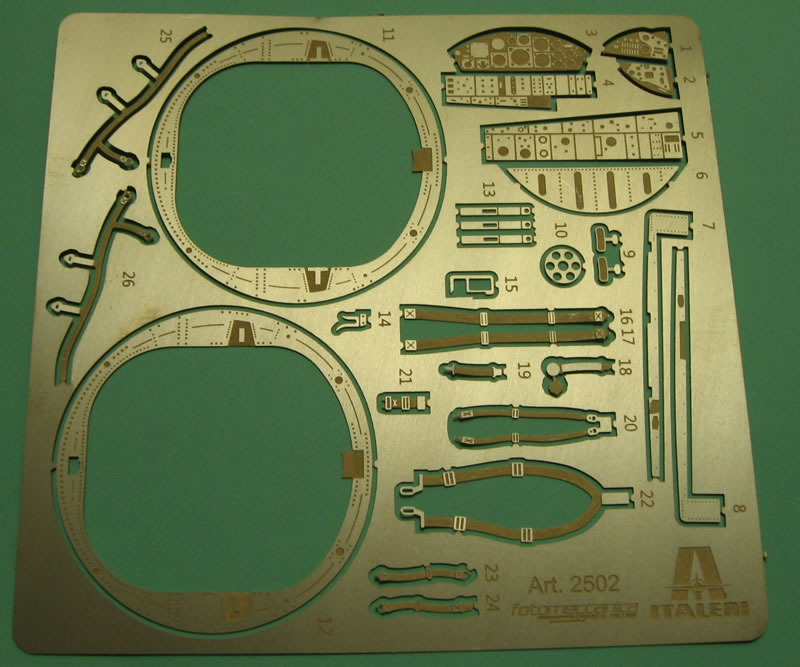
The kit includes both the Lockheed and MB seats, with PE included for the belting. The detail seems a bit basic for the scale with all of the detail on the sides of the seat being molded in (like the MB seat O2 bottle) instead of being separate, and the face curtain and center pull handles on the MB seat look much too small. I suspect many people are going to be replacing the seats.

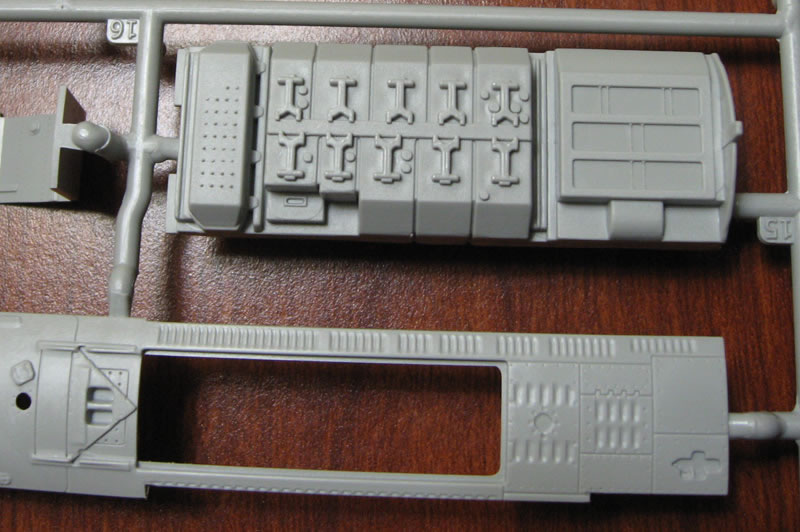
The canopy can be shown in the open position, and includes the defogging pipe that runs around inside (it's a single part, so be careful when removing it from the sprue). Italeri included nice detail for the canopy sills. Aside from PE sills, they included the cylindrical canopy ejection charges, the U-shaped canopy pin guide, and the plexiglass breaker knife for the left sill. In addition to the canopy being open, the computer bay hatch behind the seat can be posed open, showing a full load of cans, plus detail on the inside of the hatch. The ammo bay hatch just behind can also be posed open, although if your aircraft has the 20mm cannon deleted, it wouldn't have the ammo can that is shown in the kit part.
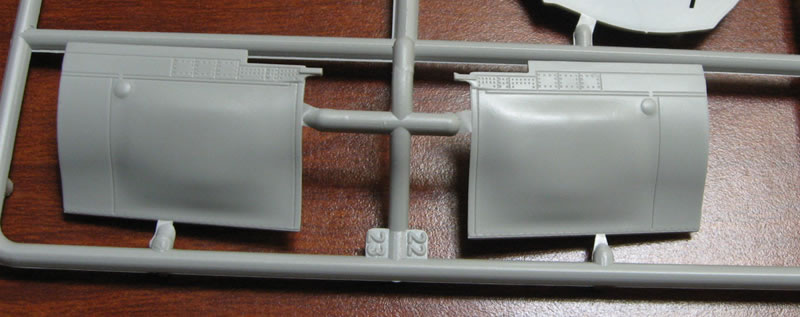
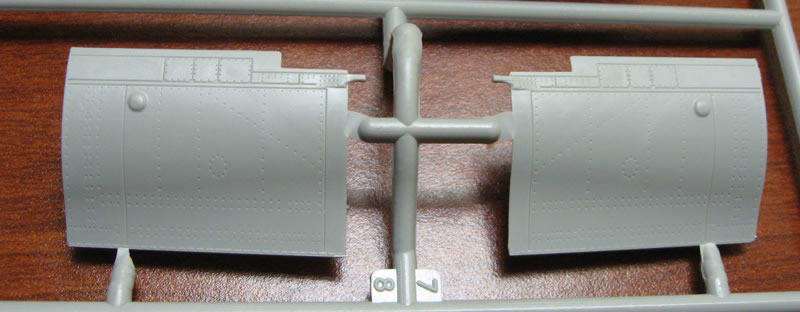
The cannon bay can be posed open, and includes a decent representation of the 20mm Vulcan, although the feed chute coming in the top is missing. The muzzle is a separate part to be attached to the fuselage which allows for the option of the cannon opening, or a covered port for versions that had the cannon deleted, like the Italian interceptors. The cannon bay doors are in the correct two parts: the large front part that covers the barrels is removable, so it's either on or off, and the rear section covering the breech is hinged at the bottom. Note that if you are building a cannon-less aircraft, or one that has a modified feed system that retains the spent shells and links inside the fuselage, you'll also have to delete the link deflector on the belly to the rear of the nose gear bay, and fill in the ejection opening.
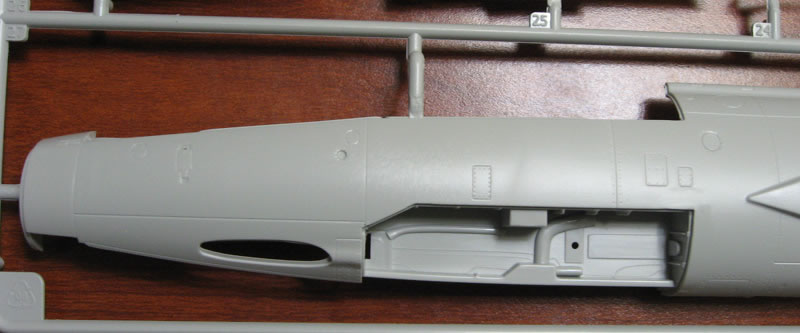
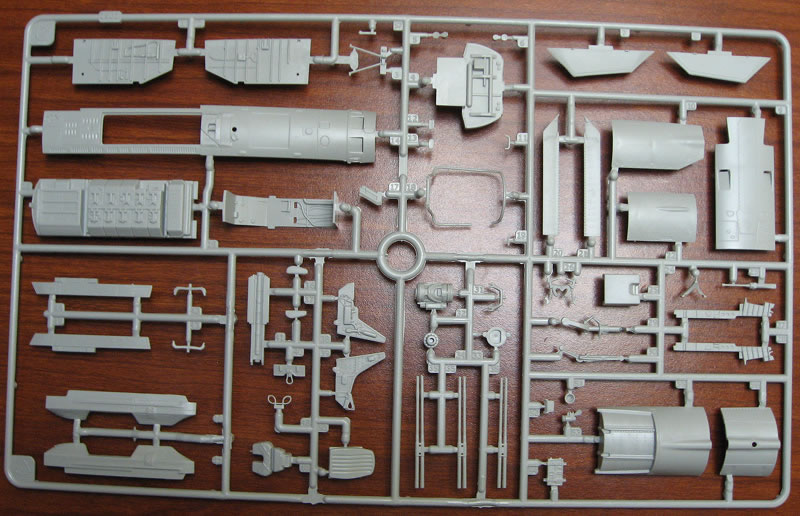
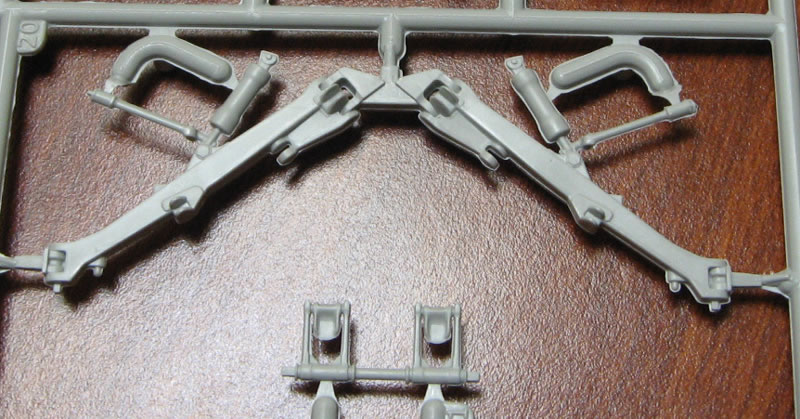
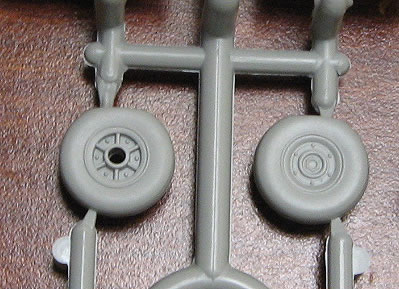
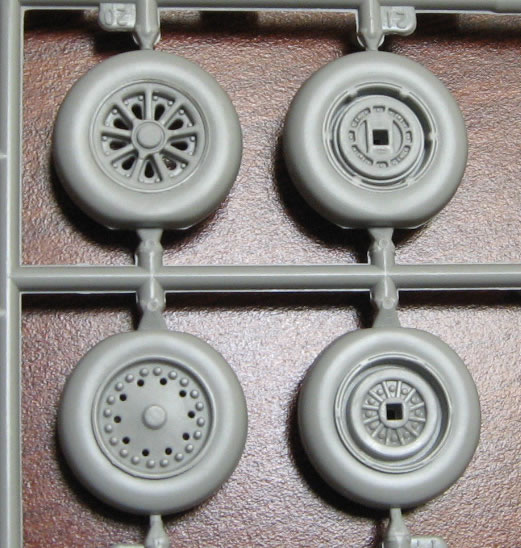
Moving to the landing gear, the nose gear bay has separate sidewalls for detail, and a more correct roof, which is a step up from the simple Hasegawa gear bay. The main gear bay is also more detailed than the simplified Hasegawa parts and includes some piping on the gear bay roof that will look OK when painted (not that many may ever see it). The gear itself is more complex than what's in the older kits and Italeri looks to have represented the main struts, rods, and linkages. The kit includes both the bulged and flat MLG doors. Italeri has done a much better job of capturing the subtle door bulge than any other kit on the market, and include the separate small circular bulge at the inboard rear corner of the main bulge. Italeri also included the small bulge on the flat gear doors, but I don't see it on any photos, including the one of the flat door in the included booklet, so it should be sanded off. The MLG doors can be open or partially closed, but note that the normal position is partially closed. The kit includes both the thick and thin tires, but the “thin” tire incorrectly has a F-104A-D dished wheel hub, and should not be used. If you want to do a thin wheel G model, it's better to just thin the insides of two-part “thick” wheels. The tires are smooth with no tread detail, and with as with the incorrect “thin” tires, this is another area that people may want to seek aftermarket replacements for. The tires come pre-flattened, with the nose wheel maybe being a bit too flat. Also, the nose wheel has a spoked hub on one side and dished on he other, while in the pictures I've seen where both sides of the wheel are shown, both are the same type, so I'm not sure Italeri is correct here.
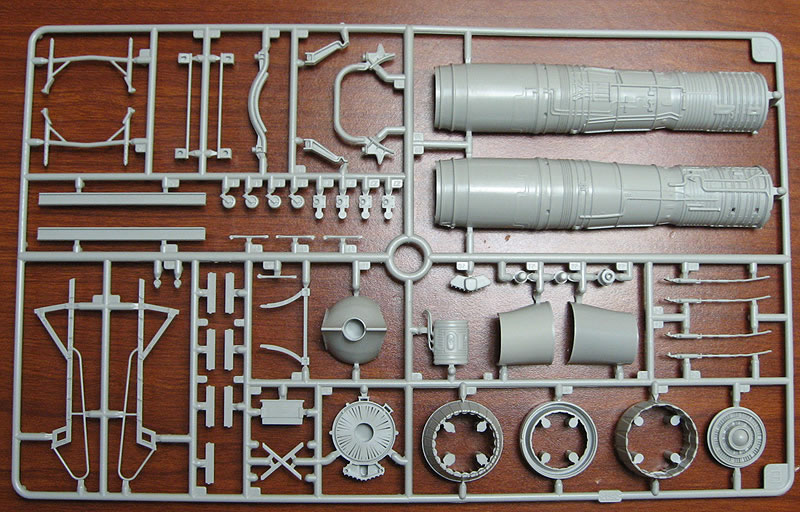
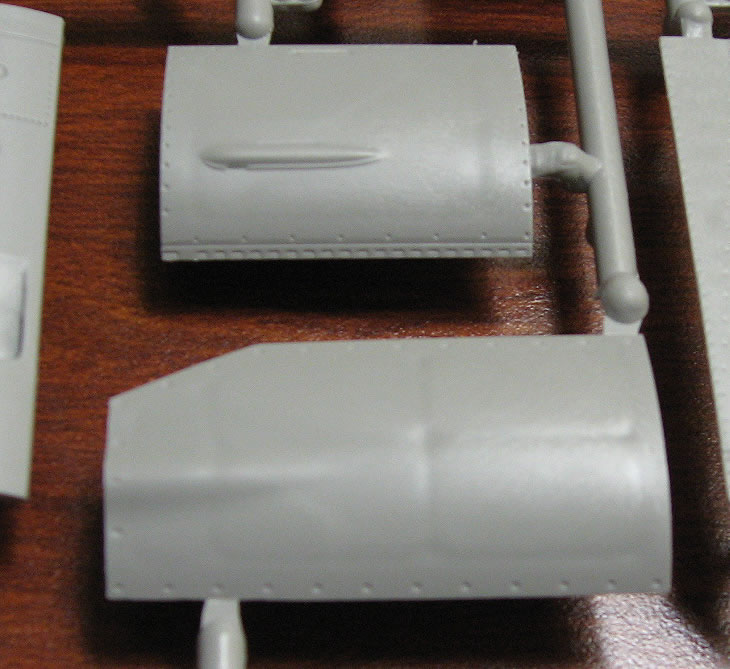
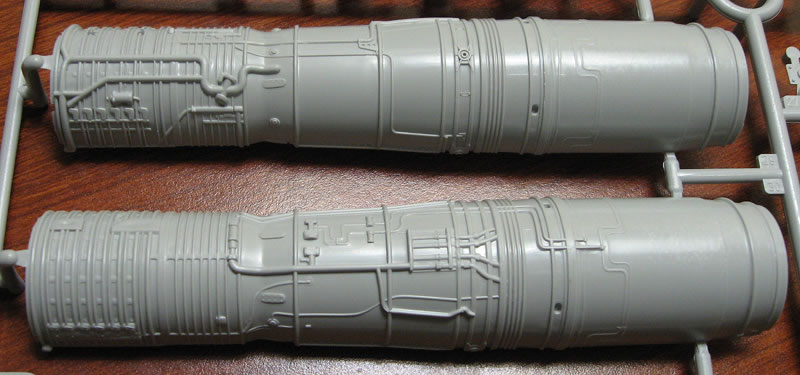
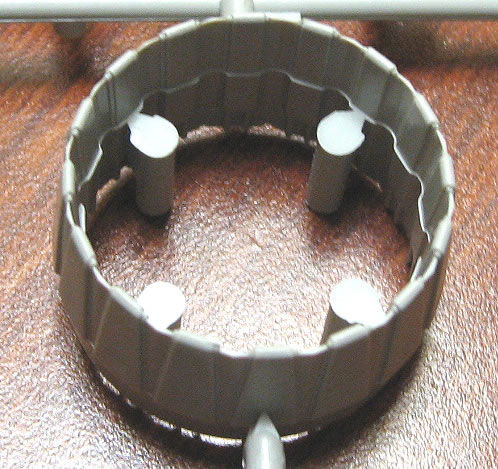
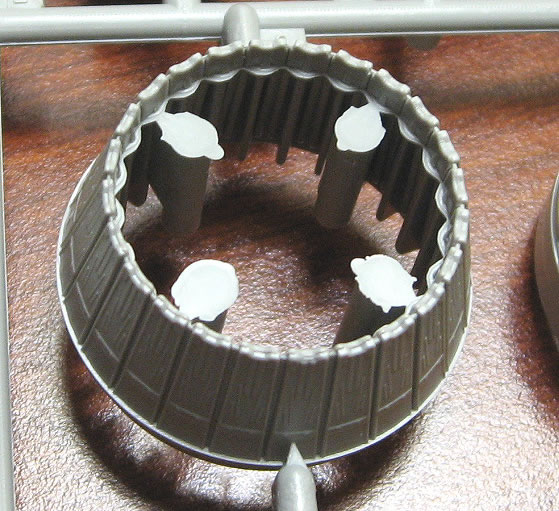
The kit has a complete engine which is visible with the rear fuselage removed, or separate on it's own engine trolley. The external detail looks decent, and the part has nice detail for the walls of the burner section, but you'll have the seam between the two halves to deal with. The kit includes the nozzle for the J79-GE-11A fitted to most G models, as well as the nozzle for the more powerful -19 fitted to the S models. The exhaust petals are different between the two and are visually similar to the differences between the F-4 short and long exhausts. Note that German F-104s fitted later in life with the upgraded J79-MTU-J1K engine used a similar exhaust to the S model. The exhausts are a bit thick and cleanup of the mold line inside the nozzle will be required. Unfortunately, the -11A exhaust is molded in the closed position, which is very rare on the ground. The exhausts are another area that people may want to consider for an aftermarket replacement.
The kit includes both G and S intakes, but there is no intake ducting. The rear of the intakes are blanked off by the front gear bay bulkhead.
Small external bits like the AOA kickers, temperature probe, and various antennas are separate parts. Note that the instructions show the pointy cone shaped antenna under the nose (5C) being used for the German and Italian options, but the corresponding one on the spine (6C) used for only the the Italian options. The antennas were for the EL-70 ECM system, which was also used on German F-104s later in life, so if you fit them, both should be there. Similarly, the wedge shaped antenna under the rear fuselage (3A) was for the later EL-73 system, and could also be seen on German F-104s late in life.
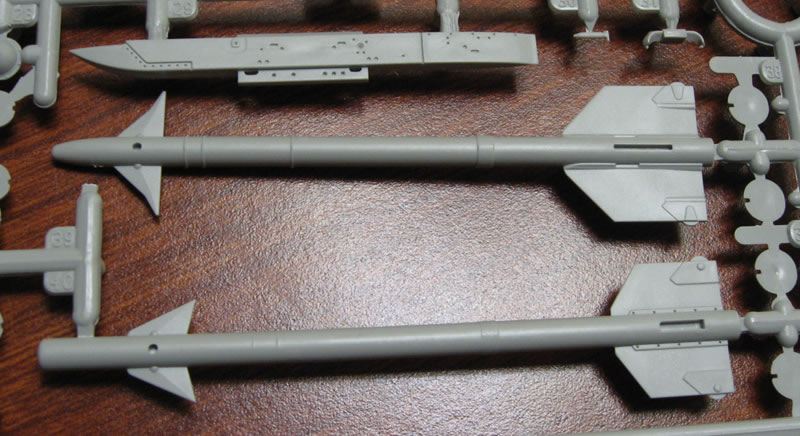
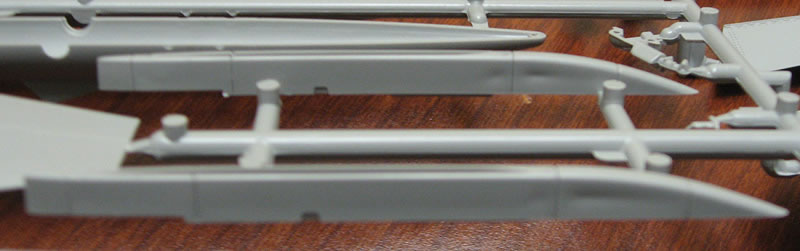
For pylons, the kit includes the standard underwing pylons (designed for tanks only as no sway braces are included), and centerline pylon. For the S versions, the kit adds the extra underwing pylons and the underfuselage BL22 pylons. As a note, the BL22 pylons were not clear to carry loads operationally. They were rarely fitted, and if carried in flight, they were empty. They were only seen loaded with weapons for static displays. For Sidewinder pylons, you only get the thick curved Red Dog launchers, used on the wingtips for all versions and for AIM-9Bs on the S model. When used on the wingtips, the rear of the Red Dog launcher was a large clear colored part used as the wingtip navigation light, since the small lights on the wingtips were covered up by the launcher. Unfortunately, Italeri didn’t provide clear parts for the lights at the rear of the launchers; they tell you to paint the solid plastic. The belly catamaran Sidewinder launcher is not included (interestingly the arms are included as unused parts, and there are flashed over holes in the belly to attach the arms), nor are Aero 3B rails that were typically used for the belly launchers on European F-104s (other than Italy). F-104Js used Red Dog rails on the belly catamaran launcher.
Both wingtip and underwing tanks are included and look good. The underwing tank is what the DACO book calls the “standard” tank, which lacks the external stiffener along the lower right side used on the “combat” tank.
The kit includes two AIM-9B, two AIM-9L, and two Aspide missiles. The missiles are a bit basic as compared to those in the Academy kits, and the Aspide missiles are missing the external cable fairings that run along the outside. The kit lacks the LAU-7 launchers used for the AIM-9L, so these shouldn't be used. Note that if you find aftermarket LAU-7s and want to load AIM-9Ls on the wingtips, the wingtip Red Dog launchers were still used – the LAU-7 was attached to the Red Dog launcher. Since the LAU-7s are missing, and the BL22 pylons weren't used, that effectively limits the load on the S model to a max of two AIM-9Bs and two Sparrows, which are only applicable to the S (the ASA and ASA-M used the AIM-9Ls). Typical S loads seem to be just one Sidewinder and one Sparrow/Aspide under each wing with tip tanks, or more uncommon two Sparrow/Aspide under the wings and AIM-9s on the tips. For G models, the only kit missile option is AIM-9Bs on the wingtips. Note that the instructions show the wingtip AIM-9s used on the CF-104, but I don't believe the Canadian F-104s ever carried A-A missiles operationally.
The two large decal sheets were printed by Cartograf, are in perfect register, and includes stencils. Markings are provided for 10 aircraft from 6 countries:
- Three Italian F-104Gs in gray/green camouflage over aluminum undersides
- One German Marineflieger F-104G in dark grey over aluminum undersides (circa 1973)
- One CF-104 in NMF with white upper wings (circa 1962)
- One Greek F-104G in tan and two greens over light gray
- One Dutch F-104G in NMF (circa 1967)
- One Belgian F-104G in tan and two greens over light gray
- One F-104S CB (fighter bomber) in gray/green camouflage over aluminum undersides
- One F-104S-ASA in gray/green camouflage over aluminum undersides
Overall, the kit is a significant step up from the ancient Revell and Hasegawa kits and you get a lot of options in the box, but it has some issues like overdone panel lines and some errors like the incorrect thin wheels. The instructions have a few errors regarding antenna and loadouts, so check your references for what parts to use for the aircraft you are doing. It's also a somewhat expensive kit (although that's relative), and people will have to decide whether what they see and get in the kit are worth the price.
© Dave Williams 2013
This review was published on Monday, December 09 2013; Last modified on Tuesday, April 26 2016