
Mr. Paint | Chrome, Basic Black, RLM 02, RLM 66
Reviewed by Kevin Futter
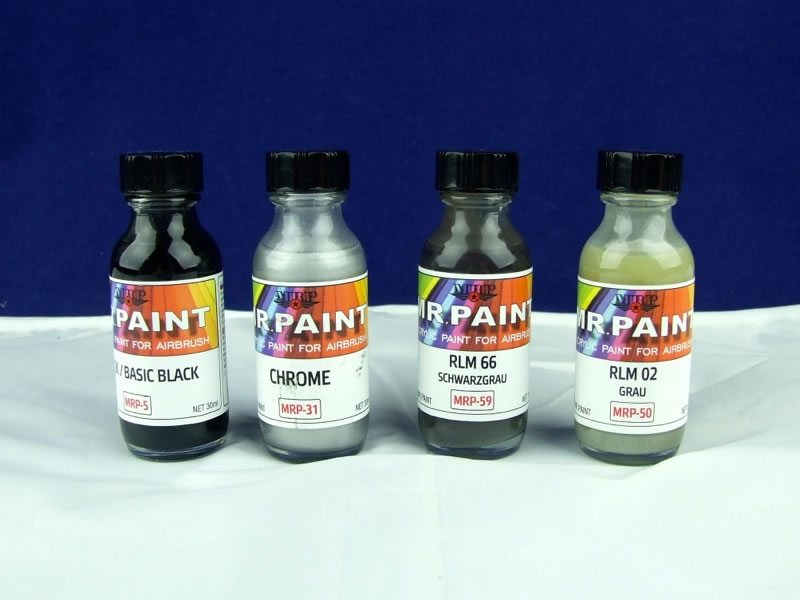
Mr. Paint is a relatively new line of hobby paints currently being distributed by Uschi van der Rosten. The range is already quite extensive, consisting of basic black and white, a slew of camouflage colours for various air forces and eras, and a series of metallic paints. The paints themselves hail from Slovakia, and Uschi has sent along four bottles for evaluation and review: basic black, RLM 66 and RLM 02 from the "German Luftwaffe RLM Colors" set, and Chrome from the metallic range. Let's take a closer look at this new contender.
The Specs
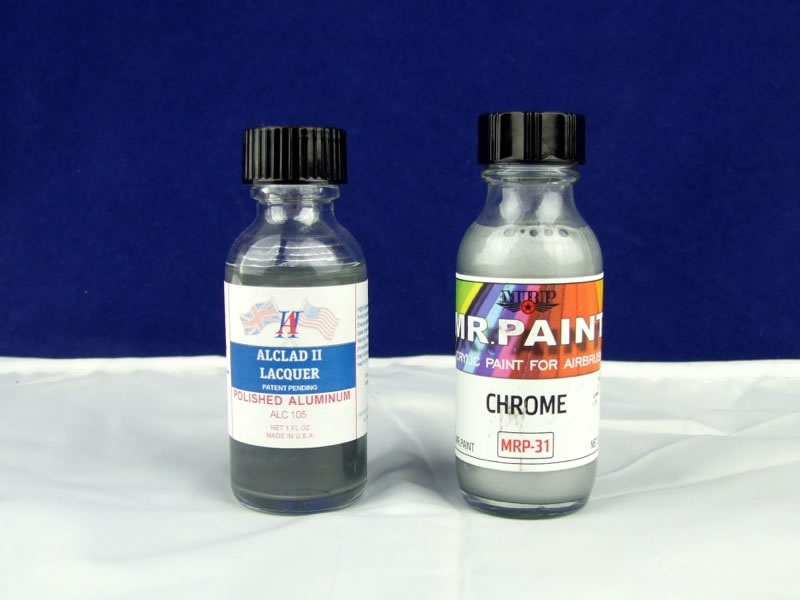
The label on each bottle says "acrylic paint for airbrushing", and as it suggests, Mr. Paint is for airbrushing only. It's far too thin for brush painting (though I'll concede at this point that I didn't actually test it with a brush). Each bottle is a net 30ml, which is three times the amount supplied in the most popular jar size for Gunze and Tamiya acrylics, and represents a decent amount of paint. As you can see in the photo below, the bottles are similar to those from Alclad in size and style:
Each of the four bottles I tested has an agitator in it - probably a small ball-bearing or similar object. This helps remix the paint when shaking the bottle, and is a nice touch. Just don't go too hard, or you may risk cracking or breaking the bottle while you're shaking it!
Like all paints, the pigment will tend to settle out to a varying degree, so shaking or stirring to remix the paint is a must before loading it into your airbrush. The pigment in Mr. Paint appears to be among the finest I've ever seen, and doesn't tend to glob or gel at the bottom of the jar. It remixes easily and remains in suspension for an extended period. So far so good, but how does it perform?
On Test
For testing purposes I followed the basic instructions for the paint, which are to ensure the colour is thoroughly mixed, and to apply on clean, dry plastic or over a primer. I poured the paint straight into the airbrush cup without thinning, and sprayed it at around 12 PSI. The airbrush used was an Iwata HP-C Plus, which was stripped down and cleaned prior to these tests. In all cases I used generic lacquer thinner to flush out the airbrush ready for the next colour.
Basic Black
For this colour I took a bomb half from the spares box and sprayed it directly on to the bare plastic, with no prior preparation:
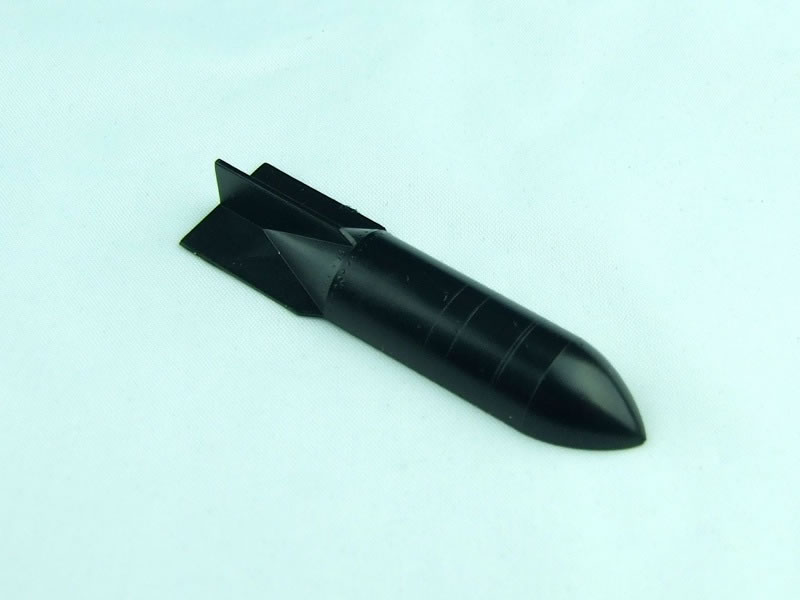
I was immediately impressed! The paint flows smoothly and effortlessly from the airbrush, producing consistent atomisation even at a relatively low 12 PSI. Coverage was also excellent, with no spattering, runs or other unwanted effects. And as you can see from the photo, it produces a smooth, satin black with no signs of chalkiness or orange peel. The painted part was able to be handled in around 20 minutes, with a tough finish closer to what you expect from lacquer paints than anything wearing the 'acrylic' moniker.
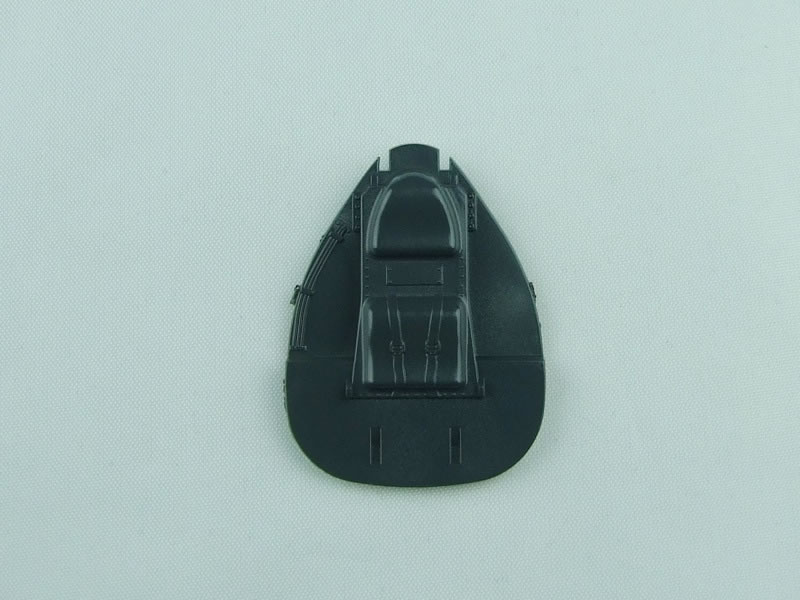
I decided to risk using it on my current project - Kittyhawk's Texan - which requires a black anti-glare panel on the forward fuselage:
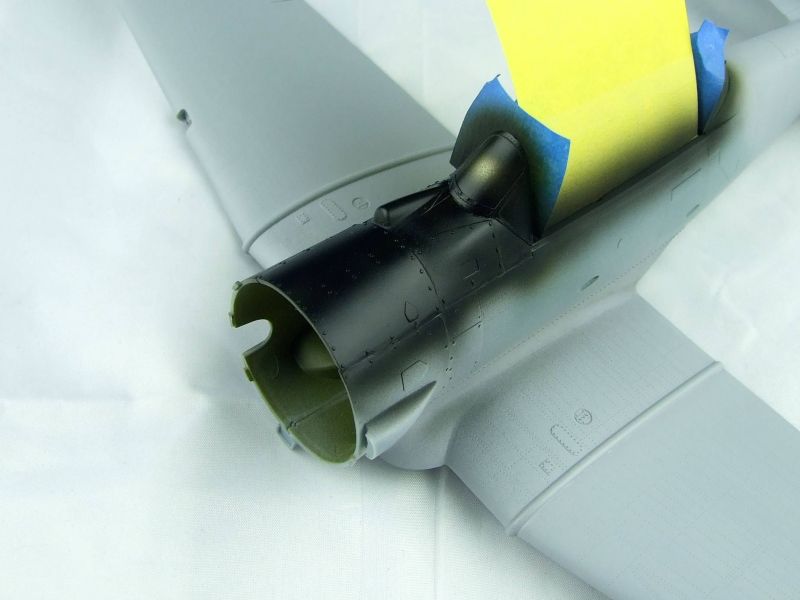
This was sprayed over unpolished primer, and produced a slightly more flat result. Again, the paint went on flawlessly, and I was able to build it up in a very predictable, reliable fashion.
One of the advertised purposes for Basic Black is for use with pre-shading. I'm not a big fan of pre-shading, but I performed a couple of basic tests that I'll show the results of in the context of testing the other colours.
RML 02
With the two Luftwaffe camouflage colours, I decided to take a two-stage approach. Firstly, test how the paint performs on an untreated model part, and then A/B-test the colour against a known competitor. I wrested a couple of Revell He 162 parts out of the spares bin and set to work. In the photo below, I pre-shaded the part using Basic Black, and then built up the RLM 02 around it:
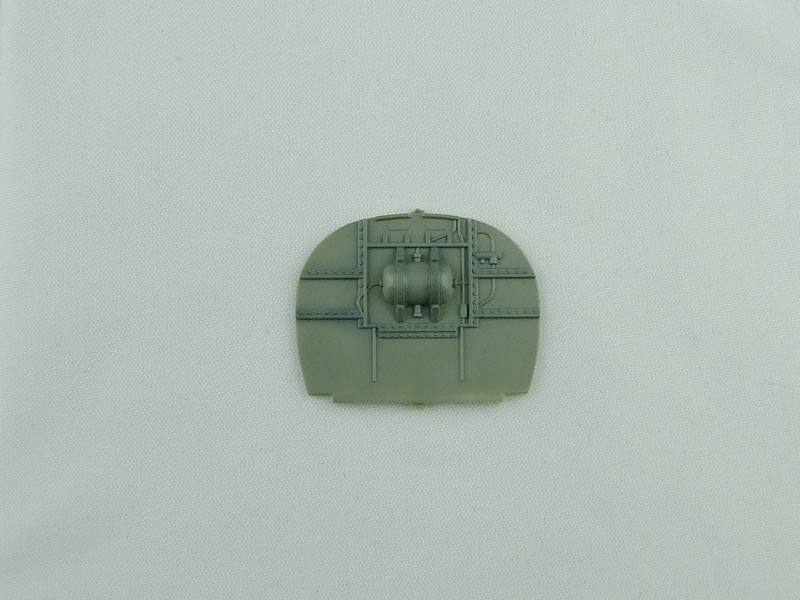
The viscosity of this paint is near-perfect for airbrushing, and allows an impressive amount of control over paint flow. This in turn allows for some subtle blending effects that I normally find difficult to achieve with standard acrylic paints. Controlling the amount of coverage is easy, and you come to trust how this paint comes out of your airbrush quite quickly.
After the paint had dried for around 30 minutes, I decided to test how it handles an oil-based wash, unprotected by any clear coats. I prepared a thin mix of Payne's Gray and white spirit, and applied it liberally to the part. After about 10 minutes, I cleaned it up with a cotton bud. There were no signs of damage to the finish from the white spirit, nor did rubbing it with the cotton bud incite any damage. Here's the proof:
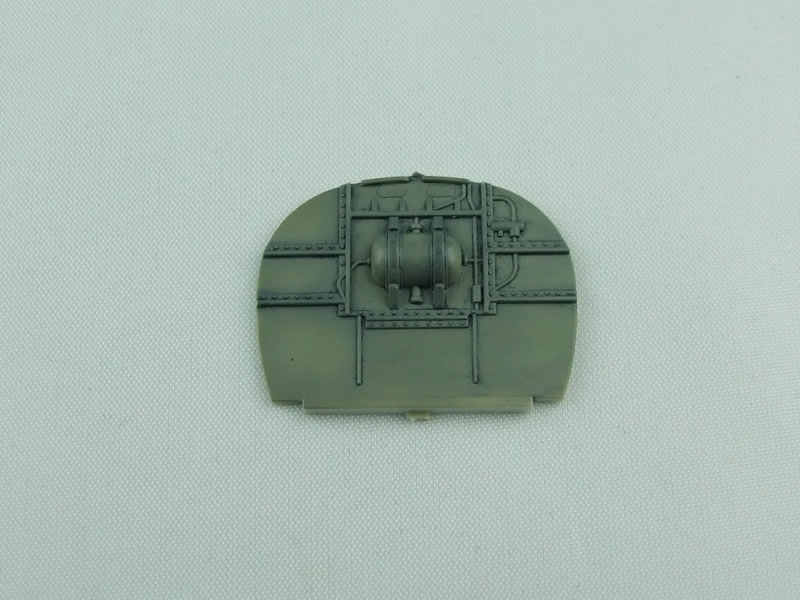
Note that the part as shown in the photo above features some colour lightening effects using Gunze's version of RLM 02 for comparison.
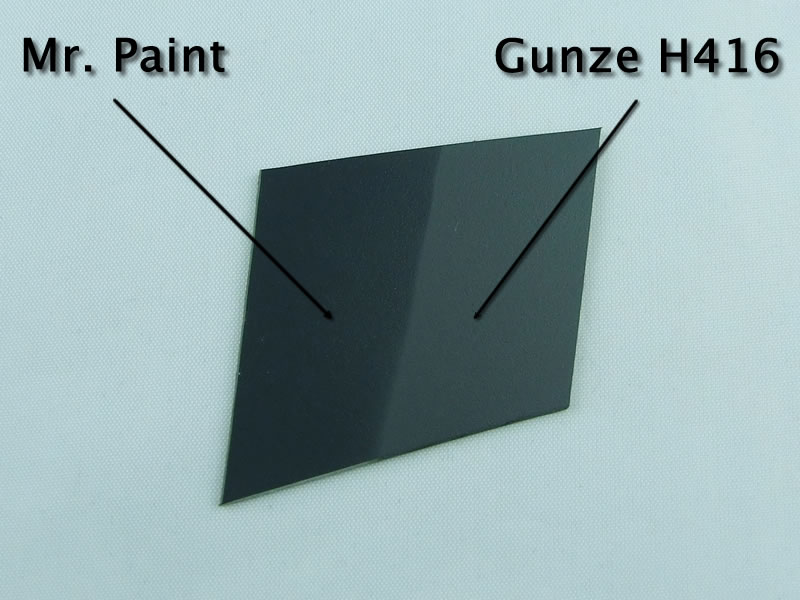
So what of the actual colour itself? Is it accurate? I think trying to determine that is a hopeless cause, and since I don't possess RLM colour chips of any kind to check against, the most I can do is compare it to the same colour from another established brand - in this case, Gunze's H70:

As noted in the photo, the Mr. Paint version is on the left, with the Gunze colour on the right. Immediately we can see that the Mr. Paint interpretation is darker, with more grey, while Gunze's is lighter, with more green. In terms of practical application inside a cockpit, wheel well or airframe, I think either colour is acceptable. I've always thought that Gunze's interpretation was a little too green though, and quite like the Mr. Paint version. And as already shown, both colours can be used together in a complementary fashion.
RML 66
Having already established the salient qualities of these paints, I pulled out another spare part and gave it a coat of Mr. Paint RLM 66:
As before, this was done straight onto unprepared plastic. And once again the paint performed beautifully, with great flow out of the airbrush, excellent coverage with great control and no unwanted effects. The precision these paints allow is impressive.
Another point worth mentioning is that, while not odour-free, these paints aren't as offensive to the nose as many similar paints, especially helped by the fact that you don't need to use any pungent thinners to prepare them for airbrushing.
I felt that the Mr. Paint interpretation of RLM 66 was much darker than others I'd seen, so I repeated the colour comparison, again using the Gunze version:
As before, Mr. Paint on the left and Gunze on the right. The contrast here is much greater than it was with RLM 02, with the Mr. Paint version being very much darker than Gunze's interpretation. I've always felt that H216 was a little light, but am left wondering if perhaps the Mr. Paint version is a little too dark. I'll leave that conclusion up to you, dear reader. Personally I think it's fine given that it's an interior colour with limited visibility.
Chrome
With the standard colours out of the way, it was time to turn my attention to the metallic colour in the set: Chrome. This paint presented more of a challenge than the others, partly due to a lack of time on my part to prepare any parts adequately for testing. This colour airbrushed just as beautifully and consistently as the others tested so far though, and I began with the other half of the already-used bomb from earlier:
Again, this is unprepared plastic, and in this case it really shows. Like any decent metallic paint, every scratch and scuff is visible, and the lack of a polished surface has limited its metallic effect somewhat.
To extend the testing, I decided to take the first bomb half that had already been painted black, and apply the Chrome over the top of it. Here's the two halves side-by-side for comparison:
The part with the black undercoat is on the left, and as you can see, there's little discernible difference between the two. So unlike with the high-shine Alclad varieties, the undercoat seems to have no real effect here.
I decided that in order to test this Chrome paint fairly, it would need to be applied over a highly-polished surface, with as few imperfections as possible. I broke out an old Emil spinner, polished it up as best I could and applied the Chrome:
This resulted in a noticeable orange peel effect - the first trouble I'd had with these paints so far. Orange peel is often a sign of the air pressure being too low, and the paint not atomising effectively. After waiting about three hours, I masked off one half of the spinner, cranked the air pressure up to about 22 PSI, and painted the unmasked half again. De-masking revealed another issue:
On the plus side the orange peel effect was less noticeable using the higher air pressure, and I'm sure the results would have been even better had I not sprayed over the existing problem. But the strip of Tamiya masking tape I used made short work of the previous layer of paint. I would like to have tested adhesion and general performance over a coat of primer, but unfortunately I ran out of time. I'm certain I haven't seen the Mr. Paint metallics at their best yet.
A Final Test
As part of my testing I decided it might be useful to use the paints in the same fashion you would for a real-world project, so I broke out a pair of Fw 190 undercarriage legs and set to work. No primer was used on the parts - a small deviation from my usual practice to save time.
First, I sprayed the oleos with Chrome, waited 30 minutes and masked them off with Tamiya tape. For one part I de-tacked the tape on my forehead, and for the other I used a segment straight of the roll.
Next I roughly pre-shaded the parts using Basic Black. This was followed by a couple of light passes with RLM 02. I deliberately allowed the pre-shading to show through more than I normally would. After de-masking, this was the result:
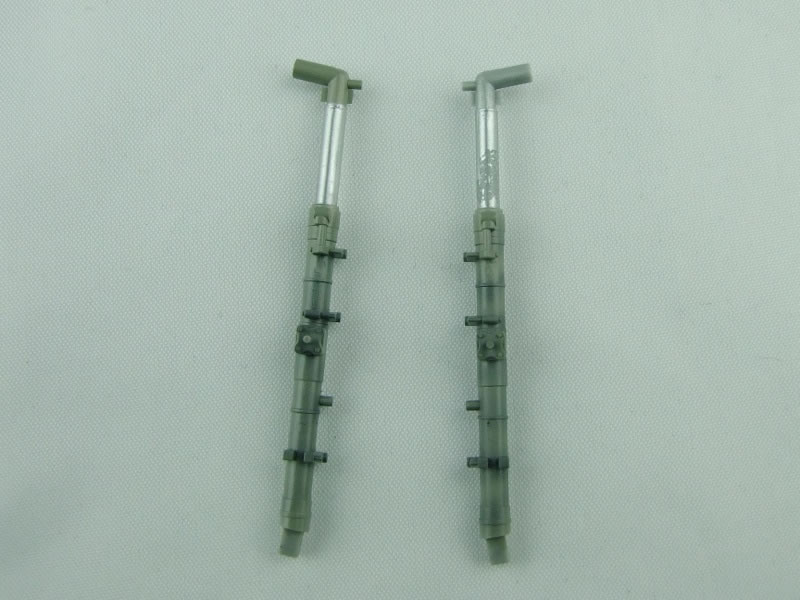
The de-tacked Tamiya tape did not remove any of the Chrome, while the virgin piece most certainly did. On both parts, the tape dulled the shine of the Chrome paint noticeably, so it seems best to use it last or in circumstances where it won't need to be masked over. It's possible of course that the paint just needs to be left to cure longer than I've been able to allow it to.
Conclusion
Despite my troubles with the Chrome, which I'm prepared to concede were mostly circumstantial, I think these are superb paints, and the nicest I've ever airbrushed. The pigment is extraordinarily fine, and this is definitely noticeable to the naked eye in my A/B colour tests with the Gunze products. In effect, we now have camouflage colours available in an Alclad-class paint, and I'm not aware of any other paint line that matches its combination of ease-of-use and performance. I look forward to using more Mr. Paint on future projects. Highly recommended!
Many thanks to Uschi van der Rosten for the review samples. Check out the Mr. Paint page on the Uschi site for more information about the range.
© Kevin Futter 2014
This review was published on Saturday, May 17 2014; Last modified on Sunday, May 18 2014