
Flugzeugwerke (Bo Monroe) | 1/32 Fokker D.III (M19F/K)
Reviewed by Mike Swinburne
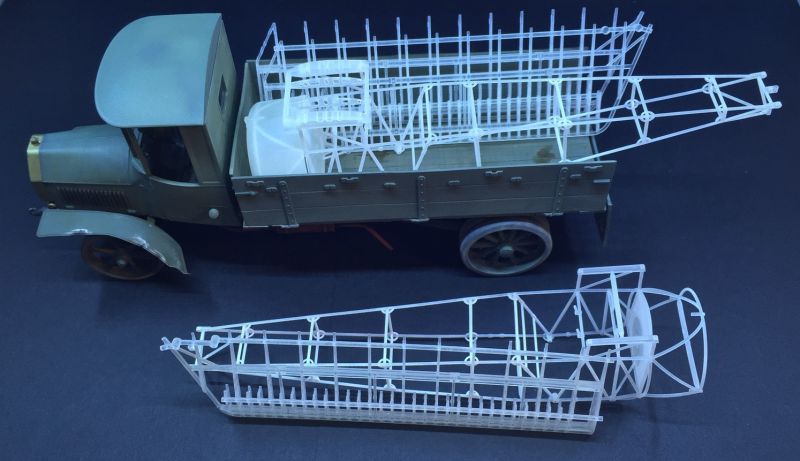
Bo Monroe is managing to make a name for himself lately among WWI modeling circles, with instruction design work for LSP sponsor Aviattic's Marienfeld truck, as well as designing his own line of detailed 3D-printed upgrade parts for 1/32 WWI aircraft. These items are available through 3D-printing service Shapeways, under the seller name of Flugzeugwerke. If you are looking to add more detail to an Albatros D.V or Pfalz D.III kit and appreciate the level of detail that a resin engine from Taurus provides, make sure to have a look at these offerings.
Back on topic, what we have here is a kit of a little-known Fokker D.III biplane, apparently not one of the pivotal aircraft designs of the First World War, but in skilled hands such as Boelcke's, it had a chance of holding it's own in a dogfight with contemporaries of the time - Boelcke claimed seven victories in this aircraft according you sources. The D.III has been designed as a skeleton kit and made available in several sets which is partly due to the print size limitations afforded by Shapeways, and partly to allow the builder multiple options for a build project, allowing a build of the entire aircraft or just the fuselage, or wings, or a few random components, or any combination.
3D Printing...
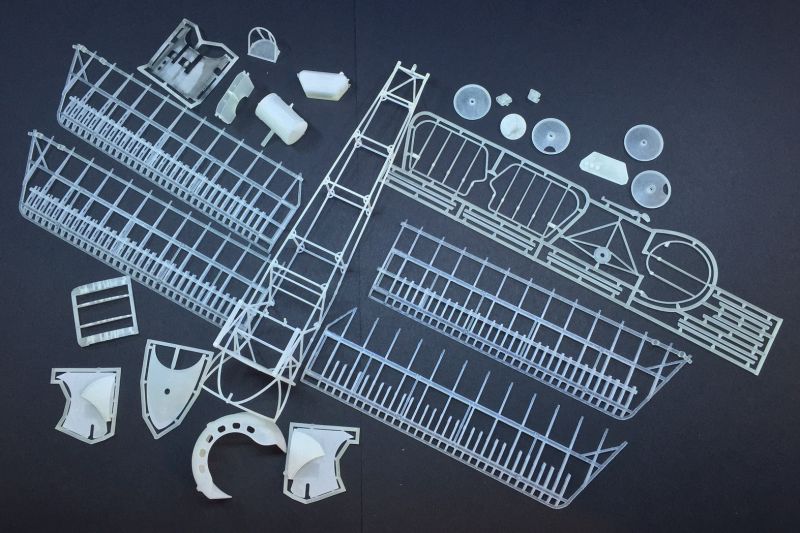
What is common with 3D printing are visible layers produced. The layers are generally more noticeable on solid parts like fuel tanks, cowl panels, etc and on structures like wing ribs and airframe tubing, these layers generally present as a slightly grainy surface that require only gentle sanding/priming to hide. Solid pieces take a little bit of additional work to hide with putty and sanding, but are generally not a massive use of time/skill/resources. From the pieces i've worked on already, personal preference has me looking at these parts in favor of short-run kit parts. Let's take a look at the four sets offered:
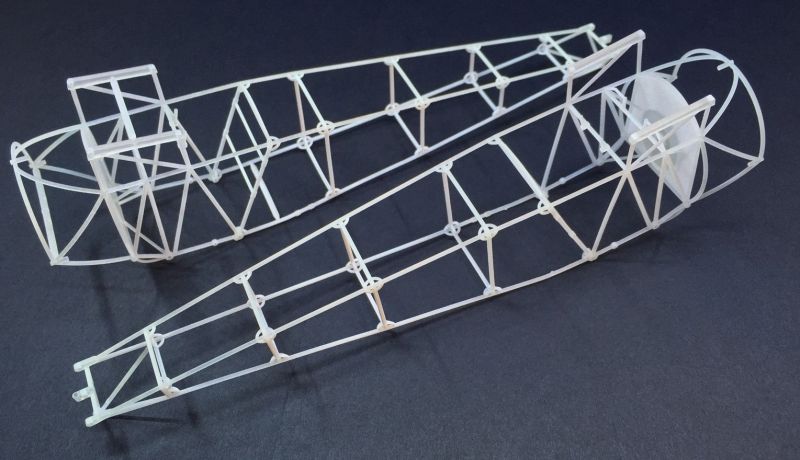
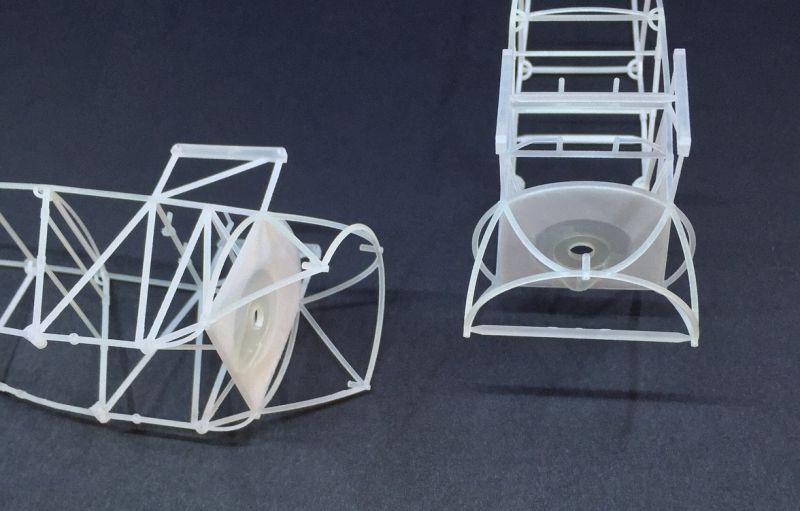
Fuselage
If you're not familiar with Shapeways as a 3D printing service, there are multiple print materials and resolutions available, with a wide scope of price points. The D.III kit is offered in "Frosted Ultra Detail" and "Frosted Extreme Detail" resolutions. I opted to purchase an additional fuselage to compare the print resolutions of both levels.. From my experience with 3d-printed figures, I find it pays to go for the more expensive option to capture the fine and varying details ("frosted extreme detail" resolution). Quite happily, I can report that I can see no gain or loss in detail and print quality between the two print resolutions of the fuselage frames. Can you tell which one is which? I didn't think so - neither can I! You may note in the photos that I have snipped off the extra "sprue" strengtheners from one fuselage frame.
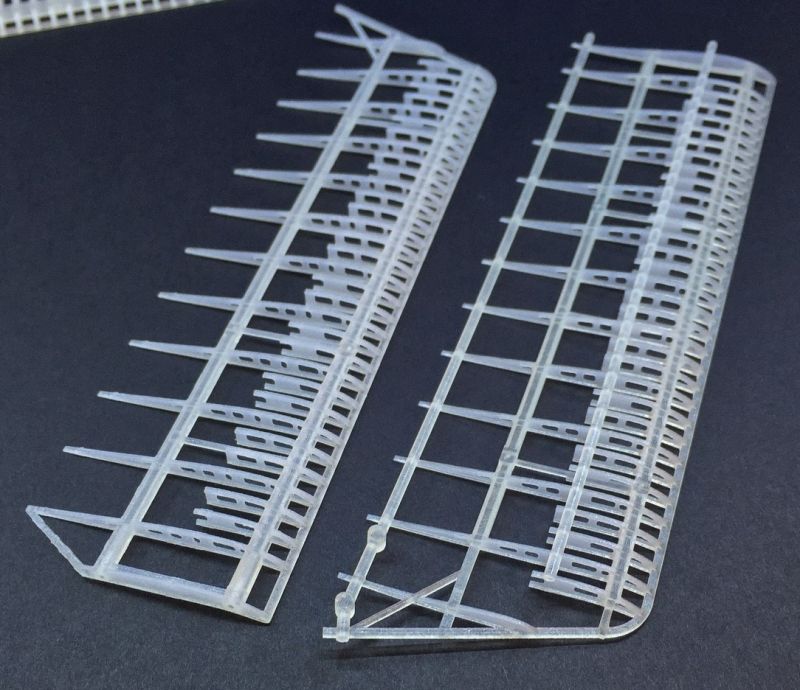
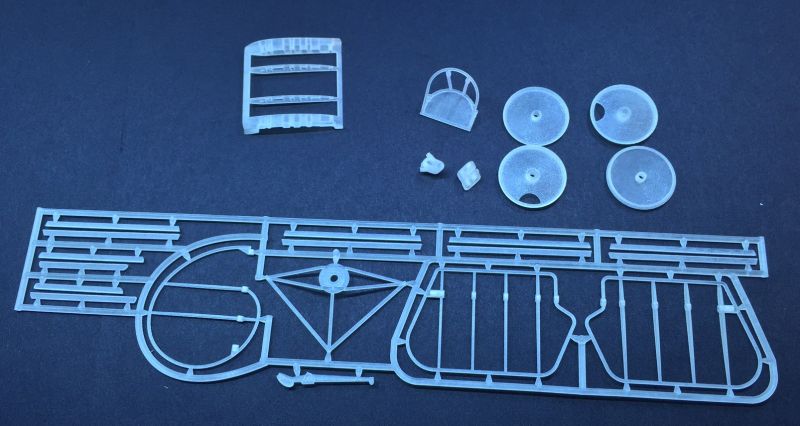
Wings
There are two wing options available to the builder - early or late. The early upper and lower wings are identical, these aircraft (M19F) used wing warping to maneuver the aircraft as did the Fokker E.I - E.IV Eindecker series. Later D.IIIs (the M19K) featured ailerons on the upper wings and this set is available as well with separately-printed ailerons and a redesigned upper wing. Shown in this review is the early wing set. The wings are printed with two "sprues" on the top to provide strength to the wing ribs in printing and shipping. I attacked one wing carefully with a standard set of sprue cutters and the sprue came off quite easily and needing very little cleanup of the wing ribs. To attach the wings and various other pieces, you will need to cut specific lengths of varying diameters of metal rod. Diameters and lengths are clearly laid out in the instructions and from first glimpse, looks like these will provide a very tight fit.
Accessory Set A
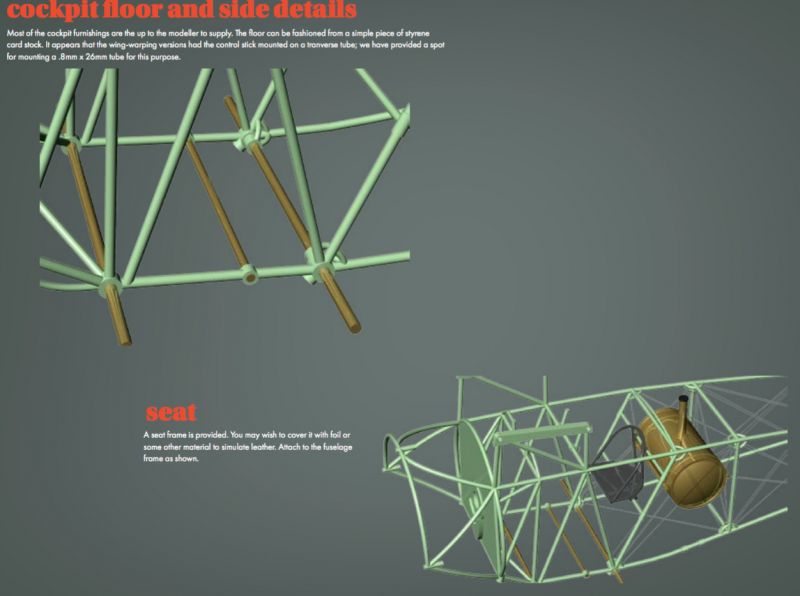
Set A contains some rather important pieces to be able to show a completed basic airframe: Rudder and elevator frames, wing and landing gear struts, handing gear "knuckles," engine mount for the Oberursel U.III, tail skid, seat frame, and the upper center wing which is critical for mounting your wing set to the fuselage frame. The struts attach to the rear of metal rods that the builder will need to fabricate, to provide both strength and an accurate streamlined depiction of the aircraft's struts. A good alignment jig and two-part epoxy will probably be critical when attaching the struts.
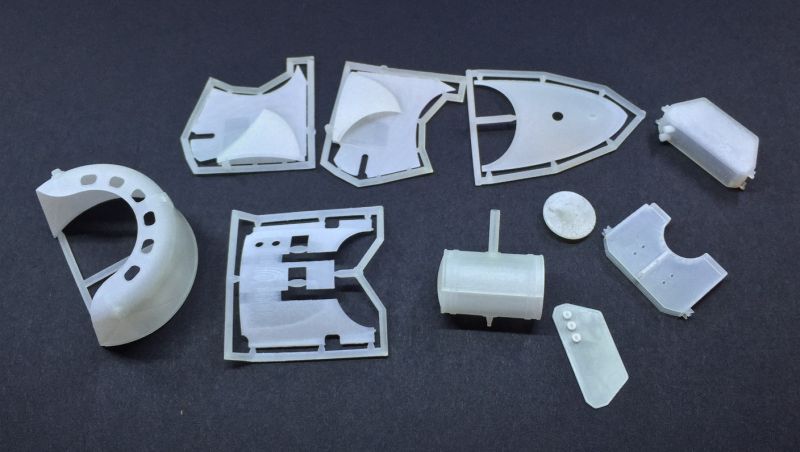
Accessory Set B
Set B contains the engine cowl, fuselage cowl cheeks, upper coaming, rear turtledeck, fuel tank, oil tank, ammo bin, and spent ammo shell container. The ammo bin and fuel tank are printed hollow with filler caps on the inside of the separate side. Simply cut off and attach your parts in the normal positions. While Bo admits that the upper coaming will need a little sanding on the inside to fit correctly, I am amazed at how well the cowl simply slides into place securely. The inside of the cowl features a concave outline of the mounting frame and this should make it nearly impossible to mess up your alignment here.
Instruction Manual
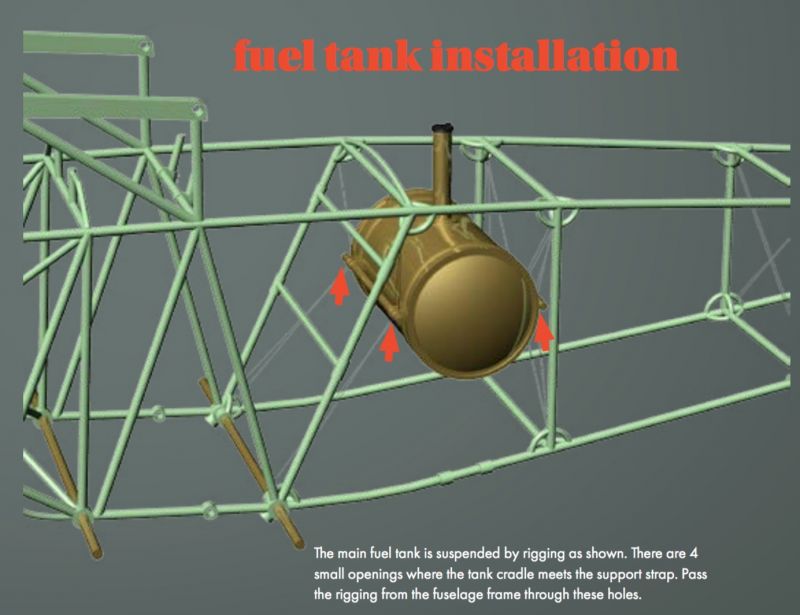
Bo has carefully thought out the assembly process for the entire aircraft and has laid out the steps in a very clear and detailed manner. He admits that the instruction manual is still a work in progress and will be updated as new techniques or build strategies are determined, but with some patience and a little scratch building skill, I'd argue the clarity is already on par with the best kits on the market. Looking through the steps, you'll notice some parts needing to be fabricated such as control horns, gun brackets, and wing and landing gear struts. I'll admit, I have a fear of scratch building even simple items, but looking over the layout for the self-fabricated parts, it gives even me confidence that I can self-produce the items needed. That said, Fokker's original design is a bit daunting in places, especially how the fuel tank mounts via rigging and not some sort of solid mounting bracket. This is laid out in the instructions but the diagram should be studied as Fokker didn't design the plane interior with consideration for model builders a century later.
Size and Display Ideas
You'll find this aircraft only slightly shorter in wingspan than a Wingnut Eindecker, but roughly 1 inch (2.5 cm) shorter in length. Given the modular breakdown of the aircraft set, modellers interested in WWI aviation will be limited only by their imagination. One has the ability to model a complete skeleton, cover the frame in tissue, or depict any number of construction/repair/transportation/crash scenes using only one or two of the sets.
While modeling skills are definitely needed if you intend to build this as a fully-assembled aircraft, I can see scenarios where less-experienced builders could work with just the fuselage (for example) and feature it as a centerpiece in a larger display without much difficulty. The main part preparation work needed will be to remove the waxy residue from the printing process, which is explained in the instructions, and prepping the parts by lightly sanding and priming with Mr Surfacer or a similar product. These aren't difficult tasks, they just take a little patience, and from there, things should be quite straightforward.

My thanks to Bo Monroe for access to an early release of the Fokker D.III kit. Taking into account the skills needed depending on the degree of build that on intends, I recommend this offering to builders with moderate skill, to expert builders for those wanting to display a complete skeleton frame with all rigging and details.
© Mike Swinburne 2016
This review was published on Friday, March 18 2016; Last modified on Friday, March 18 2016