
Linden Hill | 35006: Mil 24rkhr Conversion
Reviewed by Kylie Newton
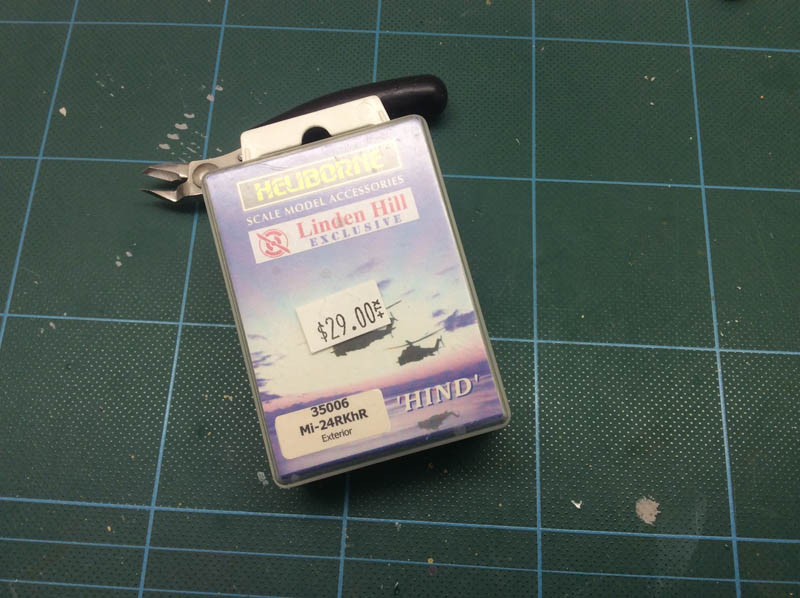
I found this little gem whilst out looking for something else, as is often the case. I immediately ordered it, given its low price for a unique bird, and set about researching it. I was amazed at the amount of information available on line about this, including enough information to scratch build a rudimentary interior specific to this bird. Linden Hill do decals to compliment this set and I got those, too. They will be looked at separately.
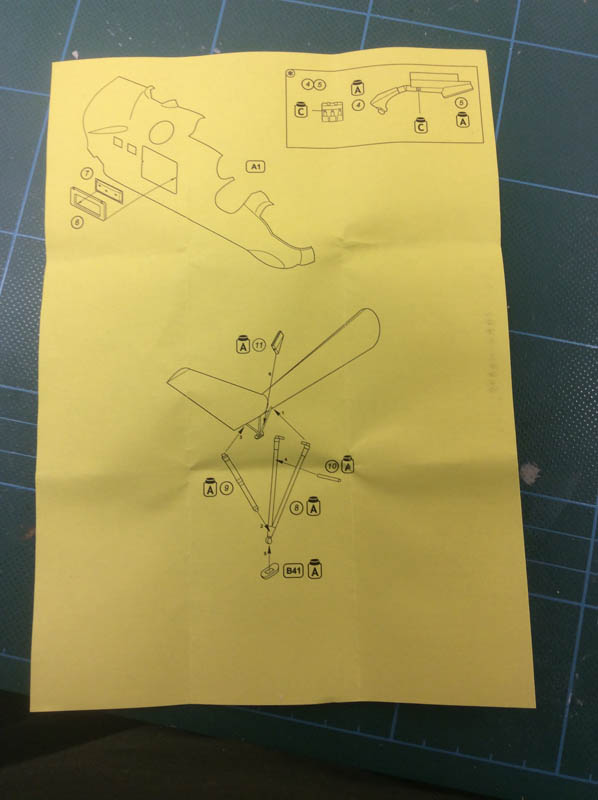
All parts arrived in a two part, tray and lid plastic container, which was very reassuring in that there were no broken parts. On opening it, I found a small printed insert which was the instruction sheet. And a number of resin parts, along with one vac-formed clear piece which is the “window” for the starboard crew door.
All parts were perfectly formed, with no warping, air bubbles, or misalignment in the casting. If the top half of the crew door looks as though it was broken and been glued together again, it has. And it was my fault. I was a little too hasty to clean up the parts, I tried to push out a thin film of resin in the centre of the window. That is when I discovered the air bubble below the surface. A stupid mistake with an easy fix, don’t let this happen to you.
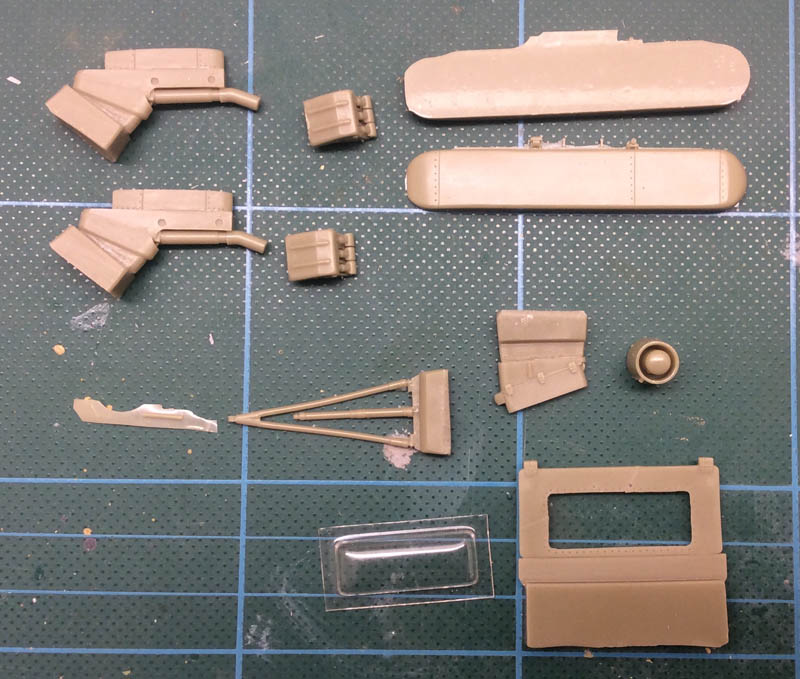

The door is a good fit for the kit, the window piece not so much… the is a bit of a gap around the corners of the frame and the clear piece which would benefit from a bit of filler. Nothing serious, but it will be necessary for a snug fit.
The sampling excavators at the end of the wings are two part affairs, where the excavator fits nicely onto the hydraulic “arms” with a male / female connection. To get the excavator to sit square to the arm, I simply pushed the arm into the excavator then sat it flat on my modelling mat. Too easy. The mating surface between the excavators and the kit part matched perfectly from dimensions, with the resin face being flat and true.
The tail bumper assemble is intricate and will require patience when fitting to the airframe. Be careful as hidden in the casting flash is a small length of resin rod that is easily overlooked and is necessary to forming the tail bumper. You have been warned. Another part here is the flare marker that is found on the struts of the bumper. It is well detailed and is fixed to the frame once finished.
There is a large, two part equipment pod that is flawless in casting, and beautiful in detail, with carefully engraved panel lines. These glued together with super glue and merely need careful alignment to complete. For those interested, there is an image online of this pod opened, showing the shelving and fittings contained therein for the dedicated super-detailer.
The intake vent on the port side, forward of the cabin doors is well done in a solid casting. The base of the vent mates perfectly to the contours of the fuselage of the kit. Whilst there is no guide as to where the intake goes, it should sit below a small slit in the side of the fuselage.
About my only gripe with this conversion is found in the omission of the chin fairing. The rkhr chin lacks the sighting (starboard) and radar (port) fittings found on regular Hinds; these areas will need filling and sanding to build an accurate chemical reconnaissance Hind. Whilst not a difficult job in itself, I am surprised at the omission as part of the conversion, and that it not mentioned in the instructions either. Further, there are “early” and “late” versions of the Mi 24rkhr, where the “early”, represented here, has no such fittings; the “late” has a forward facing optical sensor on the starboard side.
© Kylie Newton 2019
This review was published on Friday, February 15 2019; Last modified on Friday, February 15 2019