
Eduard | 32-961: 1/35 Photo-etch for Academy AH-1Z Viper
Reviewed by LSP_Paul
This set is for the Academy AH-1Z Viper and it does a nice job overall of improving both the interior and exterior of the kit using brass and steel parts. Let’s take a look!
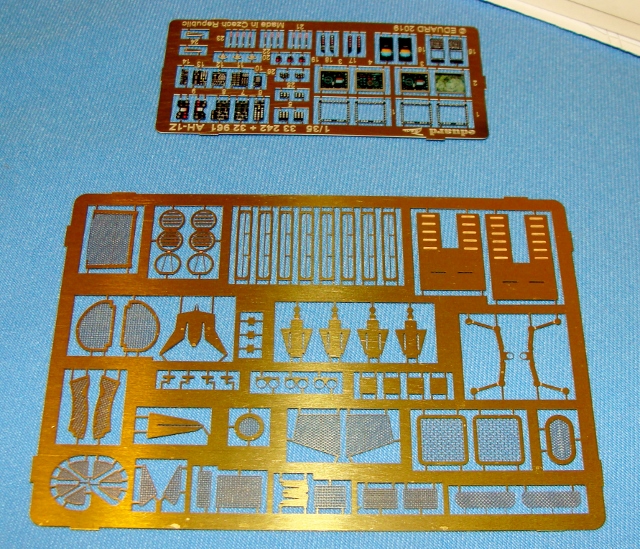
The Metal
The Photo etch is composed of both brass and steel parts, the brass being much more malleable as it will need to be shaped into some pretty complex curves.
The Set comprises two specific areas of detail, the cockpit interior, and the airframe exterior.
The Instructions
I found the instructions very clear and easy to follow, so far no mis-identified parts.
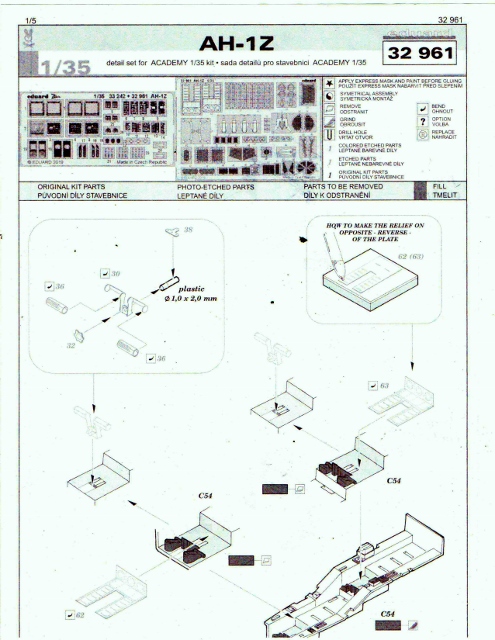
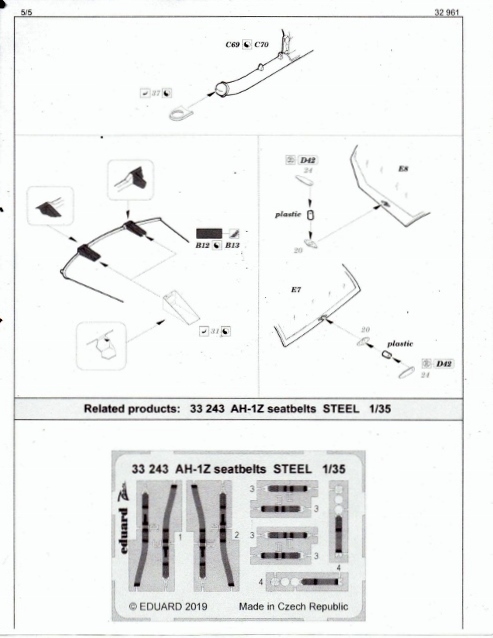
Both parts of the set will require some standard modification to the kit by removing existing detail, and four of the PE parts in this set require intermediate to advanced level PE bending if you chose to use them accurately. The exterior parts that need some pretty intensive concentration are the two larger vents that go into (not onto) the doghouse sides. PE Part 42 will need to be recessed into the kit by enlarging the openings and removing material until the parts sit flush. PE part 42 is needed on both sides, so lining it all up needs careful measuring so both sides match.
The most daunting part of this set for some people will be parts 39 and 40 as they both require a good deal of plastic to be removed from the lower forward doghouse area and must be bent to conform exactly to fit or it’s going to look odd.
PE parts 39 and 40 offer the modeler the opportunity to have actual screen material for the intakes instead of using the kits two “dot pattern” decals to represent the intake mesh of the real item. I was able to use the parts as designed without annealing, but it took some rolling around an Xacto handle a few times to figure out the curves. Take your time and it looks nice!
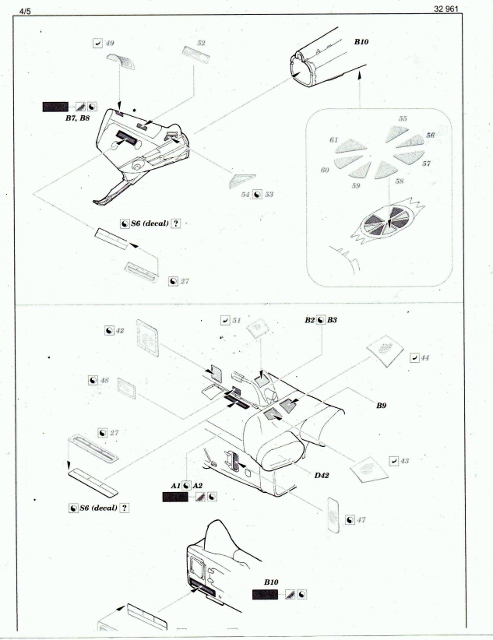
Everything else about the exterior is straight-forward. Almost all the brass from the set replaces intake screens the kit already provides in brass and as redundant as it may sound, they are a noticeable improvement over the kit parts! That’s nice for a change. The only part of exterior PE I wasn’t terribly impressed with was the wire cutting parts that replace the kit's wire cutting parts. They PE replacements appear a bit anemic in 1/35 and could benefit by being used with a piece of .015 styrene sandwiched between the parts and trimmed to fit.
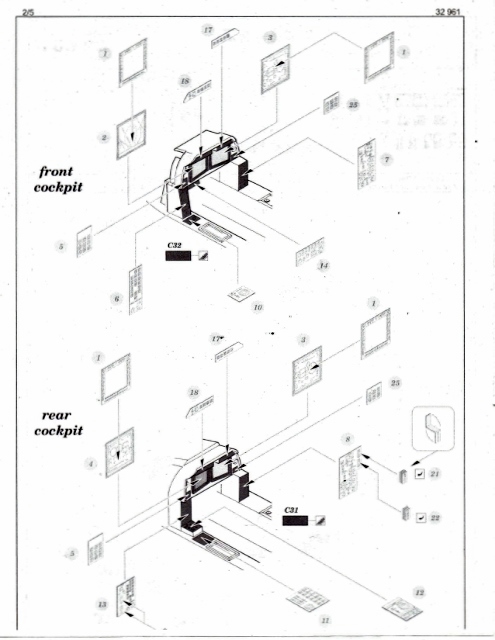
The interior parts are very straight-forward to use and are NOT self-adhesive. They will require some filing details flat or removing material to use properly but nothing about the interior is difficult to use. The color printed details on my set are nice and sharp, and the MFD and screen details come pre clear coated, so you add their frames to them to build up some depth and glue them into position and they look like the actual screens in an AH-1Z. The console parts could be further detailed with individual plastic parts to add even more 3D effect, but in 1/35th the color parts look great without adding anything in my opinion.
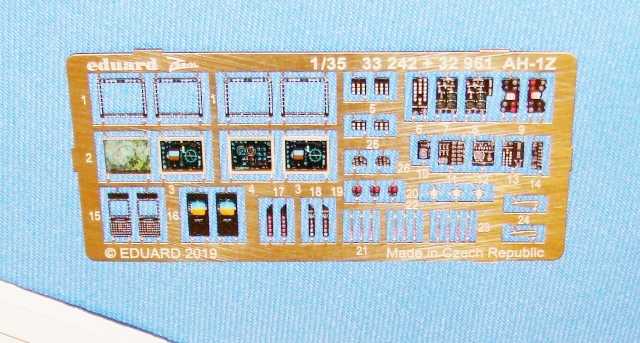
The floor sections where the crew’s legs and feet would be offers a nice chance for some added detail including embossing some 3D ribs into the mix, very effective. The Cockpit floor will be gray and if you don’t use a crew, this will really be a nice detail feature. One notable area the interior parts neglect in this set is the seatbelts! Eduard has decided you have to buy those separately as set 32-243 and I was disappointed those weren’t included considering the price for what you do get, but that’s just my opinion.
Conclusion
Overall, I really like the set. I found all of the parts that I have used so far very helpful in bringing depth and realism to the model, and I would consider it a good value for the money and time spent adding it all.
Thank you to my wallet for the review sample, and this product can be purchased from spruebrothers.com
© LSP_Paul 2020
This product is available from the following LSP sponsors

This review was published on Tuesday, February 04 2020; Last modified on Sunday, February 09 2020