
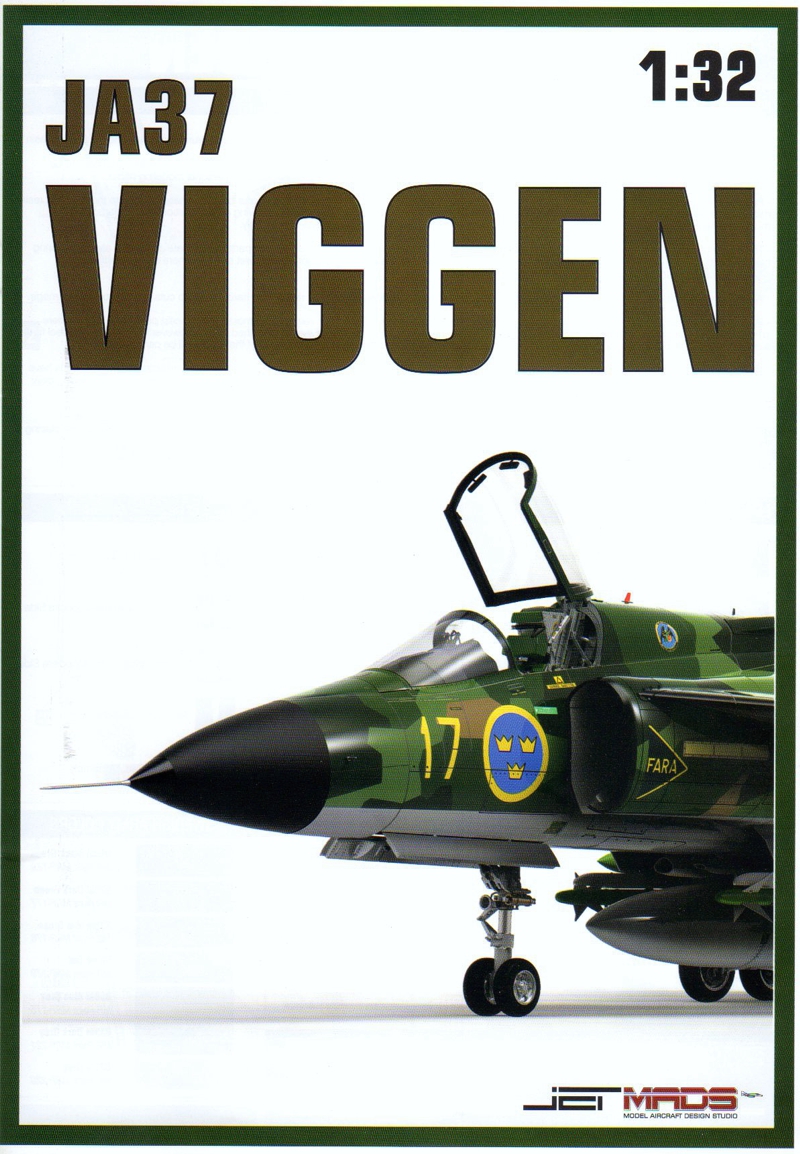
JetMADS | 303701: 1/32 SAAB JA 37 Viggen
Reviewed by Ray Peterson
Introduction
The SAAB fighter was designed as response to the Swedish Air Force’s requirement for a fighter capable of high speed, low level operating capability, and able to land or take off in a short distance, including using public roads in a emergency. SAAB designers came up with the unique double delta wing plan as well as the first use of canards to meet these specifications. One huge engine was the powerplant, using thrust reversers to allow the aircraft to stop in a short distance. SAAB was known for unique solutions to aircraft design, as one look at the Draken, the fighter the Viggen was to replace, can tell you.
There were several versions of the Viggen: ground attack(AJ), fighter(JA), trainer(SK), and recce(SF). In total, 329 aircraft were built with Sweden being the only operator.
The Kit
JetMADS(https://www.jetmads.com/), out of Turkey, is a relatively new producer of kits. They use CAD and 3D printing technology as well as resin casting to produce their kits. An interesting philosophy is they planned on releasing only 500 of each kit so they can quickly run through While they hope to produce kits in several scales, so far they have only released two in 1/32nd. Their first release was the D-558-I Skystreak, which was well received and quickly sold out. The Viggen is their second release, moved up in the schedule due to overwhelming support. In fact, the support was so great they sold out in pre-orders so fast they decided to do a second run of 500, which is also sold out even before they have shipped all the first run. The first release is the fighter version, the JA 37, though they plan on releasing other versions in the future.
The JA 37 kit is composed of over 230 parts in either cast resin or 3D printed parts. This does not include the 3D printed boarding ladder and towbar. Thirty-five of those parts are for armament. There is no photo-etch included, it is all in resin. Even the included pilot’s harness is 3D printed.
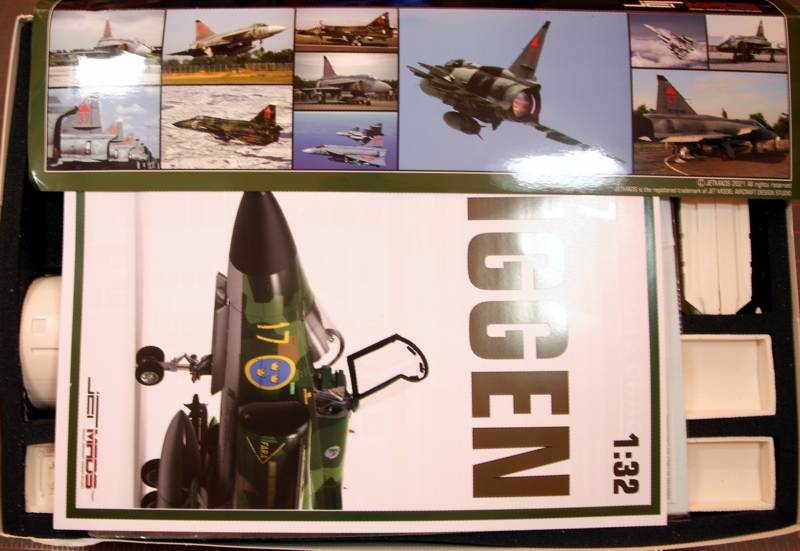
Along with the resin parts, a very high-quality set of instructions, forty-four A4 pages in full color on glossy paper. Two A4 pages of decals, by Cartograph, as well as a separate small sheet including the multi-color squadron badges. These are not Cartograph but are probably laser printed on full sheet decal paper (they note to cut out the designs as close to the artwork edges).
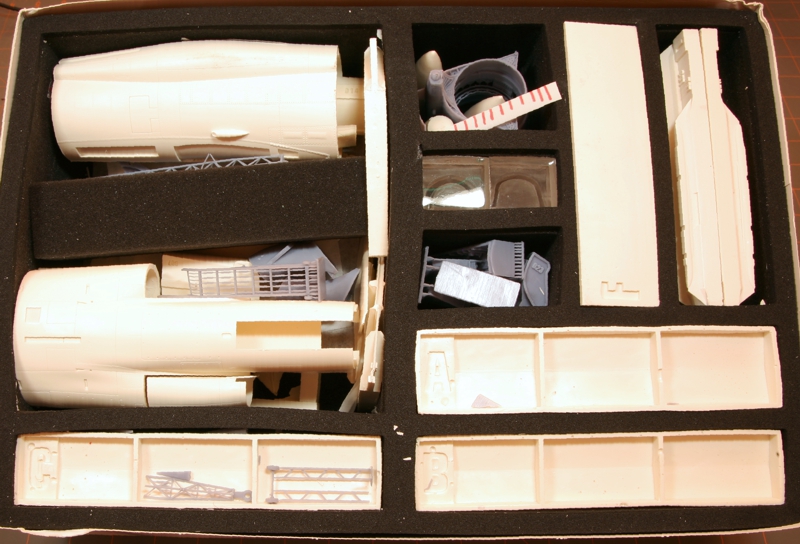
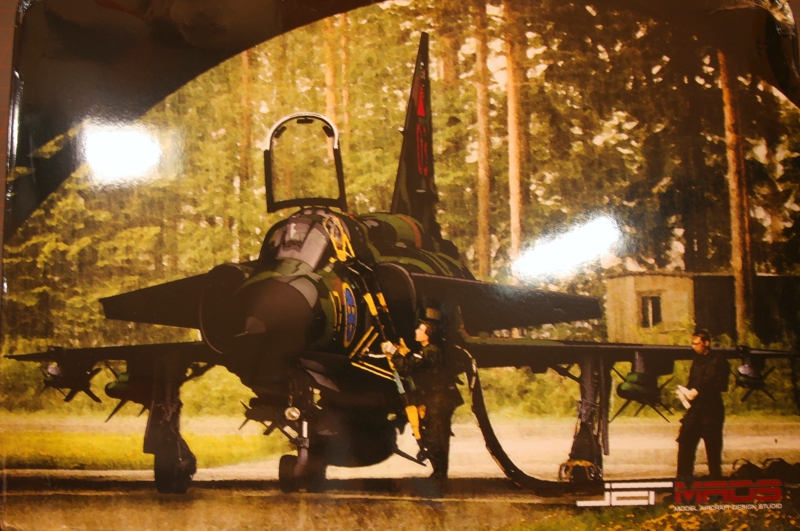
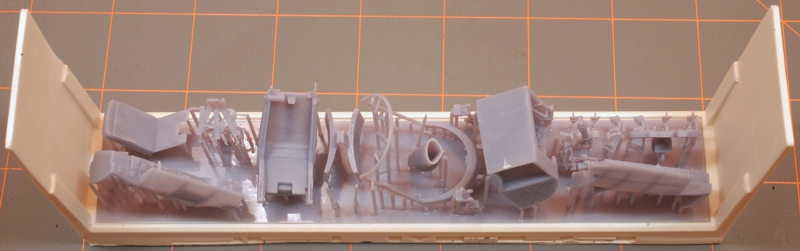
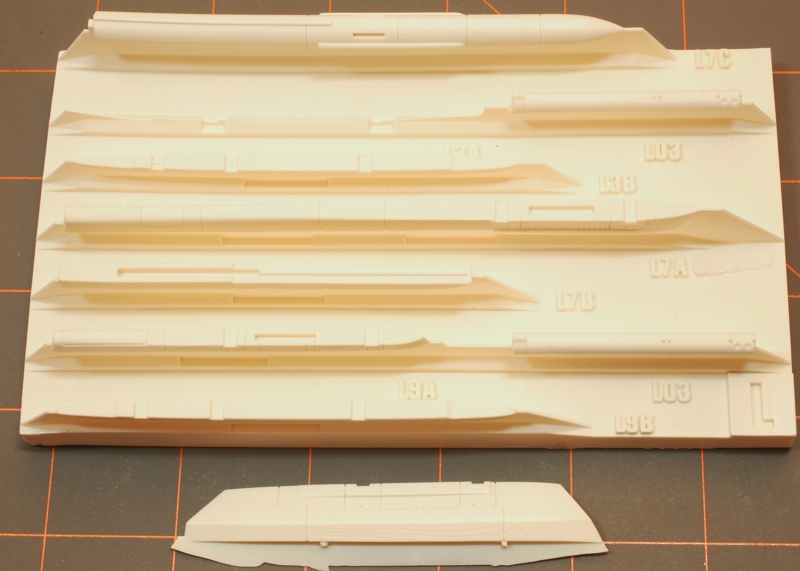
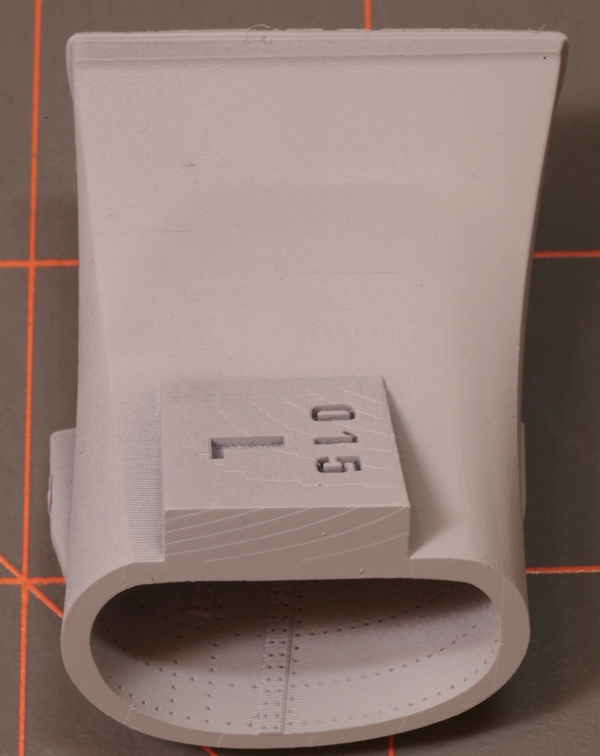
The packaging at first blush looks pretty good. A plain corrugated cardboard box holds the kit which is in a standard-type thin cardboard kit box with beautiful boxart. The postal services managed to ding up the outer box corners pretty good, and that carried through to about half of the corners of the kit box inside. Opening the box, there is a nice full color slipcover with profiles and a few photos on one of the edges. On the inside the box is lined and divided by about 1 cm thick foam. The parts are then found placed into these compartments. The smaller 3D printed parts are in sections bonded to resin frames to protect them. Larger parts are placed rather loosely into a few of the larger sections.
How did the parts survive shipping? For the most part ok. However, the larger parts grouped together had no cushioning between them and in my example bits of the wingtips were broken off, as well as a piece from the intake splitter. Also, the added towbar and access ladder were simply placed with the larger parts and the delicate parts took some damage. The towbar ended up in three parts with two rods broken and missing; the stair is broken but still together. Some parts of the grouped 3D parts broke away from their frames and were rattling around in the box. Overall, though, few parts were broken, and most can easily be fixed. A few small chunks of epoxy putty will take care of the missing chips. I have heard of others with worse damage, so this isn’t atypical so check your model when it arrives. If damage is irreparable, one should contact JetMADS for replacements.
The Parts
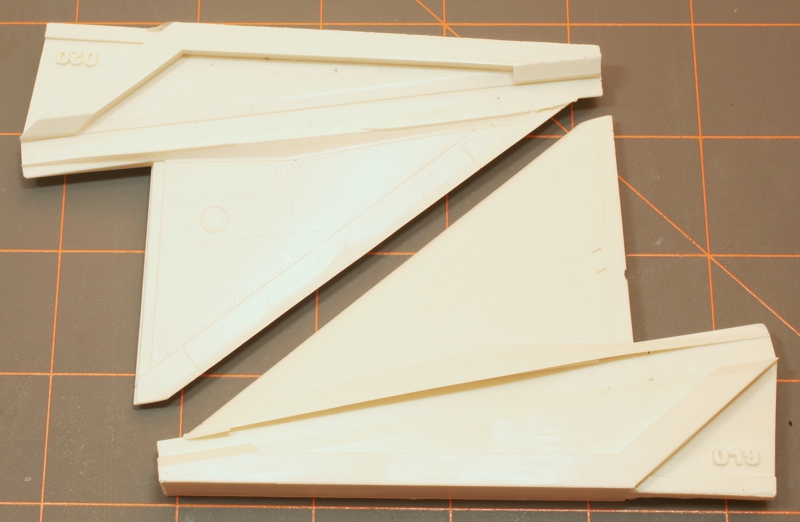
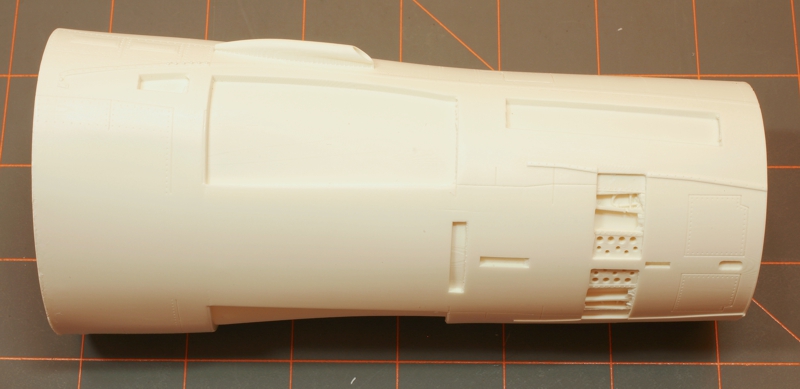
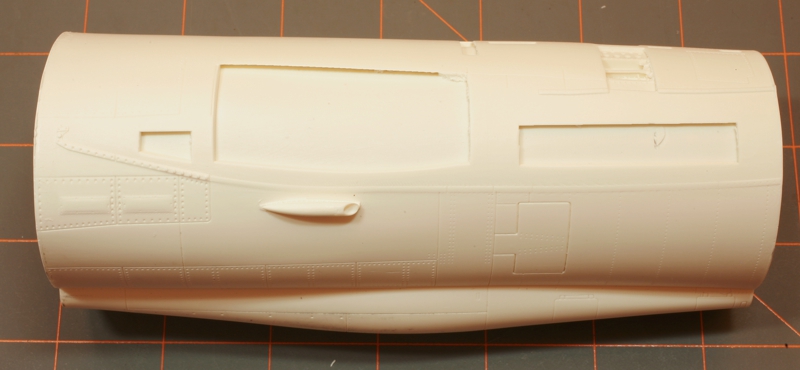
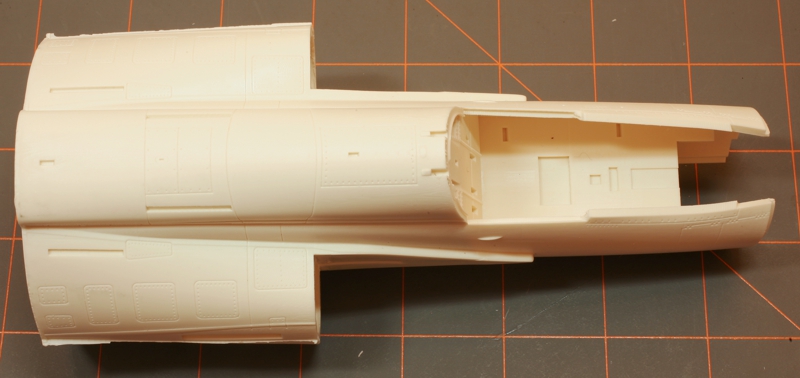
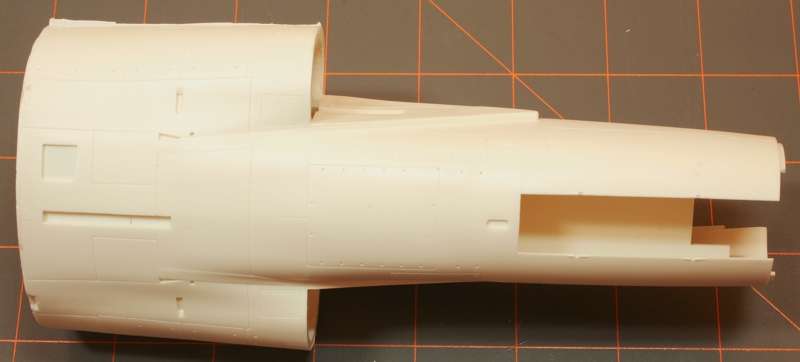

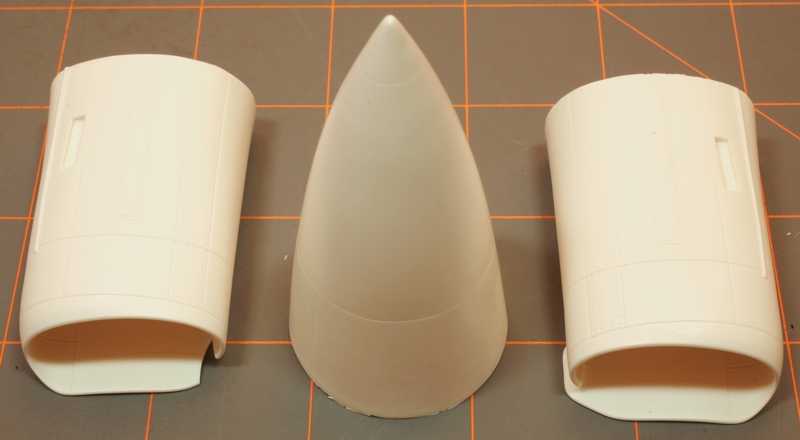
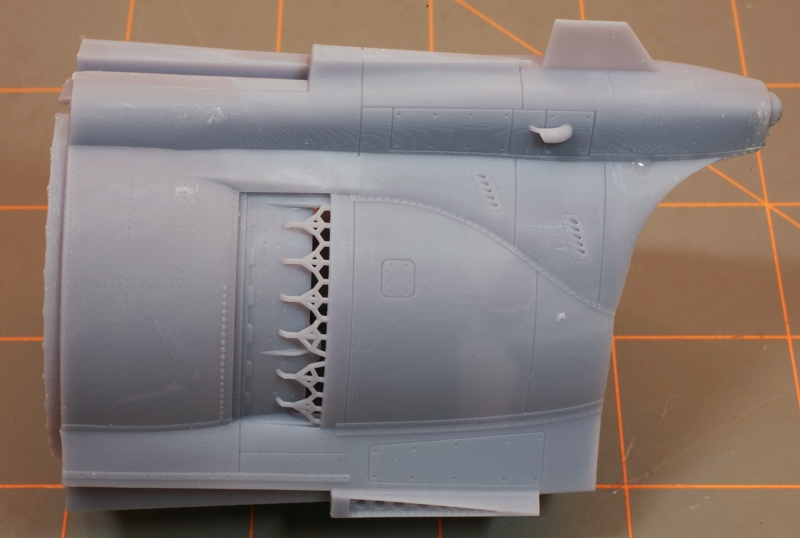
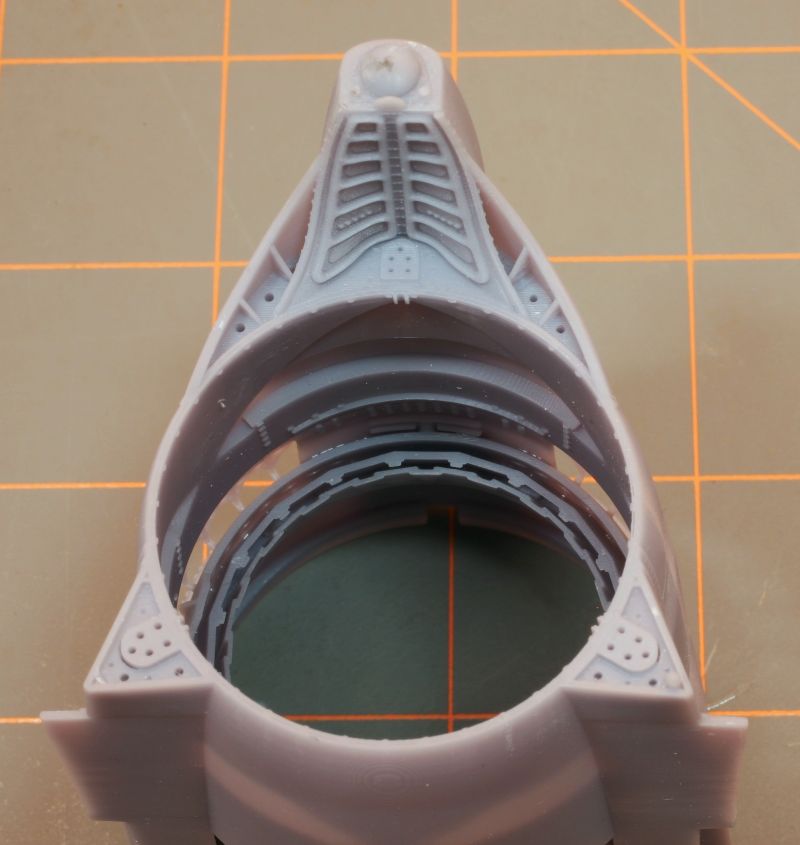
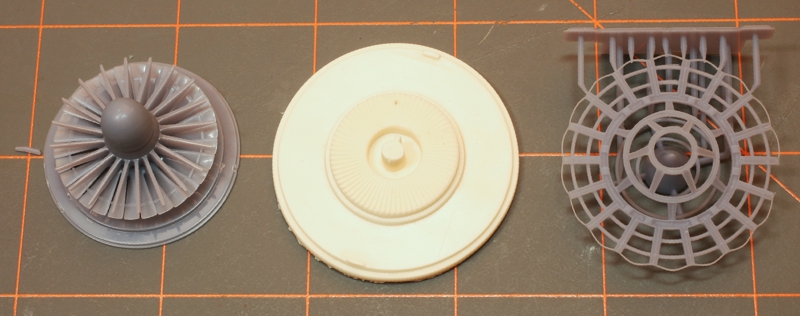

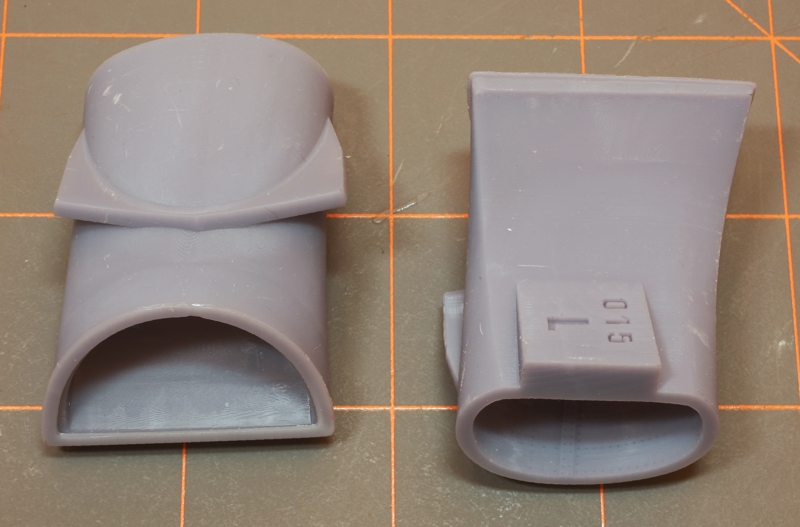
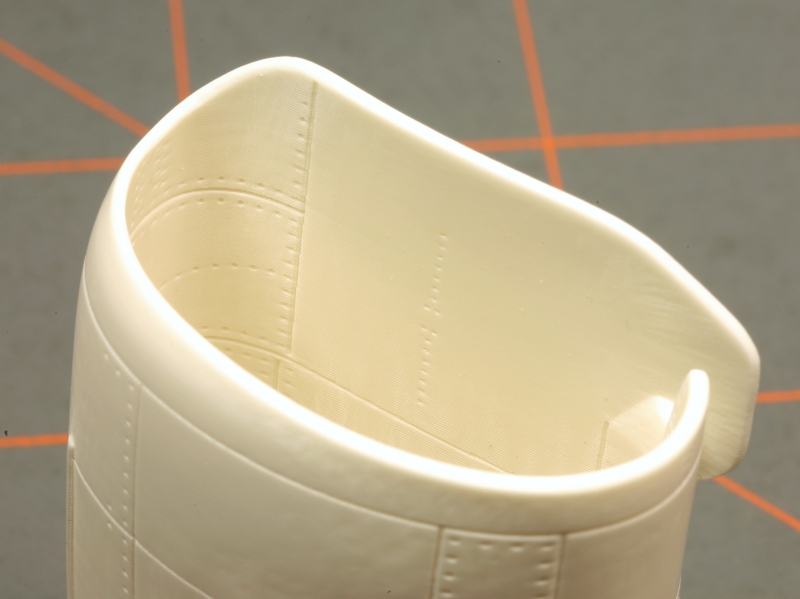
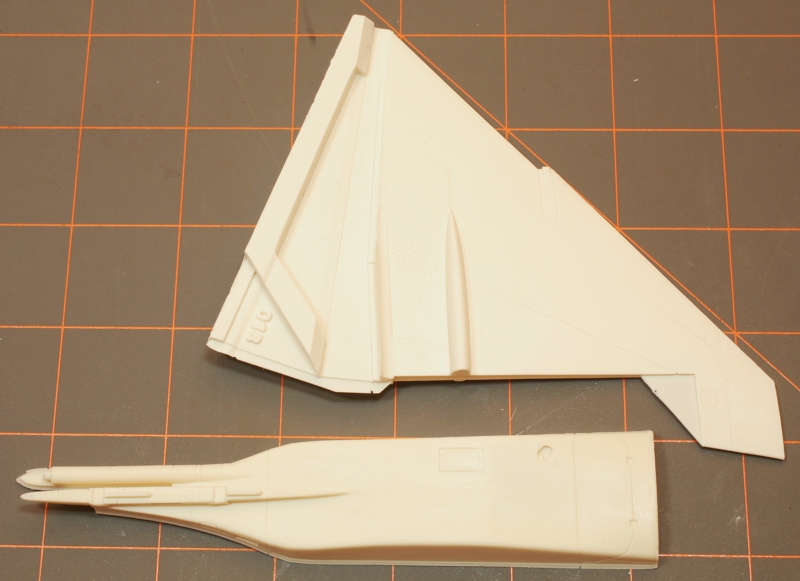
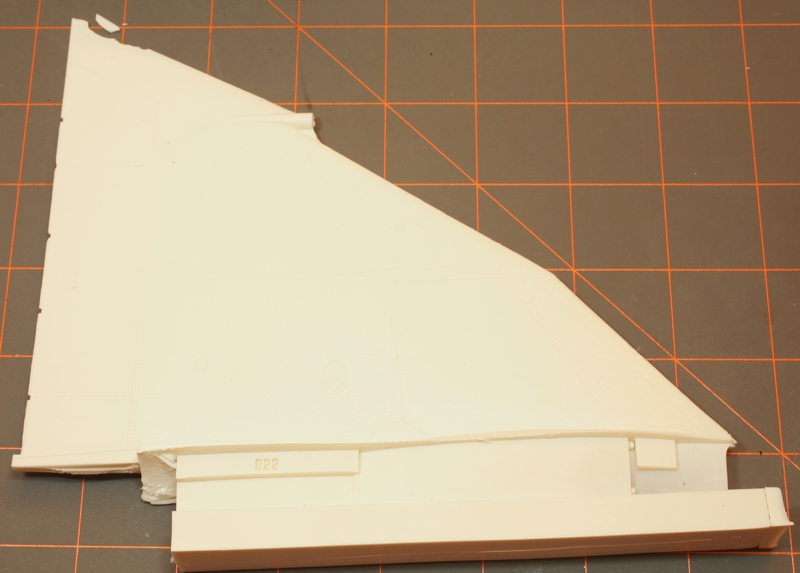
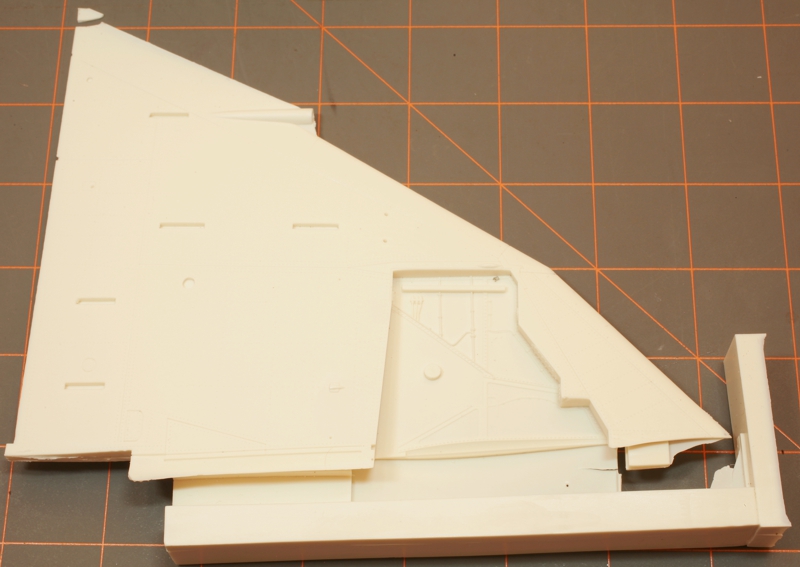
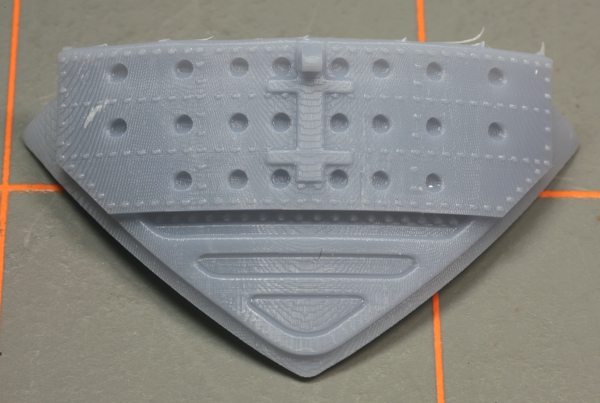
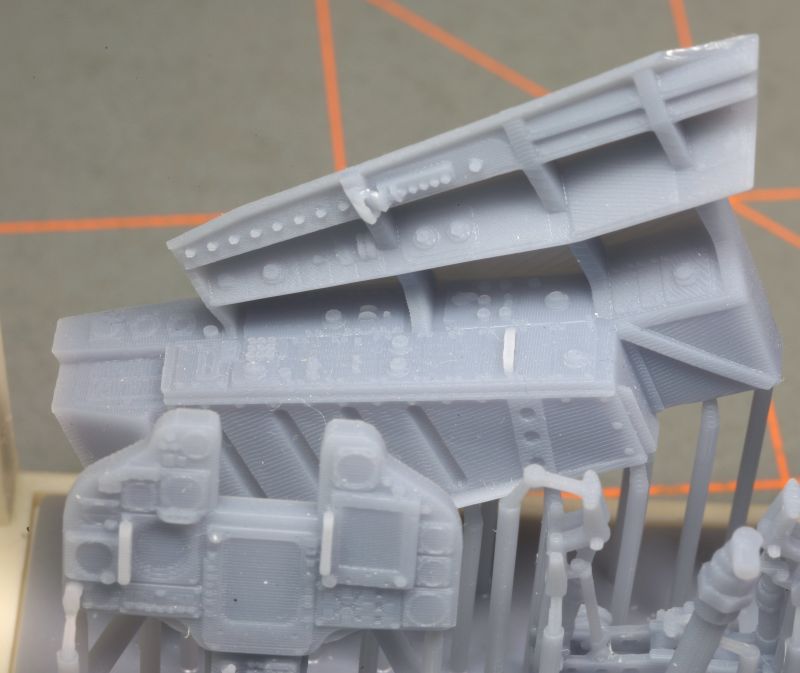
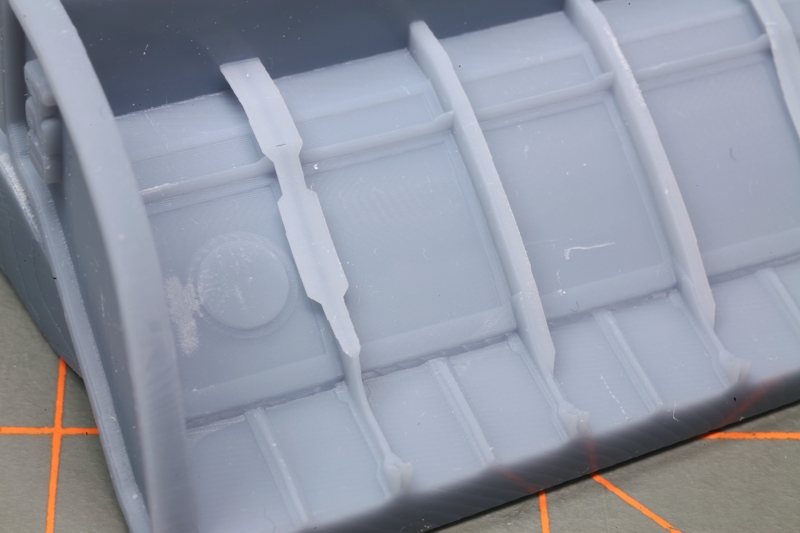
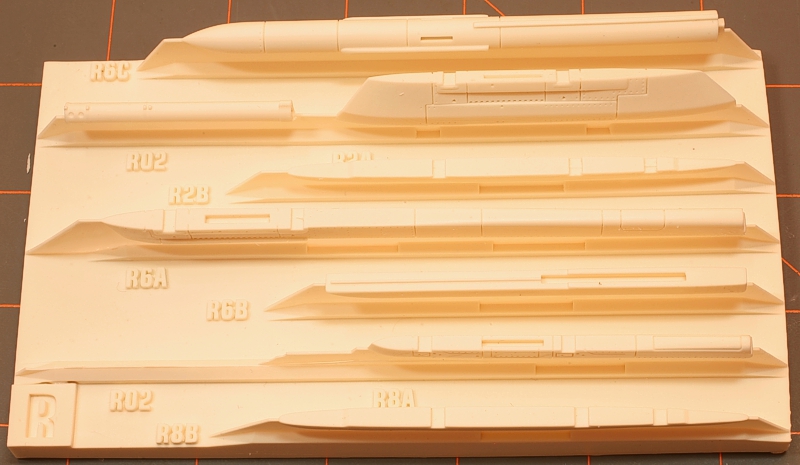
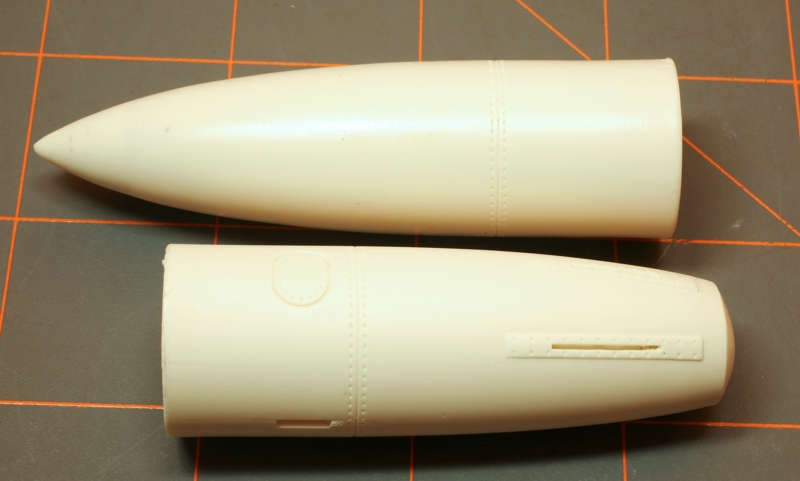
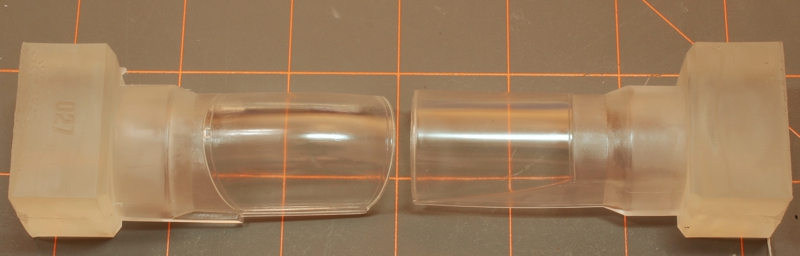
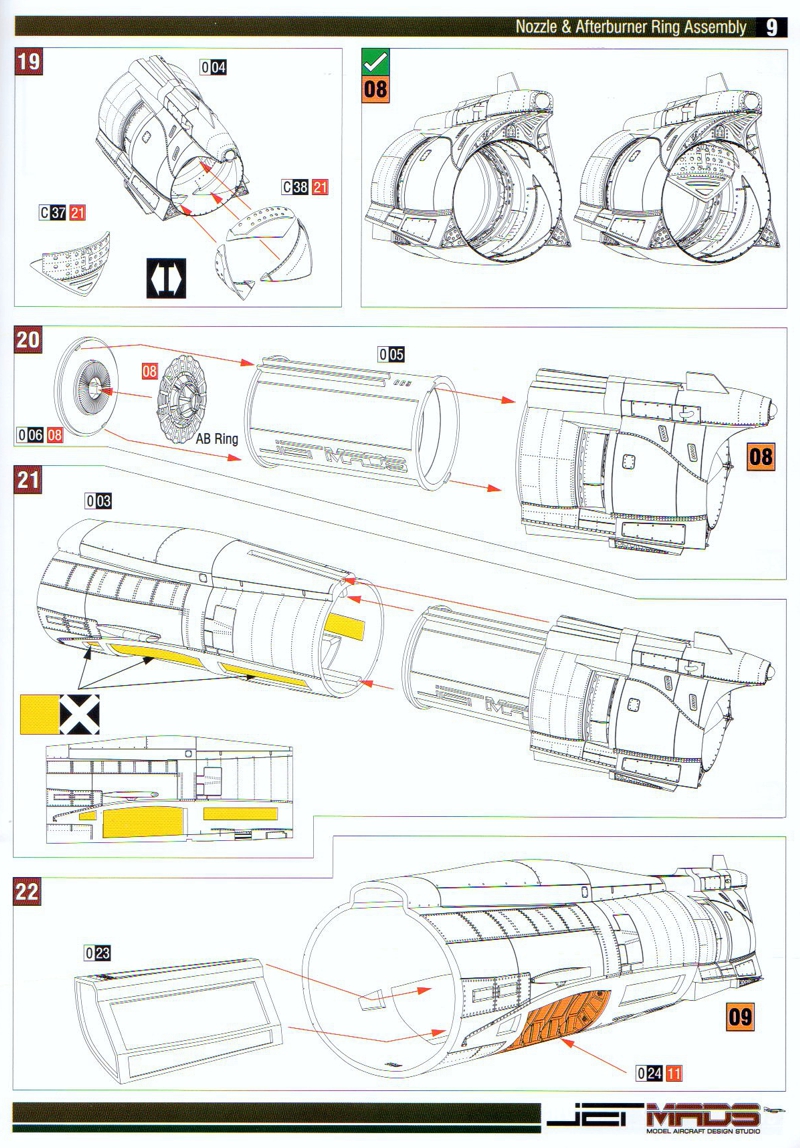
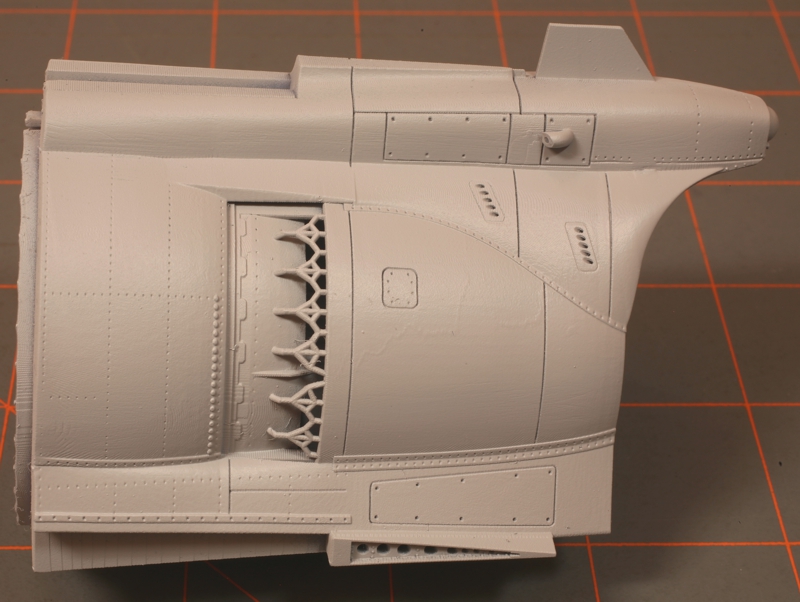
Starting with the fuselage parts, the jet is broken down into nose cone, cockpit section, center section and a 3D printed exhaust section. Wings, tailplane and canard are all cast as individual solid parts with separate moving surfaces. Intakes are also separate. The ductwork is in four parts which goes all the way from the intakes to the front of the engine. The detail is spectacular as recessed rivet and panel line detail is on the inside of the intake ducts. The intakes connect to a single funneling tube which the compressor fan attaches to. I don’t know if it will be seen as it is deep inside, but it is included. The engine is provided as a tube with the flame-holder at the front. Of course, as already mentioned, the exhaust section is a 3D printed part with delicate inside and outside detail along with three separate exhaust reverser petals. An extra top petal is provided to show it as if dropped as the jet loses hydraulic pressure.
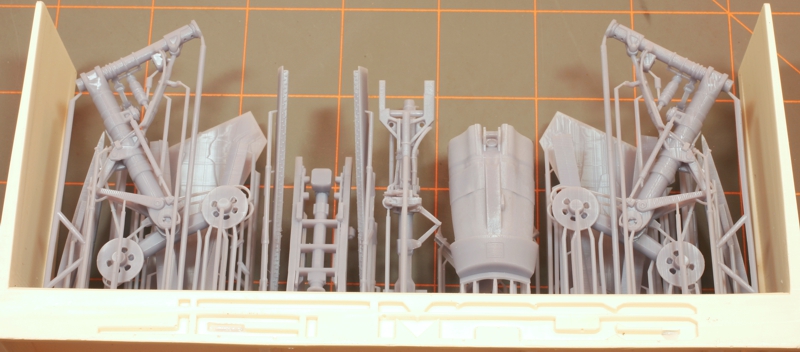

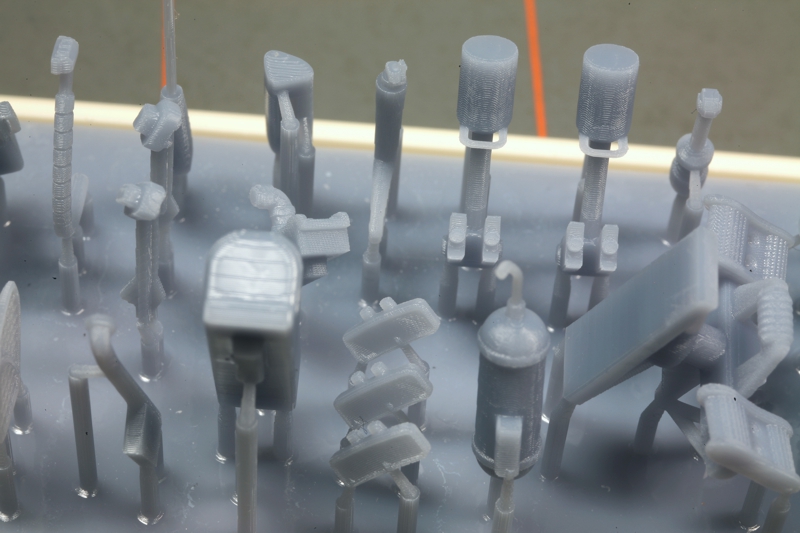
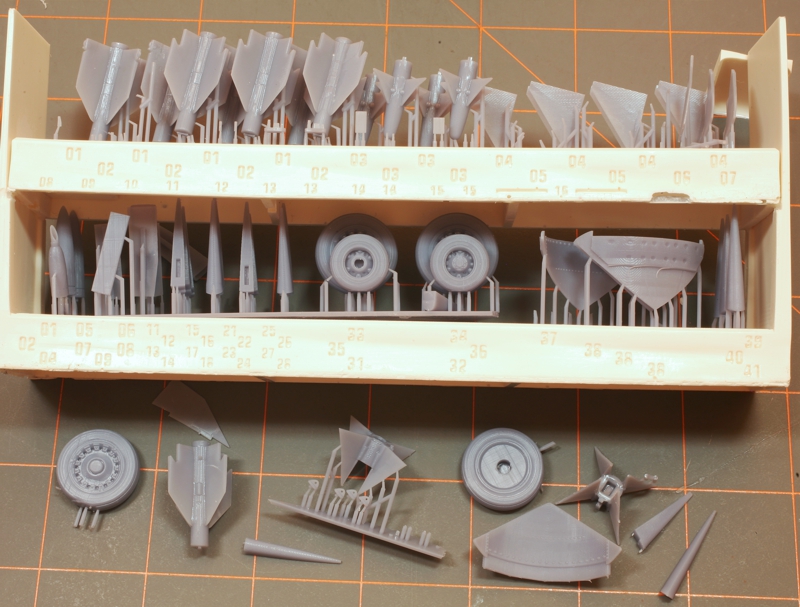
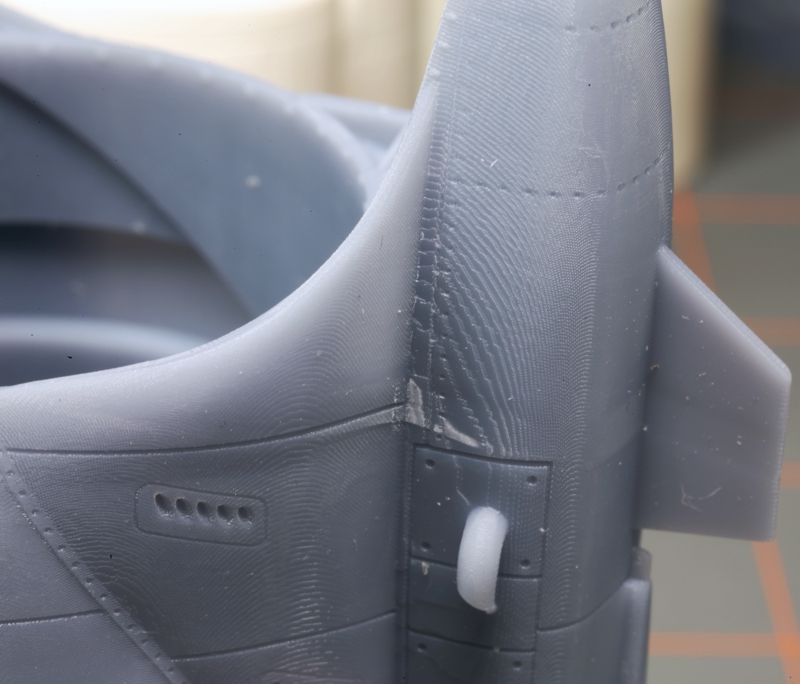
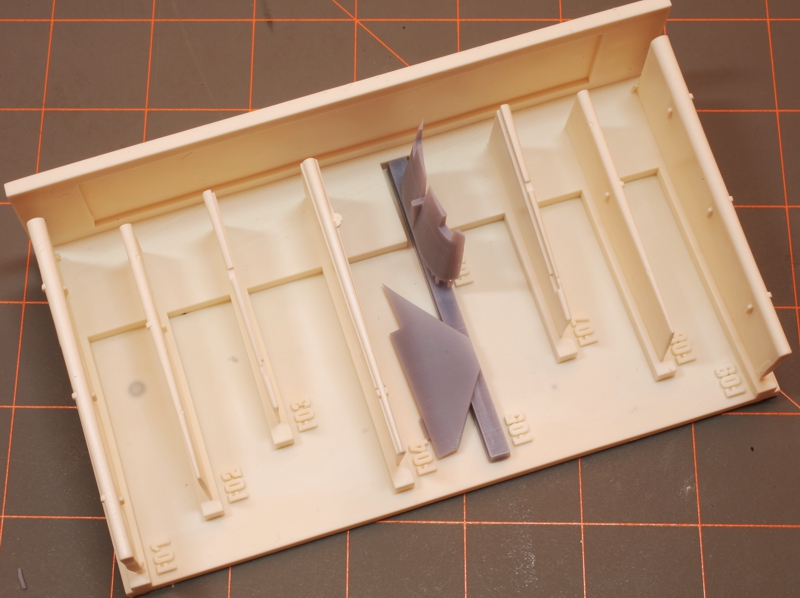
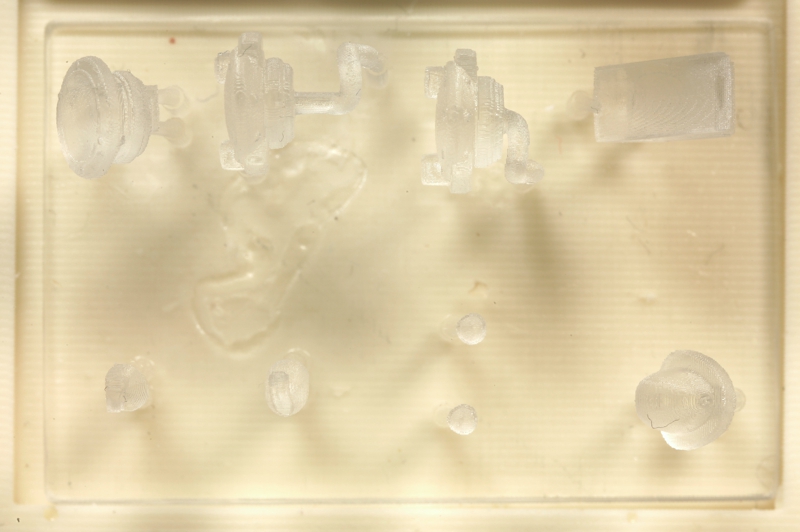
Small parts were 3D printed in groups and those groups are bonded to resin frames to help protect them in shipping. They also cast the part numbers on the sides of the frames to help in finding the parts. You can see in my pictures in my kit several of the parts have broken free from the frames and from their printing supports. The parts are very nicely detailed, though as you can see there are some ridges from the 3D process. These lines are not as obvious to the eye as they are in my macro photos, but it is something to deal with for any parts that will have a natural metal finish. A little difficult to photograph, but I think you get the idea.
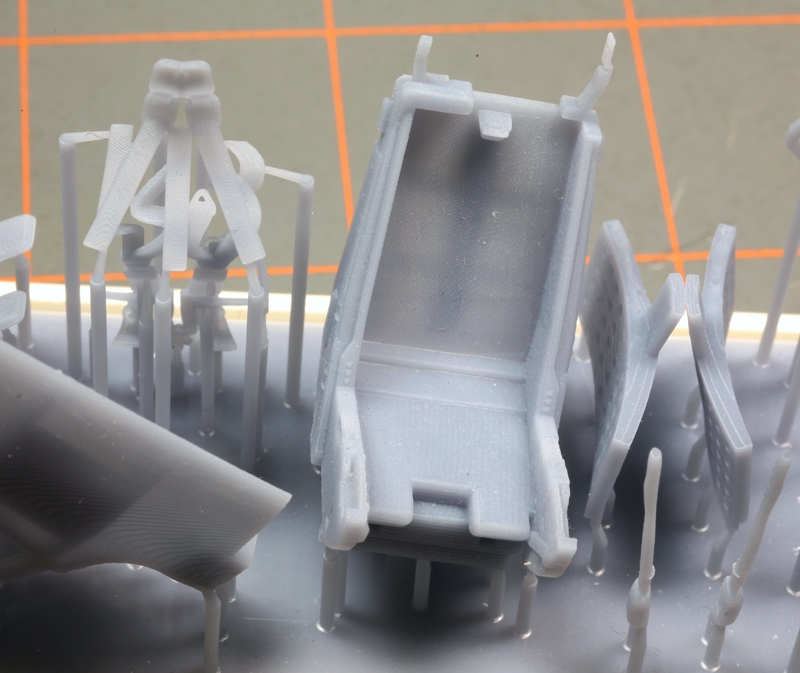
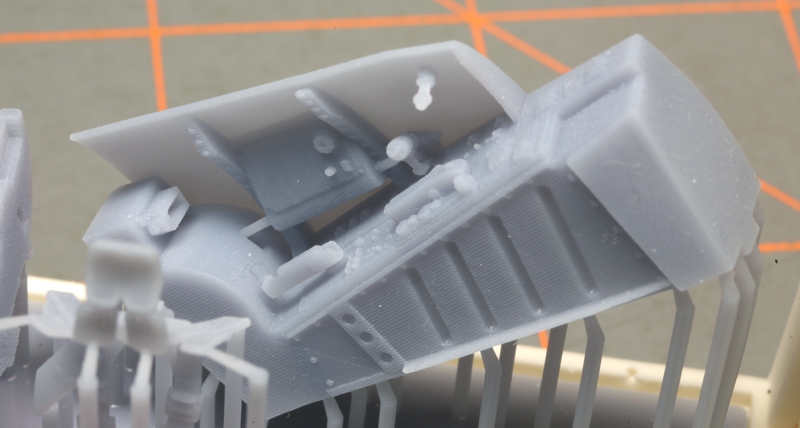
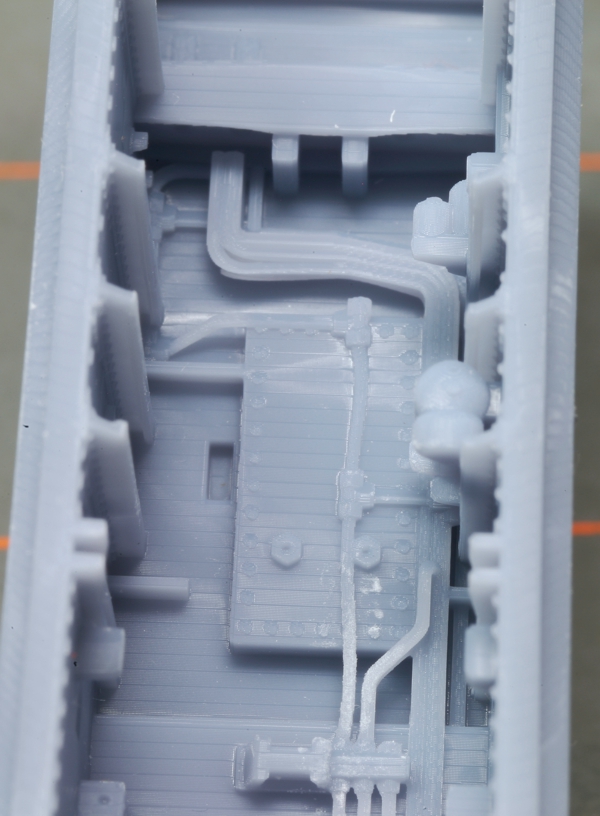
The cockpit is very nicely detailed, consisting of forty parts. The sidewalls are in one piece that will be a little hard to paint due to the curvature of the jet. The bang seat is made up of seventeen(!) parts itself, counting the rails and braces. There are also several decals to place inside the cockpit. The harness is 3D printed in one piece, quite different. I am interested in how well it works, but they do look pretty realistic.

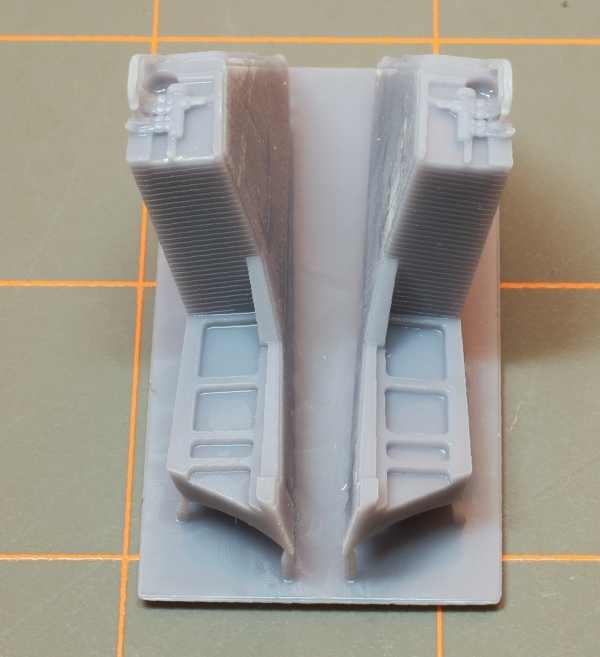
A nice touch, there are several optional parts to show some open areas and items that might be under maintenance or dropped due to the slow loss of hydraulic pressure. Besides the aforementioned thrust reverser, options exist for all flaps and moving surfaces, the lower air brakes, and the auxiliary power unit. The APU is especially well detailed, consisting of seven parts including a well done 3D printed compartment. Most of the openings must be cut out of thinned areas in the hull parts.
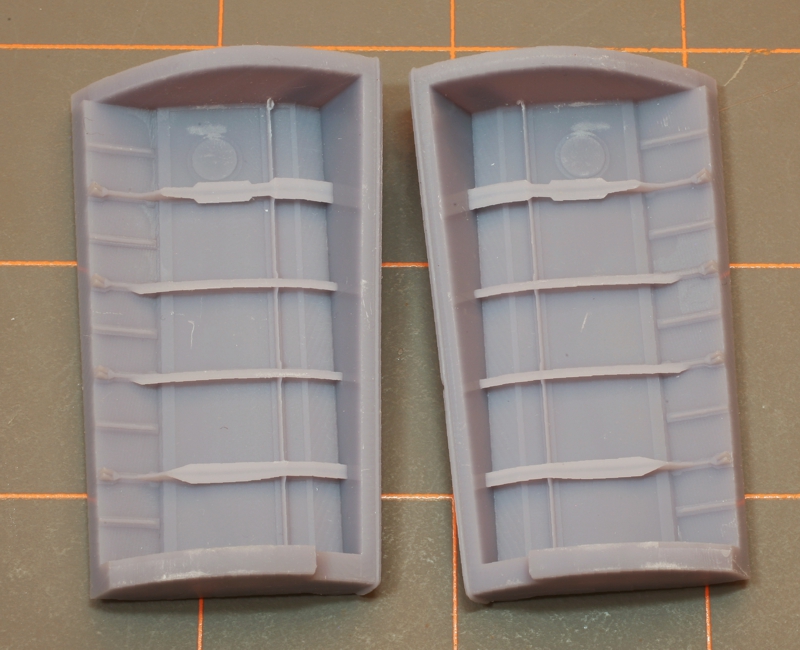
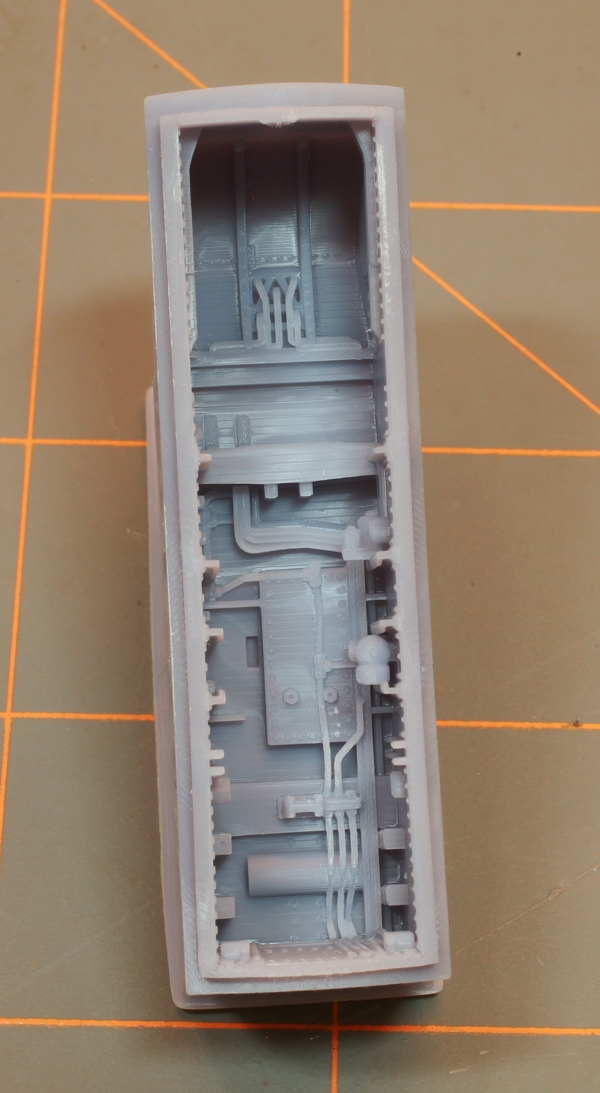
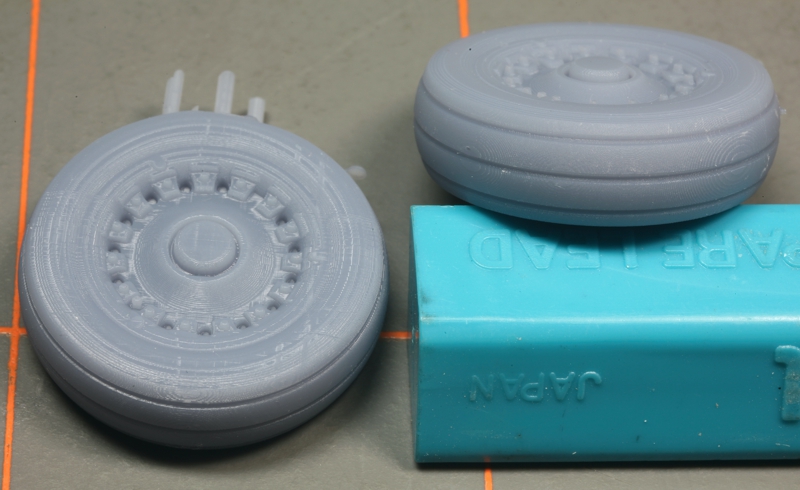
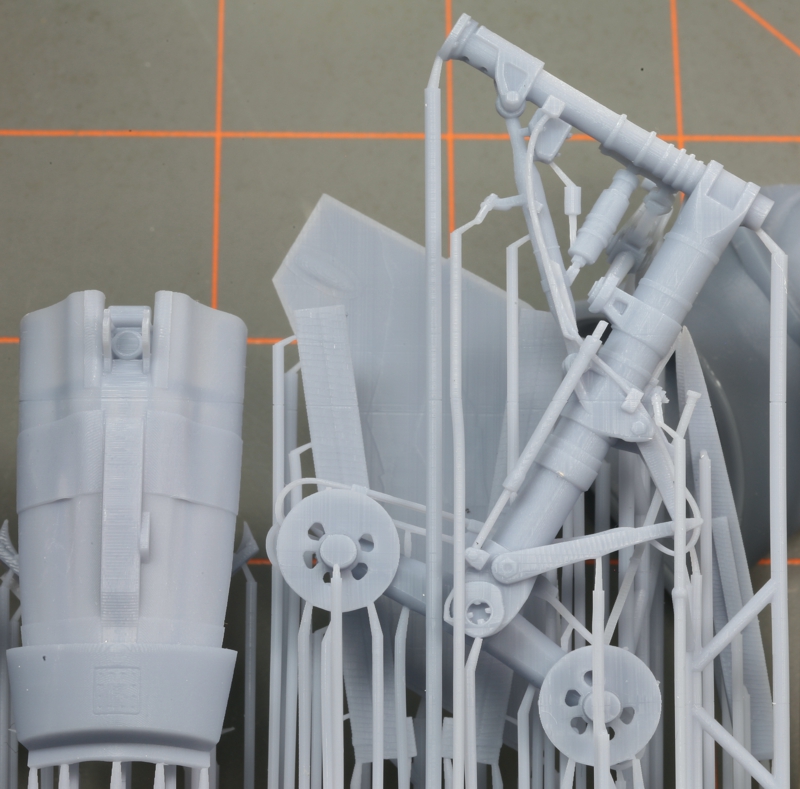
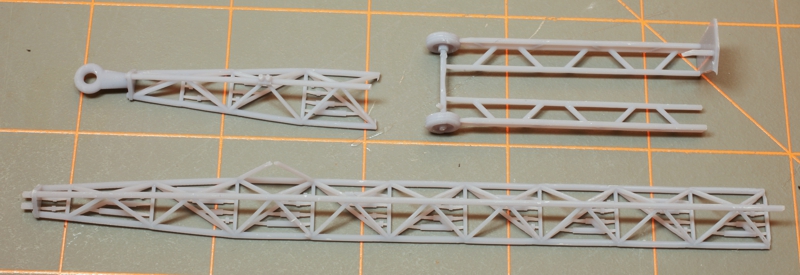
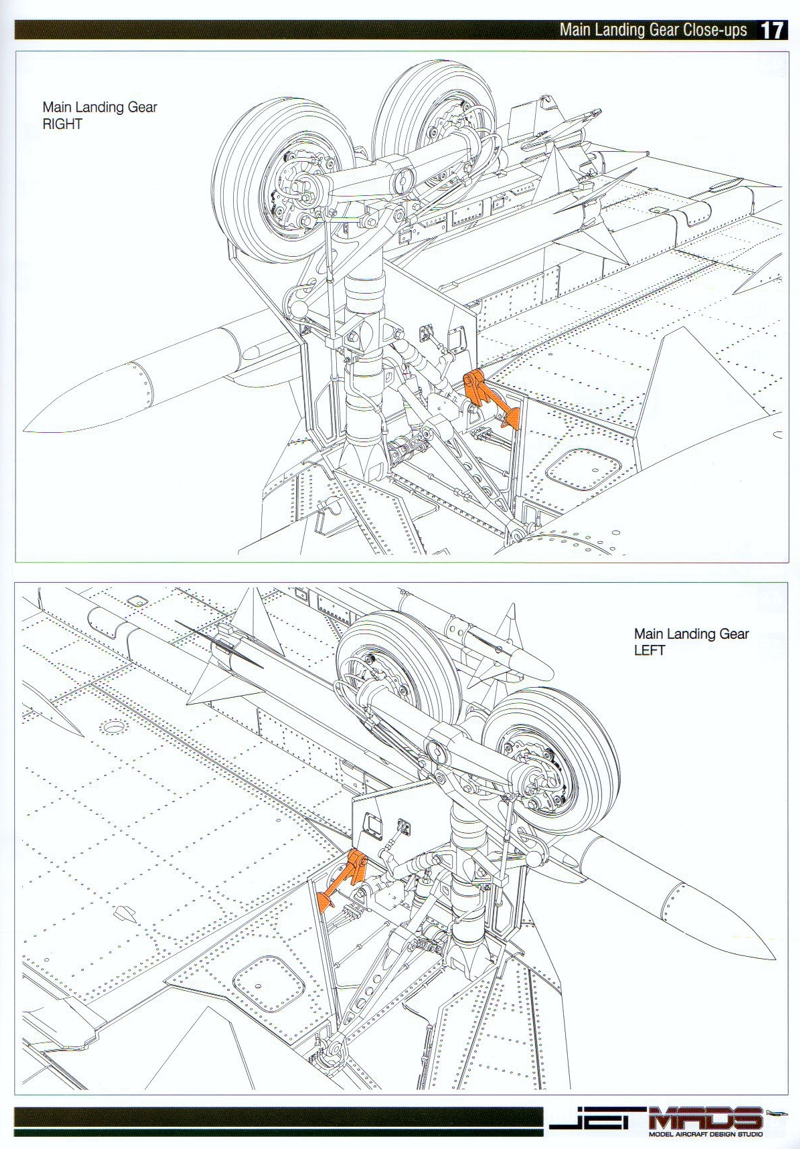
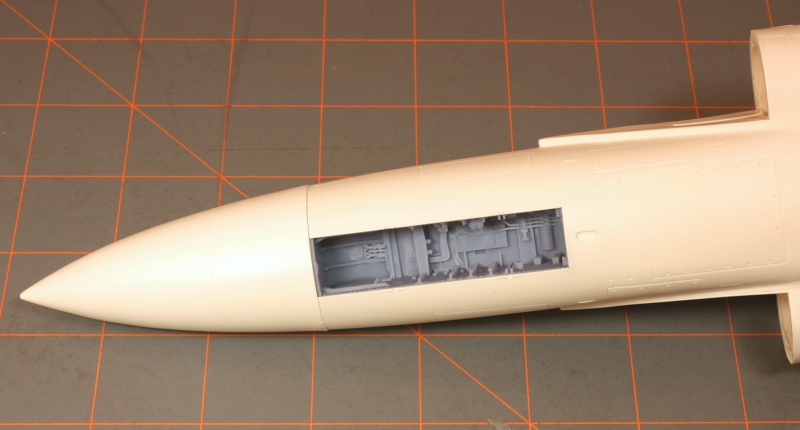
The landing gear are mostly in one piece, amazing pieces of 3D printing, with most of the actuators attached. Wheels have good tread and hub detail. Wheel wells are also 3D printed and have undercuts under structural members. Wiring and plumbing would have to be added, but usually the main doors are closed except when the gear is cycling. Nose gear is also well detailed, and the nose gear well is exceptionally well appointed with plumbing in place. You can see ridges when magnified but I don’t think it will show painted and deep inside the hole.
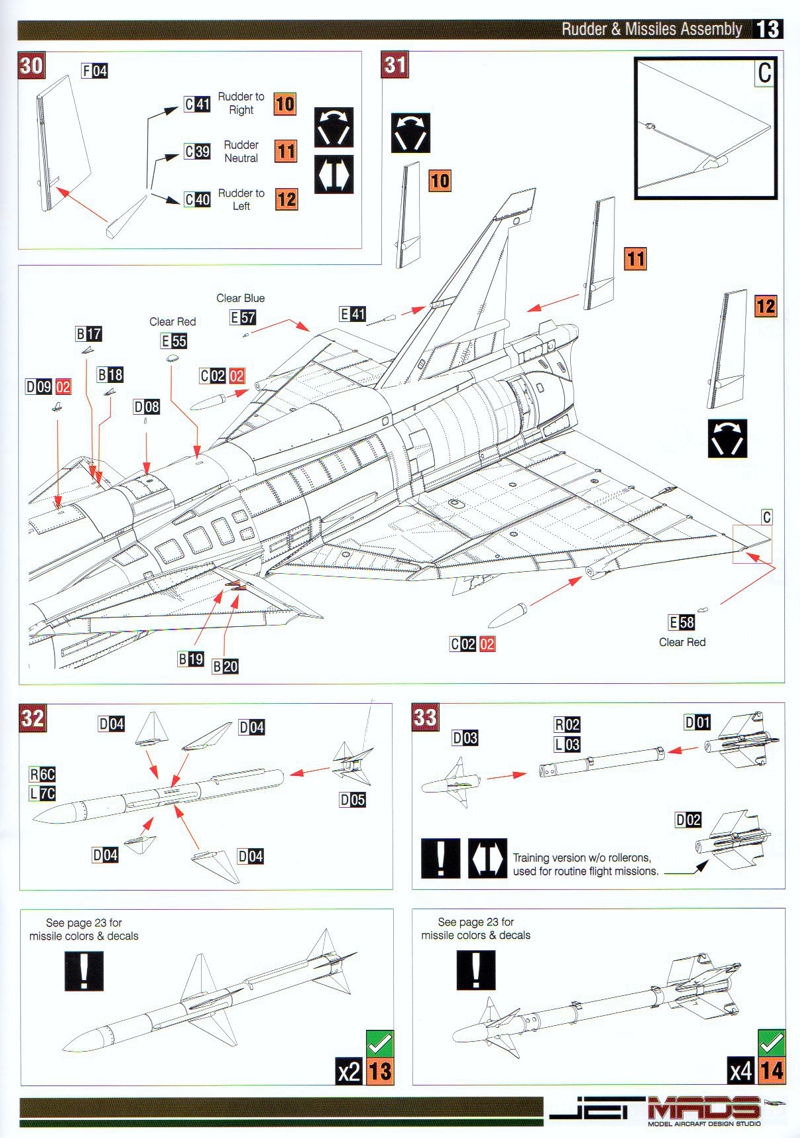
Armament is well provided for with four Sidewinders and two Sparrows, or their equivalents. Also included is a gas drop tank and a separately provided JA gunpack to hang of the belly. Sparrows have separate fins, while the Sidewinders are made up of three parts: tip, barrel, and tail, with the fins molded on the tip and tail. You have the choice between tail with rollerons, and a tail without rollerons (training rounds). The fins or finned parts are all 3D printed while the missile bodies are cast resin. Stencil decals are provided, too.
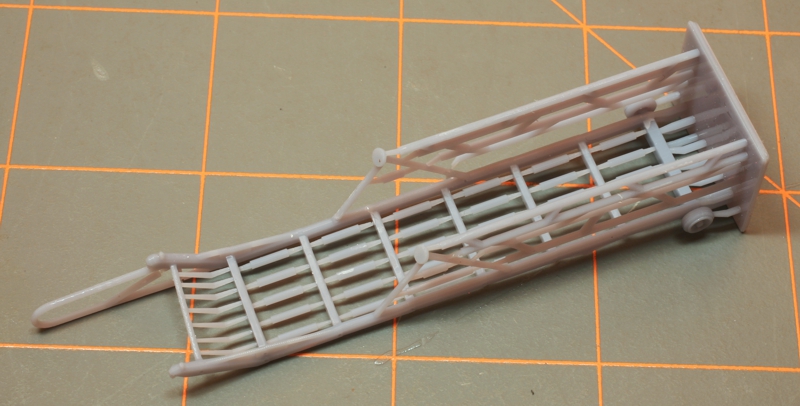
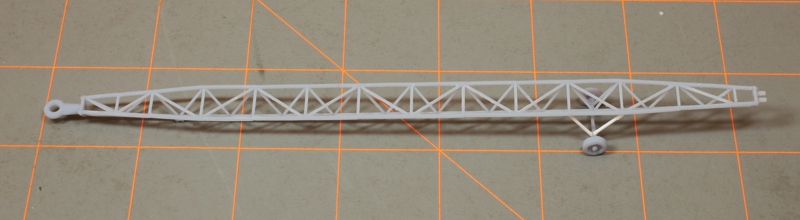
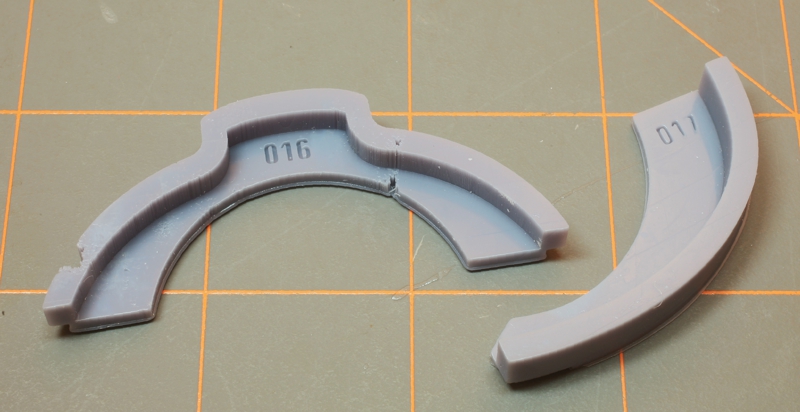
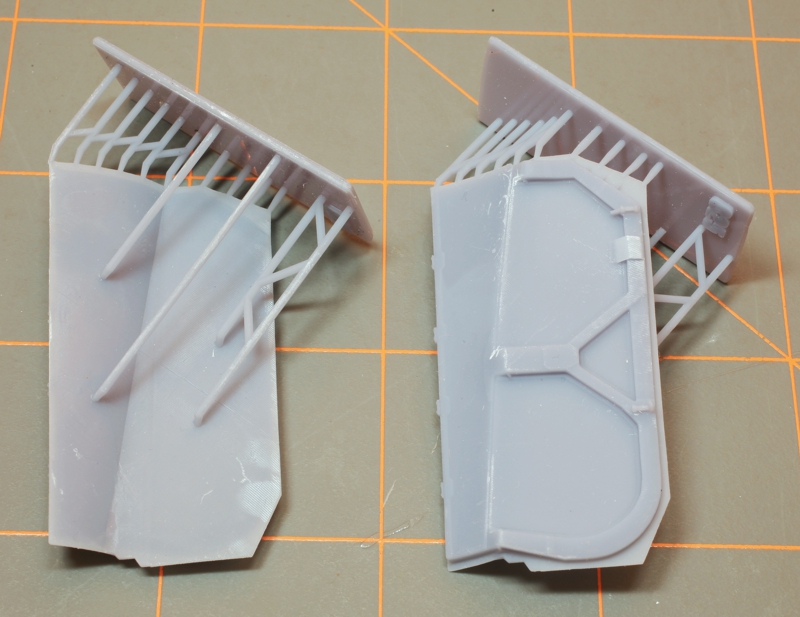
Included as a bonus, are a boarding ladder and a tow bar. Unfortunately, they were placed in one of the large sections of the boxes and were damaged. The ladder has a break on it but stayed together so an easy fix. The tow bar ended it up in at least three parts. I repaired two rods and put it together so you can see what it should look like, but I think I need to add a short rod between the axle and the bottom of the truss.
There are also several clear parts provided. The clear resin canopies look good and clear, but the 3D printed small clear parts for formation lights, landing lights, etc appear to have some problems. Some have ridges on them and are really small to try and clean up and polish. I may look for some alternatives rather than try cleaning up the really tiny stuff. Also in 3D printed resin is a inner frame for the canopy and mirror parts.
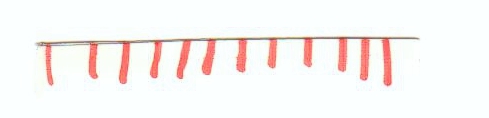
I also got a short strip with red marks on it…what’s up with that? I assume it is garbage…unless someone tells me otherwise.
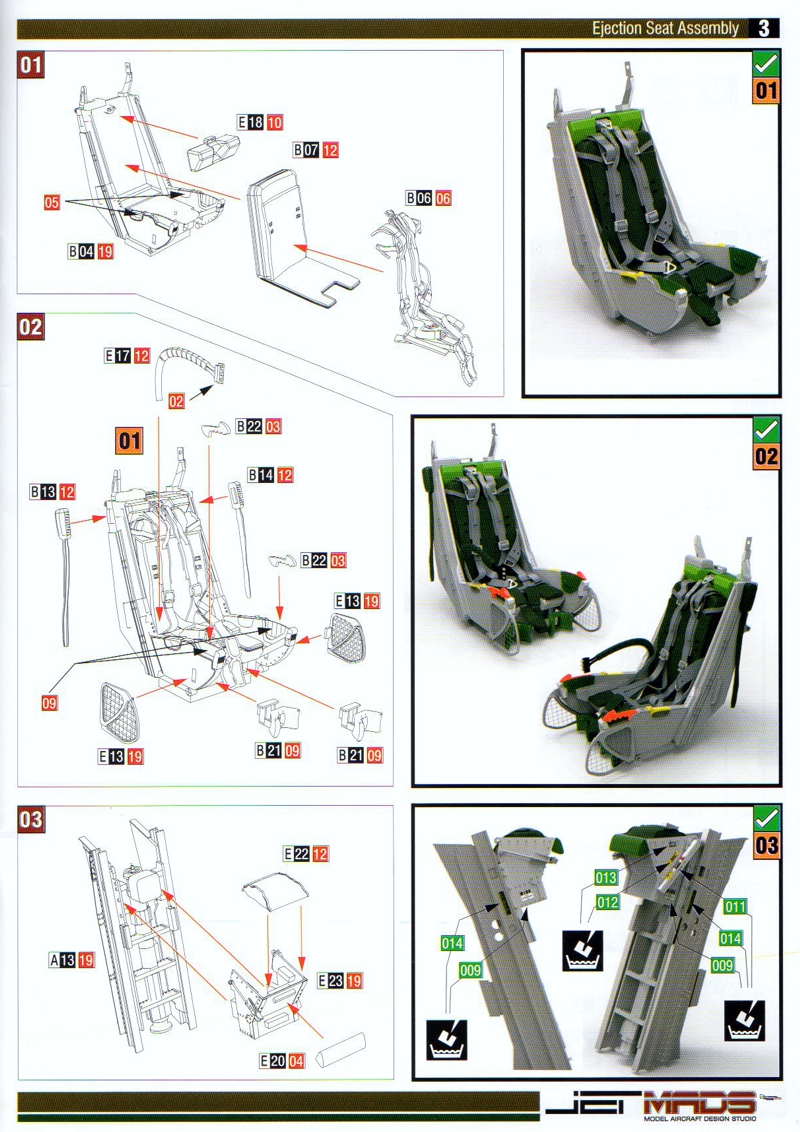
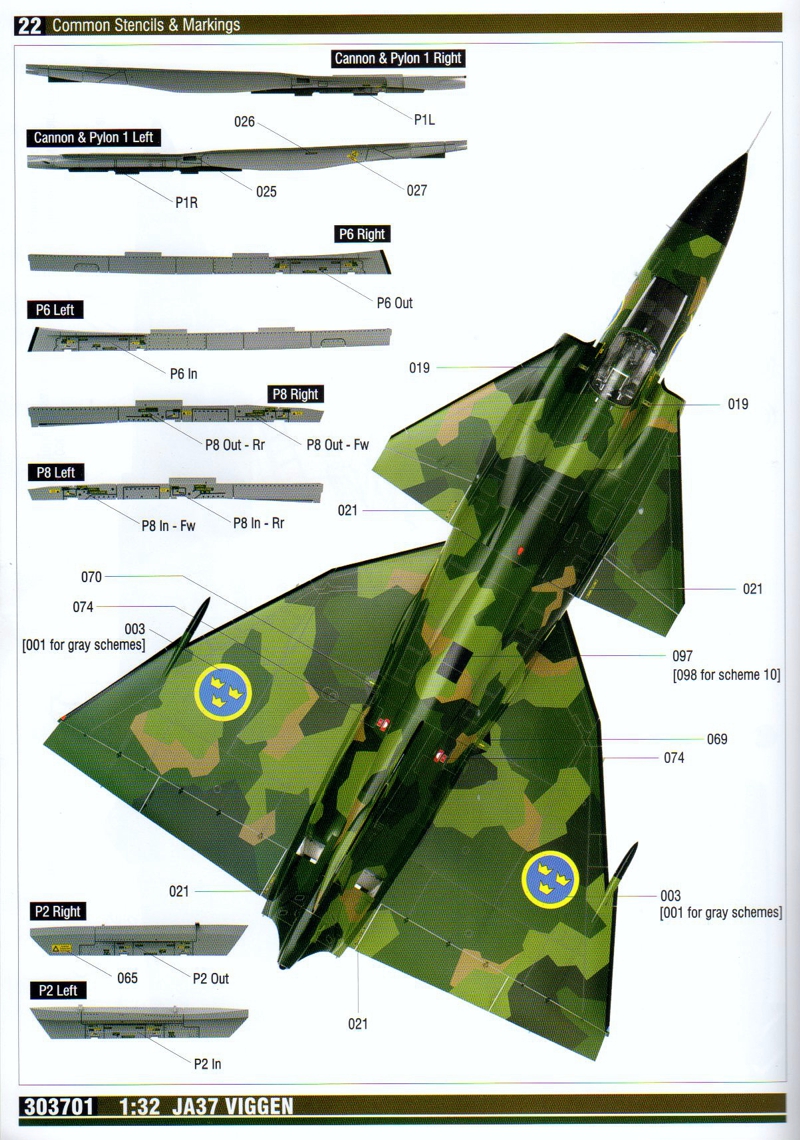

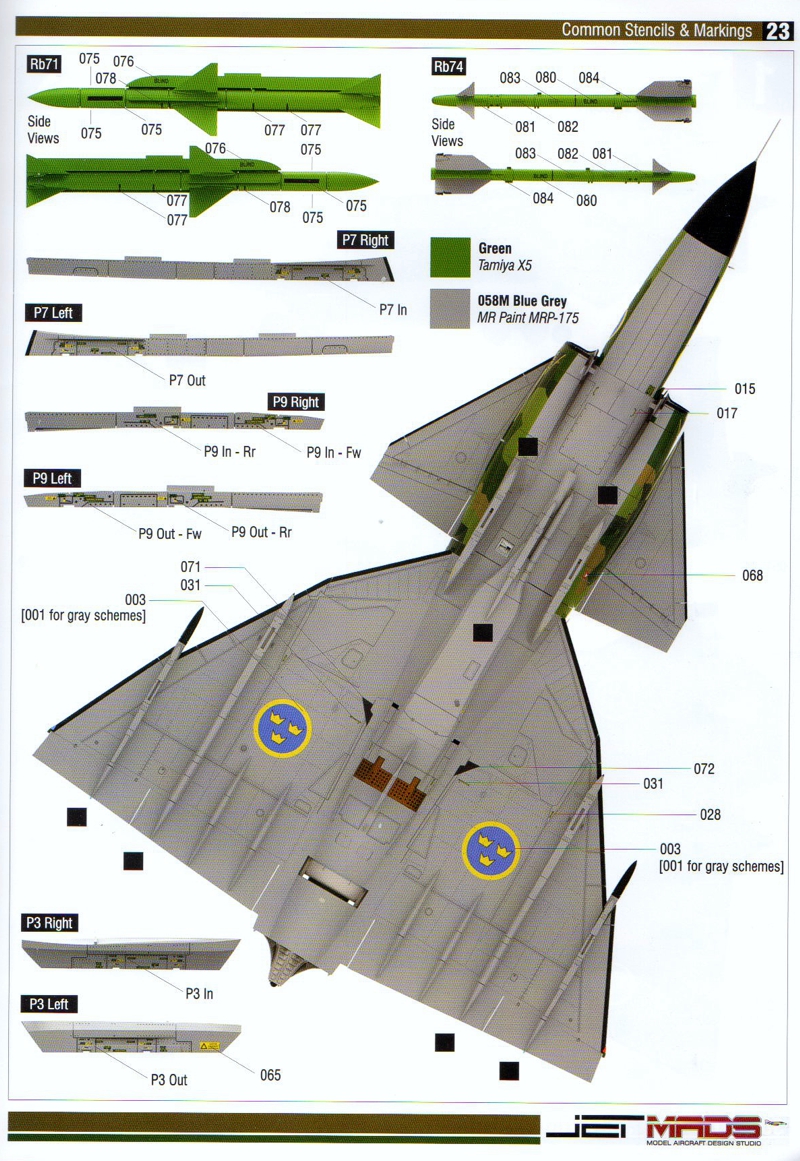
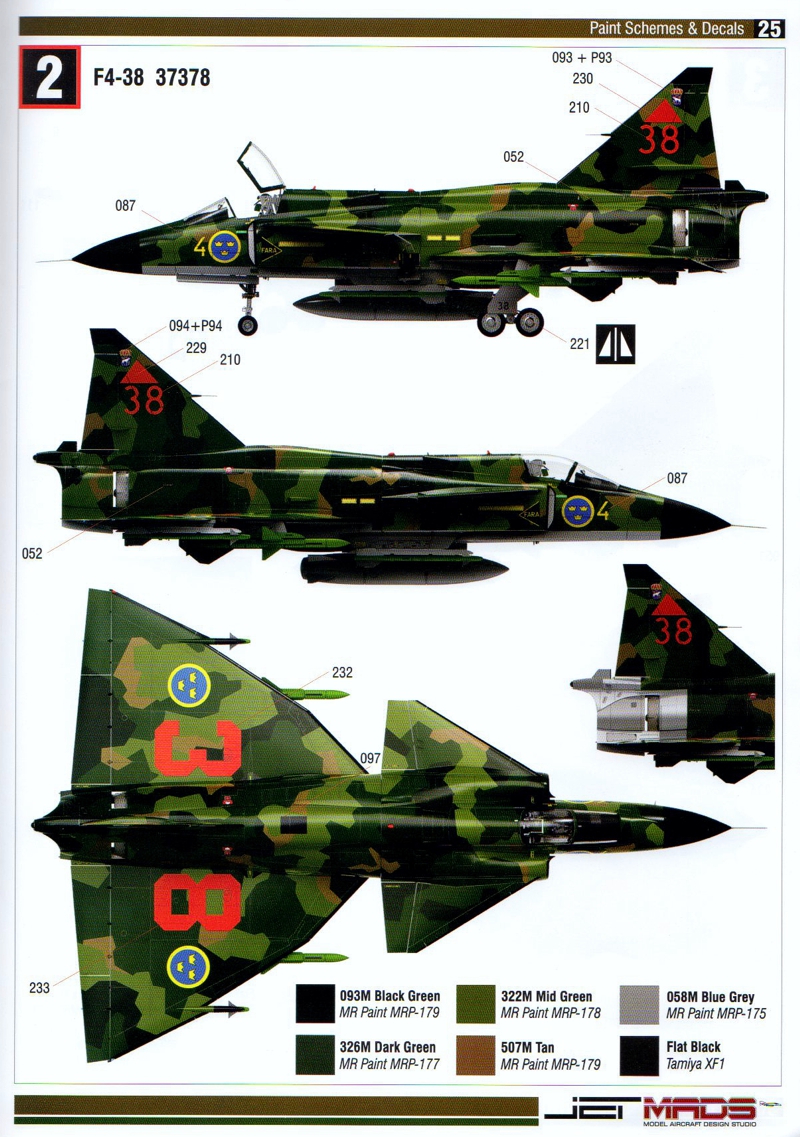
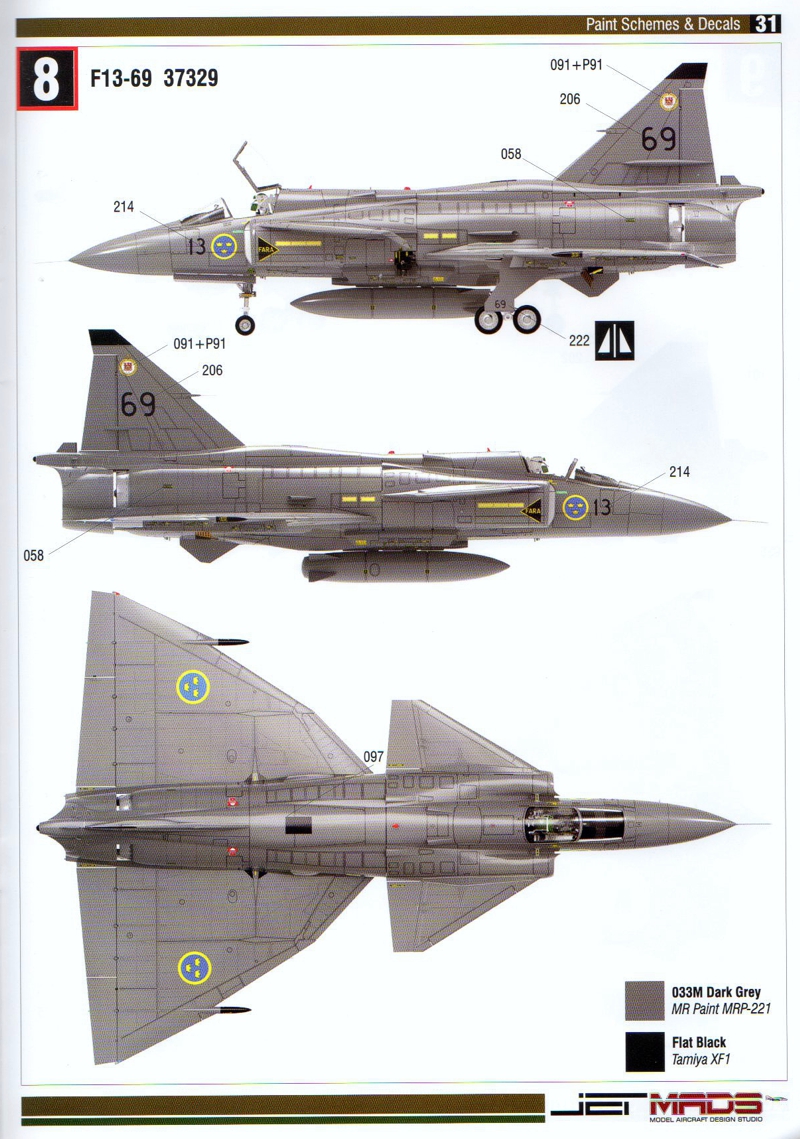
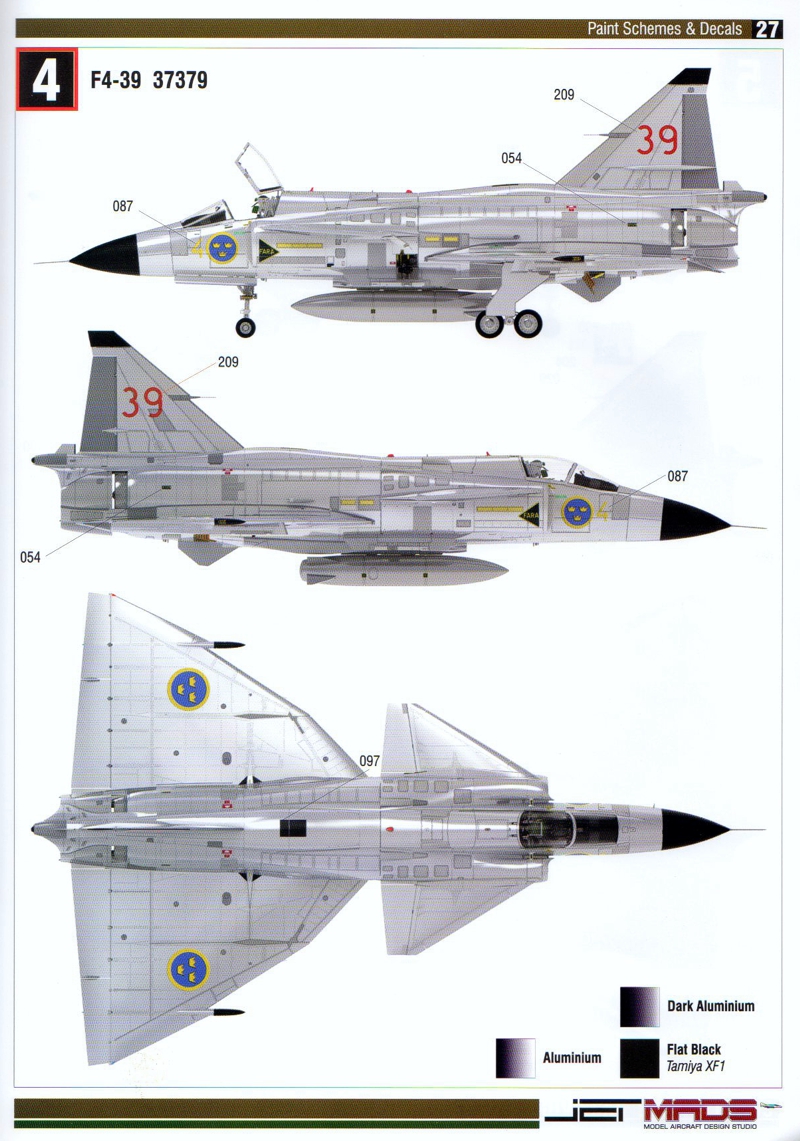
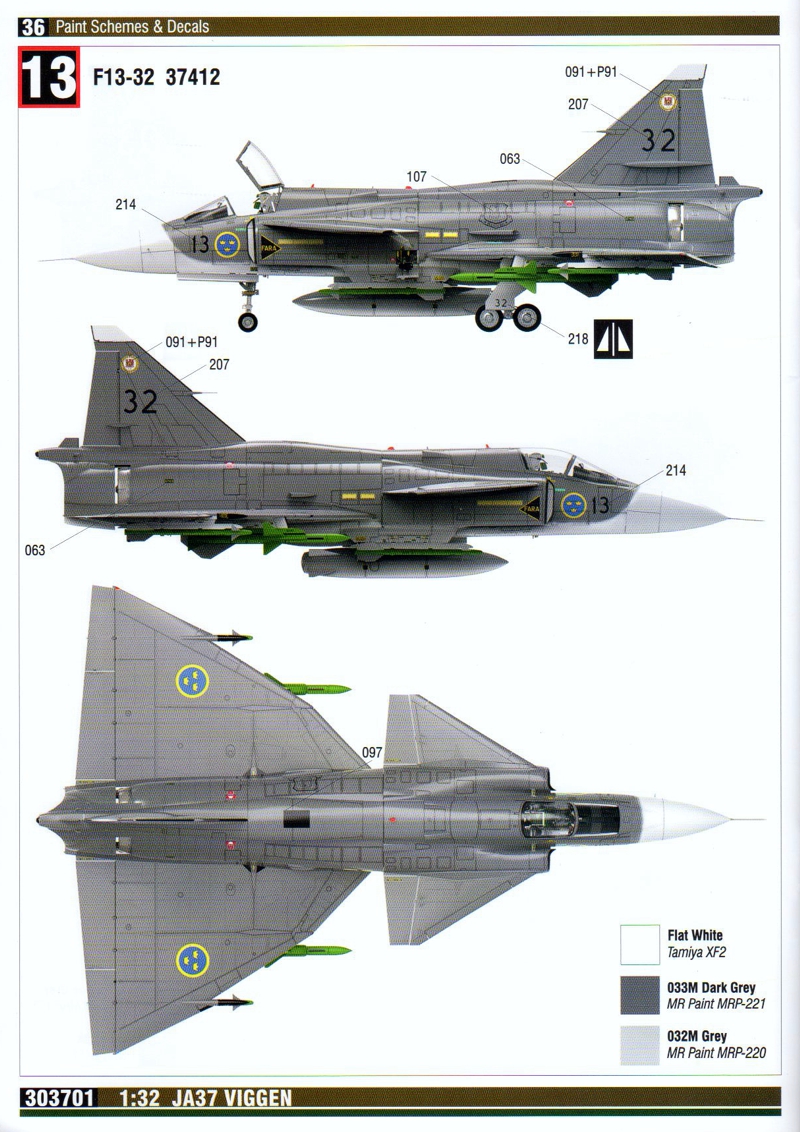
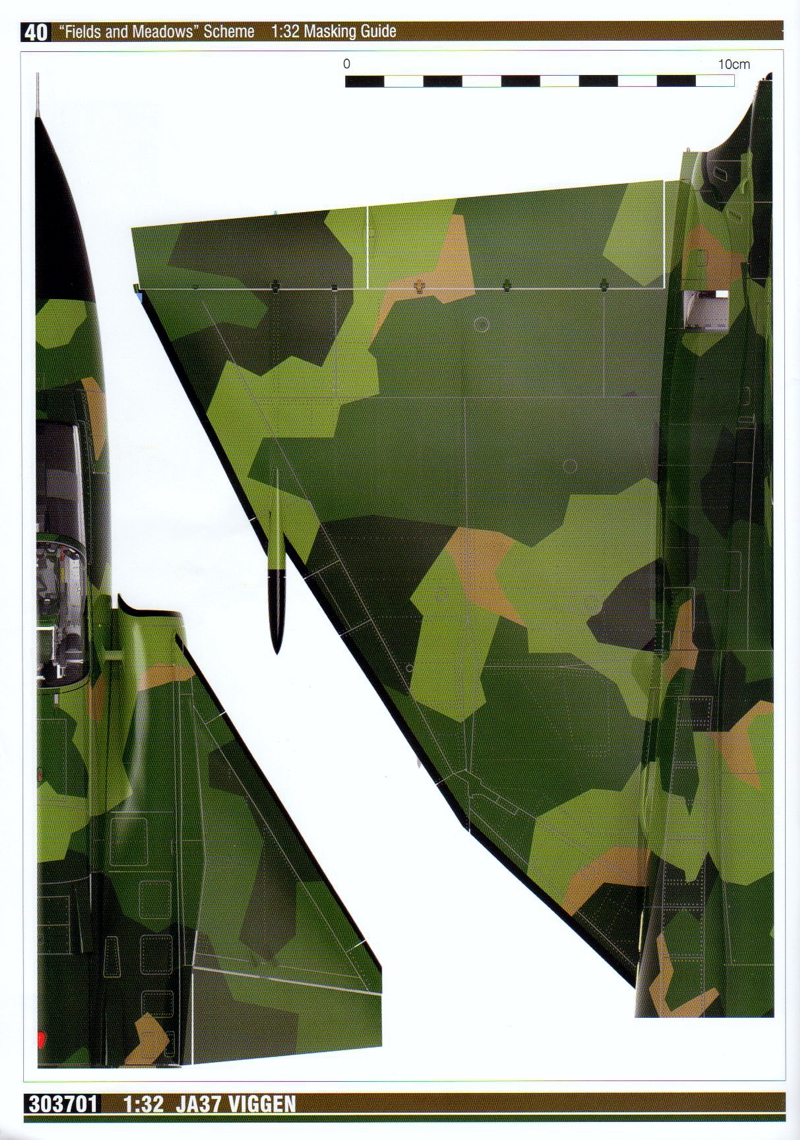
The instructions are very professionally done, printed on glossy paper with full color. They use line drawings as well as CAD color assembled renderings to help with placement, paint colors, and decal use. They include full color stencil layout for the aircraft, launch rails and armament. The fifteen different schemes are laid out on full page three-views (sometimes with scrap views) again in full color. They also include four pages of views in 1/32nd scale of the four-color camo scheme for those that want to do it themselves. Me, I am going for the DN Models mask set to reduce the time and aggravation. At any rate, probably the best instructions I have seen for a resin “garage” kit.
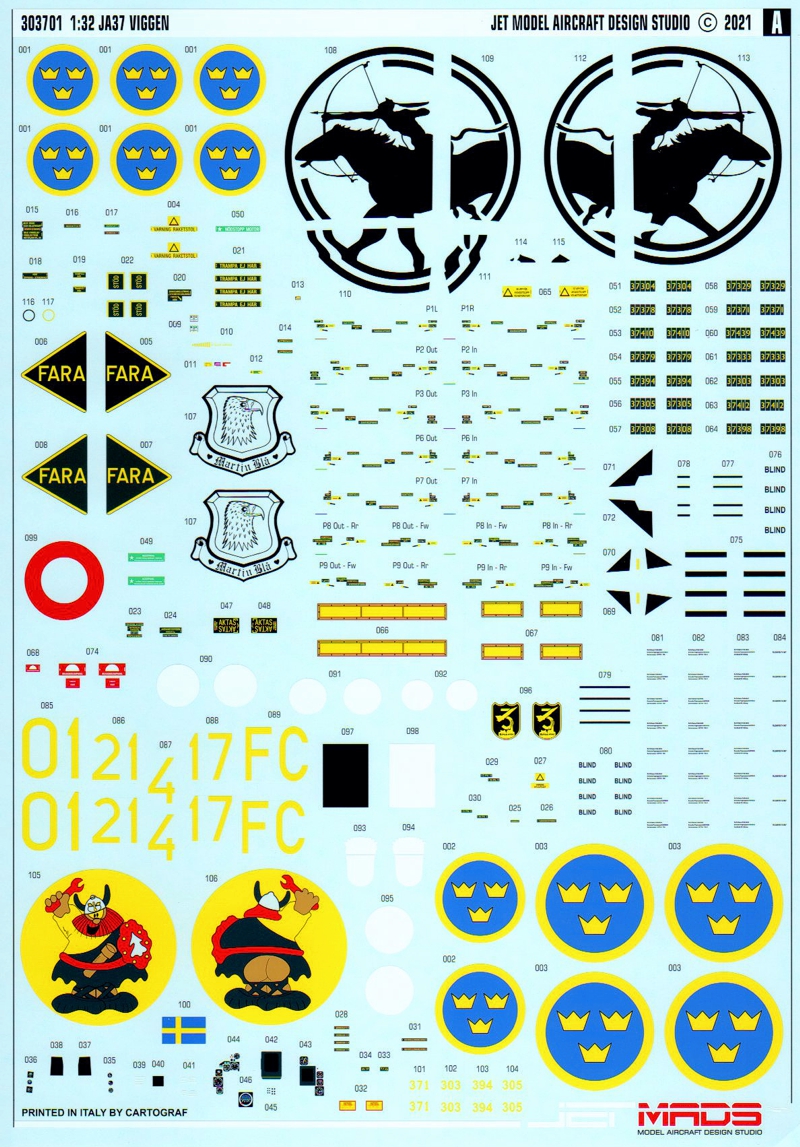
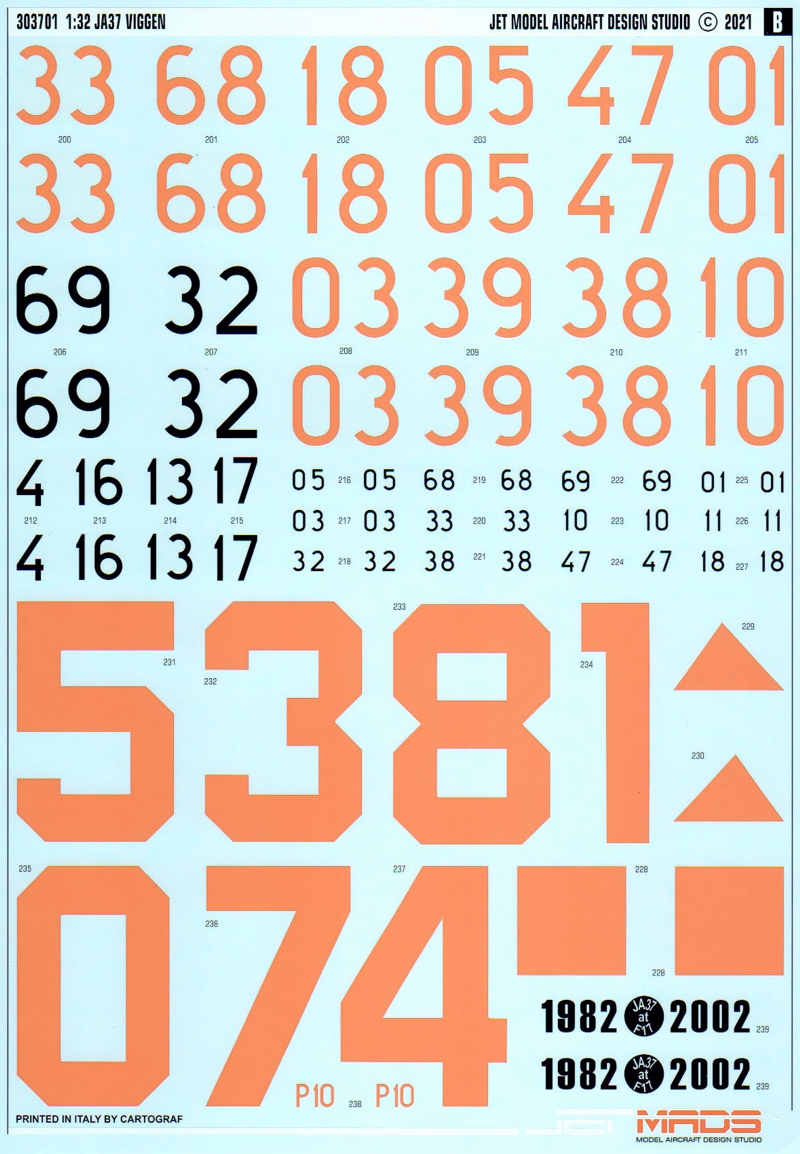
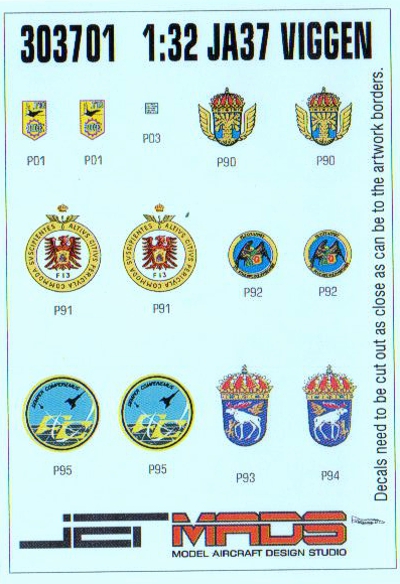
The decal sheets look very good, in registration and in good color, but that is typical or Cartograph. The dayglo numbers look as a good match to photos. The separate sheet of squadron crests looks good, too, but I do not know who made them or how well they work. Stencils are also included, for both aircraft and armament.
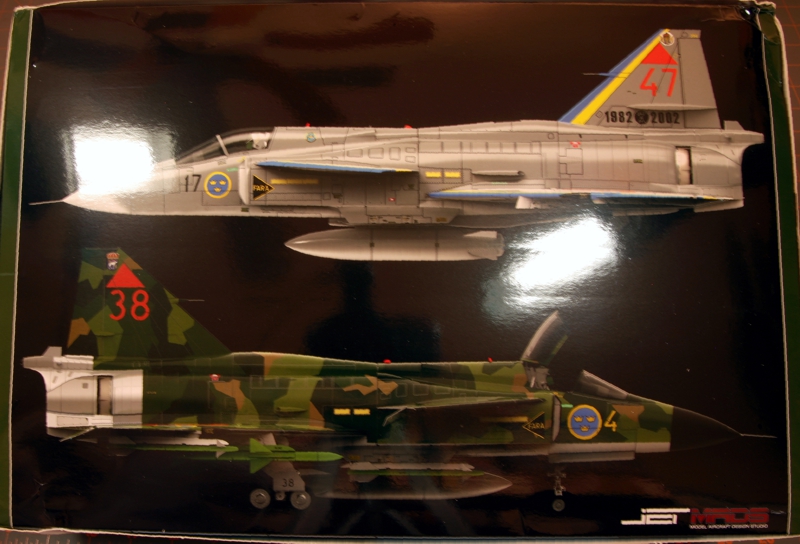
The decal schemes given are varied, as you have the choice of natural metal finish, the four camo scheme, and several variations of grey schemes. And, if you don't like the aircraft chosen, I would think many different aircraft could be modelled by mixing and matching the aircraft numbers and logos.
Test Fitting
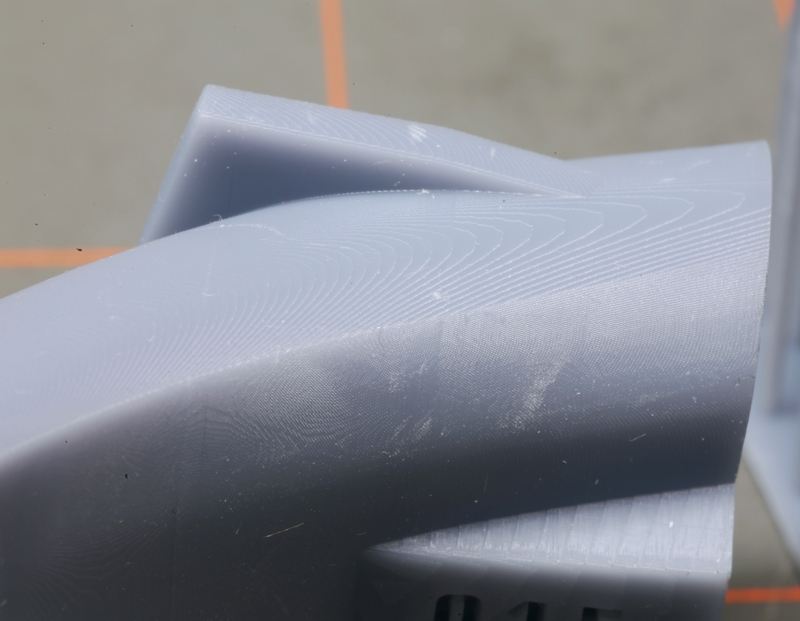
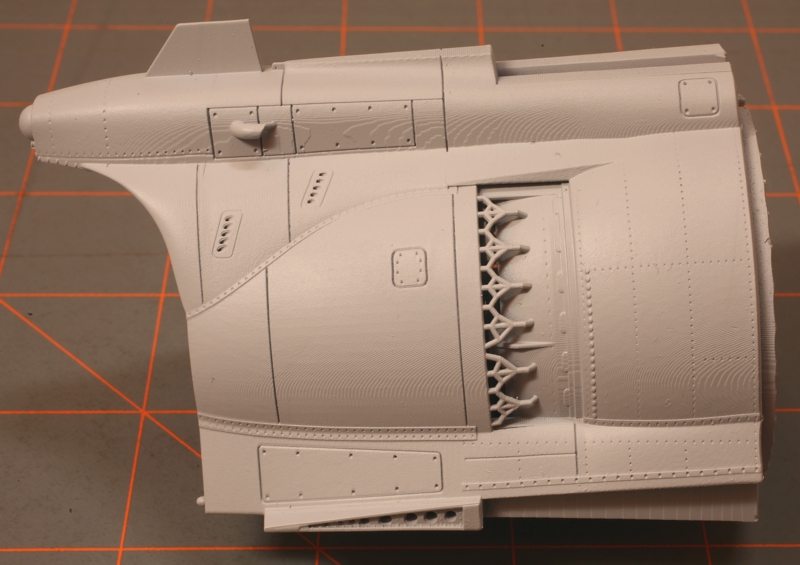
I went ahead and did a little bit of testing on the kit. First I coated a couple of parts with Tamiya Super Fine Gray Primer to see what the 3D printing ridges looked like under primer. For the finer ridges, it appears the primer smooths them out well. For the areas where there was a lot of shape change so the ridges are heaviest, they need to be sanded down – again, especially in areas of natural metal finish. I did one side of the exhaust section just with a couple of coats of primer, the other side has had a couple of rounds of sanding. There are still a few spots to work on further, not to mention the need to deal with some sanding scratches. I did not follow the instructions on not using anything over a 1000 grit on 3D parts (oops) so now I need to clean it up. Note there is some areas that also need detail replaced. That was from some kind of artifact on the part; I did not sand through the detail. Pretty common on resin kits, and I guess is occasionally on 3D printed parts.
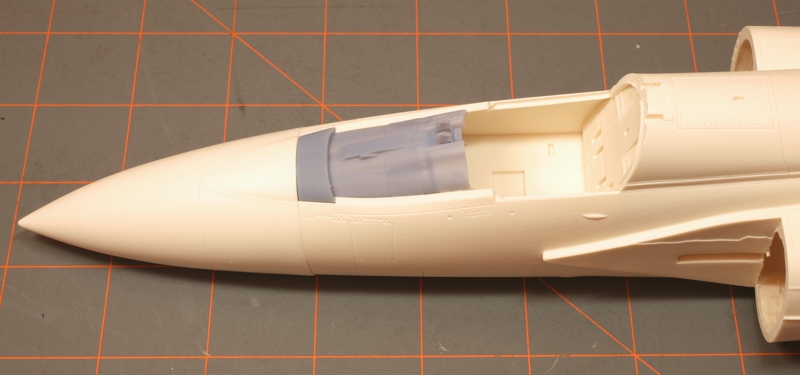
To test fit, I assembled the nose of the kit including the nose gear well, nose cone and cockpit cowling. I did a minimum of clean up on the gear well, mainly just make sure there was no chunks in the way, but I did have to open up the notches on the inside of the nose cone to get it to seat. You can see the results after putting the parts together. There is a bit of a step between the nosecone and cockpit fuselage section, maybe a millimeter at the worse, typically less than that. You may be able to remove material around the inside of the cone and get the fuselage to sit farther out. Either way, a bit of filing will smooth out the transition.
Summary
I have to say I am impressed with this kit. The fact they tackled this kit in the first place, the level of detail, the professionalism of the instructions and decals is first rate. The detail matches well with my reference, including panel line and rivet detail. The fit and quality really puts it over the edge. I can only hope they follow it up some day with a Draken!
Highly recommended.
References
SAAB 37 Viggen: Flying with the Swedish Air Force; Duke Hawkins; HMH Publications
© Ray Peterson 2021
This review was published on Friday, October 29 2021; Last modified on Saturday, October 30 2021