
Videoaviation | 1/32 RAF Houchin 25kva GPU 229732
Reviewed by Thierry Laurent
Videoaviation had another very interesting release to ease the modeller’s work interested in creating simple dioramas. This time Maurizio Amelotti changed a little bit the focus as he chose a different topic: the Houchin generator used by the Royal Air Force during a long part of the Cold War era. Actually, that item was already available in 1/32. Flightpath released it a long time ago. However, that product asked for modelling skills most airplane modellers rarely master correctly. The kit was essentially an origami-like assembly of photo-etched parts to solder and complete with white metal parts. This initiative was interesting and the only option for many years. Hopefully, the new Videoaviation option is far more user friendly to assemble.
The Houchin 25kva Ground Power Unit
Houchin Limited had a long tradition in the British mechanical industry. Located in the London area, the company was established in 1921 and specialized in manufacturing and installing rotating machinery. The involvement in the aerospace industry only started during World War Two when Houchin started making aircraft starting carts.
In the late fifties, the company moved to Ashford in a new factory specifically built for manufacturing diesel-driven aircraft ground support equipment. This is where the 25kva powering units were built. The company also built many generators for airliners. Houchin was finally purchased by a foreign group and stopped manufacturing in UK in 2015.
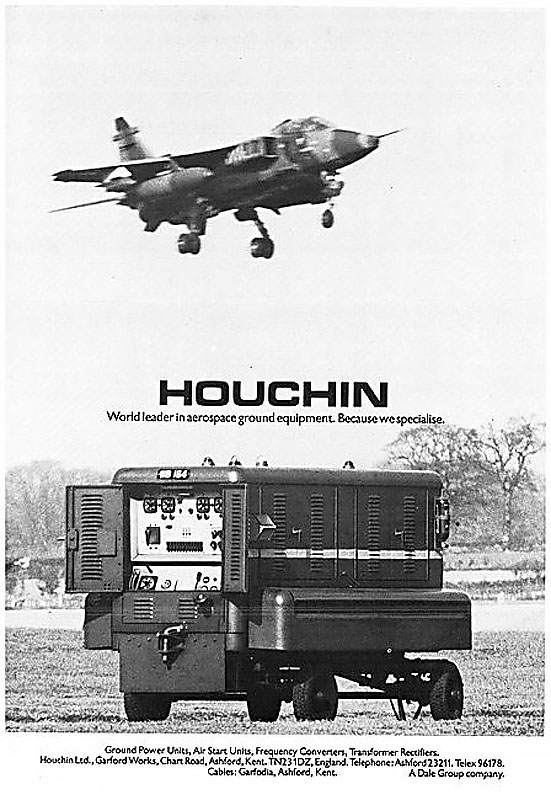
To go back to that specific 25kva GPU, it was impossible to have a look at a RAF fighter squadron base of the Seventies/Eighties era without seeing that type of generator. It was the common movable source of power for Hunters, Lightnings, Buccaneers, Phantoms, Jaguars or Harriers everywhere. Even Sea King helicopters could use them.
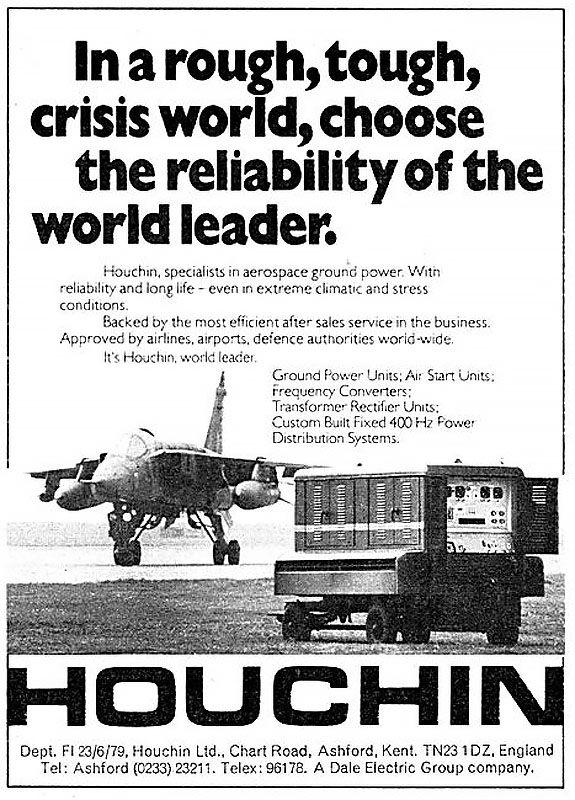
Such generators were required to allow the powering of aircraft systems during on-site maintenance operations or to simply start them before use. They were classically made of a diesel generator producing energy converted into electricity.
The Houchin units served up to the end of the Cold War but progressively needed replacement by more powerful systems. Indeed, new generations of planes with ubiquitous electronic systems (such as Tornadoes) required more electric power and from the late eighties that became the norm within NATO air forces.
References and close-up pictures are not very common but a Google search will give you some. A bunch of them can also be found on the Videoaviation product webpage:
https://www.videoaviation.com/product/1-32-raf-houchin-25kva-gpu/
The older modellers will remember a series of short articles presenting such ground support equipment units in the Scale Models magazine issues published during the Eighties.
The Videoaviation Houchin GPU Kit Contents
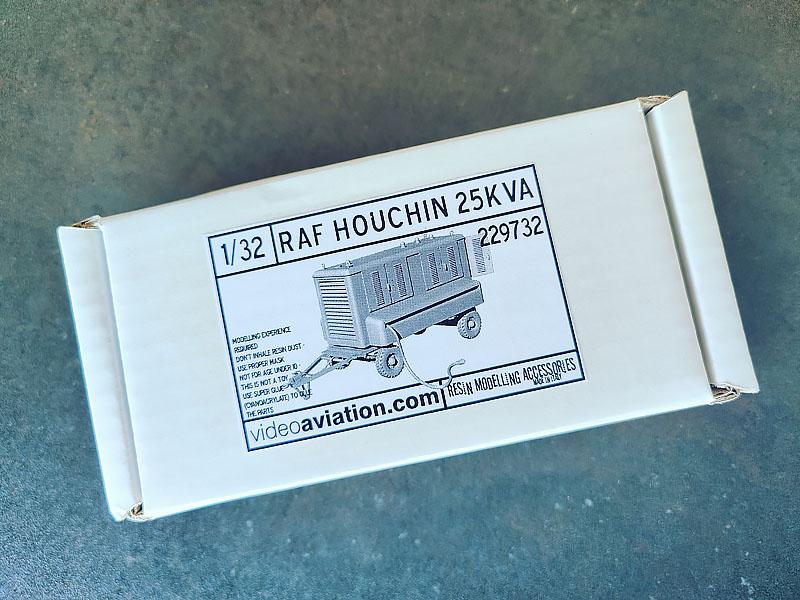
The kit is packaged in a sturdy carboard box. The top has a printed label showing a nice CAD-generated drawing of the tractor.
Opening the box shows well packed contents protected by bubble wrap. Under the instruction sheets, we can find a small label with a warning regarding the fragility of the 3D-printed parts.
The box contains:
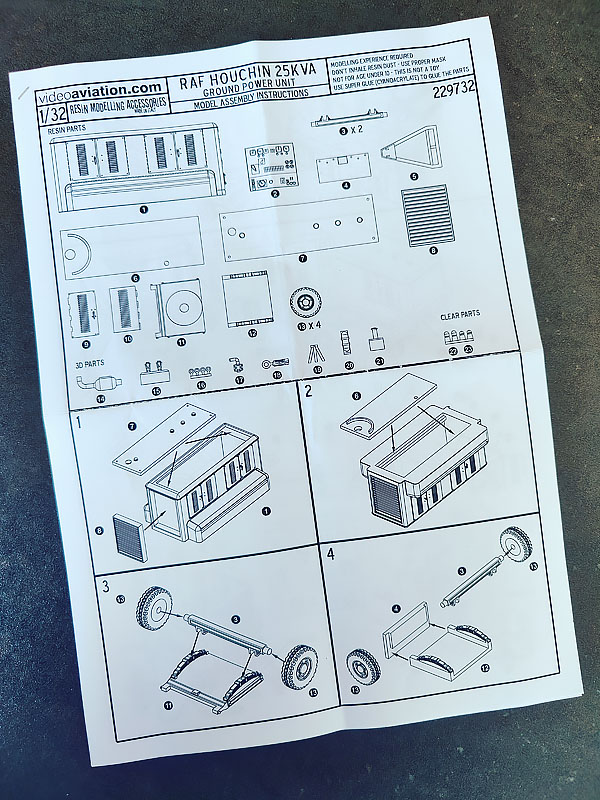
- Three pages of instructions printed on three A4 sheets and a small warning sheet
- Decals sheet
- One bag of yellow resin components
- One bag of various 3D printed parts and clear resin lights
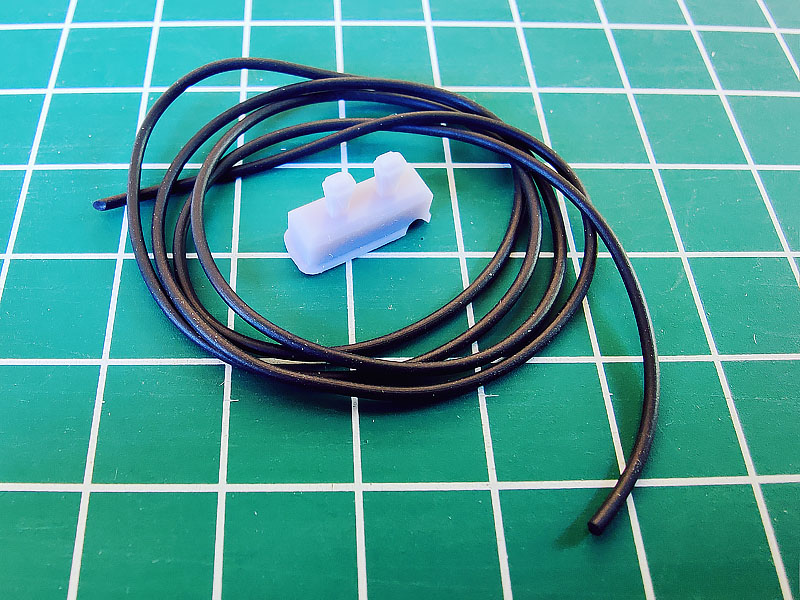
- One bag containing a flexible black tube and two 3d printed electrical plugs
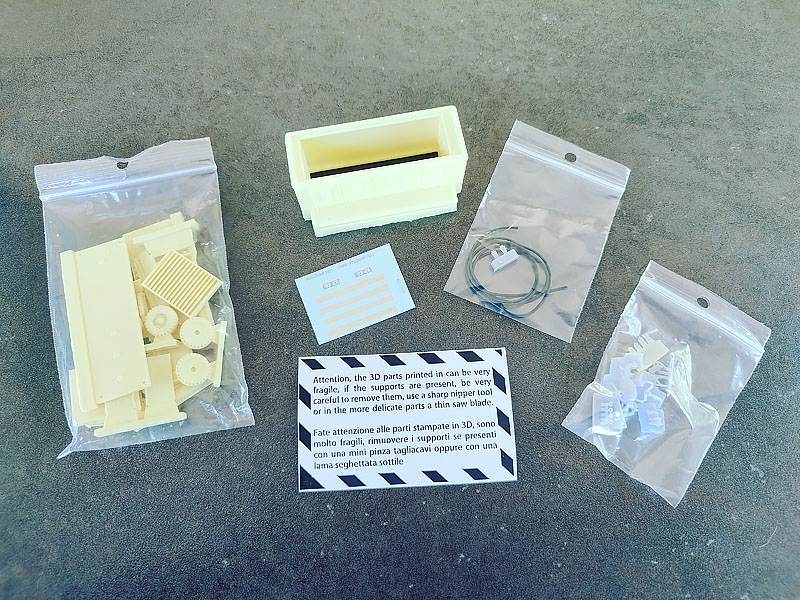
The kit is very simple. It even far simpler than the Videoaviation Coleman or Schopf 1/32 tractors I already reviewed. It is made of a little bit more than thirty parts. Again, some non-visible areas such as the chassis have been noticeably simplified but the kit captures well the look of the actual device and that design eases noticeably the assembly.
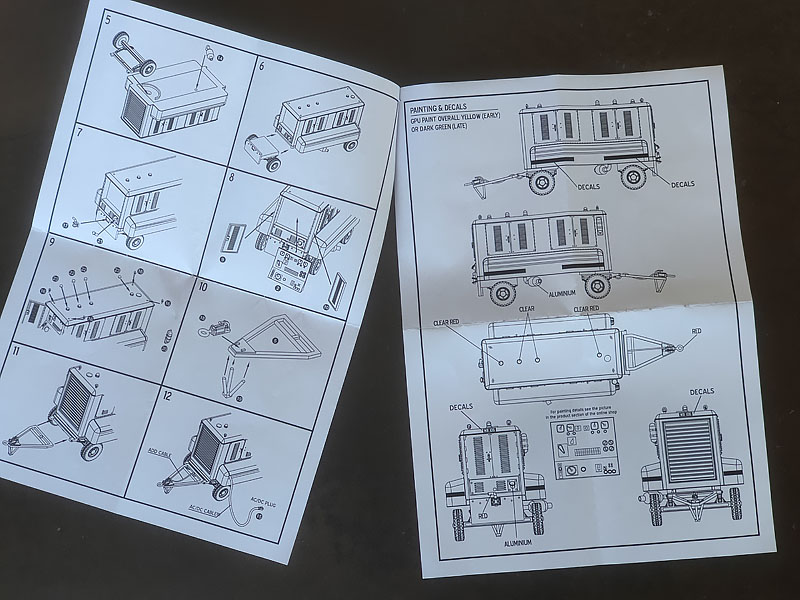
As usual, the black and white isometric views in the instructions are top notch ones. They give a description of all the parts, self-explanatory drawings of the assembly steps and scale plans for the painting/decaling scheme. This is in the same league than what you can find in plastic kits. The body is nicely cast as a single boxy part and Videoaviation already cleaned most of the bottom of that hollow resin part.
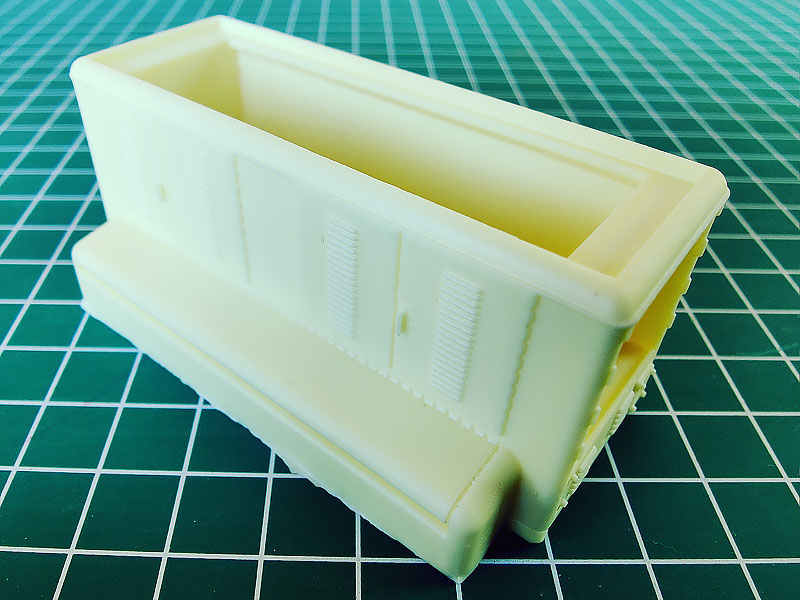
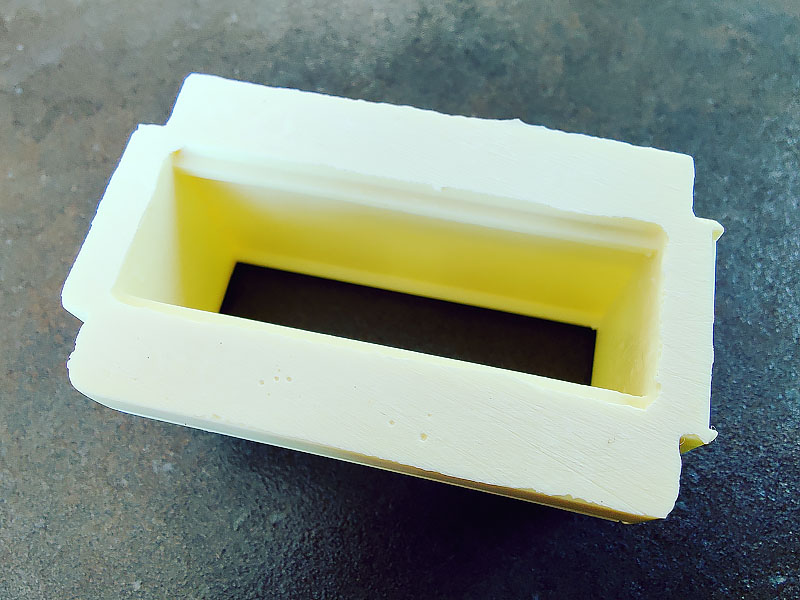
Three flat parts will close the front, bottom and top. Add some parts for the leaf springs and their supports plus the axles and the main assembly will be done! Again, you will not lose a long time to remove huge resin gates. The design is really user-friendly.
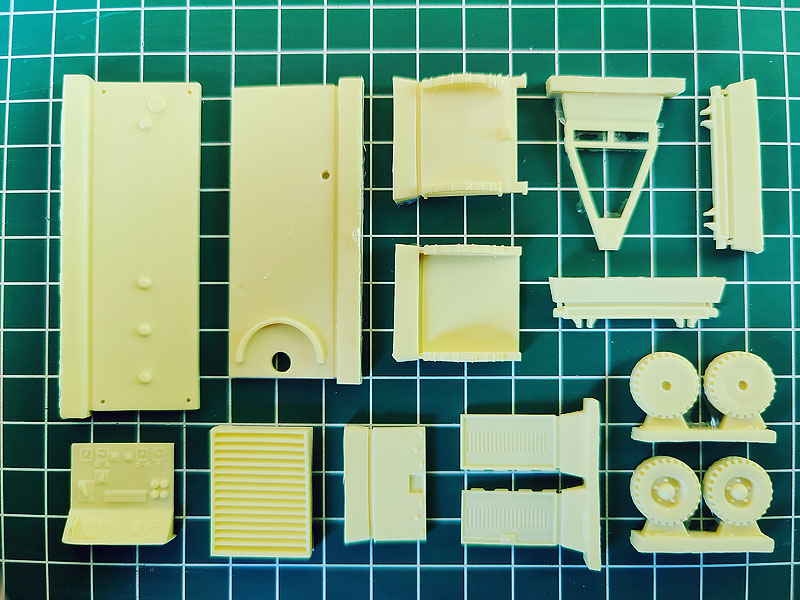
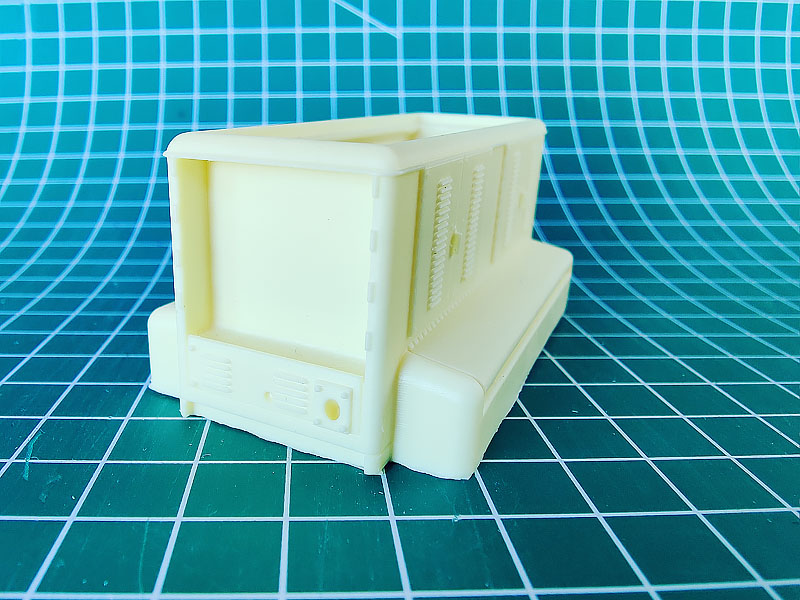
The same philosophy applies to the other parts: no huge casting block to remove. A dozen of small yellow resin parts (including four small wheels) will be quickly cleaned to assemble the full unit. The parts are nicely cast without defect on the visible sides. So, you just need to separate each resin part from its gate. The kit gives the option to open the two doors to give access to the very nice control instrument panel. The panel and interior of the doors should be painted in the body colour.
Another dozen of small parts are made of a grey 3D-printed resin. They include the muffler, fuel filling cap, rings, hooks, electrical plugs and a bunch of other parts to add all over the unit. Everything is smoothly printed without any visible defect. They do not ask ask for more work than separating each part from its gate. However, the warning given on the small label is not an understatement. By nature, 3D-printed resin is VERY fragile. So, if you are the lucky owner of an ultrasonic cutter, this is the perfect tool to clean that. Otherwise, cautiously use very thin blade saws and a precise cutter nipper (such as DSPIAE one) to avoid surface damages that typically occur when the supports are removed from the parts. Personally, in most cases, I prefer separating the support from the gate and then from the part. This decreases the tensions between the part, the supports and the gate and the consequent risk of damage. If you have surface blemishes in spite of your best efforts, use a little bit of CA glue to fill them and sand them as soon as possible. The softer black CA glue is perfect for that use.
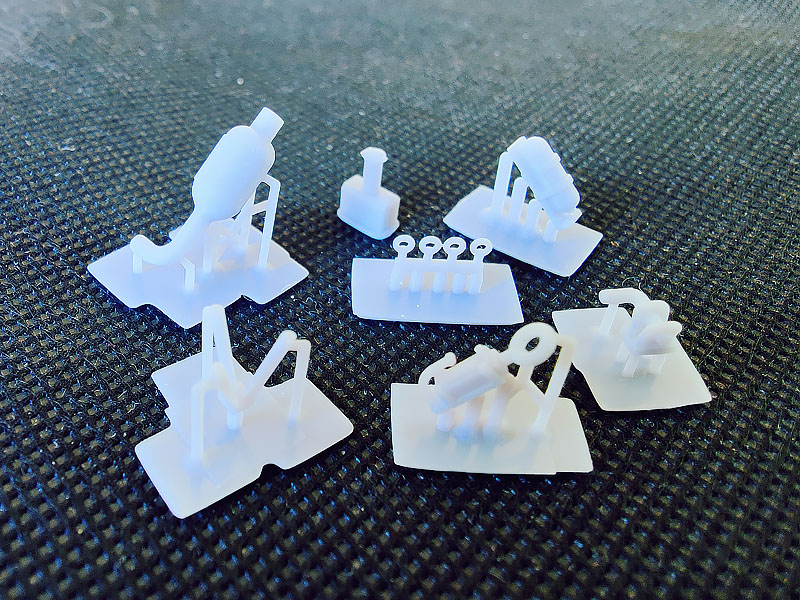
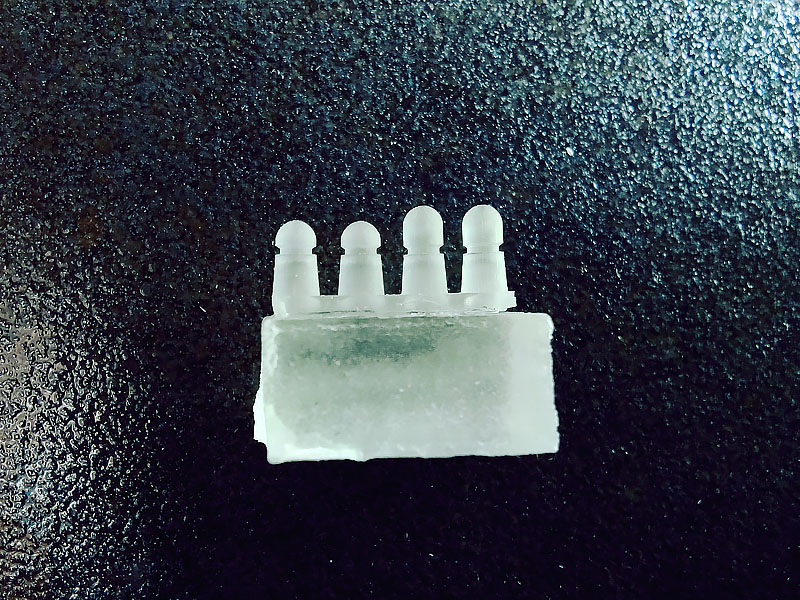
A small gate includes the clear parts for the top lights that need to be covered with a thin coat of transparent clear paint. Note that such light plastic covers are normally not fully gloss. So, using a satin coat to end the painting process would probably be more realistic. Last, check your reference pictures as there was some evolution in the colour. The two ones on the external sides were red. However, even if the instructions tell the central ones were white, they could also be orange or blue. They are probably easier colour options as obtaining a translucent white effect is not easy.
Last, a black vinyl tube is included to simulate the electrical connection to the plane. Its end is closed by 3D-printed part 15 (a power plug).
The Houchin GPU Painting and Markings
With regard to painting, the initial scheme was simply full yellow. Later, they were painted in NATO green. A small decal sheet is giving you six decals to replicate the most common yellow security stripes visible on NATO green units as well as two registration plates. The last page of instructions shows scale views of the vehicle to add them.
If you want to expose the instrument panel, take your time to paint it closely as there is no bezel of instrument decal. Personally, I will probably go back to my aftermarket stock of bezel decals to update it. This is probably the only kit area where a small improvement is possible.
If you look closely at pictures, you will see that some unit variants were existing. Accessories such as movable lights or cable winders were sometimes added. So, there are different ways to personalize the kit if you want to go further.
Moreover, vehicles used overseas close to the end of service life were sometimes repainted in Desert tan (think Operation Granby Jaguar/Buccaneer tan colour) and do not show any of markings.
Whatever may be the chosen scheme, do not weather too much such devices as they were very well maintained. The sand ones became grubbier as they were painted in urgency and moved overseas to later come back to UK. So, you can add a little bit of wear and tear showing the initial green colour scheme here and there.
Conclusion
To conclude, the kit is correctly detailed, looks accurate and simple to assemble. This is again an excellent initiative giving easier options to reproduce the RAF ground support equipment. So, to me, this is another time a winner.
What’s going to be the next RAF equipment release? A nitrogen or oxygen trolley, a weapon carrying one, a tractor? Wait and see!
Highly recommended.
Review sample courtesy of Videoaviation.
© Thierry Laurent 2022
This review was published on Saturday, August 13 2022; Last modified on Saturday, August 13 2022